Participant
May 3, 2019
Answered

Stroke - dashed line with gap that increases then decreases

  • May 3, 2019
  • 2 replies
  • 9463 views

Hello

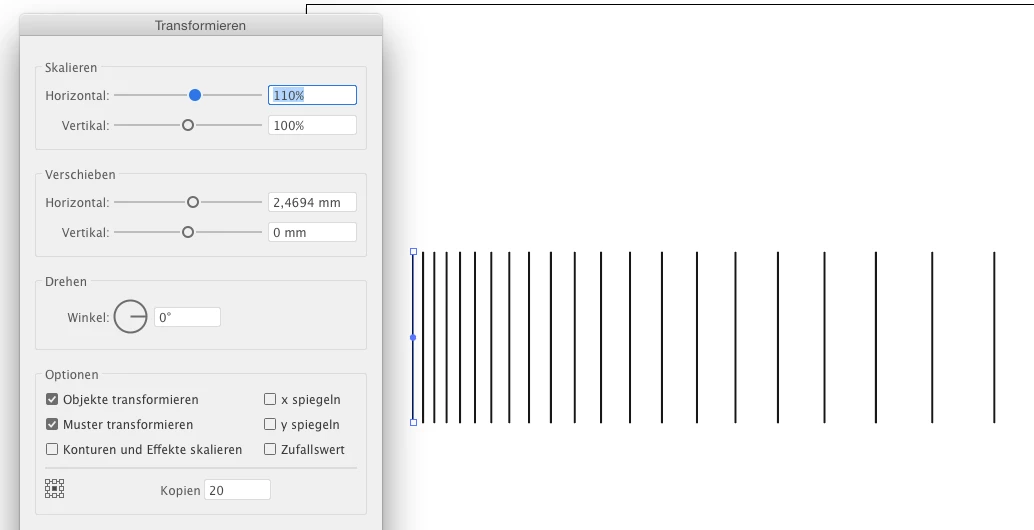
I need to create a stroke where the gap between the dashed line increases incrementally at the start - up to a point where the gap remains constant - then decreases incrementally at the same rate.

This is for a schematic representation of a birds-eye view of a bridge where the ramp goes up on one side then down on another.

Stroke to remain constant in width.

Any help gratefully received.

Kind regards

a1exa

This topic has been closed for replies.
Correct answer Monika Gause

A vertical line and then use the transform effect on it:

Sorry for the German interface, but you just can compare the boxes in your version. The checkboxes are important as well. Adjust the values to your needs.

2 replies

Jacob Bugge
Community Expert
Community Expert
May 4, 2019

Alexa,

You can create the appearance with symmetrically increasing, constant, and decreasing, gaps in one go as follows, the exact details depending on the desired range of gaps (how small to start and end with compared with the largest constant gap), and which proportion to have the constant gaps):

1) Create a vertical stroked path with a length/height equalling the apparent Stroke Weight of the apparent dashed line, and with a Stroke Weight equalling the desired apparent dash length;

2) Move a copy of 1) horizontally a suitable distance to the right, the exact distance is unimportant but should something like the total length to be covered;

3) Object>Blend>Blend Options, set Orientation to Align to Page and set Spacing to the total number of apparent dashes less two;

4) Object>Blend>Make, then Ctrl/Cmd+C+F, then hide the original;

1) - 4) should give you a basic Blend and a copy to fall back on;

5) Create a circle with a 1pt Stroke and a diameter that roughly corresponds to the desired combined length of the end parts with increasing and decreasing gaps, then Ctrl/Cmd+C+F, then hide the original;

6) ClickDrag with the Line (Segment) Tool horizontally across the top half of the circle, crossing each side at a suitable height, possibly corresponding to 30 degrees, depending on the desired start gaps: the smaller gaps, the lower;

7) With the horizontal path still selected, Object>Path>Divide Objects Below, then select the lower part and delete it, then Direct Select the straight bottom segment and delete;

8) With the Direct Selection Tool click the top Anchor Point with the Scissors Tool, then Alt/OptionClick the right part and ClickDrag it horizontally to the right by a distance corresponding to the desired length of the middle part with constant gaps, then Direct Select both top Anchor Points and Ctrl/Cmd+J, then Ctrl/Cmd+C+F, then hide the original;

5) - 8) should give you a basic Spine to create the right Blend and a copy to fall back on;

9) Select the copy Blend from 4) and the copy path from 8) and Object>Blend>Replace Spine; this gives a first feel of the dash/gap appearance, just ignore the different vertical positions;

10) Object>Blend>Expand, then Ctrl/Cmd+Shift+G to Ungroup, then Align>Vertical Align Center, then Ctrl/Cmd+G to Group;

9) - 10) should give you the fundamental dash/gap appearance; you may redo as far back as you wish, until you are satisfied, maybe especially to 6) to reuse the circle from 5) and adjust the height of the dividing line;

11) Select the Group in 10) and click New Brush in the Brushes palette, then select Art Brush;

12) Apply the Art Brush to a path with a 1pt Stroke Weight that represents the birds-eye view of the bridge.

Some of the steps shown:

a1exaAuthor
Participant
May 6, 2019

Thank you, Jacob.

I appreciate the time you spent on this guided step-by-step approach.

Regards

Alexa

Monika Gause
Community Expert
Monika GauseCommunity ExpertCorrect answer
Community Expert
May 3, 2019

A vertical line and then use the transform effect on it:

Sorry for the German interface, but you just can compare the boxes in your version. The checkboxes are important as well. Adjust the values to your needs.

a1exaAuthor
Participant
May 3, 2019

Hello Monika

Thank you very much for your reply. Very helpful.

Do you know if this can be applied along a stroke? The bridge bends so ideally I'll be applying this effect along a stroke.

a1exa

Monika Gause
Community Expert
Community Expert
May 3, 2019

You can expand the appearance (which gives you the strokes) and then create a brush out of it.