To export your Illustrator file as an SVG with specific group names ("Inca" and "Offset") that Cricut Design Space will recognize, you need to ensure your layers in Illustrator are correctly named and structured before exporting. Cricut Design Space interprets named layers and groups in an SVG as separate objects or groups.
Hopefully this works:
Organize Your Layers in Illustrator:
-
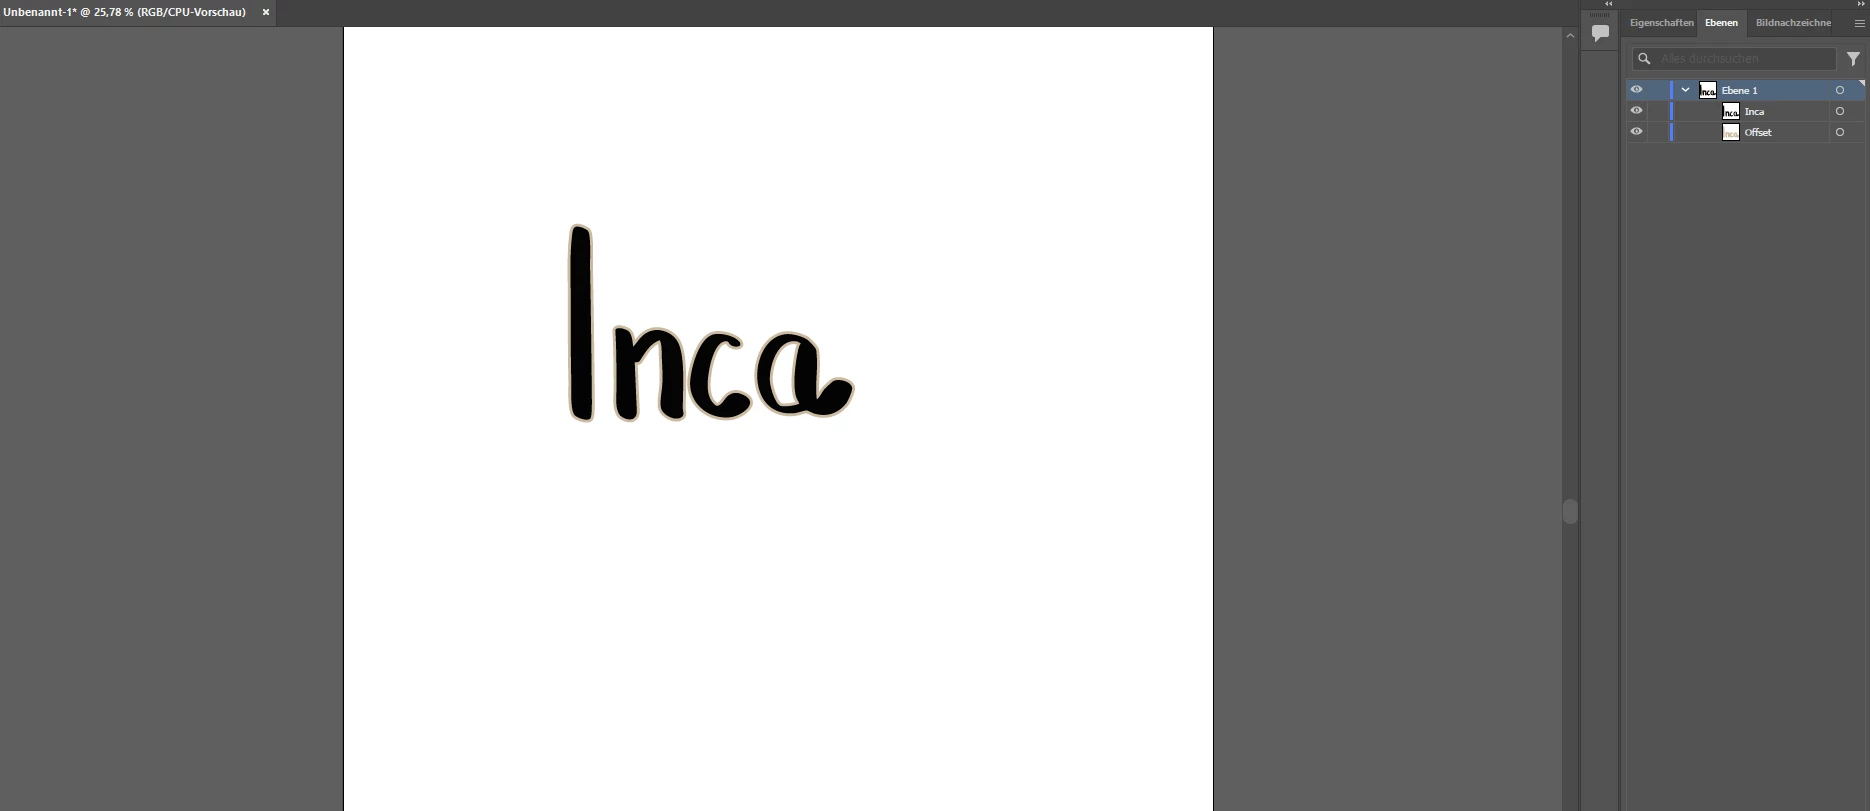
In your provided screenshot, you have "Ebene 1" (Layer 1) which contains "Inca" and "Offset" as sub-items. For Cricut, it's often best to have "Inca" and "Offset" as their own top-level layers, or within a single parent layer that then gets grouped.
-
Ideal Setup:
-
Go to your Layers panel (Fenster > Ebenen / Window > Layers).
-
Ensure your "Inca" path is on a layer named "Inca".
-
Ensure your "Offset" path is on a layer named "Offset".
-
If they are currently sub-layers or objects within a single layer, drag them out into their own individual layers by creating new layers and moving the paths into them. You can select the path in the artboard and drag the colored square indicator in the Layers panel to the new layer.
-
Granted, you can group them within Illustrator: Select both the "Inca" path and the "Offset" path, then go to Object > Group (Strg/Cmd + G). Then, in the Layers panel, double-click the name of this new group and rename it to something like "MyGroup" if you want them to be imported as a single group into Cricut, and Cricut will likely list "Inca" and "Offset" as sub-layers under that group. However, for independent "Inca" and "Offset" items in Cricut's layers panel, separate layers named "Inca" and "Offset" are usually more reliable.
Export as SVG:
-
Once your layers are correctly named ("Inca" and "Offset" as individual layers), go to Datei > Exportieren > Exportieren als... (File > Export > Export As...).
-
Choose SVG as the format.
-
Click Exportieren (Export).
SVG Options for Cricut:
By structuring your layers with the desired names ("Inca" and "Offset") in Illustrator and selecting "Layer Names" for Object IDs during SVG export, Cricut Design Space should recognize these as separate elements in its layers panel. If you group them in Illustrator and name the group, Cricut will typically import that as a single group containing the individual named paths. For two distinct, named "files" (which Cricut interprets as layers/paths), separate top-level layers in Illustrator named "Inca" and "Offset" are the most straightforward approach.
Good Luck!