• Global community
    • Language:
      • Deutsch
      • English
      • Español
      • Français
      • Português
  • 日本語コミュニティ
    Dedicated community for Japanese speakers
  • 한국 커뮤니티
    Dedicated community for Korean speakers
Exit
0

Trapezoidal Panels to Form a Curved Display

New Here ,
Feb 15, 2024 Feb 15, 2024

Copy link to clipboard

Copied

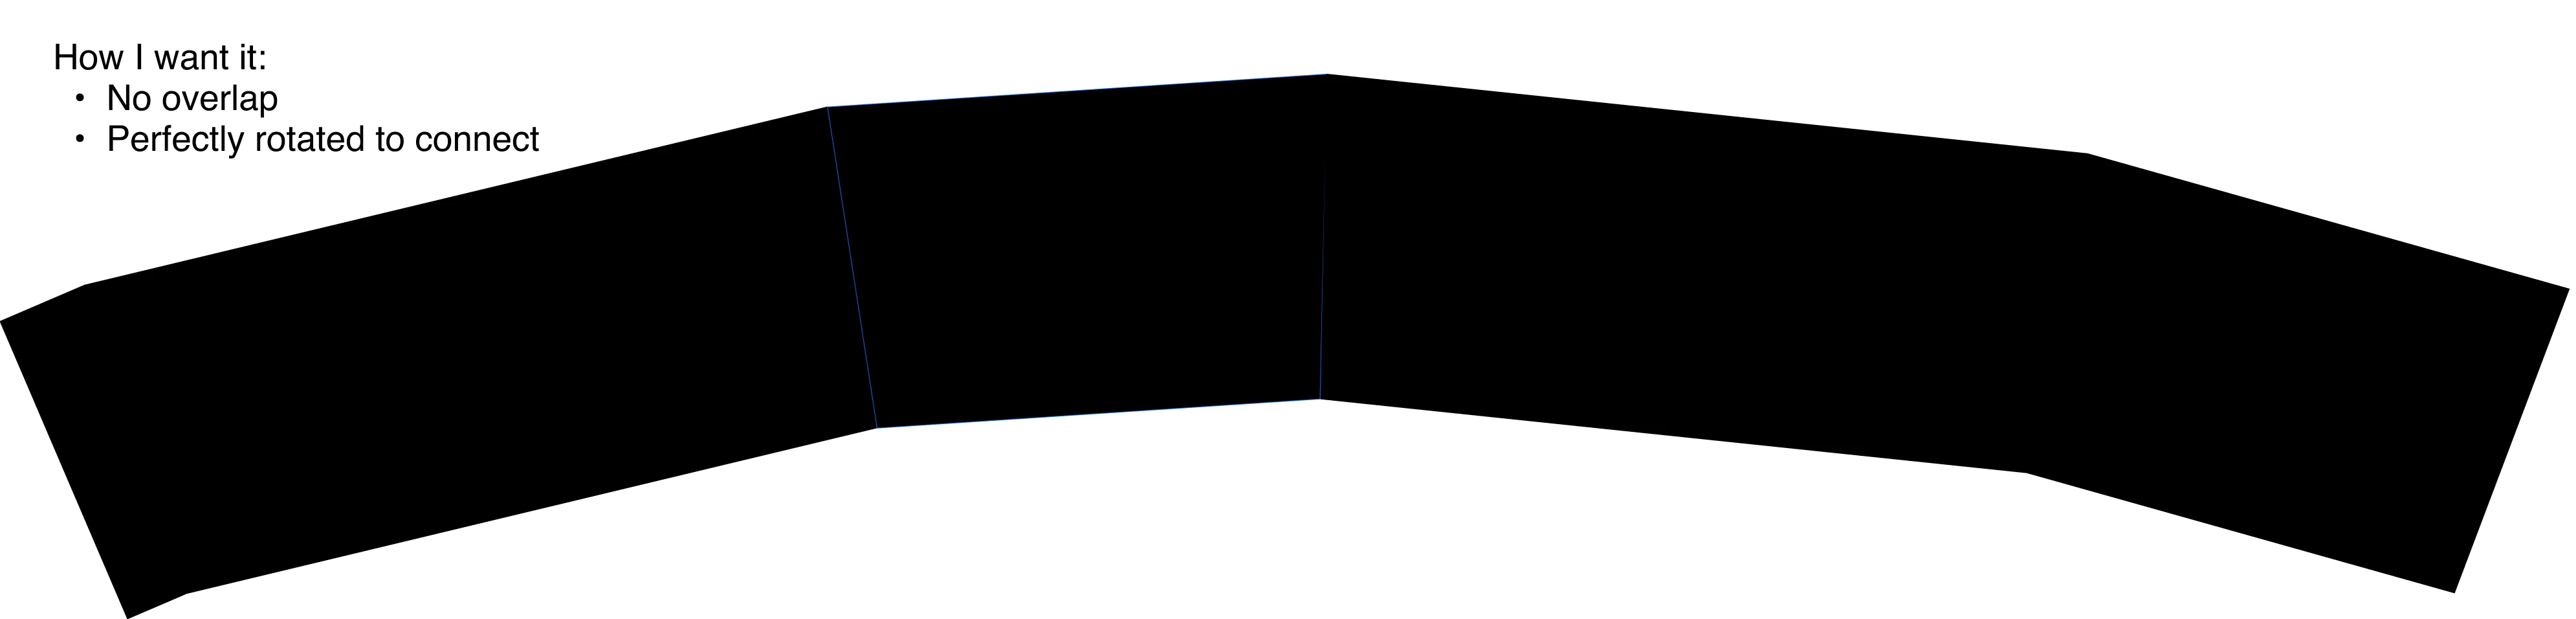
I'm working on a project where I need to arrange four trapezoidal panels in a circular pattern to create a curved display. Some of the panels have different sizes in width (see image for ref), and they should fit together without overlapping. The panels are meant to connect at their sides, forming a smooth curve with each panel being rotated around a central point. I have the dimensions and the internal angle for each trapezoid.

1. How do I get exact rotation angle for each panel?
2. How do I connect them perfectly without overlapping?

Attached are the desired outcome (black curve) and dimensions and angles for reference.

Thank you for your help!

measurements.jpg


curve.jpg

TOPICS
How-to

Views

263

Translate

Translate

Report

Report
Community guidelines
Be kind and respectful, give credit to the original source of content, and search for duplicates before posting. Learn more
community guidelines
Adobe
Community Expert ,
Feb 15, 2024 Feb 15, 2024

Copy link to clipboard

Copied

Have you already tried using the Rotate tool while Smart Guides are turned on?

Votes

Translate

Translate

Report

Report
Community guidelines
Be kind and respectful, give credit to the original source of content, and search for duplicates before posting. Learn more
community guidelines
New Here ,
Feb 15, 2024 Feb 15, 2024

Copy link to clipboard

Copied

Yes both of them! I got the rotation perfect. However I can get them to connect perfectly @Kurt Gold  any ideas? 

Votes

Translate

Translate

Report

Report
Community guidelines
Be kind and respectful, give credit to the original source of content, and search for duplicates before posting. Learn more
community guidelines
Community Expert ,
Feb 15, 2024 Feb 15, 2024

Copy link to clipboard

Copied

By "connecting" them, do you actually mean merging/unifying them with the Pathfinder?


Or something else?

Votes

Translate

Translate

Report

Report
Community guidelines
Be kind and respectful, give credit to the original source of content, and search for duplicates before posting. Learn more
community guidelines
New Here ,
Feb 15, 2024 Feb 15, 2024

Copy link to clipboard

Copied

I can do that, but then they overlap. My wish is for them to connect perfectly without any white-space and without overlapping if that makes sense? @Kurt Gold 


Votes

Translate

Translate

Report

Report
Community guidelines
Be kind and respectful, give credit to the original source of content, and search for duplicates before posting. Learn more
community guidelines
Community Expert ,
Feb 15, 2024 Feb 15, 2024

Copy link to clipboard

Copied

Can you share this Illustrator file for further inspection?

Votes

Translate

Translate

Report

Report
Community guidelines
Be kind and respectful, give credit to the original source of content, and search for duplicates before posting. Learn more
community guidelines
New Here ,
Feb 15, 2024 Feb 15, 2024

Copy link to clipboard

Copied

Hello, here you go. Thank you for being so helpful.

Votes

Translate

Translate

Report

Report
Community guidelines
Be kind and respectful, give credit to the original source of content, and search for duplicates before posting. Learn more
community guidelines
New Here ,
Feb 15, 2024 Feb 15, 2024

Copy link to clipboard

Copied

I wasn't able to upload the AI-file, so I sent it as an SVG if it's okay?

Votes

Translate

Translate

Report

Report
Community guidelines
Be kind and respectful, give credit to the original source of content, and search for duplicates before posting. Learn more
community guidelines
Community Expert ,
Feb 15, 2024 Feb 15, 2024

Copy link to clipboard

Copied

OK, this sample file obviously contains the objects after you've rotated them. There are gaps for some reason.


It would probably be better to share a file that shows the initial situation (unrotated, as per the upper part in your screenshot above).

Votes

Translate

Translate

Report

Report
Community guidelines
Be kind and respectful, give credit to the original source of content, and search for duplicates before posting. Learn more
community guidelines
New Here ,
Feb 15, 2024 Feb 15, 2024

Copy link to clipboard

Copied

Hello again,


I added the object as unrotated now.

Votes

Translate

Translate

Report

Report
Community guidelines
Be kind and respectful, give credit to the original source of content, and search for duplicates before posting. Learn more
community guidelines
Community Expert ,
Feb 15, 2024 Feb 15, 2024

Copy link to clipboard

Copied

Thanks for the sample file.


The objects are not perfectly distributed. Therefore you get the gaps when rotating them.


You may do the following:


  • Select all
  • Click on the left-most object to set it as the key object
  • In the Align palette, set distribute spacing to 0 (zero) mm and click on the Horizontal Distribute (Spacing) button


Now do the desired rotations with the Rotate tool, setting appropriate reference points. When done, you may use Pathfinder to unify them.

Votes

Translate

Translate

Report

Report
Community guidelines
Be kind and respectful, give credit to the original source of content, and search for duplicates before posting. Learn more
community guidelines
Community Expert ,
Feb 15, 2024 Feb 15, 2024

Copy link to clipboard

Copied

LATEST

Jens,


With the difference in widths and the same angle between panels there is no way to have them follow a circle/have one common centre (of rotation).


So there is only the way Kurt suggests with a certain inherent irregularity, and an inevitable final rotation of the whole set to have it appear reasonably symmetrical, so you may as well make the mutual rotations in an easy way.


When you have distributed them all and have coinciding top Anchor Points, you can can start from either end and rotate the panel(s) from that end round the next coiniciding top Anchor Point and use snapping for the bottom ones, Smart Guides being your friends. Once you have the whole set with the last panel still horizontal, you can ShiftClickDrag horzontally with the Line Segment Tool from the first/lower end bottom Anchor Point and then rotate round that to snap the last/higher end bottom Anchor Point to the line and thereby have as much (apparent) symmetry as you can get.


I hope this was sufficiently unintelligible.


Votes

Translate

Translate

Report

Report
Community guidelines
Be kind and respectful, give credit to the original source of content, and search for duplicates before posting. Learn more
community guidelines