• Global community
    • Language:
      • Deutsch
      • English
      • Español
      • Français
      • Português
  • 日本語コミュニティ
    Dedicated community for Japanese speakers
  • 한국 커뮤니티
    Dedicated community for Korean speakers
Exit
0

Trouble with blend tool in neon effect.

New Here ,
Oct 04, 2022 Oct 04, 2022

Copy link to clipboard

Copied

Hi

I was trying to create the neon effect for symbols using this yt tutorial below. I set the Stroke = 5, Offset Path = 4. I had no issues with 1 but couldn't get the same in 2 as the blend tool is giving me distorted image. Kind of messed up now.
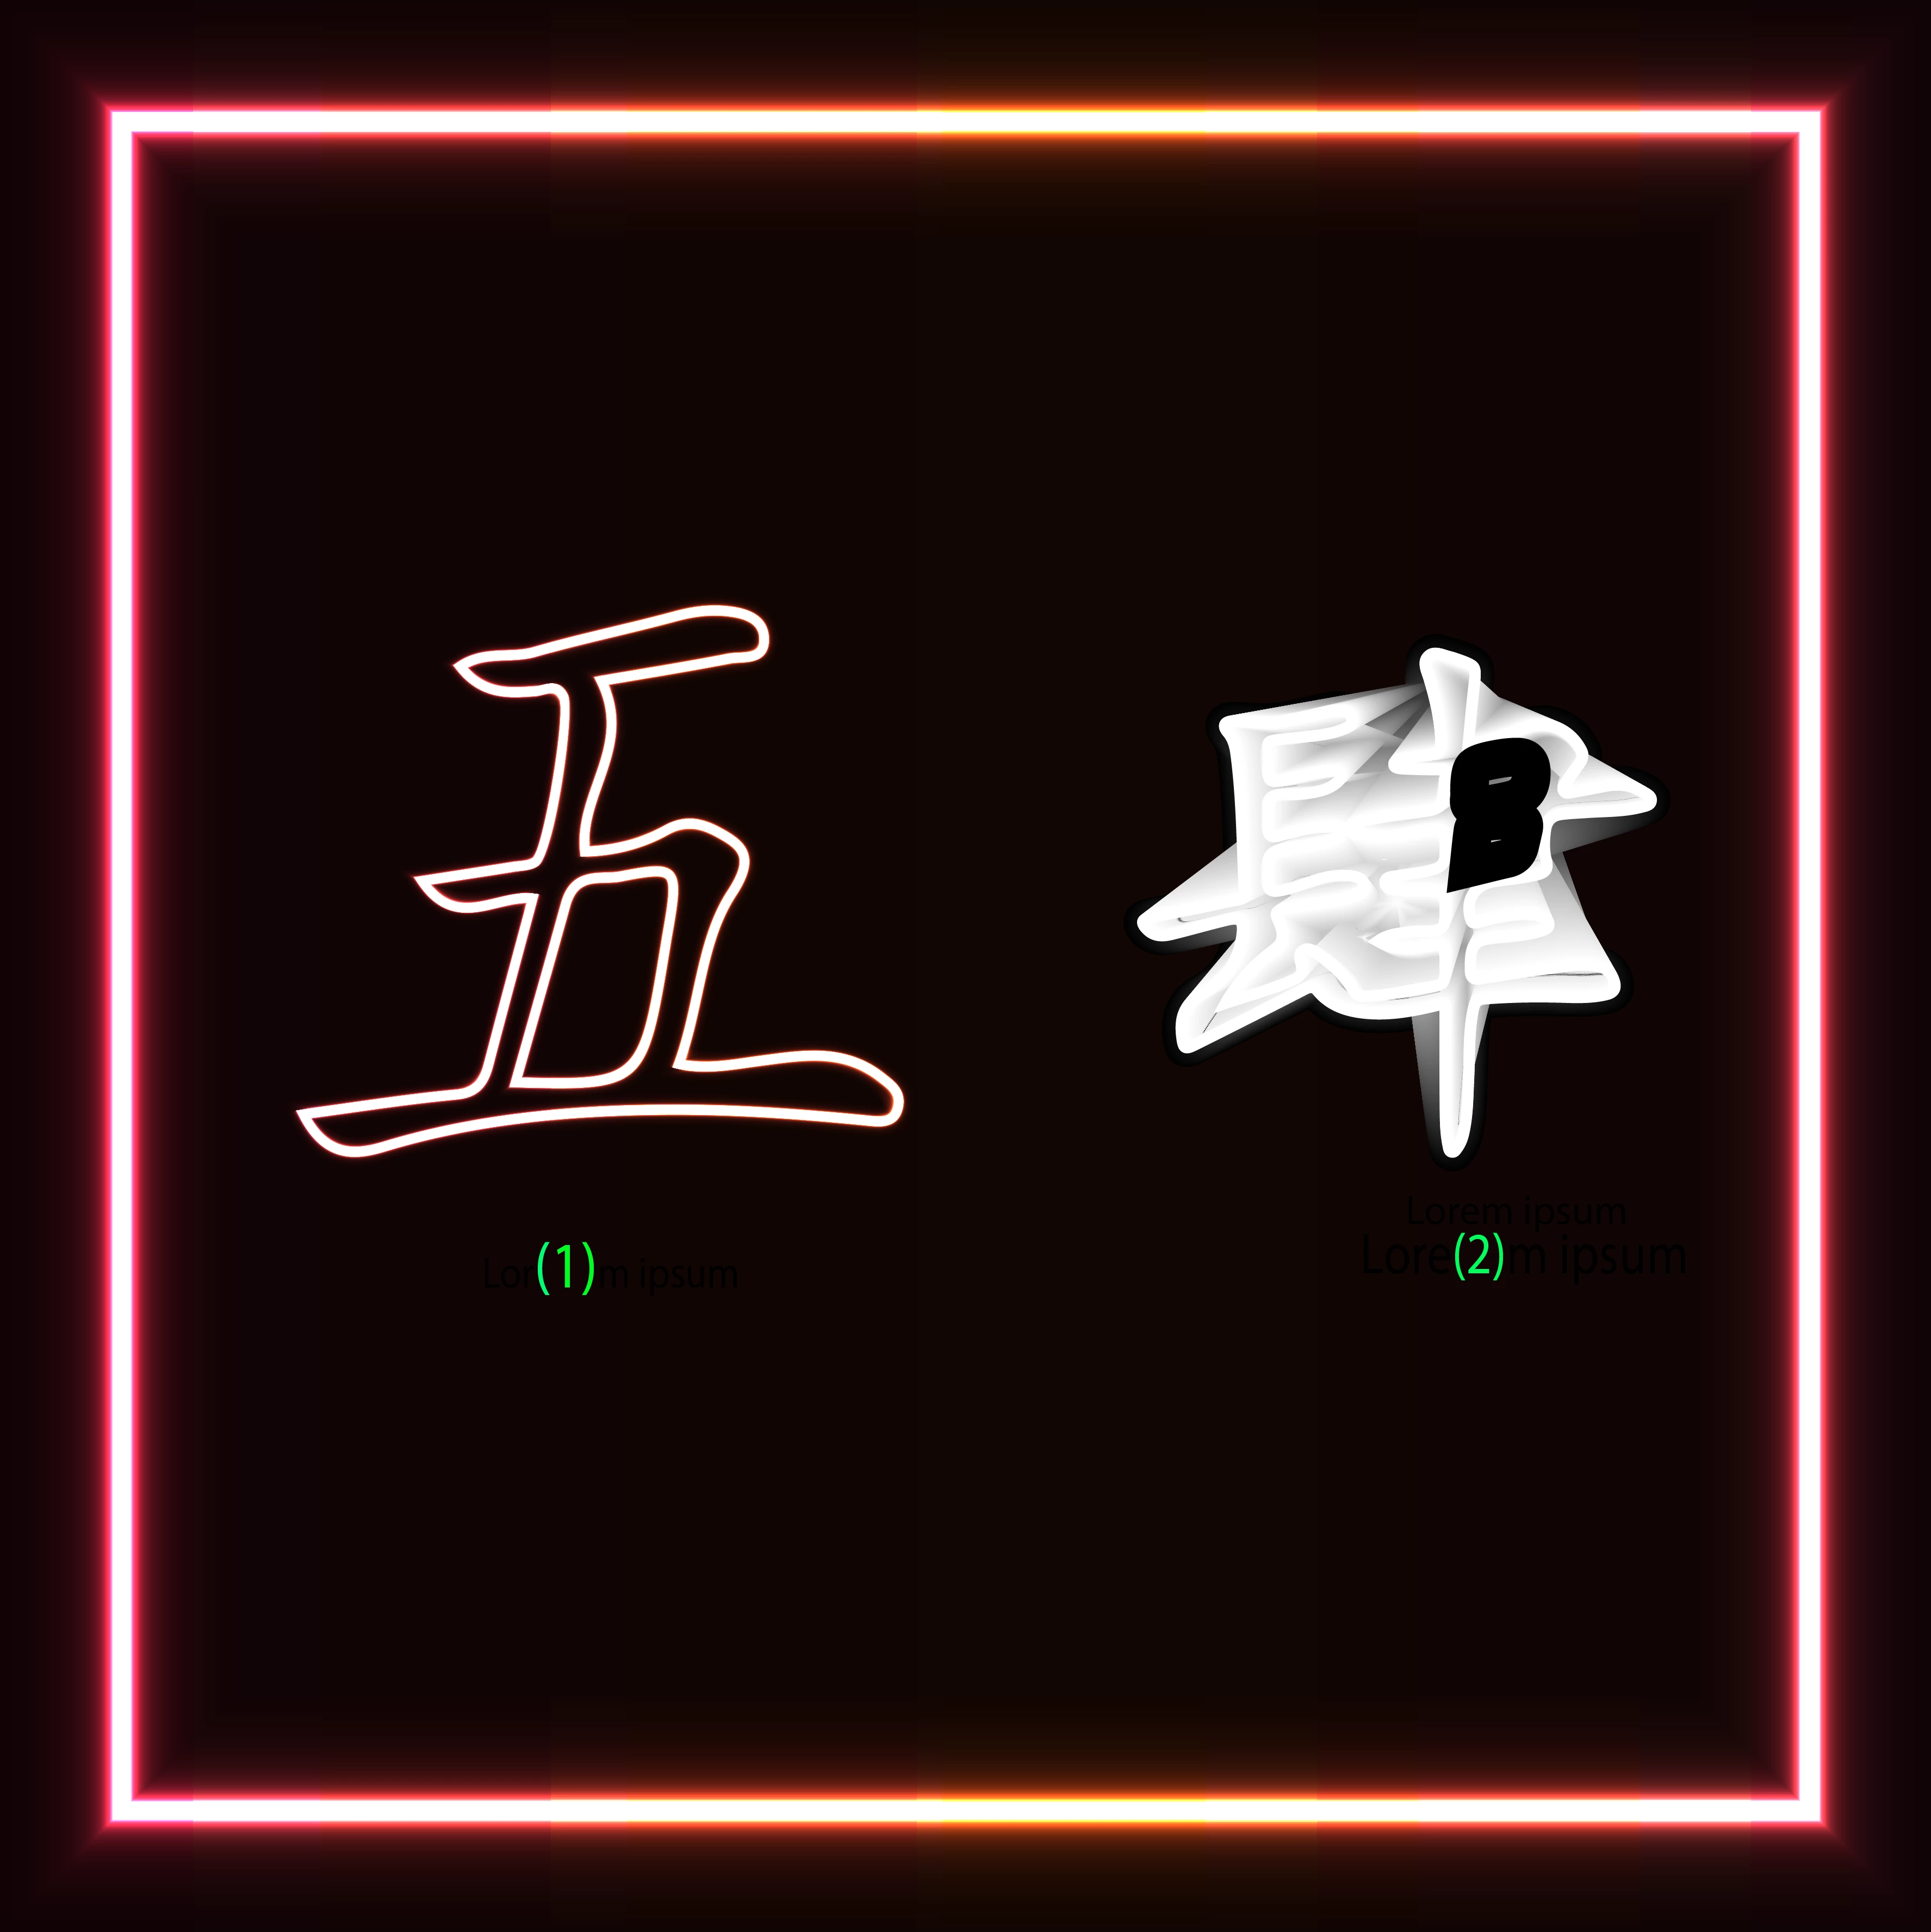
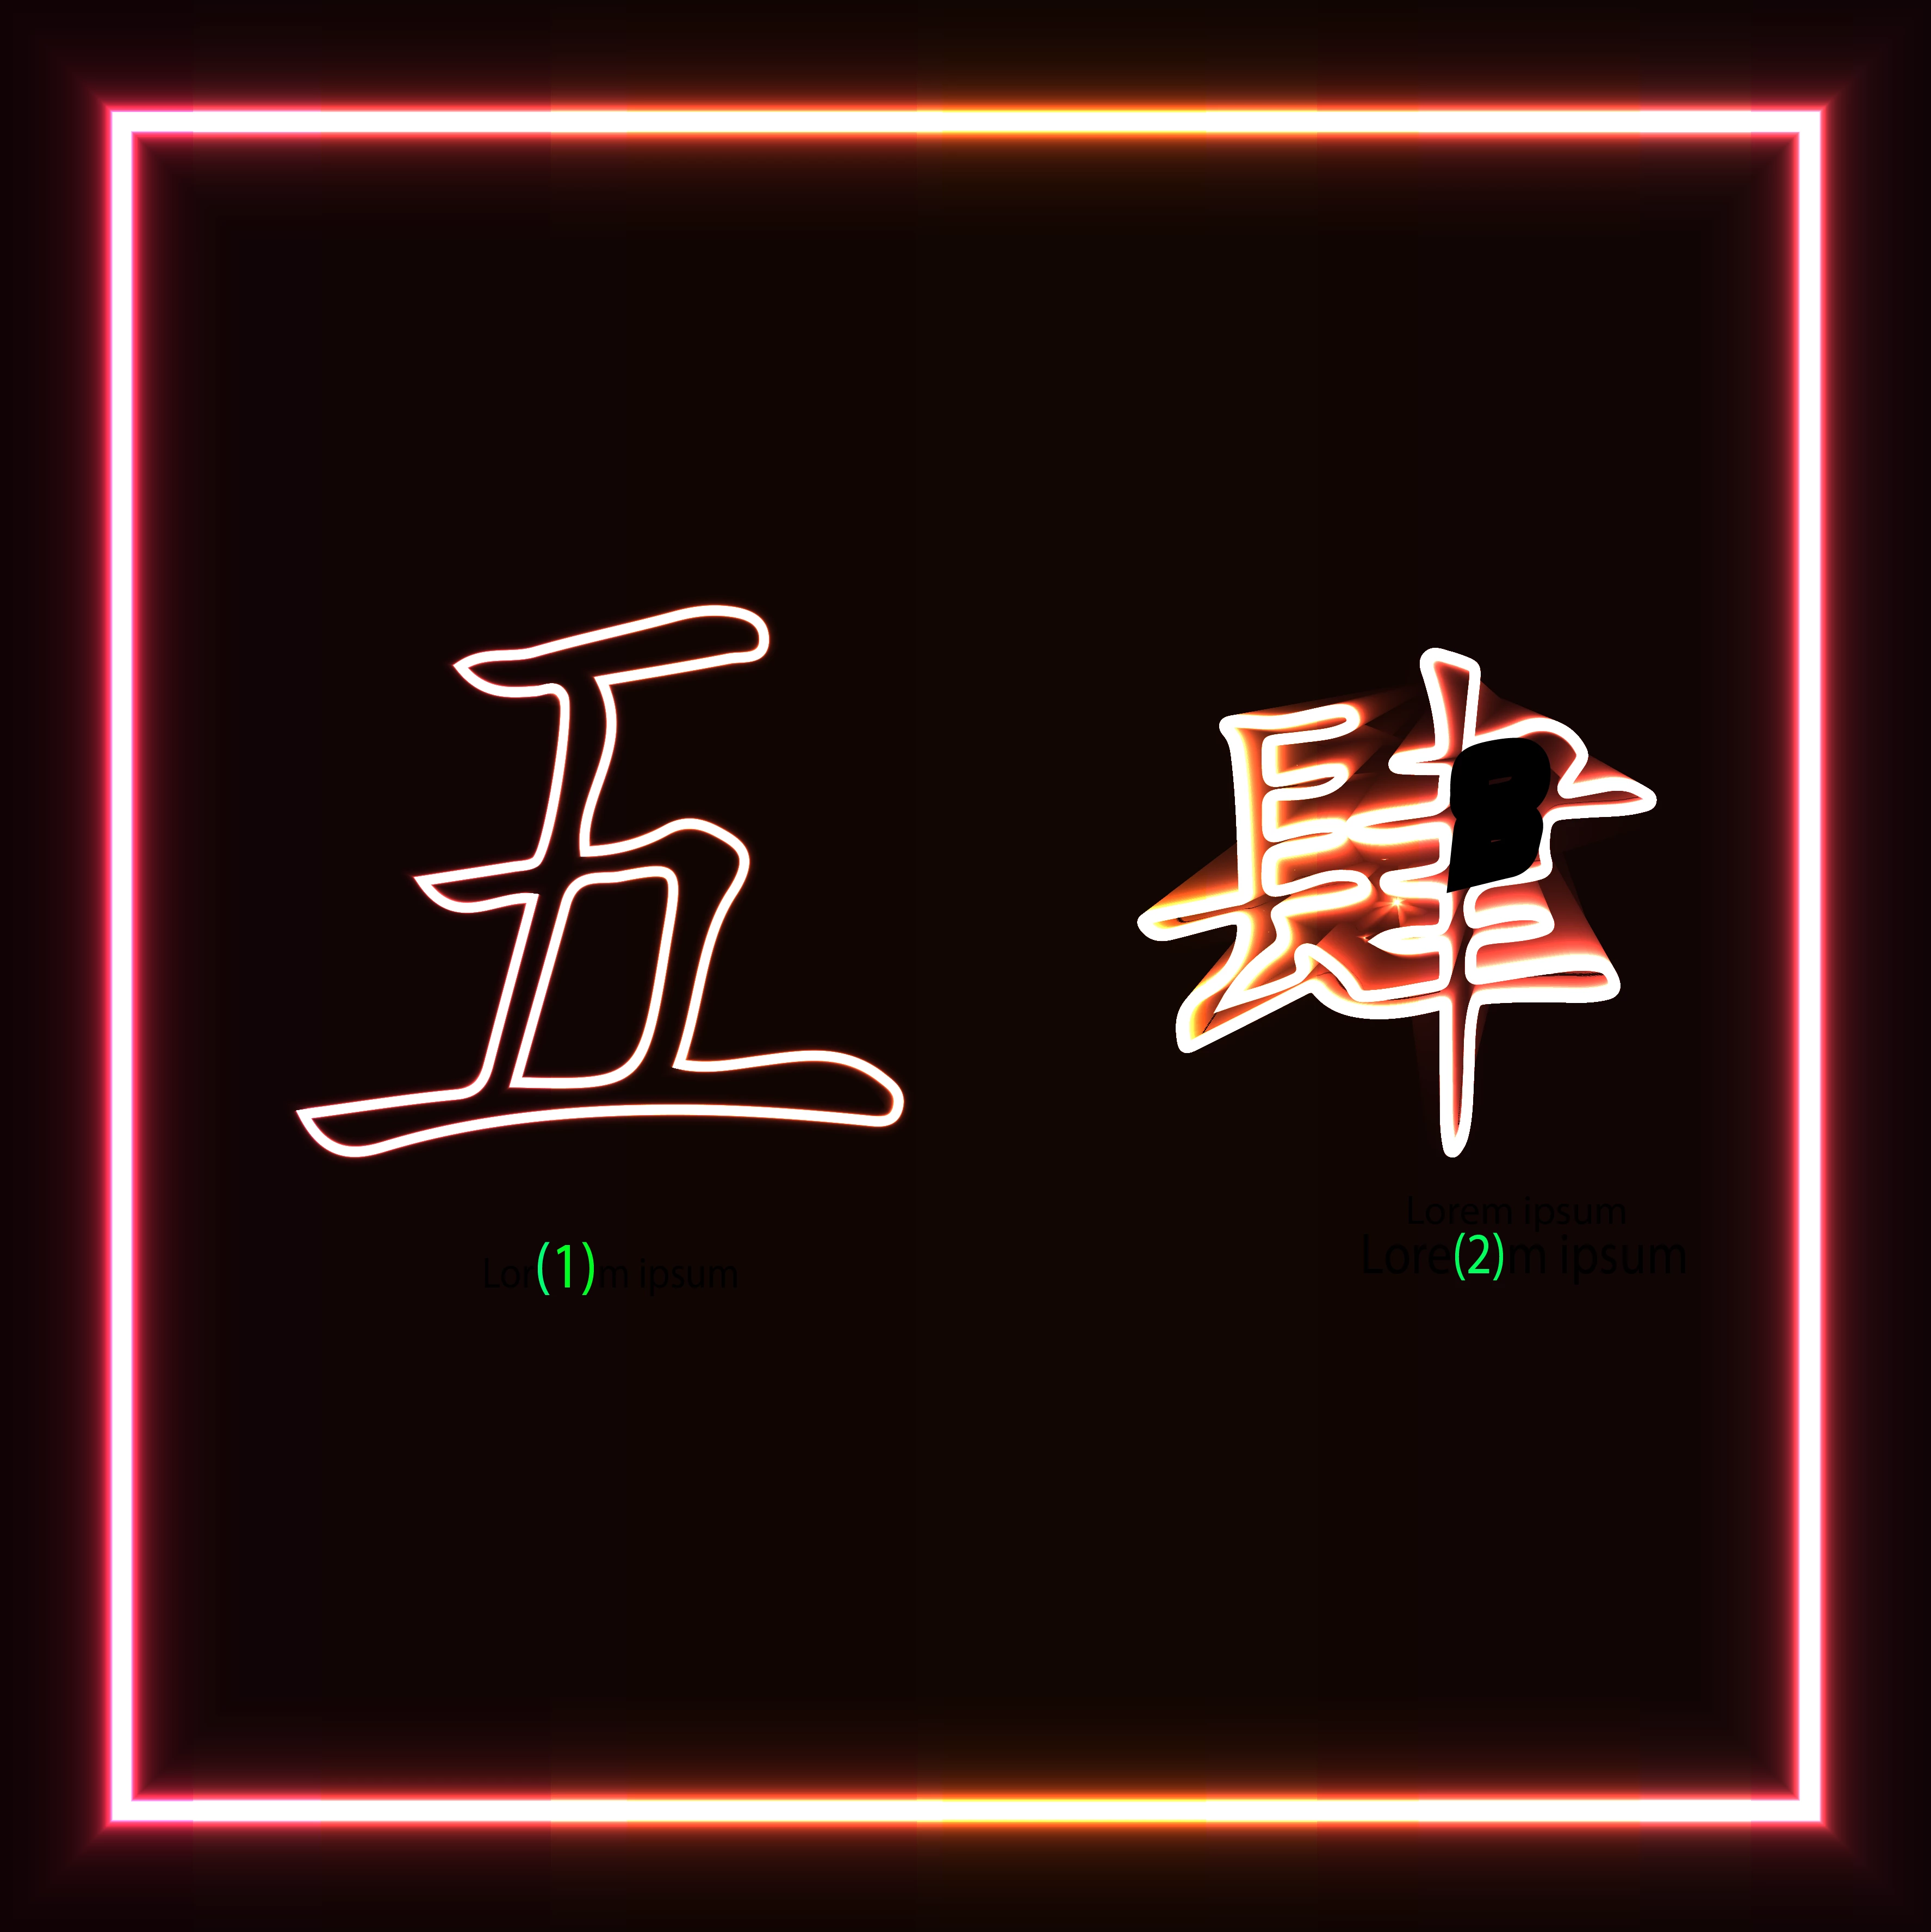
Neon Effect 1-02.pngNeon Effect 2-02.png

TOPICS
Draw and design , Type

Views

302

Translate

Translate

Report

Report
Community guidelines
Be kind and respectful, give credit to the original source of content, and search for duplicates before posting. Learn more
community guidelines
Adobe
Community Expert ,
Oct 04, 2022 Oct 04, 2022

Copy link to clipboard

Copied

That video is too long. Please tell us where exactly they set up what you didn't get.

(2) looks like a compound path that has gone wrong.

Please upload the file to Dropbox or the like so that we may take a look.

Votes

Translate

Translate

Report

Report
Community guidelines
Be kind and respectful, give credit to the original source of content, and search for duplicates before posting. Learn more
community guidelines
New Here ,
Oct 04, 2022 Oct 04, 2022

Copy link to clipboard

Copied

Thanks for your reply mam. I turned off the fill in the expand. Applied offset path around 4px and applied white for the orginal path and the offset path black colour. Used the blend tool on them but didn't get the effect as in 1. I have posted the filehttps://www.dropbox.com/s/sdp23b09xucr5cp/Neon%20Effect.ai?dl=0 

Votes

Translate

Translate

Report

Report
Community guidelines
Be kind and respectful, give credit to the original source of content, and search for duplicates before posting. Learn more
community guidelines
Community Expert ,
Oct 04, 2022 Oct 04, 2022

Copy link to clipboard

Copied

Thank you for the file.

There is one big difference between your objects: the correct working one is a compound path, the other one is a group.

I would release the groups and turn it into a compound path.

Then try again.


If you want to blend groups, then watch out for this: https://www.youtube.com/watch?v=2L_r_8PpaK8

Votes

Translate

Translate

Report

Report
Community guidelines
Be kind and respectful, give credit to the original source of content, and search for duplicates before posting. Learn more
community guidelines
New Here ,
Oct 05, 2022 Oct 05, 2022

Copy link to clipboard

Copied

Thanks mam. I ungrouped it; got 3 different groups in 2nd image. Created a off set path for all; selected the 3 paths and applied make compound. Did the same thing for offset  paths also. But still getting same result. I think since it contains more curves blend tool is not working as in 1.

Votes

Translate

Translate

Report

Report
Community guidelines
Be kind and respectful, give credit to the original source of content, and search for duplicates before posting. Learn more
community guidelines
Community Expert ,
Oct 05, 2022 Oct 05, 2022

Copy link to clipboard

Copied

It probably fails because of this:

Screenshot 2022-10-05 at 12.32.08.png


When you offset path, those shapes end up wildly different in the new shapes.


You could try and use "Outer Glow" effect.

Or try and stack several ob these shapes (maybe 4 or 5) using slightly different colors and the Gaussian blur effect. and also blend modes.


Votes

Translate

Translate

Report

Report
Community guidelines
Be kind and respectful, give credit to the original source of content, and search for duplicates before posting. Learn more
community guidelines
New Here ,
Oct 08, 2022 Oct 08, 2022

Copy link to clipboard

Copied

Yeah the offset path is overlapping that's why they give distorted image when using blend tool. I tried by making making the offset path small; didn't have any issues but didn't get the glow effect like 1. Is it possible to edit the offsetpath by making space at places where they combine mam?

Votes

Translate

Translate

Report

Report
Community guidelines
Be kind and respectful, give credit to the original source of content, and search for duplicates before posting. Learn more
community guidelines
Community Expert ,
Oct 08, 2022 Oct 08, 2022

Copy link to clipboard

Copied

I don't see how that should work.

Another things you could try is a gradient on a stroke.

Votes

Translate

Translate

Report

Report
Community guidelines
Be kind and respectful, give credit to the original source of content, and search for duplicates before posting. Learn more
community guidelines
Community Expert ,
Oct 04, 2022 Oct 04, 2022

Copy link to clipboard

Copied

We are here to help, but expecting us to watch a lengthy video is not realistic, That would take us away from helping others who take the time to write the post so we can follow.


Did you apply offset using:

object >> path >> offset path

you can also apply as an effect, bit that I do not think would work

effect >> path >> offset path


Either something is wrong with the shape you are using, or the method. As a test/training try this on a simple rectangle, then on a simple compound path. Problems with the path might be stray points, incorrectly made compound path (you could release and remake the compound).

Votes

Translate

Translate

Report

Report
Community guidelines
Be kind and respectful, give credit to the original source of content, and search for duplicates before posting. Learn more
community guidelines
New Here ,
Oct 04, 2022 Oct 04, 2022

Copy link to clipboard

Copied

really sorry sir its my first time using illustrator. I followed the same procedure they used in the video from 5- 6 min. It worked well for 1 but not for 2.


Votes

Translate

Translate

Report

Report
Community guidelines
Be kind and respectful, give credit to the original source of content, and search for duplicates before posting. Learn more
community guidelines
LEGEND ,
Oct 04, 2022 Oct 04, 2022

Copy link to clipboard

Copied

I agree with Mr. Gondek. You likely did not correctly use the Offset Path or it produced odd results due to the complexity of the shape. It probably has several self-intesecting edges and clustered up anchor points. In such a case you have to expand the offset and clean up the resulting path before creating the blend. The tutorial simply doesn't account for this and just assumes that all shapes would produce perfect results without extra intervention.


Mylenium

Votes

Translate

Translate

Report

Report
Community guidelines
Be kind and respectful, give credit to the original source of content, and search for duplicates before posting. Learn more
community guidelines
New Here ,
Oct 04, 2022 Oct 04, 2022

Copy link to clipboard

Copied

Thanks for the reply sir. For the first it went well; I think maybe the image is complex. I will try again cleaning up the the offset path anchor points and use the blend tool. Hope it might work out. I have posted the file can u look at it once if possible https://www.dropbox.com/s/sdp23b09xucr5cp/Neon%20Effect.ai?dl=0 

Votes

Translate

Translate

Report

Report
Community guidelines
Be kind and respectful, give credit to the original source of content, and search for duplicates before posting. Learn more
community guidelines
Community Expert ,
Oct 09, 2022 Oct 09, 2022

Copy link to clipboard

Copied

LATEST

Offset path will work well for simple shapes but may not work for all shapes since it may add or remove points. (As is stated in the video 7:20) The second shape is an outlined character. Some of the "internal" shapes that should be a "hole" are behaving as an object, thihs is sometimes caused by the direction of the path (which can be corrected in tha advanced part of the attributes panel). I would suggest as @Monika Gause suggests you want the glyph (character) as a compound shape. Make sure that there is only one path on eact shape, best is to draw it as a filled shape so that you can see that the holes are as they should be. Once you have confirmed that the basic shape is clean and as it should be, then you can apply the neon effect. 


Note also that this neon effect using black and white works by mixing with the background. It will also vary in appearance if you use RGB or CMYK as colour workspace, and my be limited to creating shapes as simple as in the tutorial with screen as the intent. 

Votes

Translate

Translate

Report

Report
Community guidelines
Be kind and respectful, give credit to the original source of content, and search for duplicates before posting. Learn more
community guidelines