stefanogismondi
Known Participant
February 13, 2020
Answered

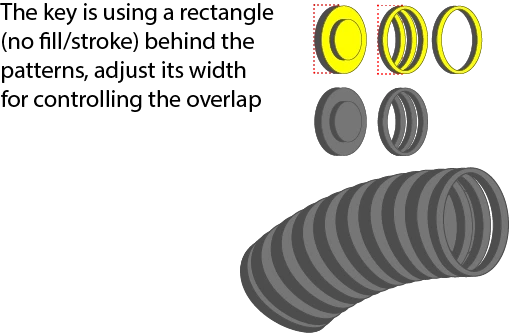
Using brushes - how to overlap the patterns

  • February 13, 2020
  • 2 replies
  • 3464 views
 

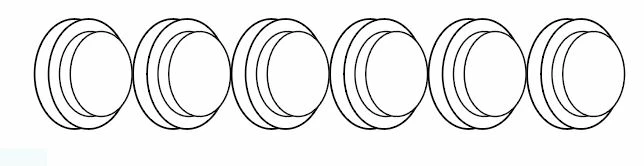
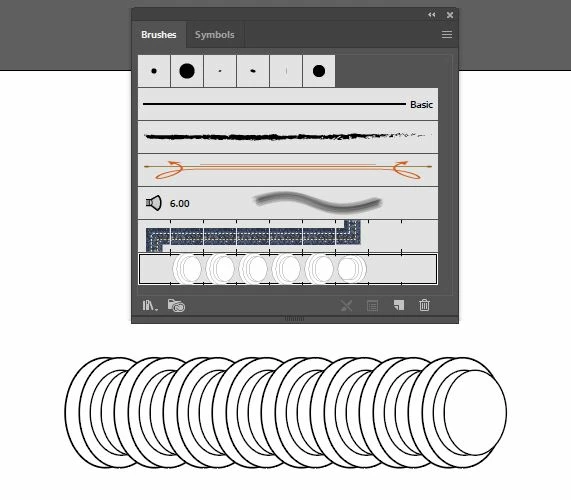
Need an help! Trying to use Brushes tool to do electrical wires. But what I obtain is what above, and what i need is what is below.

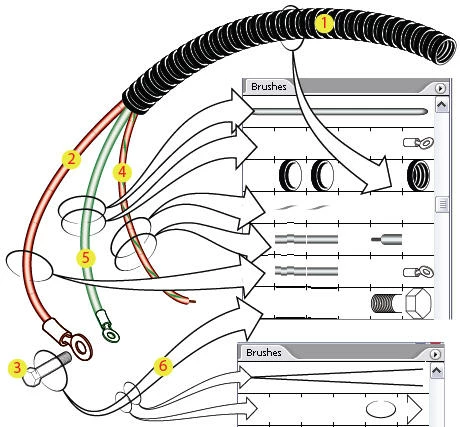
See below what I found on the web i cannot replicate (don't know why!) Please help me!!

Thank you to all for your patience!!

This topic has been closed for replies.
Correct answer federico platon

And using  Pattern Brush like the example posted, see the attached figures: 

First is for the line and second is for the end, you can adjust the width of each ring to better match the example.

The key to this pattern brush is placing a rectangle BEHIND each figure, with no fill and NO stroke, tghis will act as a Tile. Adjust as shown its width from the left, you will get different results. 

2 replies

Doug A Roberts
Community Expert
Community Expert
February 13, 2020

Place a no stroke/fill rectangle behind your pattern swatch to define where you want it the overlaps to start and end:

stefanogismondi
Known Participant
February 13, 2020

Thank you for your help, would like to end with a different view see below, seems like is possible only using pattern brushes

Doug A Roberts
Community Expert
Community Expert
February 13, 2020

Create your end object, then hold alt as you drag it to this spot in the pattern brush:

You should probably also read through the documentation on brushes:

https://helpx.adobe.com/uk/illustrator/using/brushes.html

Legend
February 13, 2020

stefanogismondi
Known Participant
February 13, 2020

Thank you for your help, this is what I got, but is not as a real corrugated pipe. Tiles should rotate accordin path. 

Doug A Roberts
Community Expert
Community Expert
February 13, 2020

Do you see the 'Rotation relative to' option in the scatter brush window? Change it to 'Path'