


Copy link to clipboard
Copied
Hi,
I am not a wiz at Adobe, but my teacher wants an all photo process for screen print. I have the color comp finished, but dont know how to do the rest in Illustrator or Photoshop. Which is best and how?


 1 Correct answer

I agree. You said your instructor wanted process color separations for silk screen. Here's some screens of a logo I designed...
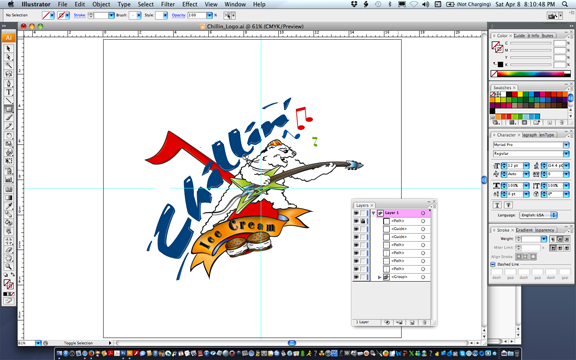
as seen in Illustrator with the Layers panel open for you to see that every Illustrator file consists of many Layers and, you are right, everything you do just about creates a new Layer. Not sure why you'd be concerned with layers if your artwork has been approved and is ready to be color separated. The above artwork is a native .ai file setup on an artboard 17" x 17
...Explore related tutorials & articles
 39
Replies
39
39
Replies
39

Copy link to clipboard
Copied
I'm not following. What exactly is the problem? Have you actually had a look at AI's Inks & Separations panel, flattener preview and all the good stuff? How are your colors actually set up?
Mylenium
Copy link to clipboard
Copied
I watched only one video about color seps for t-shirt printing. The guy made it look easy while doing complicated things. So, my comp is finished. The original art is a photo done in high bright and contrast, 15 pt dot, all black. The second art is a big brush stroke I made, scanned, outlined in Illustrator, then filled with a multi-color gradient to mimic a split font. They are visual combined in Photoshop now in two layers and no background. It looks great, but the next steps are crucial for doing negatives and exposing the screen. I don't really know what to do next, how to separate the colors, go gray, dot and pattern thing. That's all!
m
Copy link to clipboard
Copied
Here's what I do...
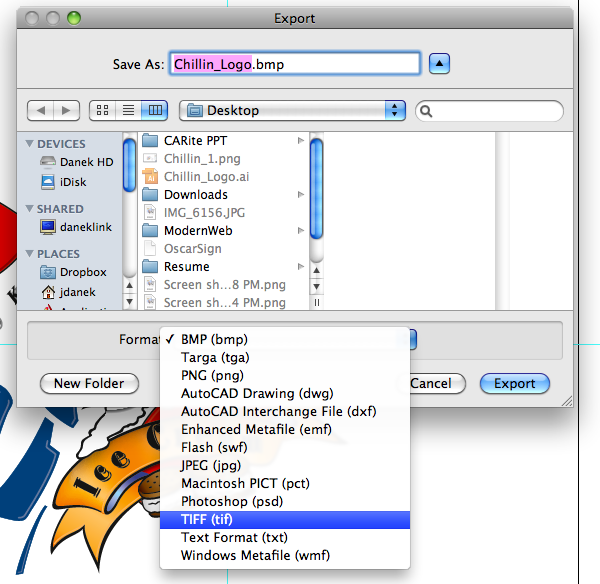
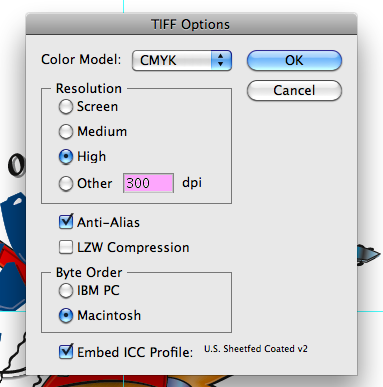
1.) Export your comp as a 150ppi TIFF @ CMYK;
2.) Open the TIFF in Photoshop > Channels > Split Channels;
3.) Convert each channel to 1-bit > in the conversion dialogs, look for Ellipse in the Shape dialog;
4.) Here's the tricky part. As part of these steps, you have to assign a screen angle and frequency to each channel. Start with C = 15 degrees; M = 75 degrees; Y = 0 degrees; K = 15 degrees; use a screen frequency of 65 lines per inch. What's tricky about this is the shirt's sewing pattern will affect your screen angle and the actual "screen" will affect your screen frequency ( you will need the maximum screen mesh to do process color work ).
Do some research by calling a local or online creen print vendor and ask them what they use for your shirts. This will give you a heads up on how to set each channel's halftone screen in Photoshop. Hopefully, none of your class mates read these forums.
Copy link to clipboard
Copied
Oh, forgot. Setup center marks on your Illustrator comp file. Set the artboard size about an inch larger than it is now. Set an invisible holding line to the size of the artboard ( 0% Stroke, 0% Fill ) and lock it ( Object > Lock Selection ). On the center marks, create them at 1/2 pt @ 100%C, 100%M, 100%Y, 100%K. These will be used to align the screens during makeready, then will be taped out during the print process.
Copy link to clipboard
Copied
Once the Photoshop files are ready, print each channel on vellum at 100% Grayscale. If you manage to pull this off, you should get an A++.
Copy link to clipboard
Copied
Your instructions look pretty simple. I'll give it a shot.
Mikka
Copy link to clipboard
Copied
I don't see the conversions dialog.The channels are already split into all four colors, but all have the main object in them. Is it OK for all colors to print over each other in the black? Also, I was trying to copy all the layers or channels just in case I mess up.
mikka
Copy link to clipboard
Copied
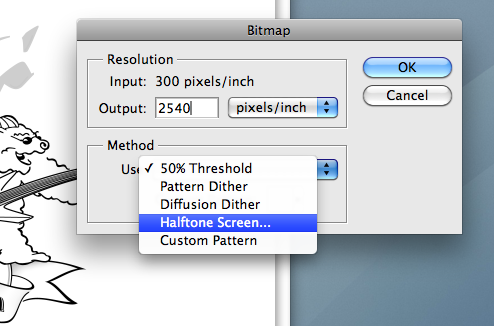
Right, so you should have 4 grayscale files. Look for Image > mode > bitmap; save the new file using a new name so you do not get confused. In the bitmap dialogs is where you set the shape and frequency of the halftone pattern.
Sent from my iPhone
Copy link to clipboard
Copied
"Is it OK for all colors to print over each other in the black?"
In silk screen, the Black files are burned into the mesh screen used to image the shirt. So, after you've printed the vellums using the halftone files ( Black ), the vellums are used to expose the screen(s), then the press is loaded with ink, the ink is then squeegied over the screen and thru the screen onto the shirt. What your instructor is asking you to do is pretty advanced. Because of the nature of silk screen and the hoops you have to jump through to get a decent print, it takes years to develope the skills and knowledge necessary to produce the print. That's why I say, if you can pull this off and get a nice print, you deserve an award.
Copy link to clipboard
Copied
I just ran the entire scenario as a test ( been a while since I did seps ). When you have split the channels, you now have 4 grayscale image files C-M-Y-K. When you convert from Grayscale to Bitmap ( Mode > Bitmap ), you will be met with the conversion dialog where it asks you for resolution. Set the bitmap resolution to 2400. This is the minimum amount of resolution needed to generate the dot in the screen. Also, in the next dialog, you set the frequency, angle, and dot shape. The frequency is default 53 lines per inch. Depending on the mesh of the silk screen, your frequency could be as low as 35 lines per inch. That's why I told you to contact a screen printer and ask them 1.) the mesh of their silk screen, 2.) the shirt fabric count and sewing angle ( if available ), and 3.) typical screen angles for a process color job. A good shop will give you that information because they rather not have to deal with separations if possible. But, the key is the Bitmap resolution has to be high enough to generate a good, halftone dot. I tried generating a sep at 5080dpi, but Photoshop wouldn't do it without distorting the image. A good halftone film positive depends on at least 5080 dpi; Photoshop only goes up to 2400 dpi.
Copy link to clipboard
Copied
Be aware that, depending on your image's density, some dots will not image via the silk screen because they are simply too small. This will mean some highlights will drop out. To avoid this, you could adjust the image density using Curves. But only if your highlight density falls below 5%. This all depends on your file.
Copy link to clipboard
Copied
So, what I am saying is you would most likely be better off sending the file out for high res film positives. But, I did further experiments using Photoshop CS2. I enlarged my original 200% > Export as CMYK Tiff > Open tiff in Photoshop > Save as high res in the name of the file > Channels > Split Channels. You now have 4 grayscale tiff files at the 200% enlarged size. Go to Mode > Bitmap > Output Resolution 2540 dpi > set your frequency, angle, and shape > Save to a folder named High Res Seps. Now open the Bitmap in Photoshop > Go to Size > set the size to 50% whatever it is now > for Resolution set it to 5080 dpi. If you enlarge the file, you will see a fairly decent dot shape suitable for silk screen burn.
Copy link to clipboard
Copied
Well my friend, it turns out that only one assistant at school know anything about screen print, and shes out till Monday. So far, I have run into every block, like converting to grayscale , which asks for flattening, merging, discarding color info, all which eliminate all channels. I got a flat blob of gray with a nice black photo. The channels are already "split" into four, but I cant do anything with them, separate them, adjust them, copy them...maybe I started with the wrong file type(Ai color image saved as PSD, two layers). How can I convert 4 channels into bitmap when they disappear after going gay? Too many questions!
m

Copy link to clipboard
Copied
You might need to copy the content of each of the channels into its own file. Then convert each of these files to bitmap.
Copy link to clipboard
Copied
I don't know how to make those copies or separate the channels to work on them...it's all stuck together and one change affects the rest.
m
Copy link to clipboard
Copied
I just tried to go back to the original Ai file to flatten it or do whatever...make layers there, but there is a layer for every little thing I did, incl. 3 masks to cover the edges because I could not find a crop tool.
Copy link to clipboard
Copied
When you have a CMYK file in Photoshop, open the channels panel.
Then go into one channel, select all, copy, create new file and then paste.
Repeat for every channel.
Read the documentation on how to work with channels in Photoshop.
Copy link to clipboard
Copied
I tried to copy channels this morning with a TA, but the copies were of the whole Ps document, not separated at all. I read all the info you sent me but I am so frustrated with the conversion to gray, bit, merge, mask, etc. issues. If I were designing this thing I would make it a one click deal, convert all channels at once to a film transparency for screen print at 100% black in just the right dot size and pattern...one box!
mikka
Copy link to clipboard
Copied
mikkanani schrieb
If I were designing this thing I would make it a one click deal,
That's what a RIP is there for: https://softwareforscreenprinters.com/what-is-a-rip/
Photoshop serves several purposes and so you might not find the one click solution for each and every specific task in it.
It would help if you could show something.
But actually I'm by no means an expert in screen printing. The steps I described above are my interpretation of what jdanek told you to do. This might or might not be what he had in mind. So you might want to wait for him to get back to you.
Copy link to clipboard
Copied
Monika,
I checked out the rip software for $500. Too bad the school doesn't have it, which would make sense especially for students who need too much help from too few teachers. Monday I am going to a real print shop to ask them to do it for me.
m
Copy link to clipboard
Copied
I agree. You said your instructor wanted process color separations for silk screen. Here's some screens of a logo I designed...

as seen in Illustrator with the Layers panel open for you to see that every Illustrator file consists of many Layers and, you are right, everything you do just about creates a new Layer. Not sure why you'd be concerned with layers if your artwork has been approved and is ready to be color separated. The above artwork is a native .ai file setup on an artboard 17" x 17".
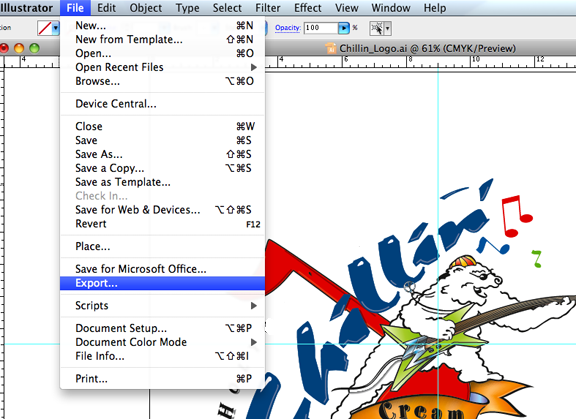
In Illustrator File > Export...
Above is your Export dialog...
continue on...
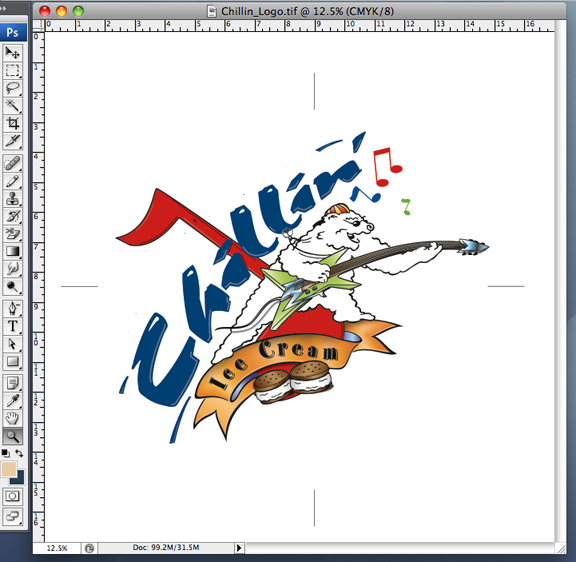
above is the composite opened in Photoshop, complete with center marks...
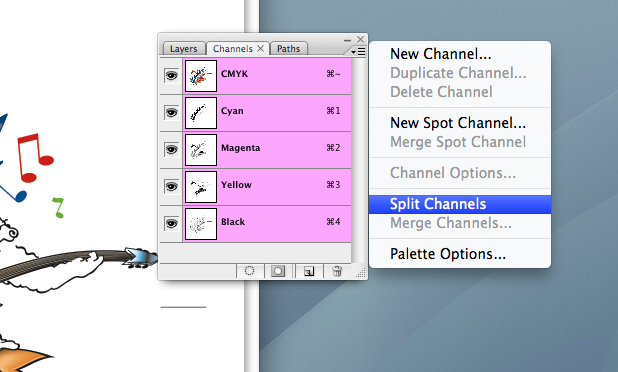
in the Channels dialog, select "Split Channels" ( not necessary to copy Channels )...
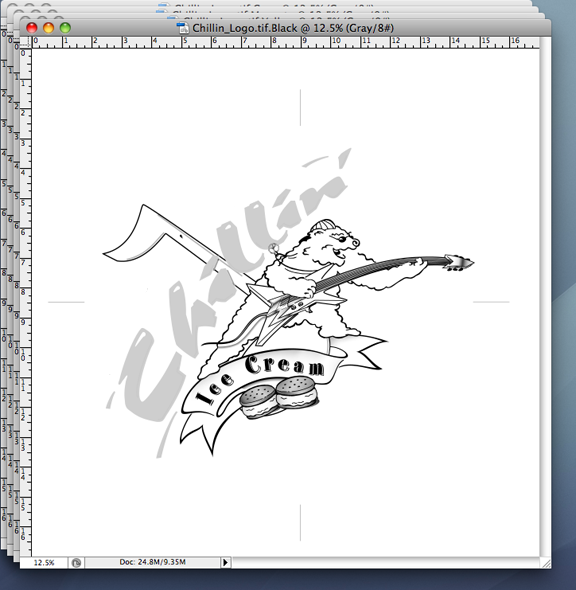
...notice this grayscale file is now named Black...
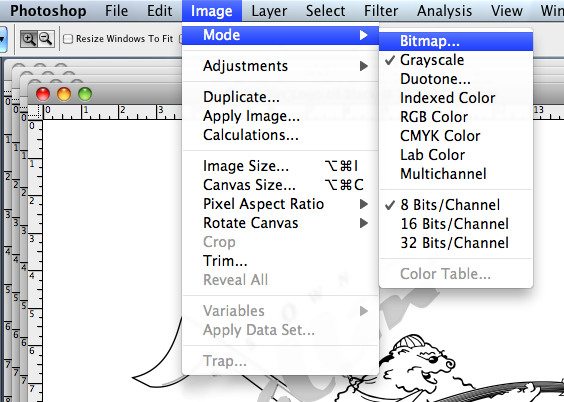
...now its time to convert to Bitmap ( Mode > Bitmap )...
...set the output resolution at 2540 dpi, disregard what I told you previously about doubling the file size and scaling it back down ( not necessary )....
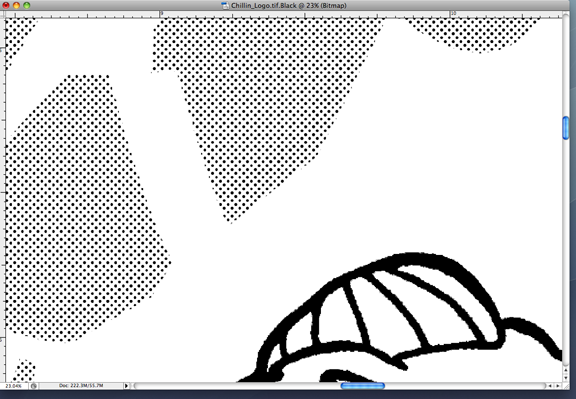
...each Channel is now ready to be printed on vellum and then burned onto a silk screen.
I hope this gets me out of the doghouse. Didn't want to be rude, after all.
Copy link to clipboard
Copied
jdanek schrieb
I hope this gets me out of the doghouse. Didn't want to be rude, after all.
You weren't.
You are one of the nicest, most knowledgeable, most insightful and most helpful members of this forum.
And your instruction was totally worth waiting for.
Copy link to clipboard
Copied
Thank you, Monika. Very nice of you to say ( er, write ). I forgot the halftone screen setup for Black...
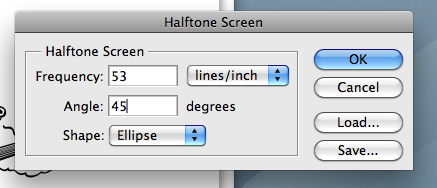
The default frequency is "53"; which should be OK for silk screen.
Copy link to clipboard
Copied
Thanks for that detailed, pictoral demo. Here's how it went...
The original art was an Ai color gradient combined with a Black/15 pt dot photo, saved as a PSD. In Ps, the conversion to grayscale discards all color info, and the BMP flattens(for what?) Then, there are no layers or channels to play with. While still in the full color version, there was no "split channels" option available(gray out). So, I could not move forward as you may have expected.
mikka
-
- 1
- 2

Find more inspiration, events, and resources on the new Adobe Community
Explore Now
 AdChoices