Inspiring
February 6, 2020
Question

Blend tool and Replace Spine

  • February 6, 2020
  • 3 replies
  • 3452 views

Hi forum.


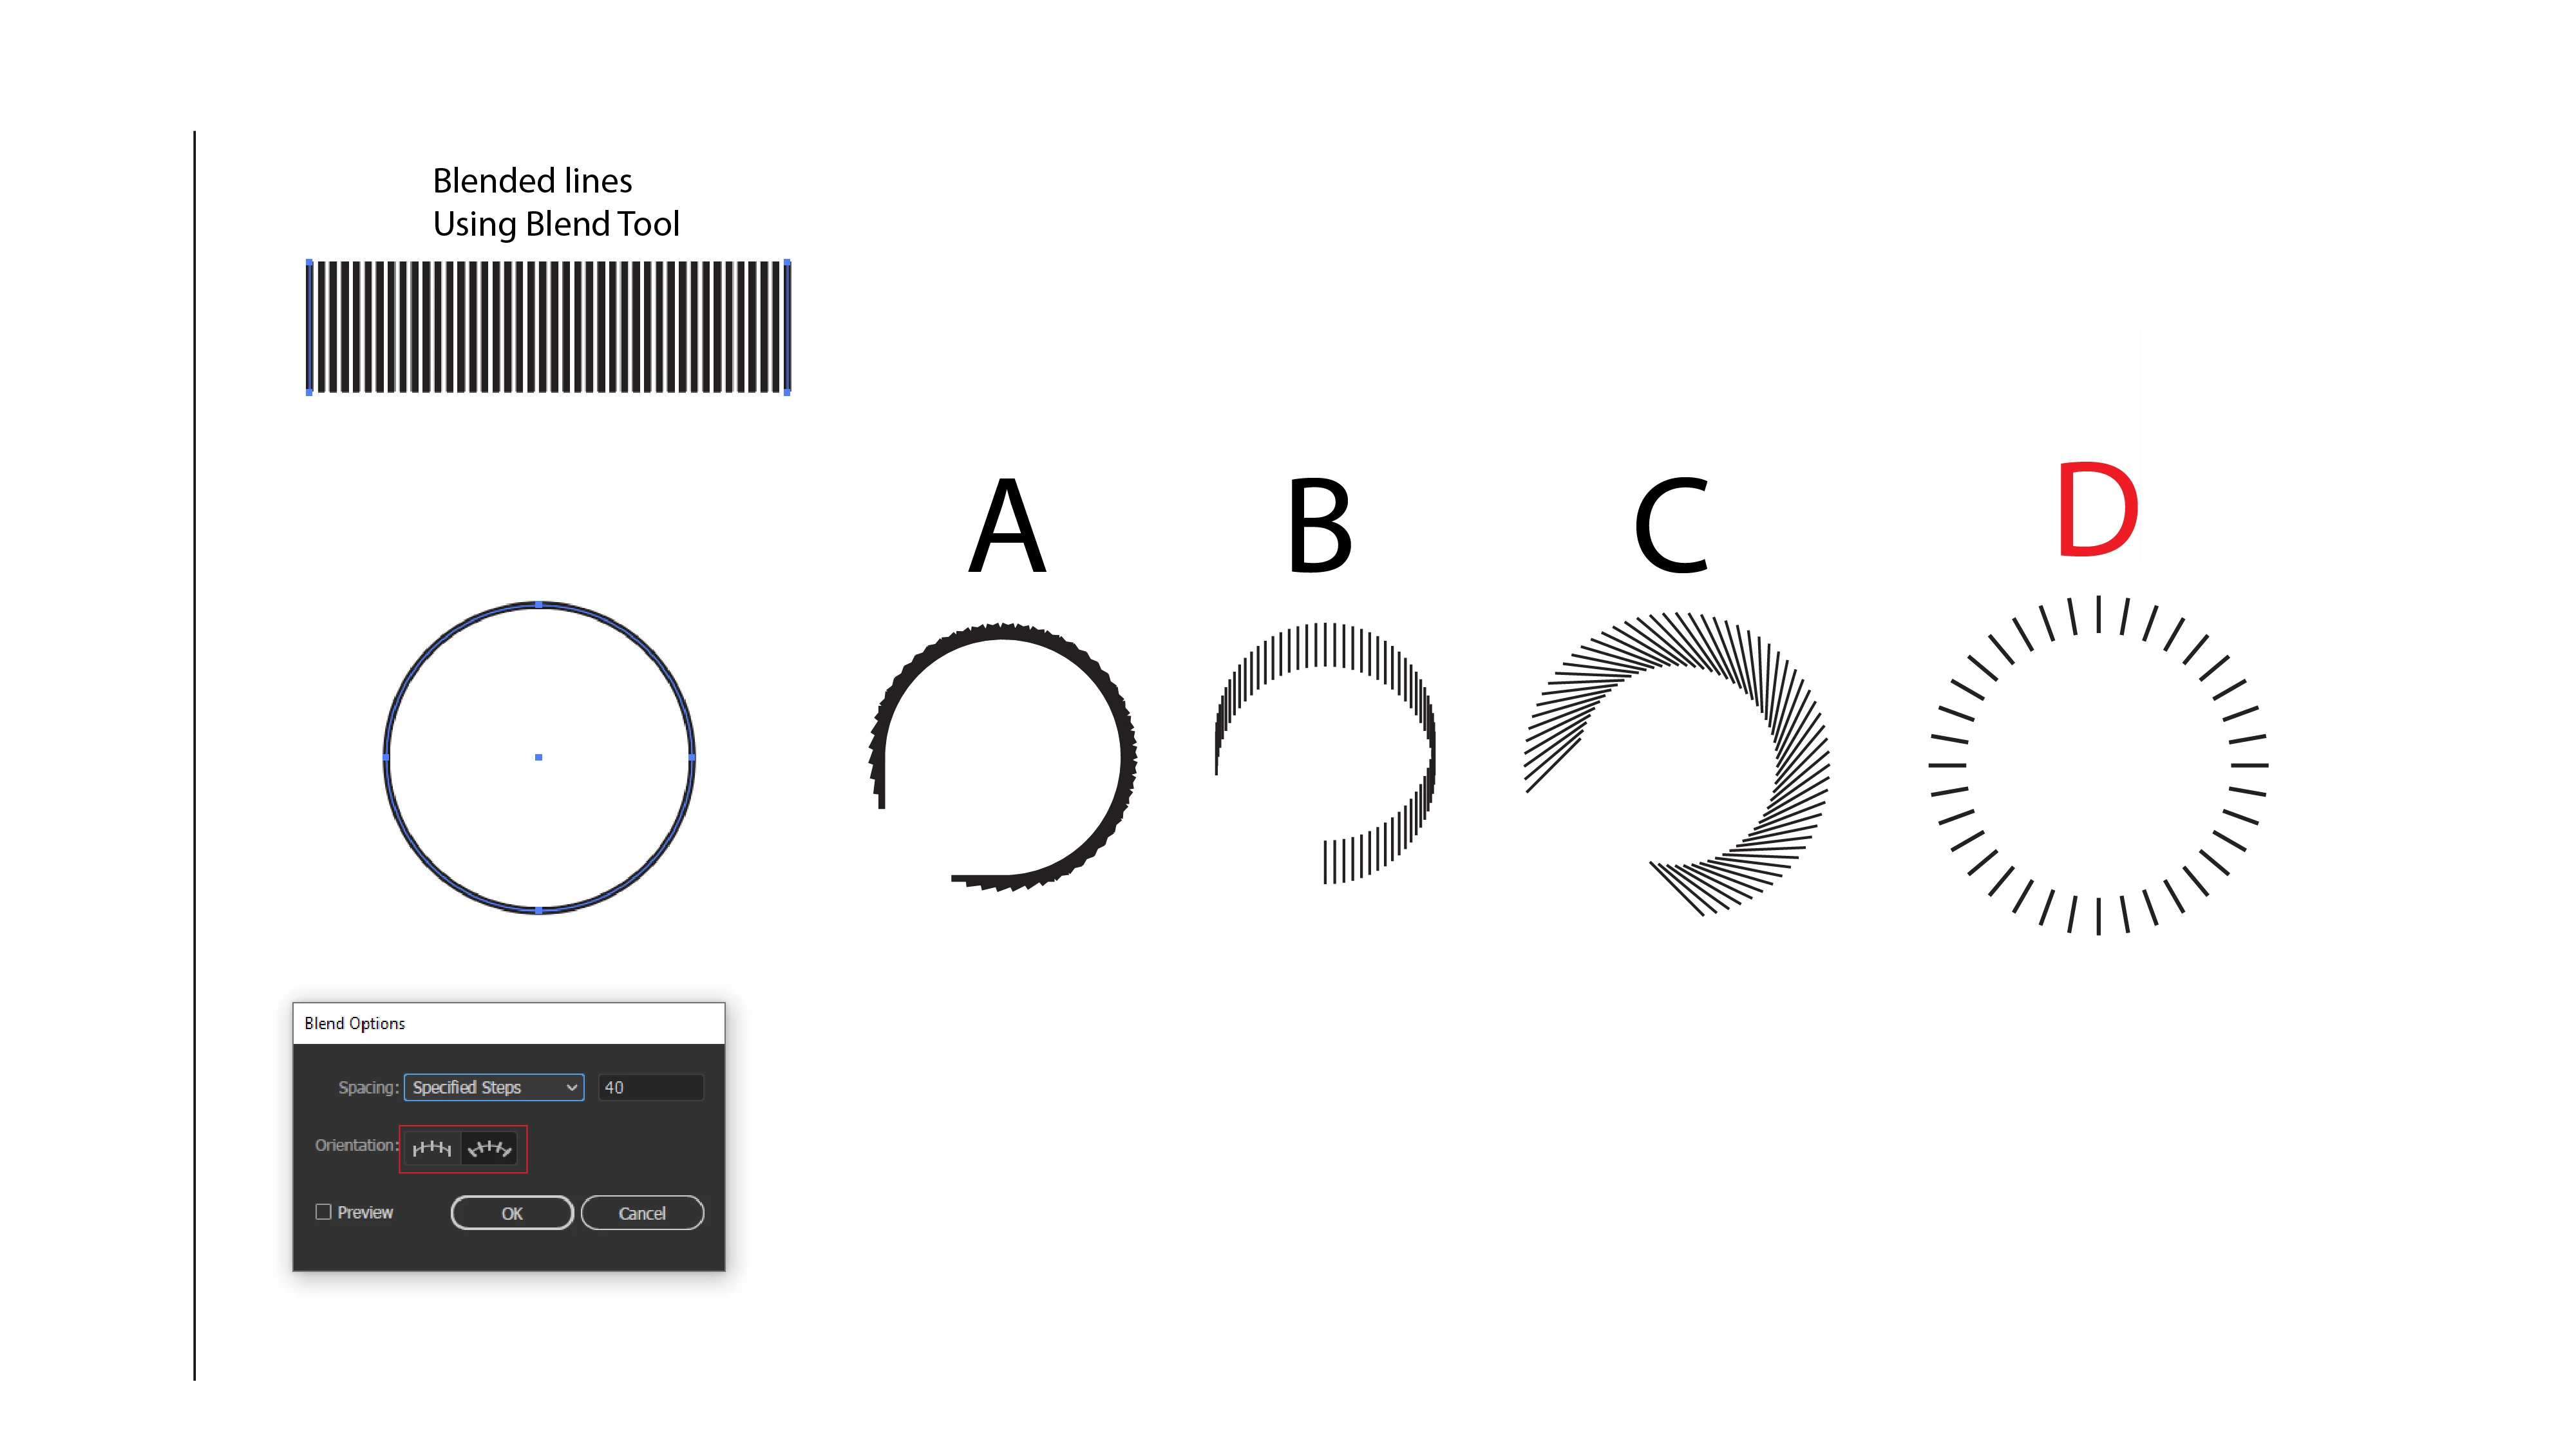
Im trying to achieve the D shape with shows the lines going around the elipse, but each time Im getting a different result doing the same exactly technique. I make two lines, then use the blend tool, specify the desired amount of lines, then choose the elipse and lines and do replace spine. Each time I have to click on the path orientation until I get the D result. What am I doing wrong?


Thank you.


3 replies

Participant
September 9, 2025

You are using vertical lines, try to make a horizontal line, duplicate it and use the blend tool with the same settings your blend options window is showing, then replace the spine. You're probably gonna need the scissors tool to cut a point on your circle to make it close perfectly. I've attached some print screens to help you visualize it.

meganchi
Legend
February 11, 2020

When I create something like this, I make sure to choose the far right icon "align to path" in the blending options. Then after replacing the spine, I take my scissors tool and cut one of the points on the circle. This will distribute the lines all the way around the ellipse.

Participant
February 11, 2020

I'm not sure if this will work for you, but when creating shapes like "D", you can use


1) Effect>Distort&Transform>Transform and create copies with a rotation effect


2) You can manipulate a dashed line in the Stroke properties. Give it fat stroke, and a super short dash. You can also adjust the space between, and dont need to do the math like in method 1.