Exit
  • Global community
    • Language:
      • Deutsch
      • English
      • Español
      • Français
      • Português
  • 日本語コミュニティ
  • 한국 커뮤니티
1

How can I wrap text inside a path, with an angle?

New Here ,
Feb 18, 2020 Feb 18, 2020

Hi humans. I am trying to recreate the picture below. Now I need to put the text in its place, but I couldn't find a good way to do so. Let me explain with screenshots:

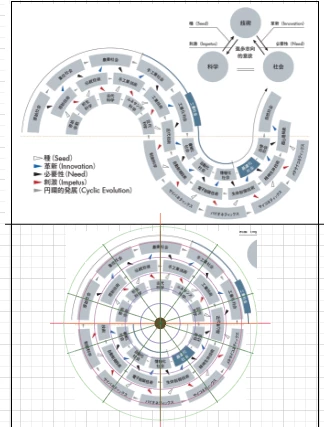
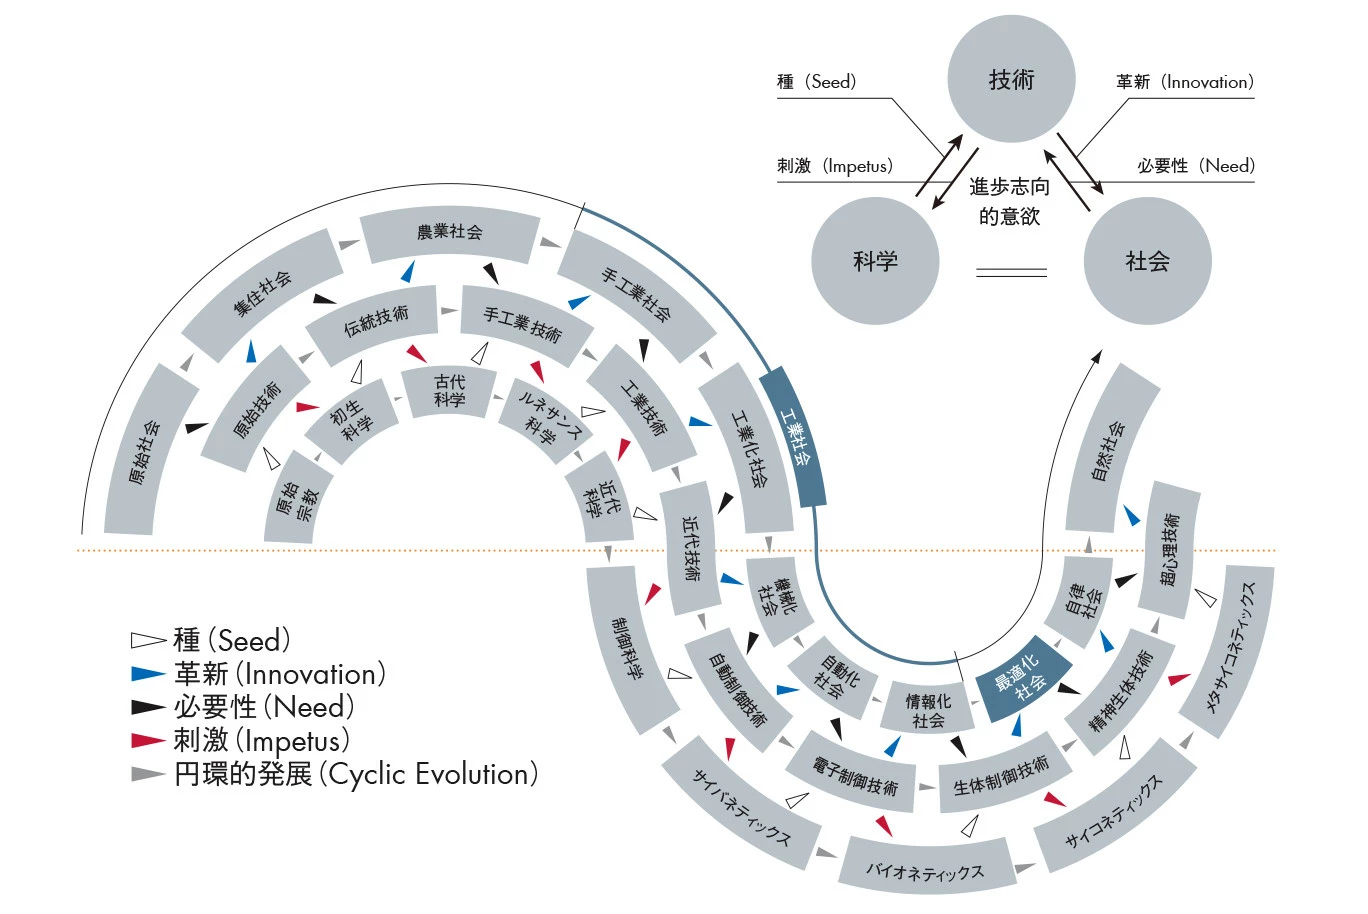
This is what I am trying to recreate. 

omron.jpg

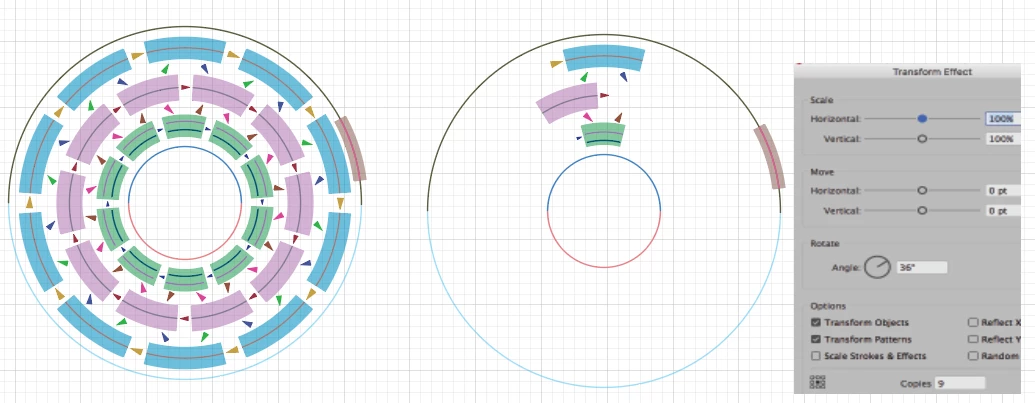
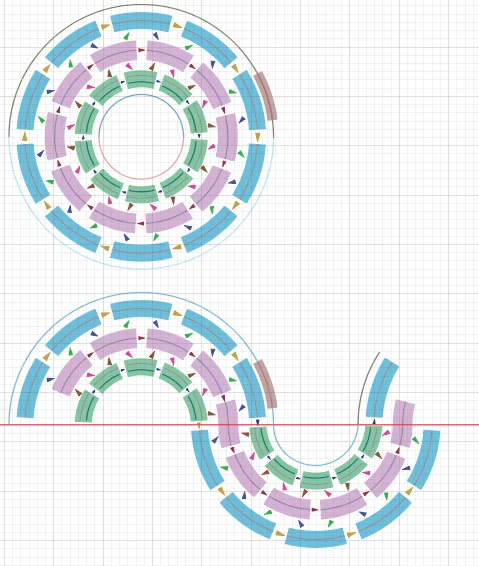
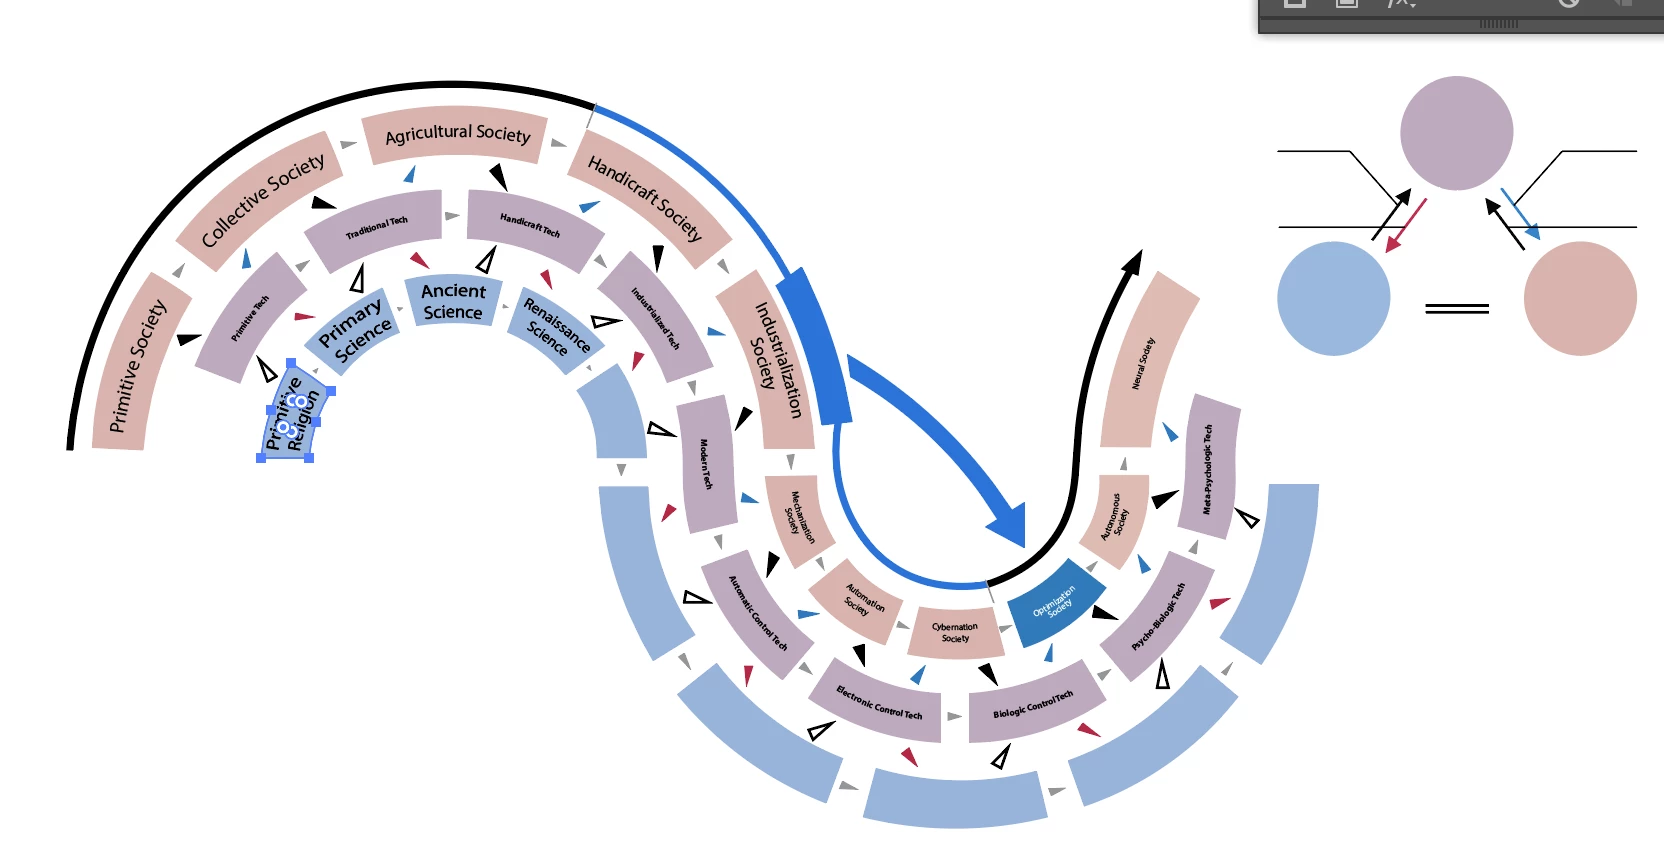
I made the shapes with the pen and curvature tools:

image.png

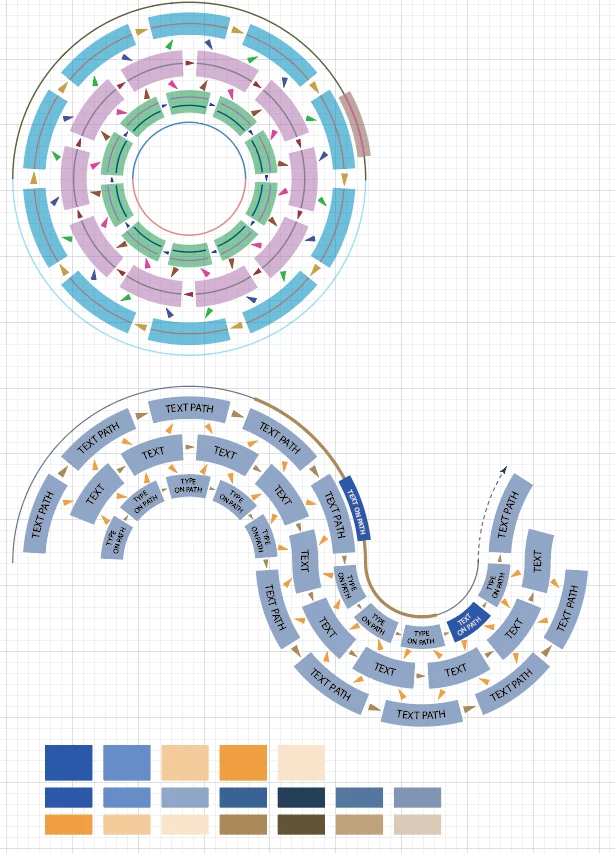
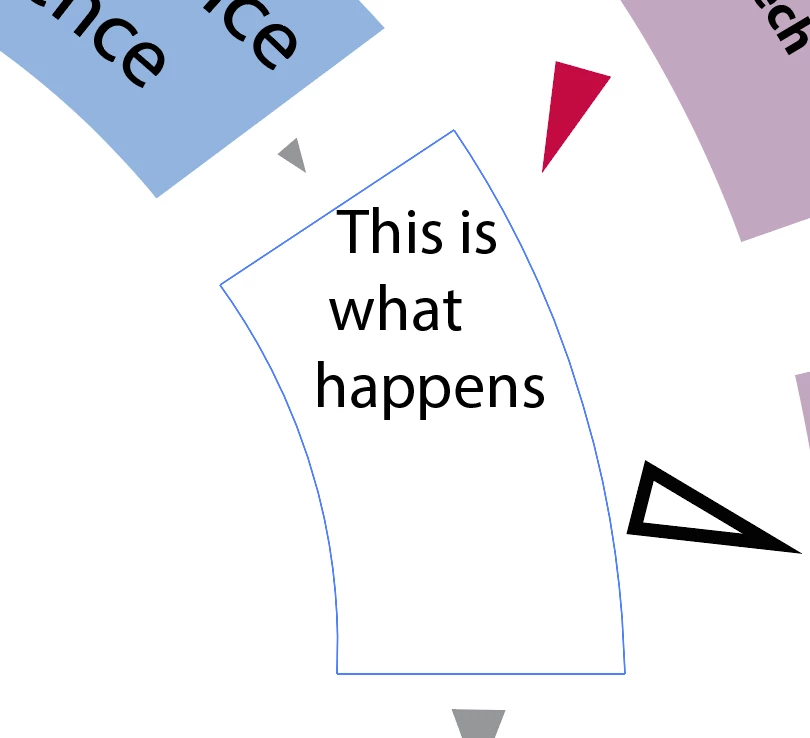
I am not happy with how the text looks, I think fitting the text inside of the shapes would look nicer.

But when I try to do that using the area type tool:

Screen Shot 2020-02-18 at 16.24.59.png


Since I want this artwork to be an extruded acrylic object in real life, I want it to be as visually pleasing as possible. How would you do it?

TOPICS
Draw and design
3.0K
Translate
Report
Community guidelines
Be kind and respectful, give credit to the original source of content, and search for duplicates before posting. Learn more
community guidelines

correct answers 1 Correct answer

Advocate , Feb 20, 2020 Feb 20, 2020

orkhon, Hi.


As mentioned by Mylenium, clearly the best approach here is to use Type on a Path.

Now trying to modify a given/purchased file to now fit your needs???


Thank you for providing a screen shot.

It’s very nicely constructed Info Graphics as an inspiration piece.


Illustrator is good for this one.

Reverse engineering:

It’s a radial (concentric circles) with shapes and live text, all rotated from center.

Copy and then move, over.


Fill and/or Strokes, Scissor cut, Transform, Smart Guides, Type on

...
Translate
Adobe
LEGEND ,
Feb 18, 2020 Feb 18, 2020

Use an object based warp and text on paths rather than area text inside objects. Lay out the text as a regular straight line, then bend it into shape, create duplicate paths of the warp shape to create the text.


Mylenium

Translate
Report
Community guidelines
Be kind and respectful, give credit to the original source of content, and search for duplicates before posting. Learn more
community guidelines
Community Expert ,
Feb 18, 2020 Feb 18, 2020

orkhon,


You can (from the beginning, and you can work on a locked copy of the original 日本語 version):


1) Create one long path for each of the set of boxes, corresponding to the midline, then create a copy on top, and lock the copy;

2) Cut the original path at the ends of the 日本語 boxes, then create a copy of it and lock the copy;

3) Delete the intermediary paths, then select the box paths and set the Stroke Weight and the Stroke colour to fit, if you must, you can outline their stroke, preferably later; lock the box parts;

4) Unlock the copy paths from 2) and create the text centred in each box as Type on a Path (Paragraph>Align center), set the Baseline shift as desired; here you can use the locked copy path from 1) as a guide, and then unlock and hide it;

5) Select the intermediary paths and Object>Path>Add Anchor Points, then hide the rightmost part and add arrowheads to the leftmost ones (in the Stroke palette or Effect>Stylize>Add Arrowheads depending on version), adjusting their position and the Stroke Weight, then Object>Expand Appearance and hide the path parts.


Now you should have everything as desired, and you can delete the hidden bits.


It may be worth keeping a copy of the full artwork.


Translate
Report
Community guidelines
Be kind and respectful, give credit to the original source of content, and search for duplicates before posting. Learn more
community guidelines
Advocate ,
Feb 20, 2020 Feb 20, 2020

orkhon, Hi.


As mentioned by Mylenium, clearly the best approach here is to use Type on a Path.

Now trying to modify a given/purchased file to now fit your needs???


Thank you for providing a screen shot.

It’s very nicely constructed Info Graphics as an inspiration piece.


Illustrator is good for this one.

Reverse engineering:

It’s a radial (concentric circles) with shapes and live text, all rotated from center.

Copy and then move, over.


Fill and/or Strokes, Scissor cut, Transform, Smart Guides, Type on a Path>Center Align text were my friend.

Not hard, just a process.  (Fun to do)


Here are a few screen shots with my process.


K

Info graphic 01.pngInfo graphic 02.pngInfo graphic 03.pngInfo graphic 04.png

Translate
Report
Community guidelines
Be kind and respectful, give credit to the original source of content, and search for duplicates before posting. Learn more
community guidelines
New Here ,
Feb 21, 2020 Feb 21, 2020

Thank you so much for taking the time to help (and teach) a stranger! I am working on it now, and it all finally makes sense. Thank you!!!!

Translate
Report
Community guidelines
Be kind and respectful, give credit to the original source of content, and search for duplicates before posting. Learn more
community guidelines
Advocate ,
Feb 21, 2020 Feb 21, 2020
LATEST

Glad I could help.

K

Translate
Report
Community guidelines
Be kind and respectful, give credit to the original source of content, and search for duplicates before posting. Learn more
community guidelines