

- Home
- Illustrator
- Discussions
- How to draw paths that follow all angles of a shap...
- How to draw paths that follow all angles of a shap...
How to draw paths that follow all angles of a shape? Example given

Copy link to clipboard
Copied
I have a shape which is quite complex. From this shape I want to draw lines at all angles of the shape so I end up with a grid that can be filled in. This is a perfect example:
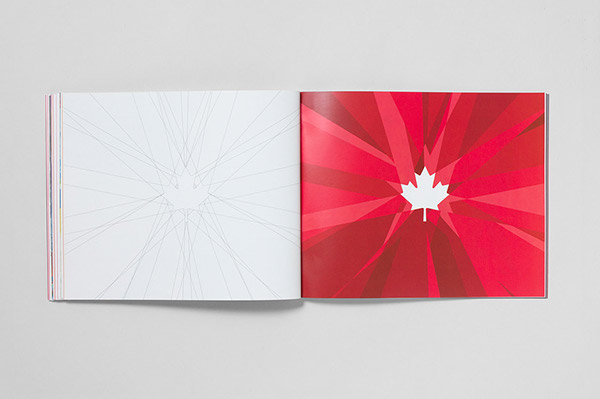
So you can see the shape of a leaf in the middle. Then on the left page, lines (unclosed paths) have been drawn that intersect all angles of the shape. I have tried to this manually using a pen tool but it doesn't accurately follow the exact angles of the shape - it's always slightly off. Is there an automated tool for this or can anyone suggest how its done please?


Explore related tutorials & articles
 7
Replies
7
7
Replies
7

Copy link to clipboard
Copied
The plugin SubScribe can do that with its Line-tangent-from-path-tool.

Copy link to clipboard
Copied
https://forums.adobe.com/people/Monika+Gause wrote
The plugin SubScribe can do that with its Line-tangent-from-path-tool.
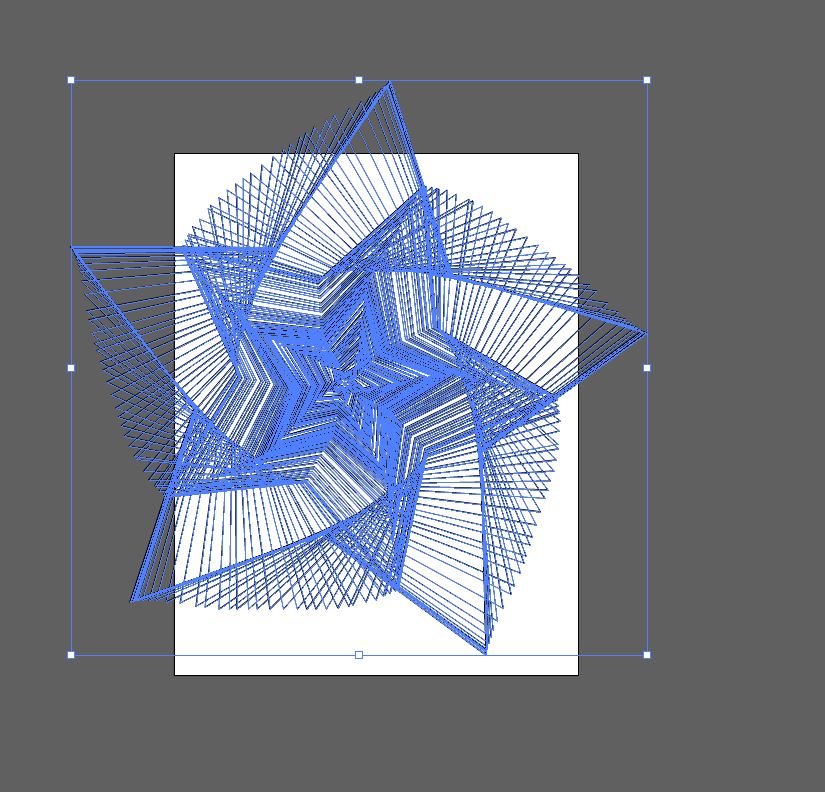
I add my vote to this. This was a couple of minutes' work with the tool:


Copy link to clipboard
Copied
I am not sure but may be we can use Bleed Tool then Expand..Did you know how to use Bleed Tool?
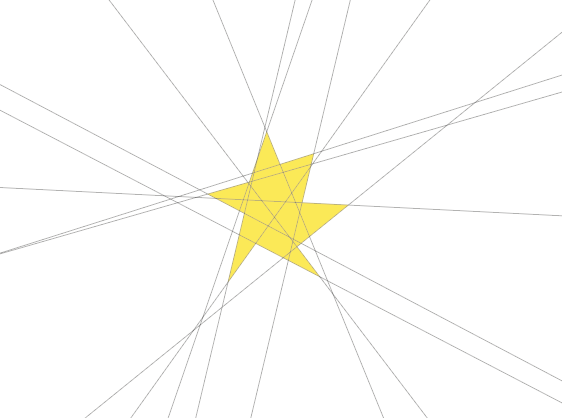
There is another trick: When you drawing any object you can press "~" and move mouse at any direction. It will create copies of the object and you will have something like this. Then you can work with stroke and fill colors,.
Then you can work with stroke and fill colors,.


Copy link to clipboard
Copied
Another option is to turn on your grid (you can adjust the spacing increments within guides & grid preferences), and with snap to point turned on draw your lines.

Copy link to clipboard
Copied
If you want to do something similar in Illustrator without a plug-in, you could try the Zig Zag effect.
- Make a star

- Go to Effect > Distort & Transform > Zig Zag...

- Adjust the settings as desired

- Overlay the original shape

- Then you can Expand Appearance and use Live Paint to color in the sections
Copy link to clipboard
Copied
If there are only straight line, what you can do is:
- copy the original object
- split up the object at all anchor points, so you have a collection of straight lines
- Make sure all the lines are ungrouped
- Object > Transform > Transform each with a scaling setting of 2000% vertical and horizontal

Copy link to clipboard
Copied
If all the lines are straight on the source object (no curved segments at all). You can break open a copy of the object into separate line segments (preferably on another layer) and then proportionately scale each line to shoot outward away from the original shape. Use the selection tool to select an outer corner on the object's 9 point section box and hold down the shift key while scaling up the line. Another approach is creating new line segments, snapping them to parts of the original shape and then scaling them in the same manner.
If the source shape has any curved segments in it then, indeed, a plug-in like SubScribe would be the solution.

Get ready! An upgraded Adobe Community experience is coming in January.
Learn more
 AdChoices