- Home
- Illustrator
- Discussions
- multiple offset paths / outlines with defined offs...
- multiple offset paths / outlines with defined offs...
multiple offset paths / outlines with defined offset?
Copy link to clipboard
Copied
i want to have multiple offsetoutlines on a closed or non-closed path.
with "offset path" i can make only one additional outline but i need multiple?
i searched all over the net for answers with no success.
thanks!
Explore related tutorials & articles
Copy link to clipboard
Copied
laden.m,
Is repeating the offset out of the question?
On a Win Machine, you may press Alt+O+P+O (hold Alt and press O then P then O), then the set value and press Enter. After that, you can just repeat the Alt+O+P+O for each new offset.
Copy link to clipboard
Copied
hi jacob,
thanks, but i'm on a mac and the shortcut you gave me isn't working. but i suppose you mean the "offset path" effect?
this is not working for me because i need more than 100 multiple paths.
i need something where i can give the distance or the number af offset paths.
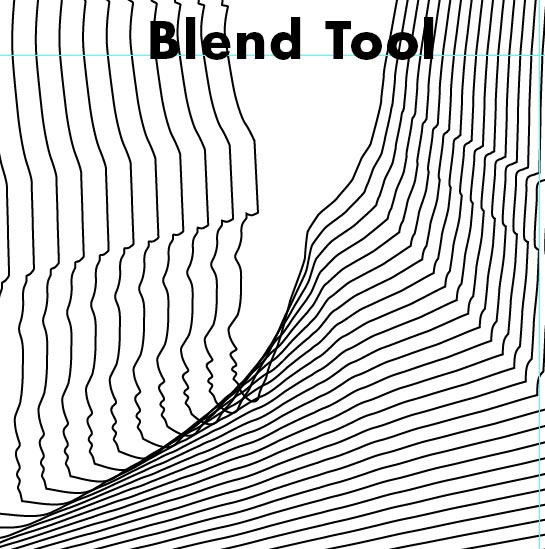
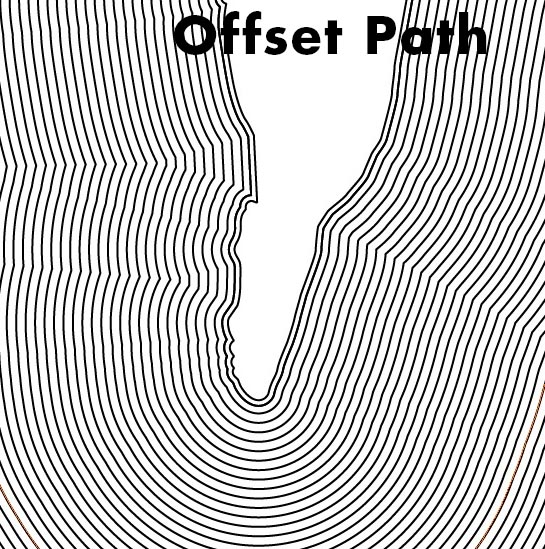
the blend tool could do this, but it is messing too much with the original shape of the mask.
i need the look of the offset path filter but with the functionality of the blend tool?
here an example:
Copy link to clipboard
Copied
Have you tried a graphic style consisting of multiple strokes to which the Offset Path effect is applied?
It's a bit time-consuming to set up the graphic style, but once it is done you can reuse it with a single click.
Copy link to clipboard
Copied
The feature you're needing is a contour command/tool which is common in other drawing programs but missing in Illustrator:
Corel Draw:
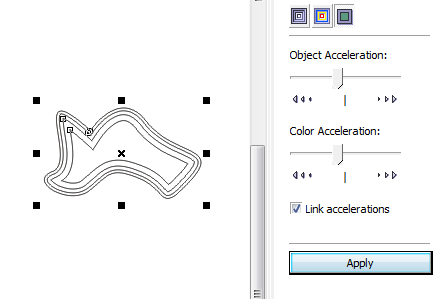
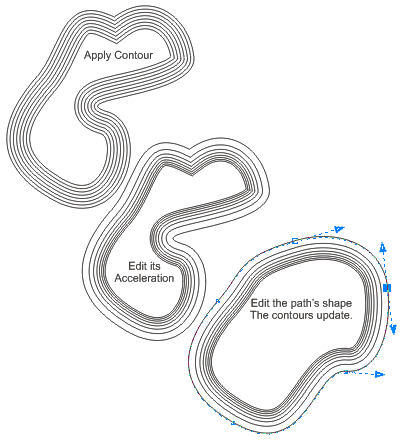
Xara Designer Pro has a similar interactive feature:
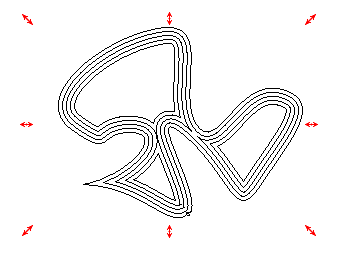
Everything in Illustrator is a workaround.
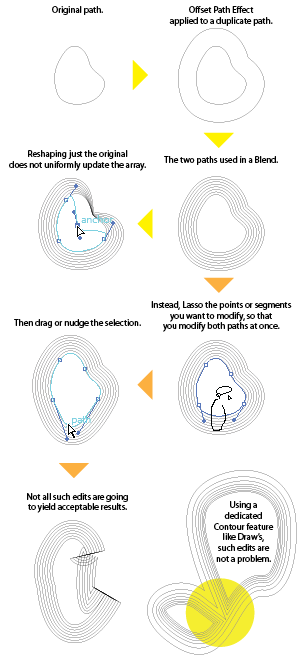
Cumbersome workarounds are possible, but don't match the ease, features (ex: accelleration), or after-the-fact adjustability of a proper contour feature:
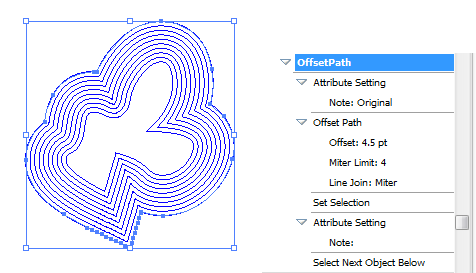
You should be able to do a dumb (non-adjustable) workaround by repeatedly applying Offset Path. However, a few versions ago Illustrator's Offset Path command was wrecked by a change which leaves both the original and the new path selected. You can work around that by building an Action which "names" and "un-names" the original each time so that it can be targeted by the Set Selection step. The Action does the following:
1. Sets a Note in the Attributes palette to temporarily flag the selected path as "Original."
2. Performs the Offset Path command.
3. Sets the selection to the path labeled "Original" (thereby deselecting the offset path).
4. Clears the selected path's note (so it is no longer labeled "Original").
5. Selects the Next Object Below (which is the offset path).
After recording the Action, it can be run by repeatedly clicking the Run button. Each time, it offsets a path by the same distance.
Illustrator Workaround; Offset Path Action:
Of course the above results in just a set of dumb unrelated paths, so there is no after-the-fact adjustability that automatically updates. You can have some live adjustability by using a Blend between two identical paths which both have Offset Path applied as an Effect, but with different offset distance parameters:
Illustrator Workaround; Offset Path Effect Blend:
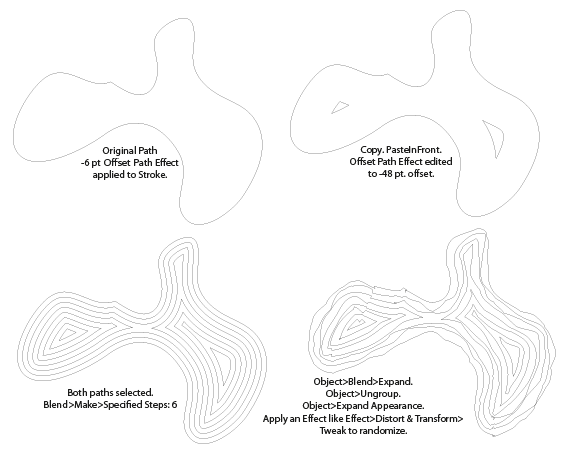
Tolerable, but still doesn't match the capabilities of a proper contour feature:
JET
Copy link to clipboard
Copied
Beautiful explanation! I miss CorelDraw sooo much...
Copy link to clipboard
Copied
I have found a way to cut the task of making multiple offset paths in half.
Example: Create a circle. Offset the path twice the distance you want, let's say 50 points (if your desired distance is 25 points.)
Do this again several times so that you have a number of concentric circles 50 points apart.
Now select all the circles in this concentric set and offset their paths at 25 points in just one trip to the offset paths menu.
You now have twice the amount of circles at your desired distance of 25 points between—done in half the time it would take to create the offset paths one at a time.
Copy link to clipboard
Copied
Hello! Was checking out the forums for an answer to this also - I'm sure there is an exact way to get Illustrator to perform multiple offset paths with a defined offset (hoping someone chimes in here!) - but came across something in a tutorial from Chris Spooner that I think does most of the trick.
Original Path
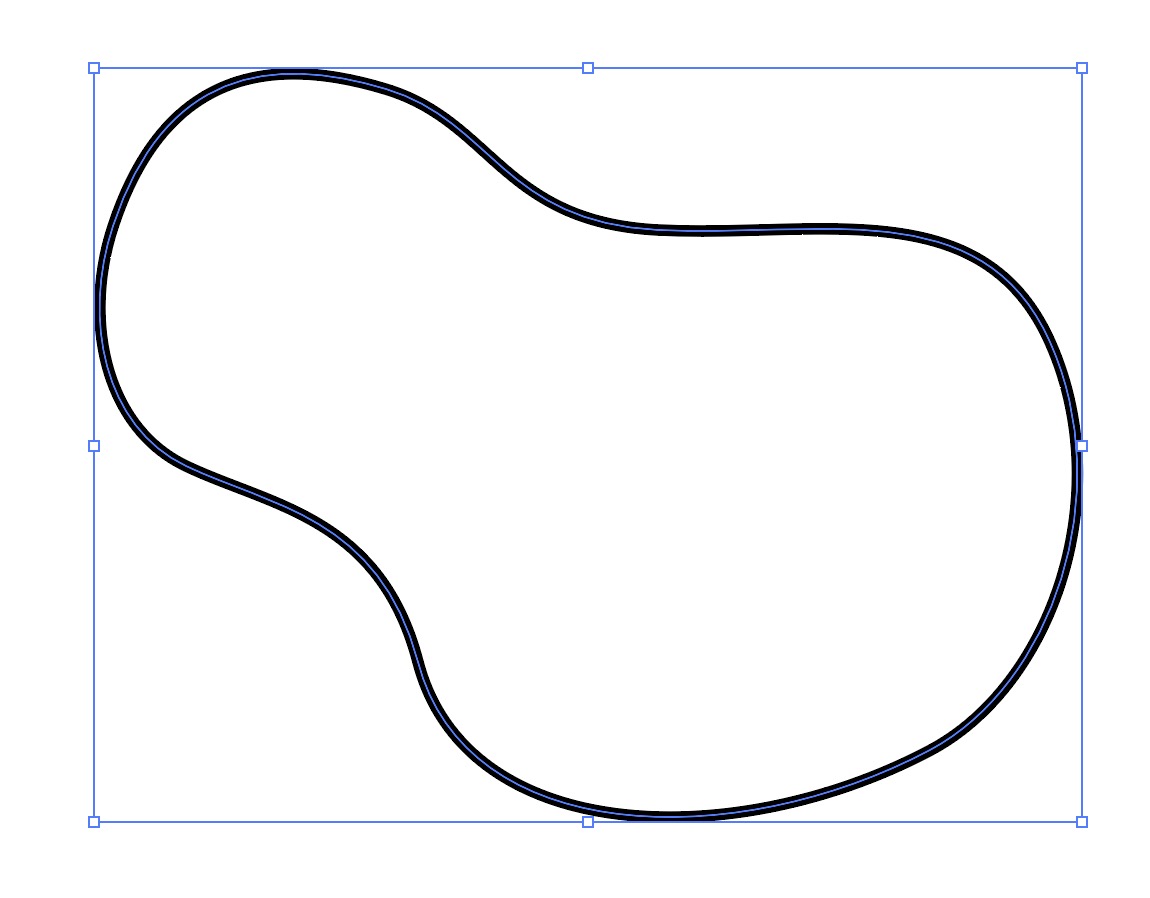
With path selected open Appearance Panel
With Stroke selected click on Fx
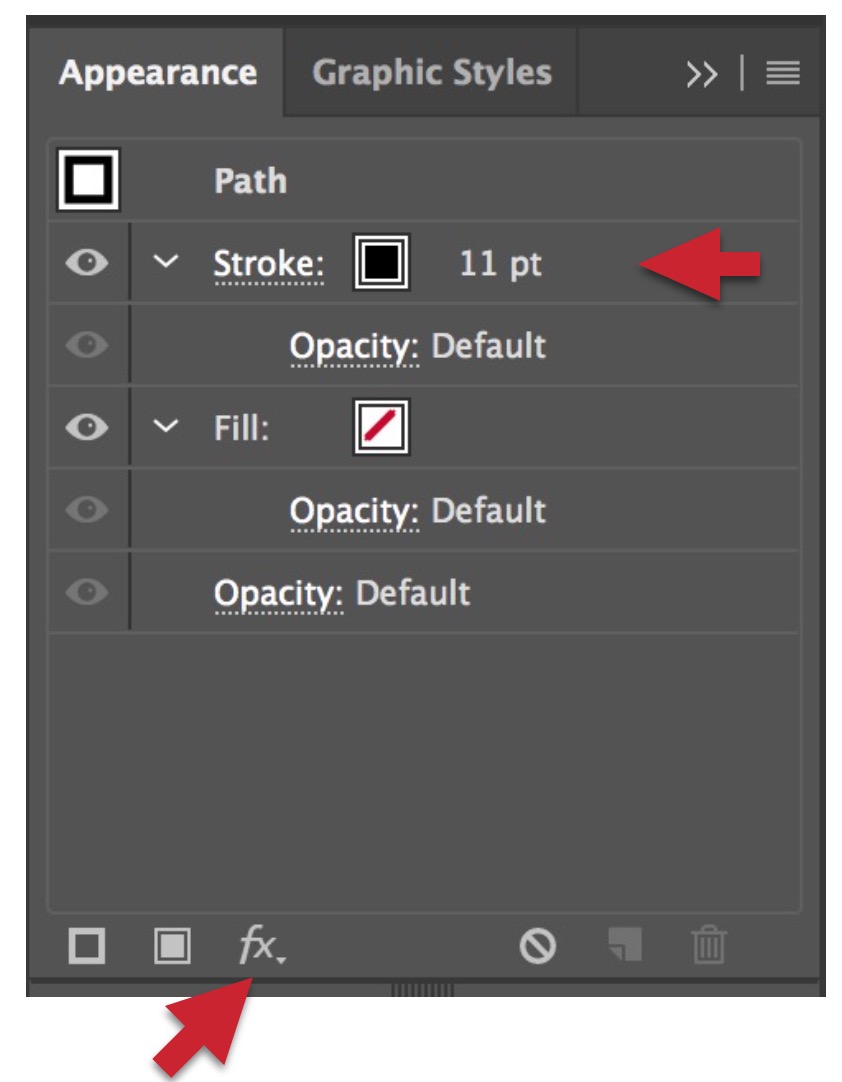
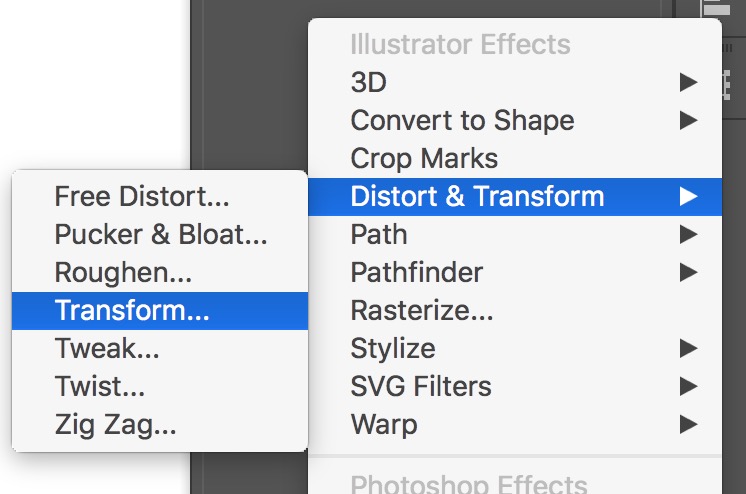
This will pop up a selection window
For this I chose Distort & Transform -> Transform
Tweak your changes
MAKE SURE YOU CLICK THE PREVIEW BOX TO BE ABLE TO SEE CHANGES IN PROGRESS
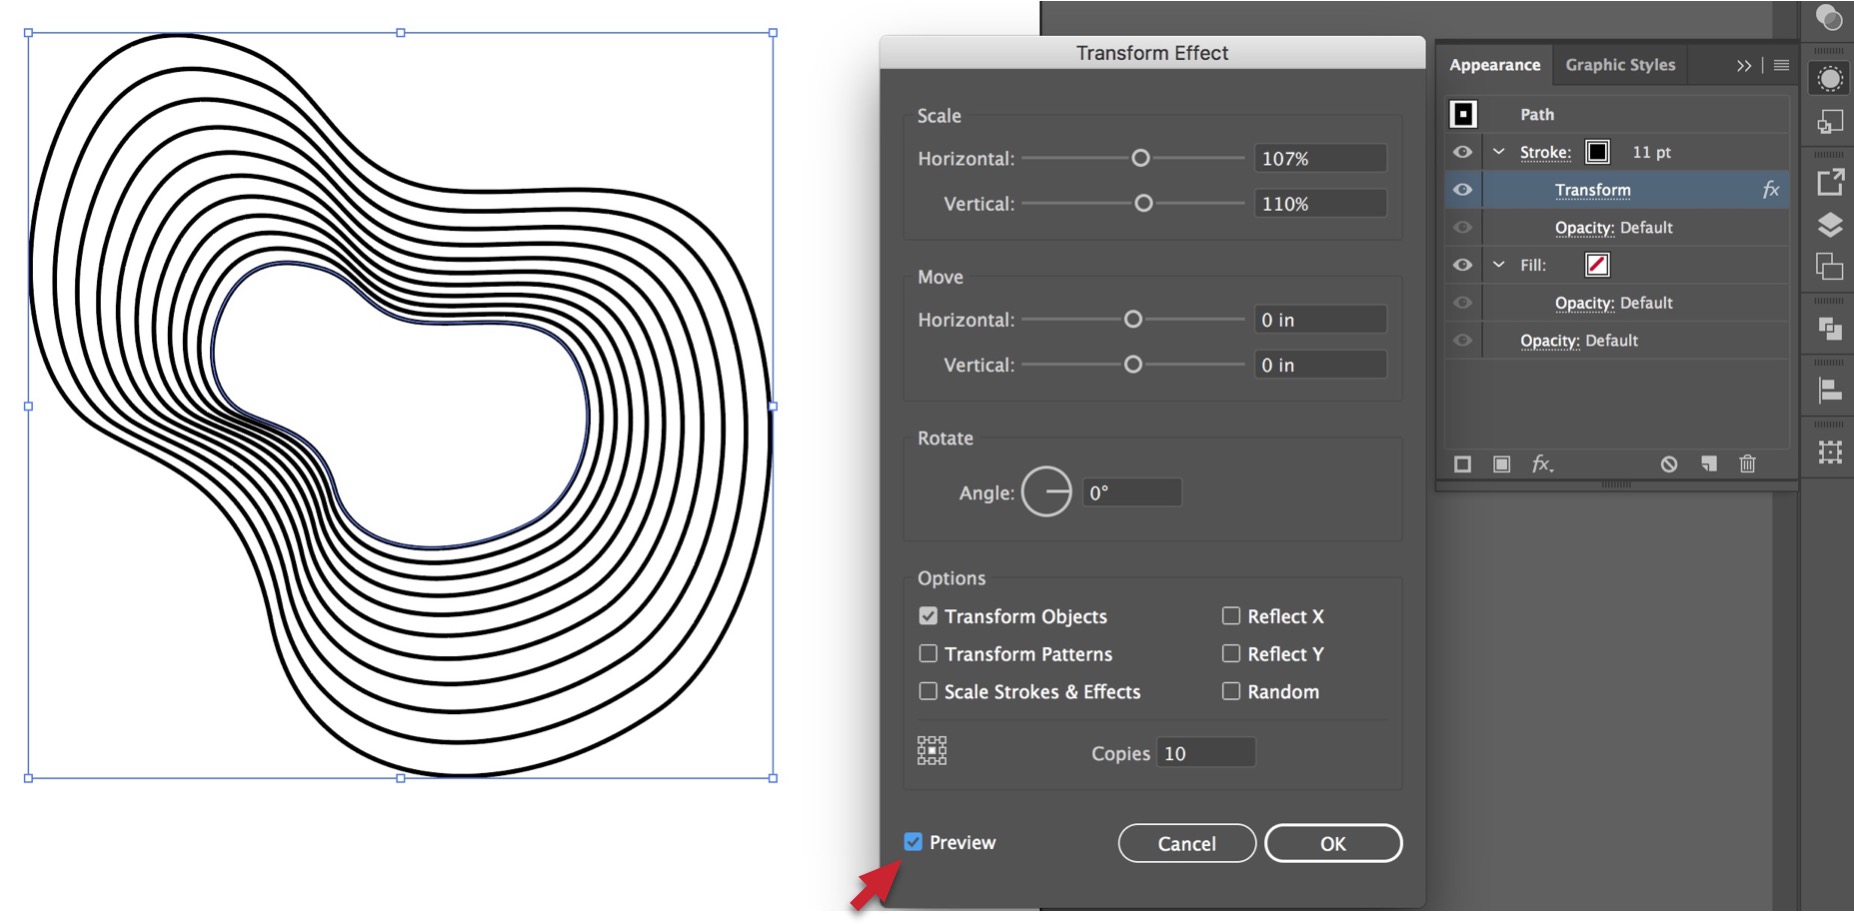
Once you get something you like you can leave it editable for later tweaking - or expand appearance.
Seems like a lot you can do once you get your head around it - plus effects can be saved and applied to other shapes etc
Not saying this is the end answer - but wanted to throw in something I just learned.
Good luck!
Get ready! An upgraded Adobe Community experience is coming in January.
Learn more

