


Copy link to clipboard
Copied
Hello,
Since updating InDesign, I now get 3 frame boxes around an image whereas I use to get only 2 – It’s really annoying and I can’t turn it off.
Anyone know what’s causing this and how to turn it off, please? I want to go back 2 frames.
Many thanks.


 1 Correct answer

This should do the same:
var sel=app.activeDocument.selection[0];
var itms = sel.allPageItems;
if (itms.length ==2) {
app.select(itms[0]);
app.copy();
sel.remove();
app.pasteInPlace();
}else{
alert("Please Select The Outside Frame");
}
 28
Replies
28
28
Replies
28

Copy link to clipboard
Copied
With nothing selected, take a look at your Text Wrap panel. Is it still turned on? It would have the second button dented in, perhaps. If it is on when nothing is selected, turn it off by denting in the first button, which means no text wrap.
Now click on your frame with the black selection tool. Does the Text Wrap panel turn on? Then turn it off by denting in the first button in the Text Wrap panel.
Copy link to clipboard
Copied
Thanks for replying,
No text wrap, either selected or not;

It's so annoying because it's 2 of the visable box frames and the 3rd is obviously the image frame...
EDIT: It looks as though it's selected in that image because i was hovering over it when i screen printed haha! it's defo not selected though!

Copy link to clipboard
Copied
Hi Charles,
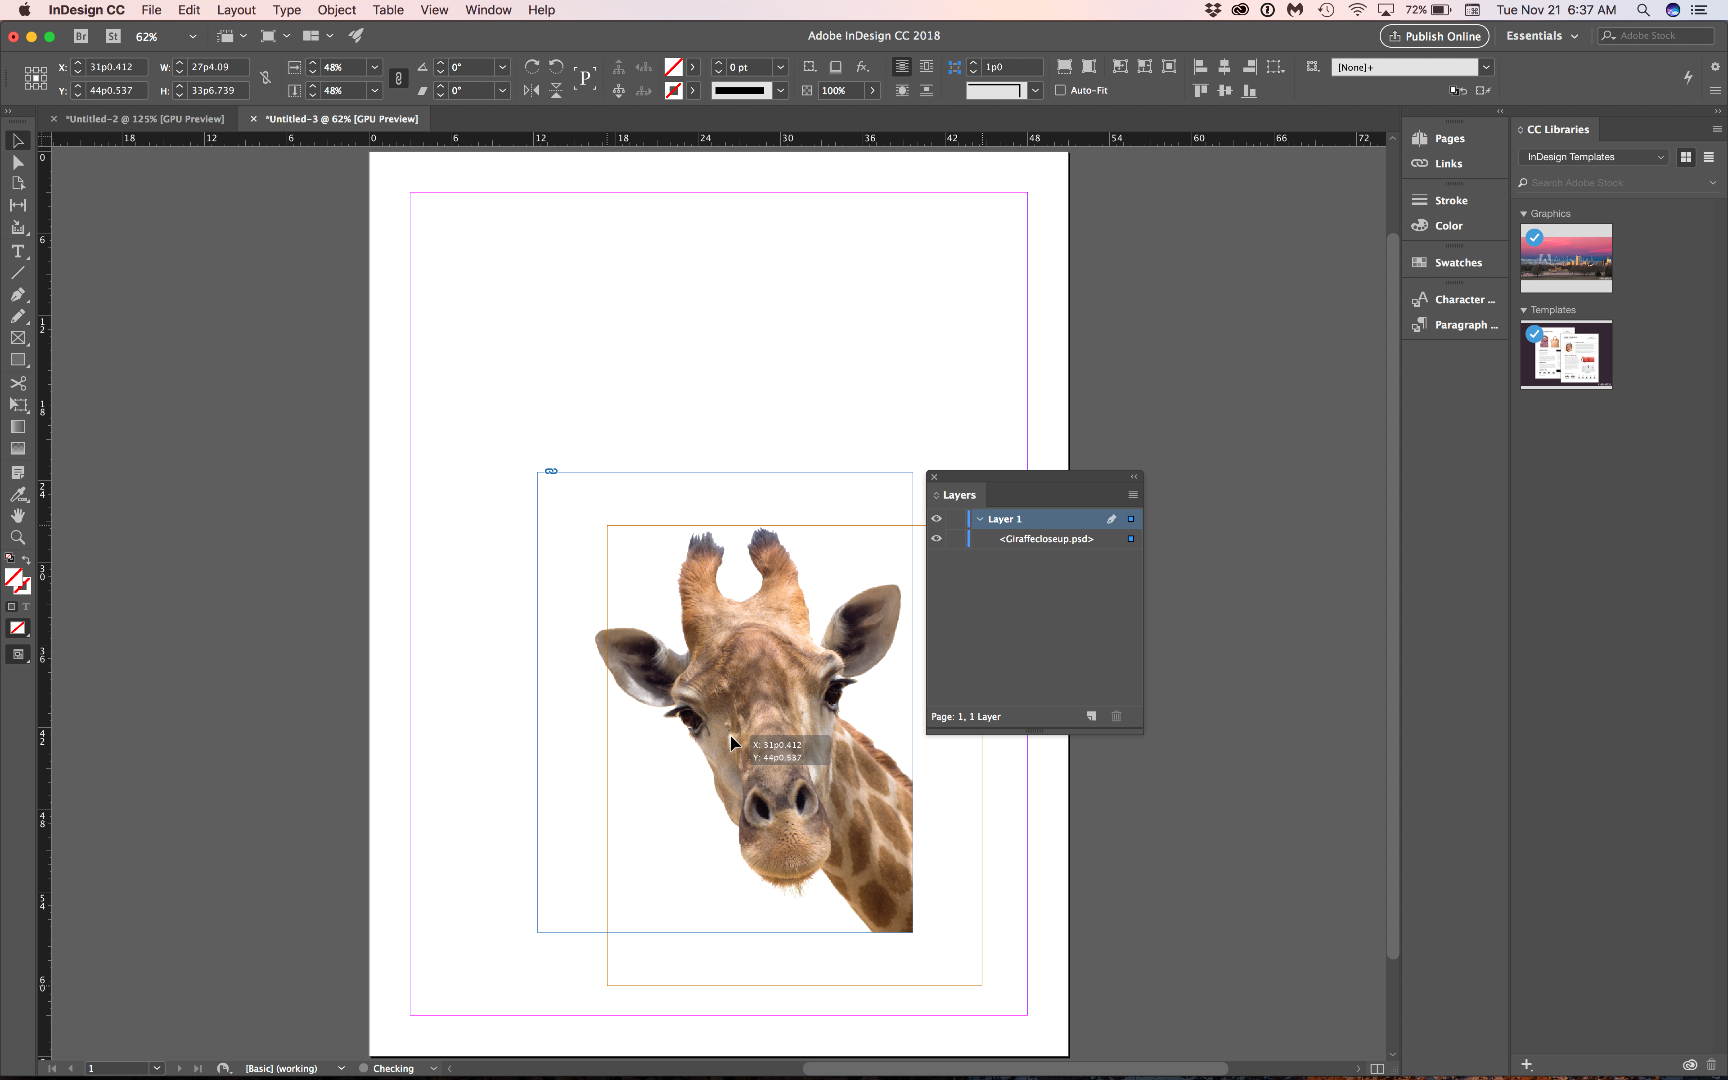
could you show the Layers panel when selecting the frame?
Are you sure, that the frame that is holding the image is not pasted inside another graphic frame?
Regards,
Uwe
Copy link to clipboard
Copied


Copy link to clipboard
Copied
Can you share a full screen screen shot with the layers panel open?
Copy link to clipboard
Copied
It certainly looks like a graphic in a frame that has been "Paste Into" another frame.
How, really, are you bringing your graphics into the page of the document?
Copy link to clipboard
Copied
Simple reminders:
1. File > Place (Cmd+D) is correct procedure. Copy n paste is not.
2. The Edit menu includes things like Paste Into (Cmd+Opt+V) which might account for what you are seeing if you have a frame selected when you paste or paste into.
Copy link to clipboard
Copied
To be honest, the last catalogue 2017 i got the file and dragged it in - But for this catalogue i just copied and pasted it from 2017 into 2018
And now that i think about it more obviously for the 2017 catalogue i was using the last version of indesign and for this one i was using the most updated version, leaving me to think it was that but from you've told me clearly it was human error all along!
What the best way to rectify this? I'm like 200 images deep now.
Copy link to clipboard
Copied
charlesd8830180 wrote

Uwe's right your IMG_0244_shadow.jpg has been pasted along with its parent frame into another frame, which is indicated by the drop down arrow.
So this image's frame parent is set to red and it shows with out a drop down arrow in Layers

If I select and copy the parent frame and paste into another frame I get this with the nested frames showing in Layers:
Copy link to clipboard
Copied
Yes, it was stupidity all along - Lesson learnt, I assume there is no quick fix for this?
Copy link to clipboard
Copied
Edit;
I'm not sure who to award the correct answer too as you've all contributed equally, Thank you all very much.
Copy link to clipboard
Copied
Hi Charles,
your screenshot is showing that your image was indeed pasted inside another graphic frame.
The case is solved by writing this, but nevertheless I'll post it…
Here the difference:
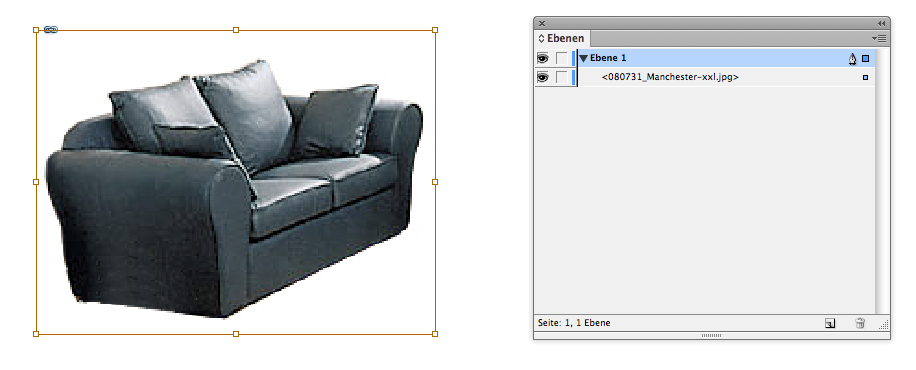
1. Not pasted into
The image's name is only visible at the root of the layer.
Container frame selected:

Image itself selected:
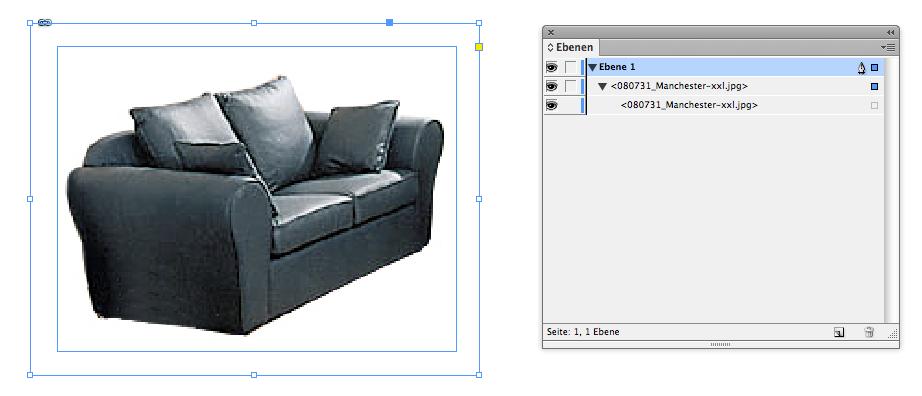
2. Pasted into
The image's name is not only visible at the root of the layer, but you can open the little triangle before its name and the same name is visible again.
Frame selected where the image was pasted into:
Container frame of the image selected:
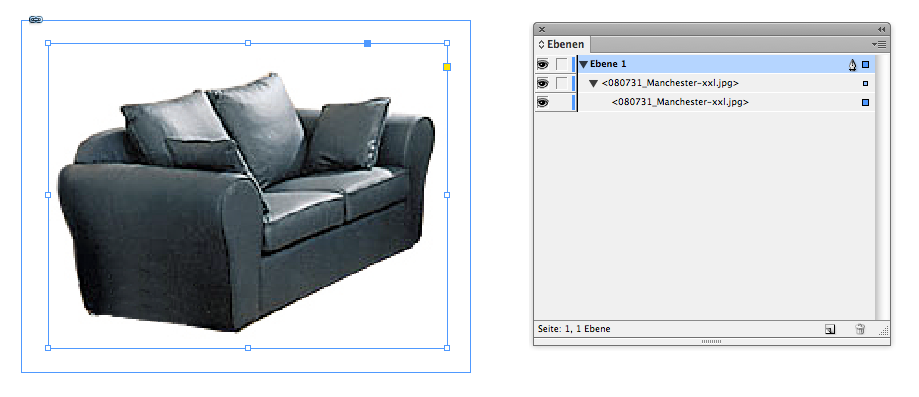
Image itself selected:

A script that moves all the images out?
That would take a moment…
In the meanwhile:
From the Layers panel just drag the inner image name out:


Regards,
Uwe
Copy link to clipboard
Copied
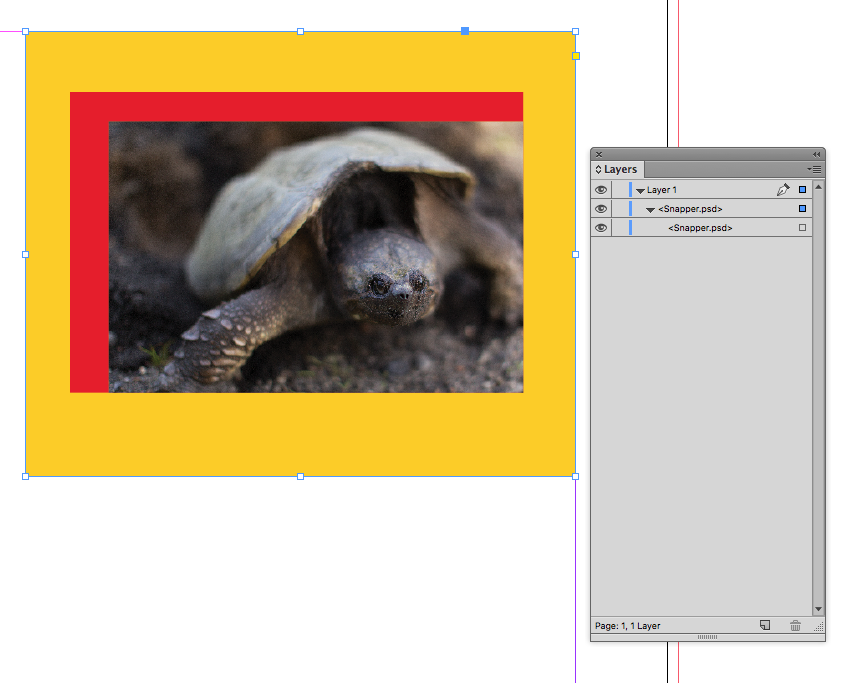
When you place an image in InDesign, the image is placed inside a frame. That should give you two edges: the image edge and the frame edge. They may be at the same place, or not. The image below shows the frame edge (blue, with the linked image badge in the top left corner) and the image edge (amber). It's very hard to see what is going on with your closely cropped image. Can you select the outer edges? Can you share a full screen screen shot with the layers panel open?
Copy link to clipboard
Copied
Of course, in addition to all that, there are things like frame inset amounts (Cmd+B for text frame options) and new factors like Object Styles that define Width, Height, and X and Y positioning. Have you checked all these things?

Copy link to clipboard
Copied
Start a new document. Place one image. What do you see?
Copy link to clipboard
Copied
What the best way to rectify this? I'm like 200 images deep now.
It would be awesome if there was a javascript that could un-nest graphic frames. I dont know of one, though.
Copy link to clipboard
Copied
I think i'll just bite the bullet Michael and go through each image and update it.
Many thanks.
Copy link to clipboard
Copied
I think i'll just bite the bullet Michael and go through each image and update it.
To keep the position of the interior frame you'll have to select it, copy, delete the exterior frame and use Paste in Place to put it back in position.
If you are using OSX this Applescript will do it in one move. For it to work select the exterior frame and run the script. The script could be assigned a key command.
tell application "Adobe InDesign CC 2018"
set sel to selection
set itms to all page items of item 1 of sel
if (count of itms) is 2 then
select item 1 of itms
copy
delete sel
paste in place
else
display dialog "Select The Outside Frame"
end if
end tell
Copy link to clipboard
Copied
Very cool, Rob! I wish it was cross-platform like a javascript!
Copy link to clipboard
Copied
This should do the same:
var sel=app.activeDocument.selection[0];
var itms = sel.allPageItems;
if (itms.length ==2) {
app.select(itms[0]);
app.copy();
sel.remove();
app.pasteInPlace();
}else{
alert("Please Select The Outside Frame");
}
Copy link to clipboard
Copied
I'm going to sound like a right noob now, how do i execute this? Or rather how do i make this work on my PC?
thanks.
Copy link to clipboard
Copied
This explains all in a paragraph or two:
http://trainingonsite.com/images/downloads/JetSet-JavaScripts-2017-11-12.pdf
Copy link to clipboard
Copied
how do i execute this?
Copy and Paste the code into a plain text editor (not Word) and save it as plain text with a .jsx extension into your InDesign Scripts folder:
Applications/Adobe InDesign CC 2014/Scripts/Scripts Panel
It will then show in your InDesign Scripts panel in the Application directory. Select the outside frame and double click to run.
You can also assign a key command to any script via Edit>Keyboard Shortcuts>Product Area>Scripts.
Also, the script assumes there's only one nested frame and you have the outer frame selected. It wouldn't work if you had a nested frame inside of a nested frame inside of a nested frame, etc... A more complex script could do an entire document and check for multiple frame depths.
Copy link to clipboard
Copied
Got it working perfectly, many thanks for your help Rob!
-
- 1
- 2

Find more inspiration, events, and resources on the new Adobe Community
Explore Now
 AdChoices