Copy link to clipboard
Copied
HI,
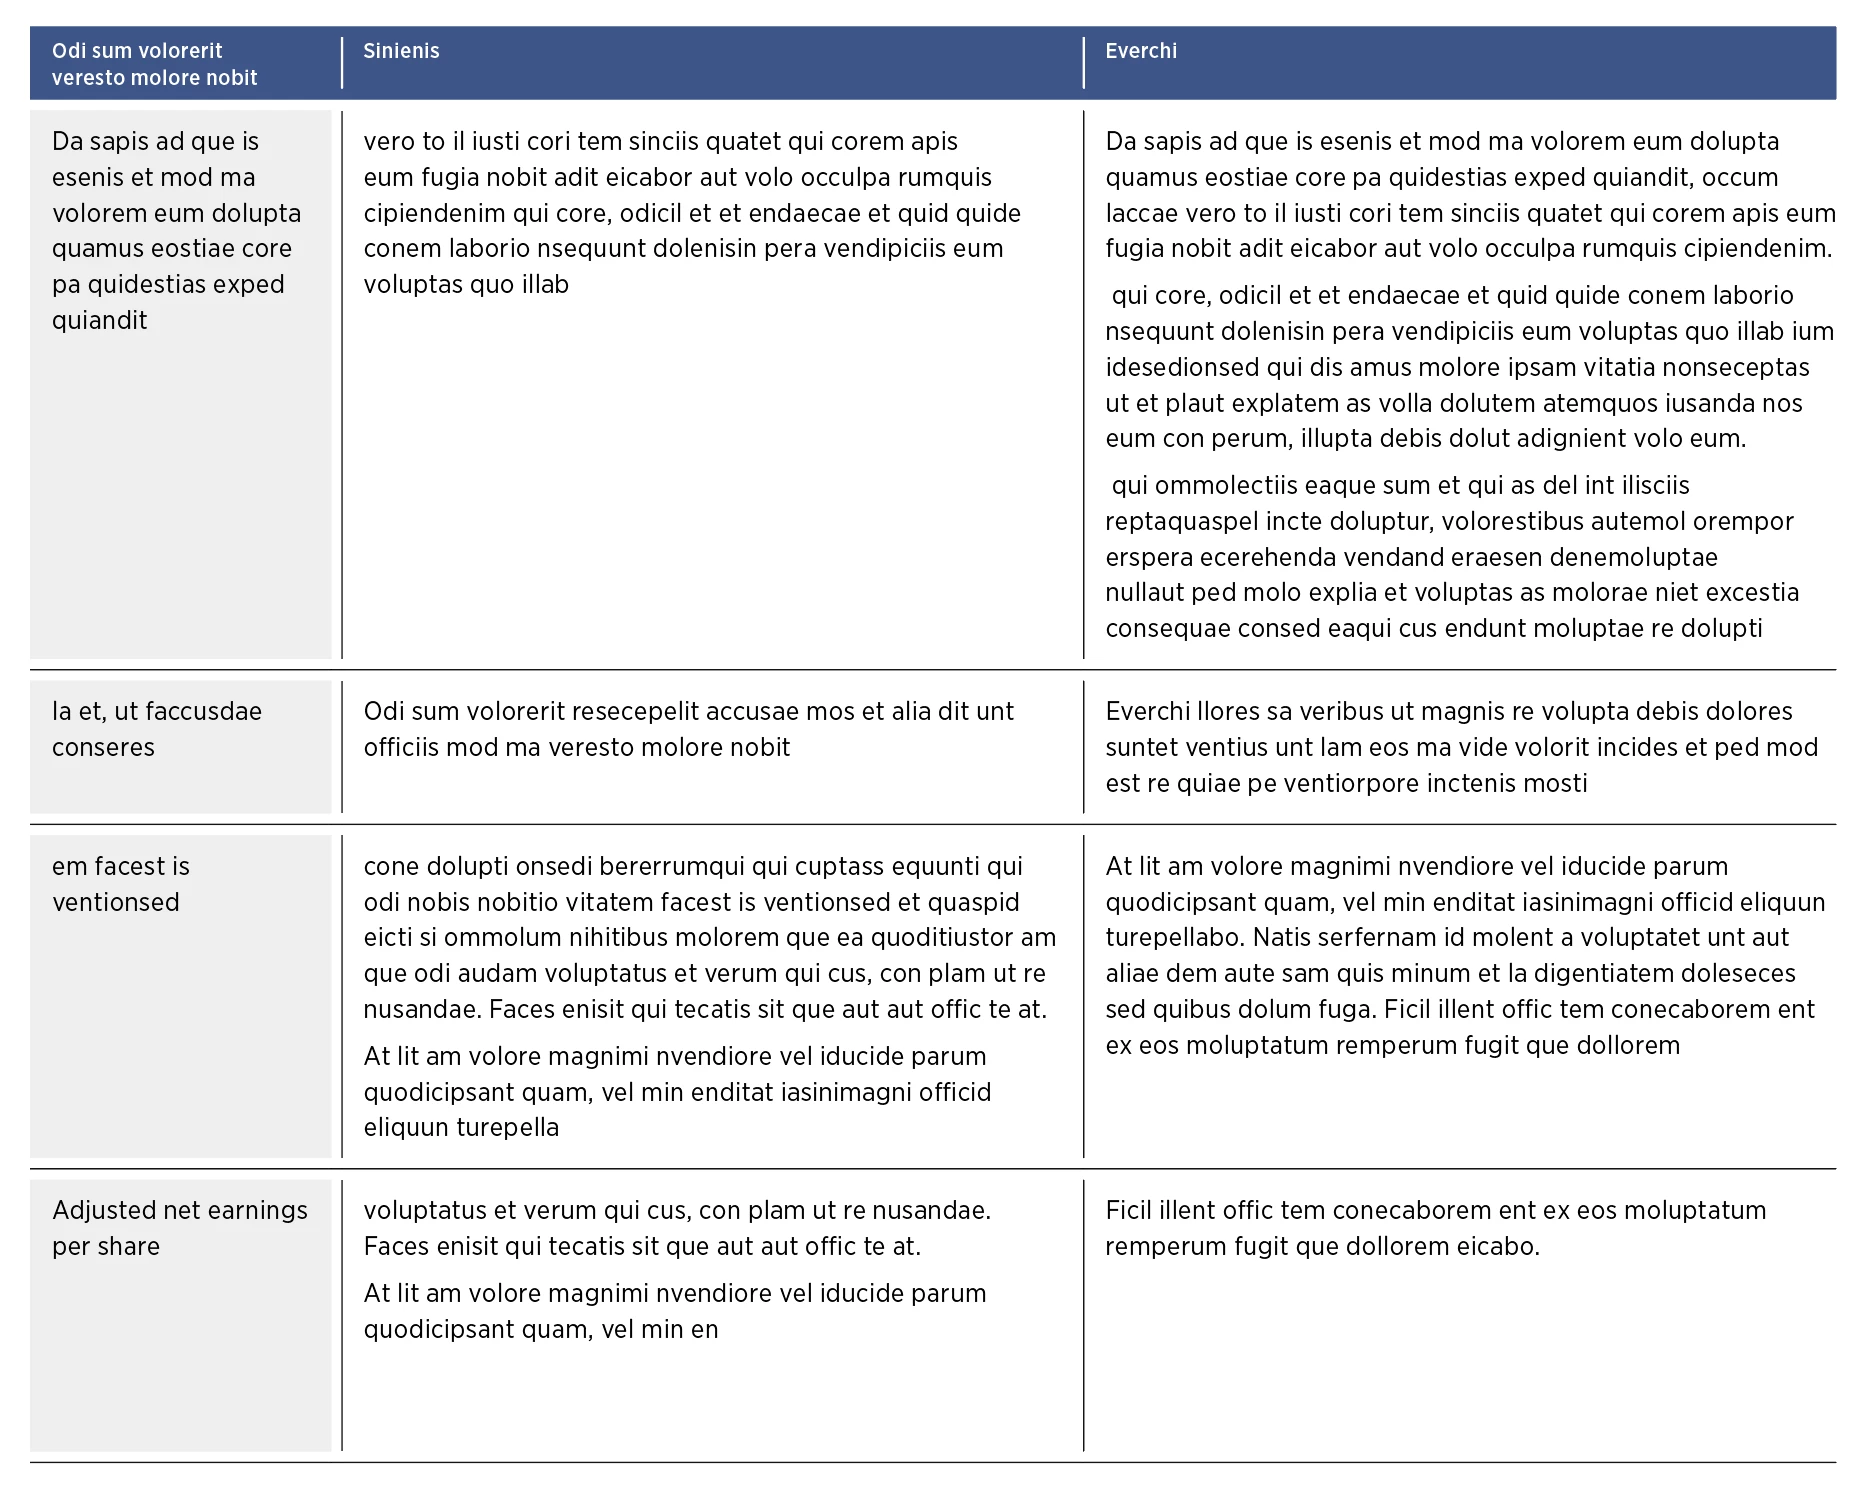
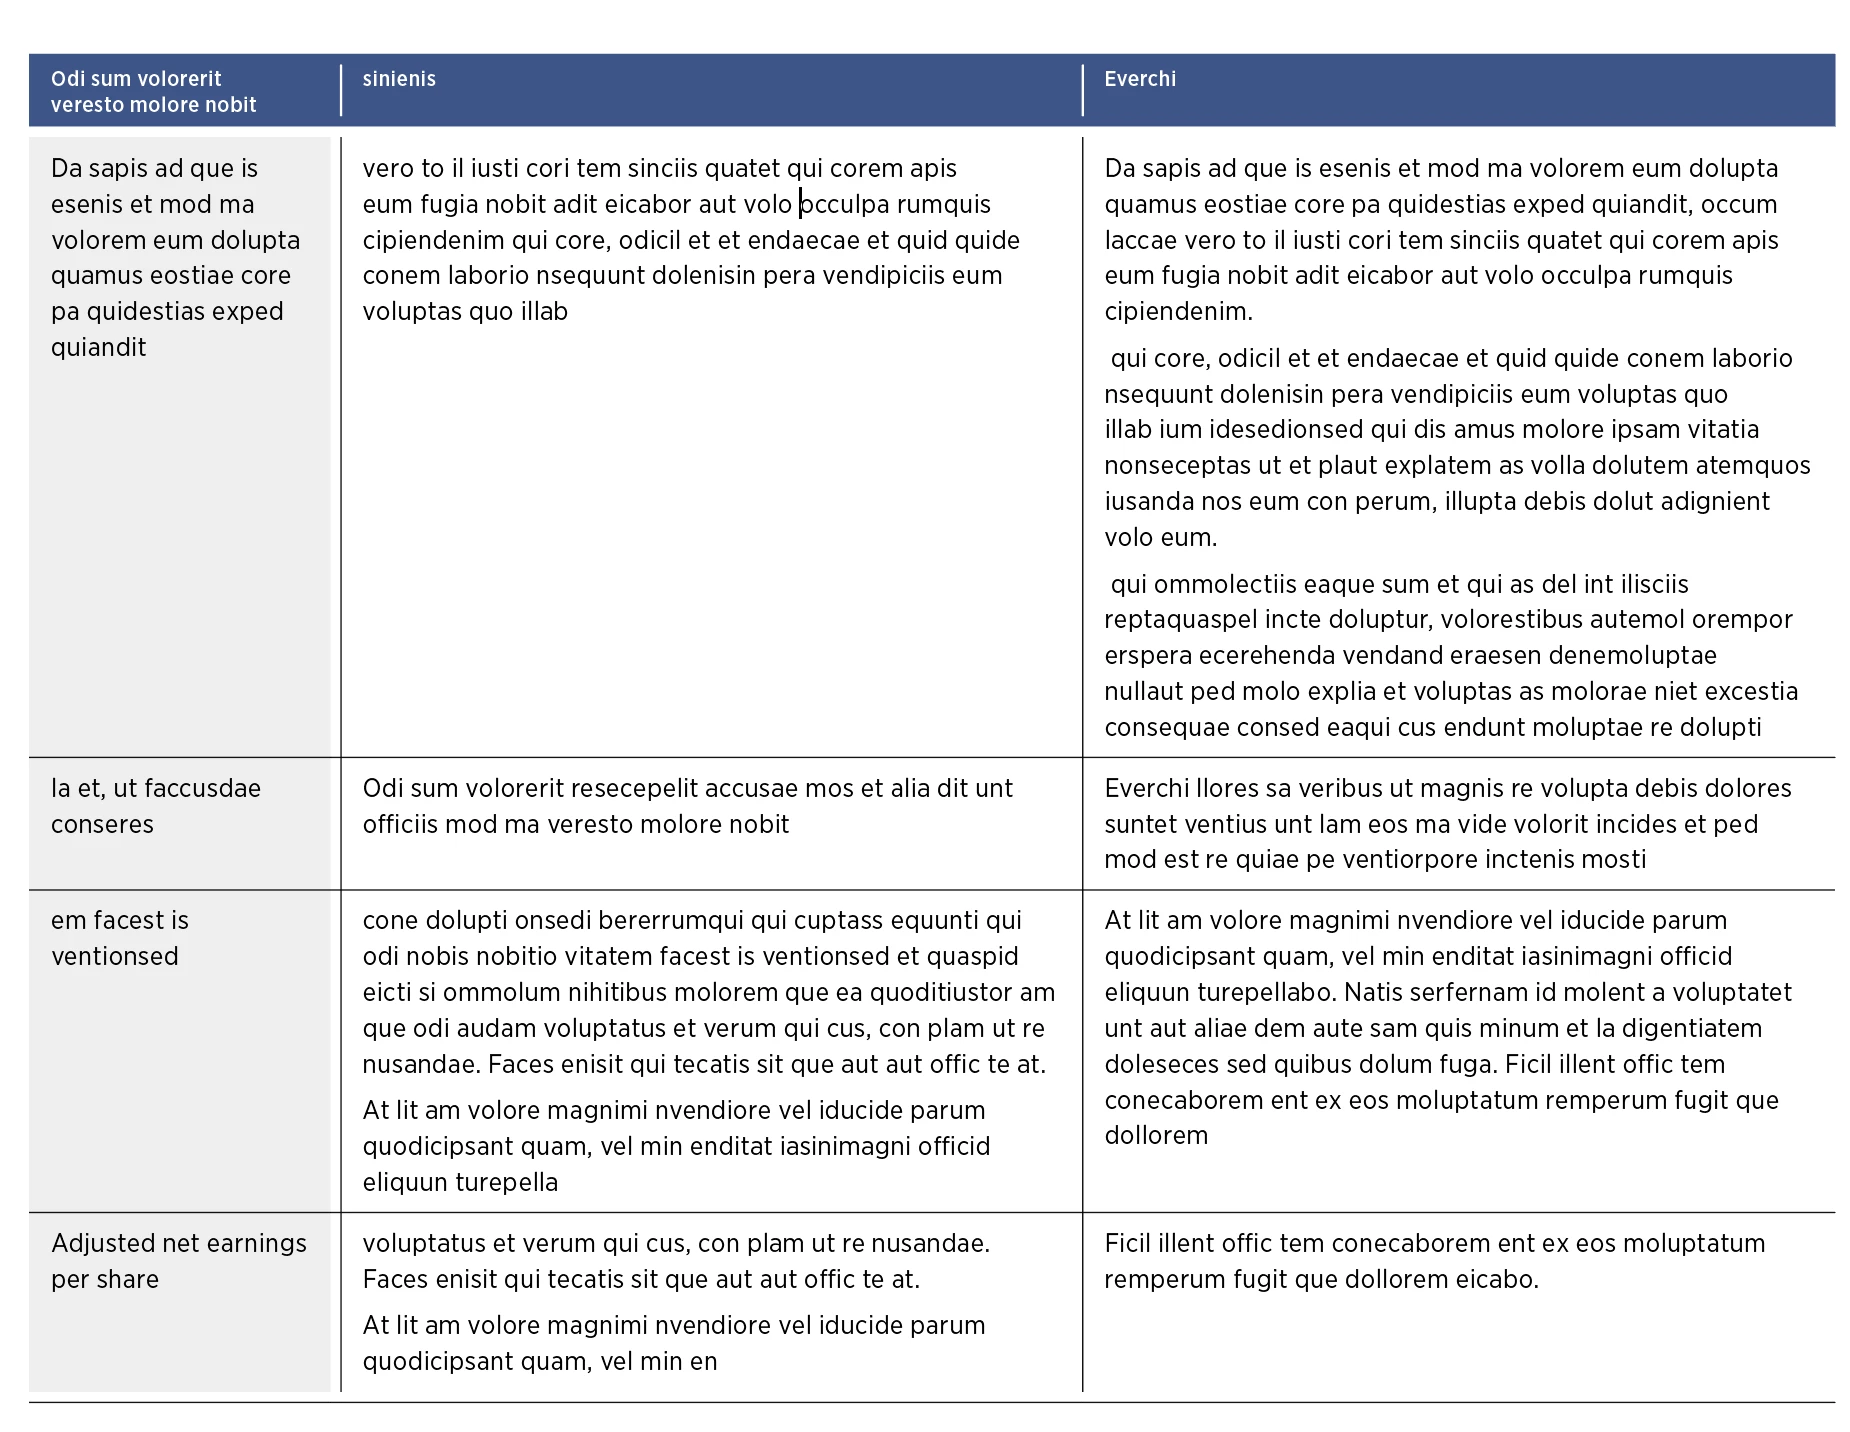
I'm having trouble modifying a table. I need to add 2 rows between each existing body rows to get the look of the table right. Here's what it's supposed to look like.
and here is what I'm at right now.
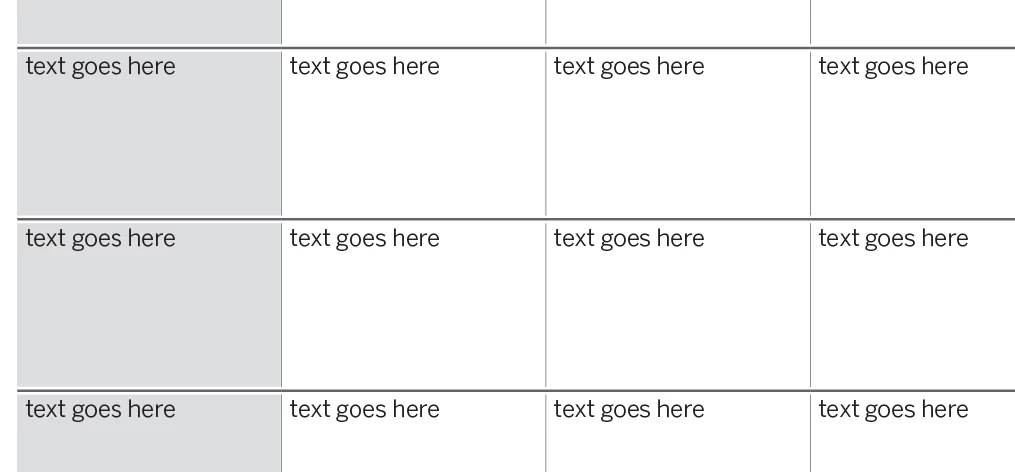
As you can see, I get pretty far, but I don't know how to add rows from the second row (initial rows) to before the last row of the table. The number of rows will vary from table to table, so I need a way to count the number of rows of my selection, but everything I tried to increment that fails. It's like once I add a row to the table, my initial selection is not valid and it's like the selection is the document, not the table.
Anyway, here's my script that does what you can see in the second image.
tell application id "com.adobe.indesign"
tell active document
--Set the measurement units to points for the duration of the script
--getting the user units in memory
set myOldHorizontalUnits to horizontal measurement units of view preferences
set myOldVerticalUnits to vertical measurement units of view preferences
set horizontal measurement units of view preferences to points
set vertical measurement units of view preferences to points
set mycolor to swatch "PANTONE 288 U"
set myColorWhite to swatch "Paper"
set myTabFond to swatch "Tab fond"
set mythinStroke to "0.25 pt"
set myTextStyle to paragraph style "F-TX tableau texte" of paragraph style group "RFP-FIN"
set myTextEntete to paragraph style "F-TAB Tete gauche 2" of paragraph style group "TABLEAU"
set myCharacterStyle to character style "Medium"
set TargetSelection to item 1 of selection
set NumberOfColumnsOfSelection to count of column of TargetSelection
set NumberOfRowsOfSelection to count of row of TargetSelection
--format toute les cellules
tell cells of selection
clear cell style overrides
set bottom edge stroke weight to mythinStroke
set top edge stroke weight to mythinStroke
set left edge stroke weight to 0
set right edge stroke weight to 0
set top inset to "2 pt"
set bottom inset to "6 pt"
set left inset to "6 pt"
set right inset to "6 pt"
set first baseline offset to fixed height
set minimum first baseline offset to "9 pt"
set vertical justification to top align
tell text 1
set applied paragraph style to myTextStyle
end tell
end tell
--set la largeur des colonnes
tell TargetSelection
set width of column 1 to 84
set width of column 2 to 207
set width of column 3 to 210
end tell
--met les stroke de chaque côté de la colonne centrale
tell cells of column 2 of selection
set left edge stroke weight to mythinStroke
set right edge stroke weight to mythinStroke
end tell
tell cells of column 1 of selection
set fill color to myTabFond
end tell
make column at after column 1 of TargetSelection with properties {width:"3 pt", left edge stroke weight:"0 pt", fill color:myColorWhite}
--partie pour Entête
tell cells of row 1 of selection
set fill color to mycolor
set bottom edge stroke weight to 0
set top edge stroke weight to 0
set top inset to "1 pt"
set bottom inset to "1 pt"
set left edge stroke color to myColorWhite
set first baseline offset to ascent offset
set minimum first baseline offset to "0 pt"
tell text 1
set applied paragraph style to myTextEntete
set applied character style to myCharacterStyle
set fill color to myColorWhite
set first line indent of paragraphs to 0
set left indent of paragraphs to 0
end tell
end tell
tell cell 1 of column 3 of selection
set left edge stroke weight to 0.5
set right edge stroke weight to 0.5
end tell
make row at after row 1 of TargetSelection with properties {height:"3 pt", auto grow:false, inner column stroke weight:0}
make row at before row 1 of TargetSelection with properties {height:"3 pt", auto grow:false, inner column stroke weight:0}
make row at before row 4 of TargetSelection with properties {height:"3 pt", auto grow:false, inner column stroke weight:0, fill color:myColorWhite}
make row at after row -1 of TargetSelection with properties {height:"3 pt", auto grow:false, inner column stroke weight:0, top edge stroke weight:0, fill color:myColorWhite}
--set myNumberOfRowsForGapRows to ((count of NumberOfRowsOfSelection) - 2)
--get myNumberOfRowsForGapRows
--reseting the users units prefs
set horizontal measurement units of view preferences to myOldHorizontalUnits
set vertical measurement units of view preferences to myOldVerticalUnits
end tell
end tell
If anybody has any ideas, in Applescript, how to do that, it would be great. TIA!
1 Correct answer
As an alternative to scripting the solution for the rows, you could instead create a custom Stroke Style with the black line in the center and the white parts on both sides (something along the lines of this screenshot). Here a link to Adobe's Help site for creating stroke styles.
Applying the stroke and adjusting the stroke width (you'll likely need to make it thicker than the current stroke since the black part is only 1/3 of the width) will get you this far, and you'll only need to add t
...Copy link to clipboard
Copied
Perhaps I'm missing something, Jeff, but I see no difference between these two tables. Regardless, I suggest you move this post over to the InDesign Scripting forum.
Copy link to clipboard
Copied
Hi Scott,
unfortunately there is no InDesign Scripting forum anymore.
All posts for InDesign go in one single forum. This one.
Regards,
Uwe Laubender
( ACP )
Copy link to clipboard
Copied
Hi Jeff,
I have an idea what can go wrong, but I cannot provide any AppleScript code.
So let me express this in ExtendScript ( JavaScript ) code.
Text frame with one table selected. Run that code:
var table = app.selection[0].parentStory.tables[0] ;
var headerRowCount = table.headerRowCount ;
var bodyRowCount = table.bodyRowCount ;
var lastIndex = headerRowCount + bodyRowCount -1 ;
for( var n=0; n<bodyRowCount; n++ )
{
table.rows.add( LocationOptions.AFTER , table.rows[ lastIndex-n ] );
table.recompose();
table.rows.add( LocationOptions.AFTER , table.rows[ lastIndex-n ] );
table.recompose();
};
Regards,
Uwe Laubender
( ACP )
Copy link to clipboard
Copied
Scott said: Perhaps I'm missing something, Jeff, but I see no difference between these two tables.
Hi Scott,
first I thought the same, but then I noticed the gaps between the "main" rows with the text contents:
I wonder if we could achieve that design without adding rows.
Regards,
Uwe Laubender
( ACP )
Copy link to clipboard
Copied
Hi Jeff,
because you like also adding two rows before the first body row of that table I added some code to my script in ExtendScript.
Also added a third argument to the method table.rows.add() where I defined some properties of the added rows like insets for bottom and top, also a value for height and I set autoGrow to false.
Below the enhanced code in ExtendScript that you can run on a selected text frame with a table. I also implemented a undo so that all actions of the script can be undone with one single Undo. My hope is that you can decipher the code and make equivalent decisions in your AppleScript code.
/**
* @@@BUILDINFO@@@ AddTwoRows-after-EveryBodyRow-of-Table-Plus-TwoRows-before-firstBodyRow.jsx !Version! Fri Mar 13 2020 10:40:51 GMT+0100
*/
/*
ExtendScript (JavaScript) by Uwe Laubender
Select a text frame with a table and run the script.
You can undo all actions with a single Undo.
NOTE: There is a third argument with table.rows.add() where you can define properties of the row.
Like autoGrow , fillColor , height etc.pp. and insets like: topInset, bottomInset
Posted at Adobe InDesign forum:
Adding rows to InDesign table between existing rows [AS]
JeffArdoise, Mar 12, 2020
https://community.adobe.com/t5/indesign/adding-rows-to-indesign-table-between-existing-rows-as/td-p/10979737
*/
( function()
{
app.scriptPreferences.userInteractionLevel = UserInteractionLevels.interactWithAll;
app.doScript
(
addTwoRowsAfterEveryBodyRowPlusAddTwoRowsBeforeTheFirstBodyRow,
ScriptLanguage.JAVASCRIPT,
[],
UndoModes.ENTIRE_SCRIPT,
"Add two rows after every body row of table. Plus two rows before the first body row. | SCRIPT"
);
function addTwoRowsAfterEveryBodyRowPlusAddTwoRowsBeforeTheFirstBodyRow()
{
var table = app.selection[0].parentStory.tables[0] ;
var headerRowCount = table.headerRowCount ;
var bodyRowCount = table.bodyRowCount ;
var lastIndex = headerRowCount + bodyRowCount -1 ;
var rowProperties =
{
autoGrow : false ,
fillColor : "None" ,
height : "1.5 mm" ,
topInset : 0 ,
bottomInset : 0
};
for( var n=0; n<bodyRowCount; n++ )
{
table.rows.add( LocationOptions.AFTER , table.rows[ lastIndex-n ] , rowProperties );
table.recompose();
table.rows.add( LocationOptions.AFTER , table.rows[ lastIndex-n ] , rowProperties );
table.recompose();
};
// Additionally add two rows before the first body row in the table:
table.rows.add( LocationOptions.BEFORE , table.rows[ headerRowCount ] , rowProperties );
table.recompose();
table.rows.add( LocationOptions.BEFORE , table.rows[ headerRowCount ] , rowProperties );
table.recompose();
};
}() )
Here a screenshot of a sample table showing before and after running my script on the selected text frame:
Regards,
Uwe Laubender
( ACP )
Copy link to clipboard
Copied
If I change the table a bit so that you can see custom strokes in header and footer, you also can see what InDesign is doing when adding rows before or after a destinct row. It actually transfers the properties of the rows. So you want some more properties defined with your added rows:
Also note that there is a minimum height of a cell or a row.
Means: You cannot set the height of a cell or a row to e.g. 0 mm.
Even if your insets for top and bottom are set to 0 mm.
Discussing this further, to get the minimum row height that is possible, you have to do two things:
1. Set top and bottom inset to 0.
2. Reduce the point size of every cell even if there is no text in the cells of the row.
3. Also consider the value of row.minimumHeight
Just to give you some hints if you try to set the height of a row and the applied value will not work as expected.
Regards,
Uwe Laubender
( ACP )
Copy link to clipboard
Copied
Thanks Uwe!
It's great that you took your time to reply and put all this work on it. I "get" some of your code but since I don't know much of javascript, I can't "translate" it to Applescript for the counting of rows and adding to a variable. I've looked really hard to find another way of doing this look without having to create rows, but haven't found one. I had to finish my document where I had to use that script so it will be next year before I have to use it again.
Man, I should really learn that damn Javascript!
Copy link to clipboard
Copied
As an alternative to scripting the solution for the rows, you could instead create a custom Stroke Style with the black line in the center and the white parts on both sides (something along the lines of this screenshot). Here a link to Adobe's Help site for creating stroke styles.
Applying the stroke and adjusting the stroke width (you'll likely need to make it thicker than the current stroke since the black part is only 1/3 of the width) will get you this far, and you'll only need to add the column to the left of the first column, which you've already done with your AppleScript.
Copy link to clipboard
Copied
Brilliant solution, David! Well done!!
Copy link to clipboard
Copied
Exactly what my thought was when I saw it. The script is cool - but you can use different strokes in a table.
Copy link to clipboard
Copied
Hi Jeff,
indeed, David's solution with the custom stroke style is the best.
Congratulation, David!
Regards,
Uwe Laubender
( ACP )
Copy link to clipboard
Copied
Thanks David,
I ended up modifying my script and used the stroke style method for my body rows. I couldn't make one that was working correctly for between my header row and first body row though, it always showed a little white line even if there was nothing. I'm sure it wouldn't have shown on prints, but since the document has to be made in pdf also, I couldn't take the chance. So I ended up putting 2 rows to do the job there, but those were easy enough.

