- Home
- InDesign
- Discussions
- Allow non-facing interior pages to display in a tw...
- Allow non-facing interior pages to display in a tw...
Allow non-facing interior pages to display in a two-page view in InDesign CC
Copy link to clipboard
Copied
I'm trying to set up a document for a technical manual. For ease of seeing corresponding content all at once, I would like for the "guts" pages to display side by side like facing pages do. However, I need to these pages need to retain their full bleed. Is there a way to do that within InDesign CC?
Copy link to clipboard
Copied
Try going into the Pages Panel menu button and turning off the switches for Allow Pages to Shuffle. Then, physically drag the spread icons apart from each other. You get left and right pages plus bleed on 4 sides.
Copy link to clipboard
Copied
Michael beat me to it! Got distracted with work...
Copy link to clipboard
Copied
I assume you are wanted to have the pages bleed into the spine--correct?
If the same graphic extends between both pages, the spine bleed will still output.
If using different graphics per page that bleed to the spine, you can pull the spreads apart when edited is finalized.
To do that, select all the pages in the layout and turn off Allow Document Pages to Shuffle (should really be "require document pages to shuffle"). Then pull the right page to the right until you see a thin line on the Page panel. Let go of mouse. Unfortunately, you will have to do this spread by spread.

Copy link to clipboard
Copied
Thanks for your suggestion. After re-enabling "facing pages" in my document setup, I was able to reproduce the results you showed of your Pages view. However, the result was slightly different than I'd hoped for. Although the bleeds were preserved, I don't have two pages side by side (like a two-page view in Microsoft Word). Is there a step that I missed?
Copy link to clipboard
Copied
The only step you missed was "when edited is finalized".
In other words, put the pages apart and fix the bleeds right at the end of deadline.
Copy link to clipboard
Copied
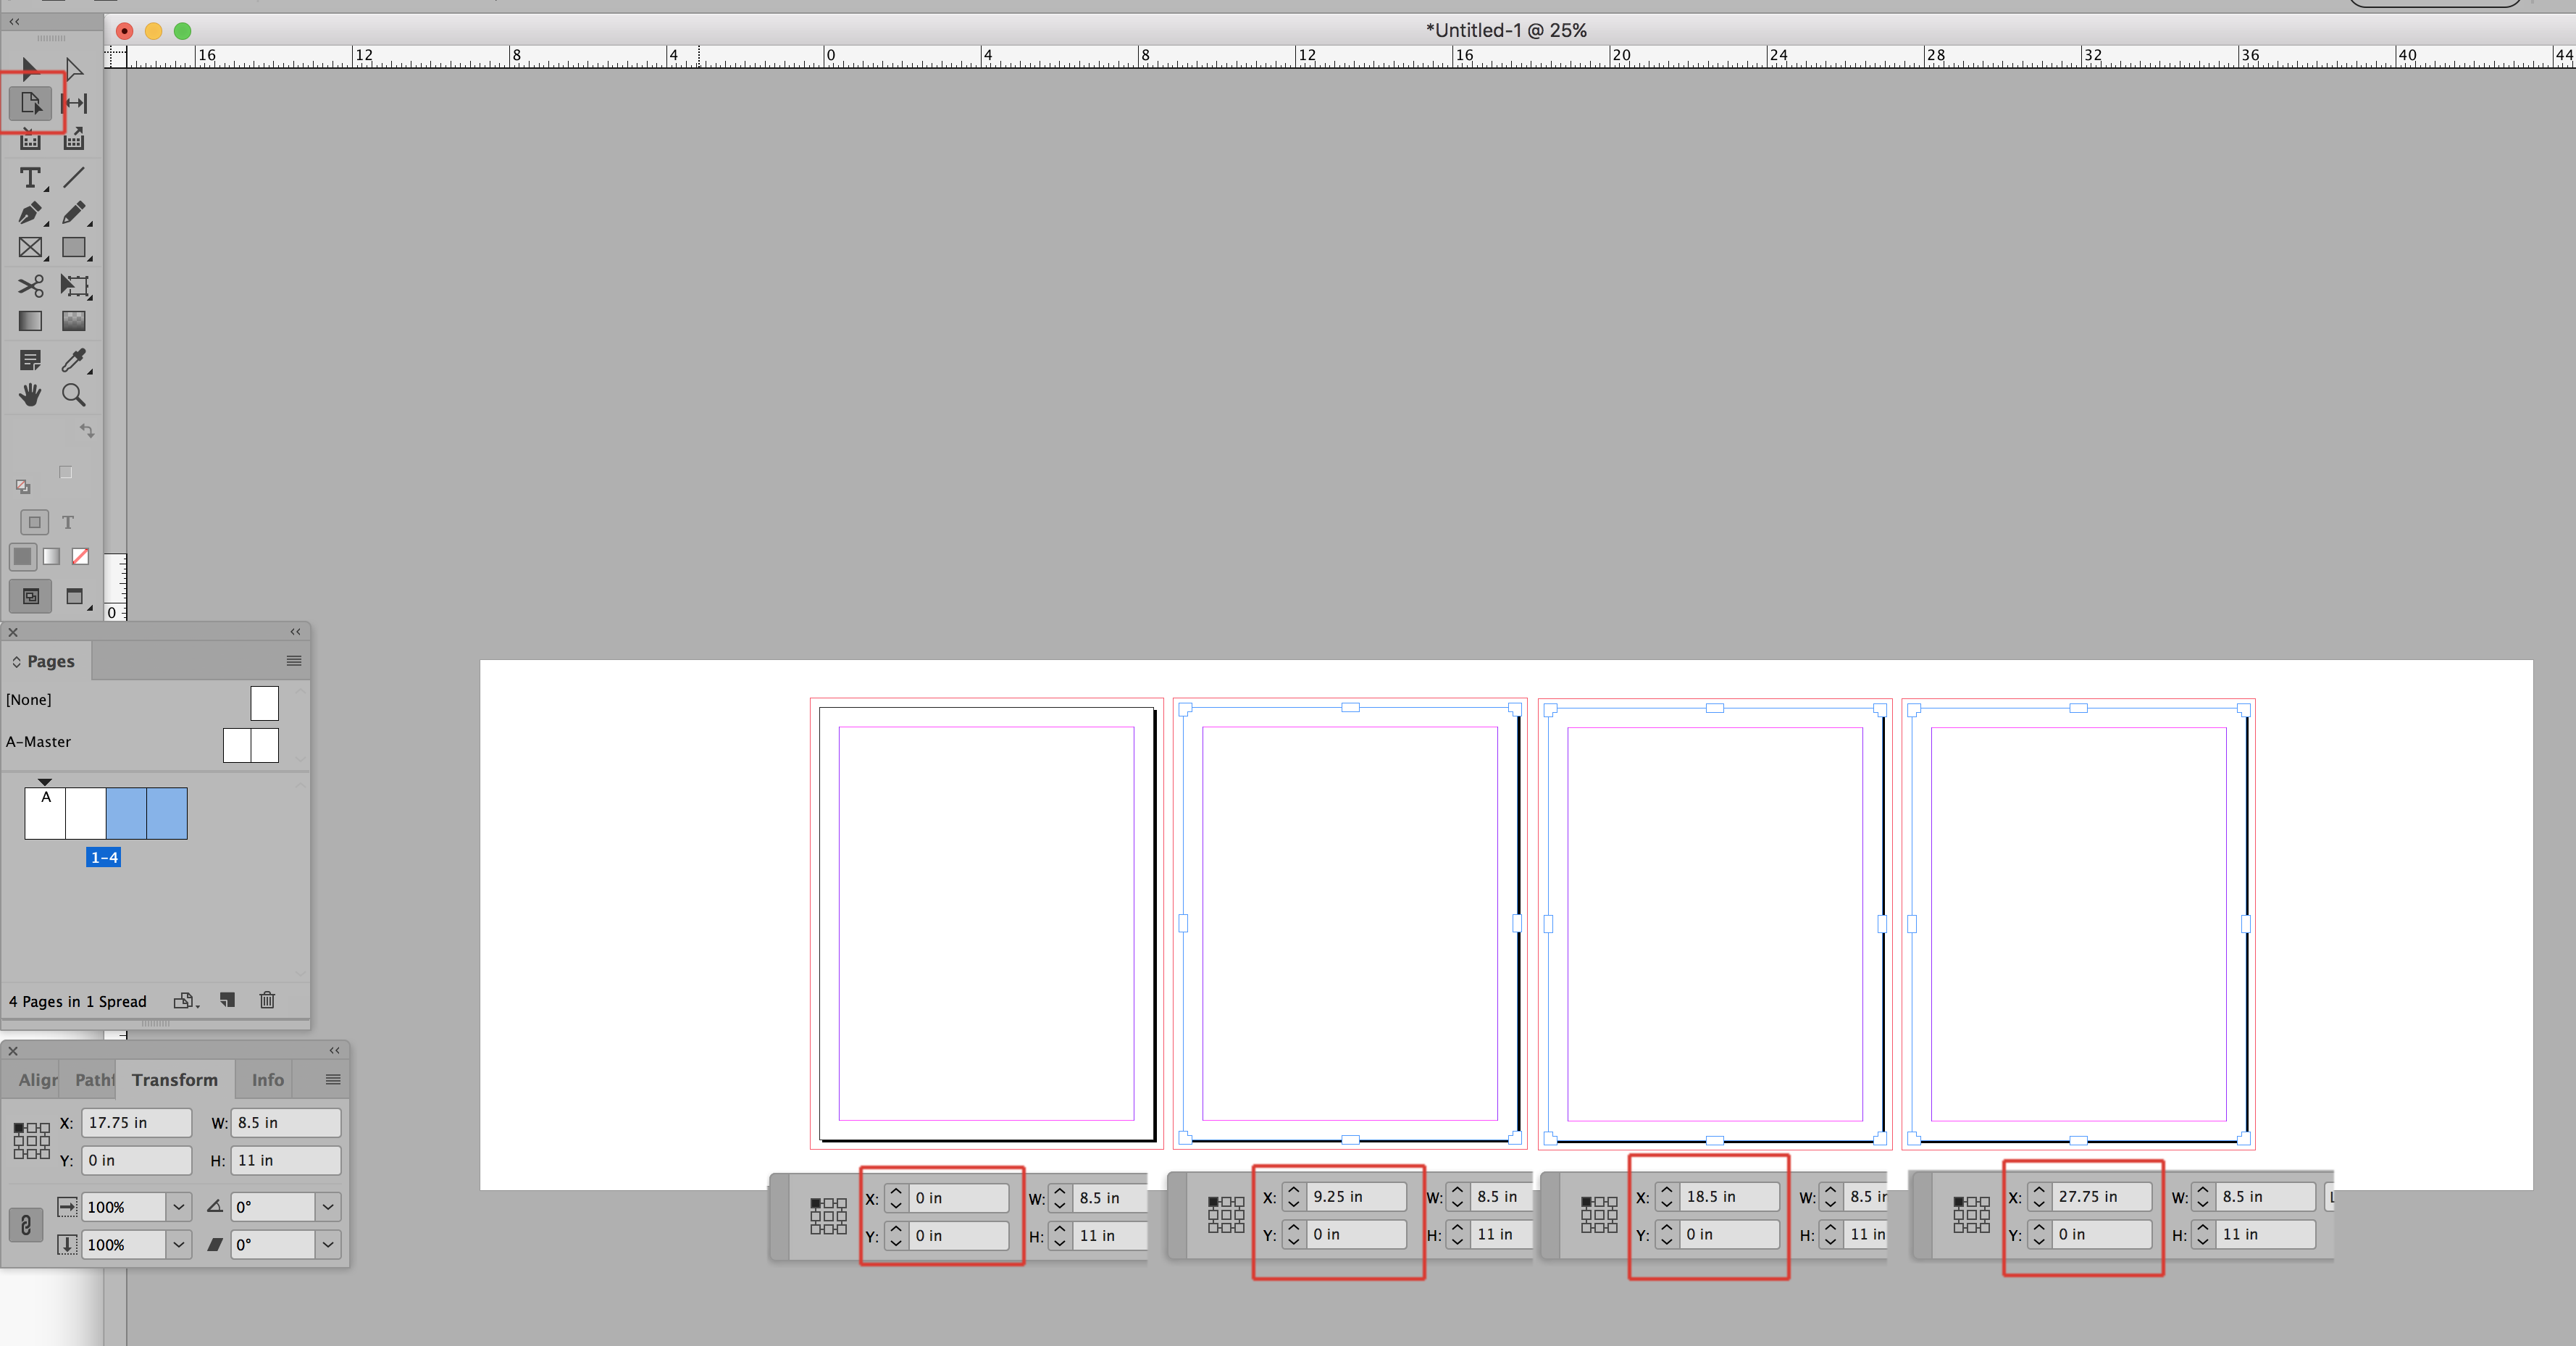
A way that you can do what you are asking is by doing the job as single pages put into spreads and using the Page Tool. See screen shot:

After turning off "Allow Document Pages to Shuffle" in the Pages Panel pull-down menu you will be able to place single pages alongside each other in the Pages Panel. Then by clicking on the pages in the document with the Page Tool you can set a new "X" coordinate for each page (it's easy to forget that the Page Tool is not only for changing the size of a page but also can be used to move pages away from one another). In the picture above I adjusted the X coordinate of each page to be .75 inches away from one another to allow for .25 inch bleed all around each page. Note that in the Page Panel that the pages still appear to be touching but the actual pages are separated and the bleed is showing.
Copy link to clipboard
Copied
Hi Bill,
it can be done with facing pages documents as well but it's a bit time consuming to set up.
The trick here is to inject two super narrow pages along the spine and print or export the outer ones only.
The schema of a facing pages thread with A4 portrait pages and 3 mm bleed would be (all numbers in millimeters showing the width of pages):
210-3-SPINE-3-210

Page 2: 210 mm width
Page 3: 3 mm width
| Spine
Page 4: 3 mm width
Page 5: 210 mm width
Master X-DO-NOT-PRINT is done this way:
1. Add new master
2. Set all margins to 0
3. Set width with the Page Tool to e.g. 3 mm
Then add two pages to the spread that starts with page 2 here in the document.
Moved one to the left side of the spread. Applied Master X-DO-NOT-PRINT to the inner pages that touch the spine.
Basically, that's it.
To print or export the outer A4 pages, just input the page range as:
2,5
If you need different numbering for e.g. the 4th page in the spread, just do a new section start on 2nd page in the spread and the 4th page of the spread and give appropriate numbers. For the inner ones around the spine you could e.g. use i, ii … for numbering and the 4th page will start with e.g. number 3.
Regards,
Uwe
Copy link to clipboard
Copied
Here a view of the Pages panel with new sections:

Regards,
Uwe

