 Adobe Community
- Home
- InDesign
- Discussions
- Re: How to get rid of extra space beneath a text b...
- Re: How to get rid of extra space beneath a text b...
How to get rid of extra space beneath a text box caption?

Copy link to clipboard
Copied
I have 2 columns on a page and too much space below my text box. Help!


 22
Replies
22
22
Replies
22

Copy link to clipboard
Copied
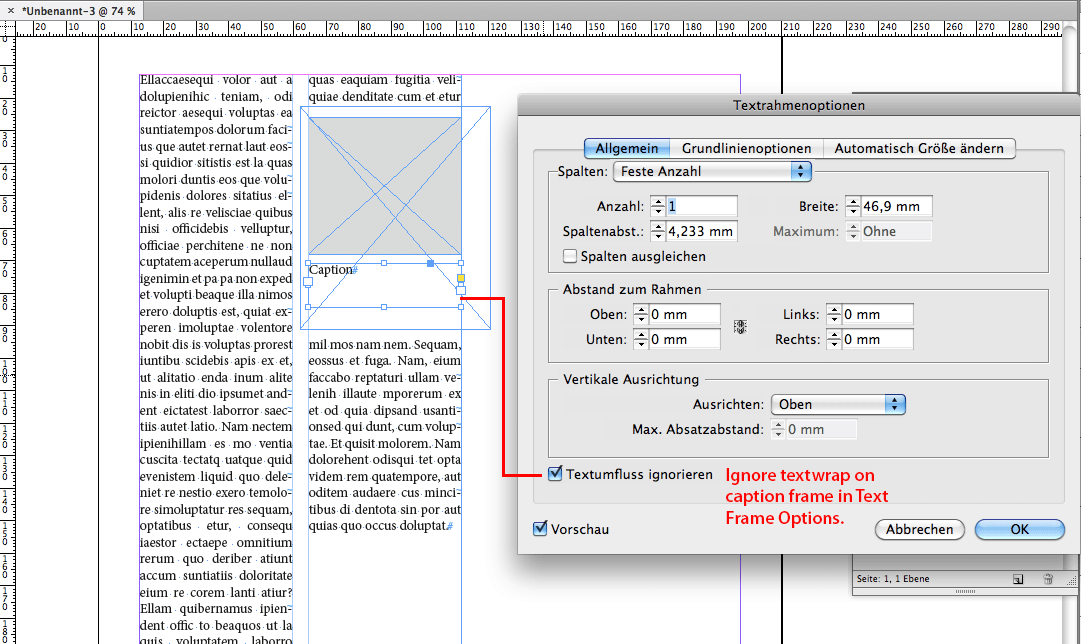
It may be because of the text wrap on your photo. Select your caption box, and under text frame options, choose Ignore Text Wrap.
This will allow you to place your caption as close as you would like to the image.
Copy link to clipboard
Copied
I selected the caption box, and under text frame options, chose Ignore Text Wrap. That allowed me to move the text closer to the photo (which is good - thanks!) but did not close the big space under the caption.
BTW, I am not using the caption feature of InDesign, but just creating an independent text box below the photo.
Copy link to clipboard
Copied
The big space under the caption is caused by text wrap applied to the caption box. Follow Jane-e's suggestion to reduce the amount of text wrap applied to the caption box, and reduce the size of the caption box as much as you can without causing your caption to overset.

Copy link to clipboard
Copied
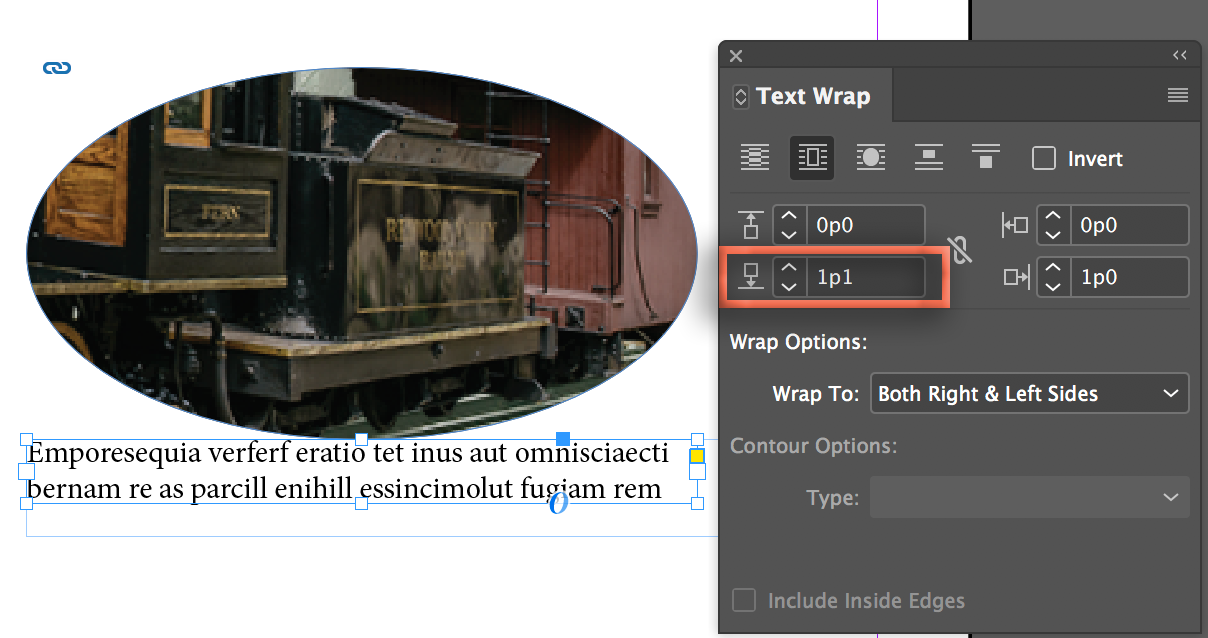
It also looks like you have baseline alignment on? I would try Jane'e's suggestion: select the caption frame, open Window > Text wrap, unlink the offsets and slowly reduce the space below.
On second thought, I'm not sure you even need the offsets—try turning off text wrap. There's a photo above and gutters on the left/right so you don't need it at all on those three sides. The only area you might have to mess with is the space below.
Copy link to clipboard
Copied
I do not know how to lower the text wrap a point at a time, but since turning it off did not help, I am guessing it would not improve the situation.
You can lower it a point at a time. by clicking the down arrow within my orange outline above.
Turning text wrap off didn't move the text any closer? Is there also text wrap on the image then? I asked about baseline alignment because that can play into this—it is on?

Copy link to clipboard
Copied
The extra space at the bottom is because the text wrap on the caption frame won't let the last line join the second to the last line. If you don't know how to adjust text wrap, you can also click on the caption frame and press the up arrow key on your keyboard a couple of times to nudge the caption higher until those two lines become one longer line.
Copy link to clipboard
Copied
This suggestion does not affect the space below the caption but I can see how adjusting the text box size with this simple technique is very useful!
Copy link to clipboard
Copied
When I turned text wrap off my caption box was drowned in other text so I couldn't do that.
I did right click on the text box, Window> Text Wrap
Then I adjusted the space and that worked. So glad to learn about that!
BTW I do have baseline alignment I think, but don't even know what it is!
Copy link to clipboard
Copied
Or instead of ignoring the text wrap completely, try lowering the text wrap on only the bottom of the frame a point at a time until the last line "on the river" pops up to join the previous line.
Copy link to clipboard
Copied
I do not know how to lower the text wrap a point at a time, but since turning it off did not help, I am guessing it would not improve the situation.
Copy link to clipboard
Copied
Those are two different functions. Ignore Text Wrap allowed the text within your caption box to ignore the wrap applied to the image frame above it. The text wrap applied to your caption box affects how other text wraps around that box.
To reduce the text wrap on the bottom of your caption box, unlink the values in the text wrap dialog, and set the bottom one to 0 (of whatever smaller value works for you.

Copy link to clipboard
Copied
Hi sarai,
I would do it the following way:
1. Do not apply text wrap to your image frame
2. Do not apply text wrap to your caption frame
3. Set the caption frame to ignore text wrap
4. Use another graphic frame for your text wrap.
I think, you are more flexible with that approach.
Regards,
Uwe
Copy link to clipboard
Copied
Okay, I tried that but now I cannot see the caption. I only see the photo and a big blank space where the caption should be. I tried 'send to back' under arrange but that did not help.
Perhaps I am missing something. I don't see a difference between your 2 and 3.
Copy link to clipboard
Copied
Ignoring text wrap is a text frame option.
On a Mac, select the caption frame and do cmd+b. There you can see the option "Ignore Textwrap". Check it.
On a PC the keyboard shortcut is strg+b, I think.
Regards,
Uwe
Copy link to clipboard
Copied
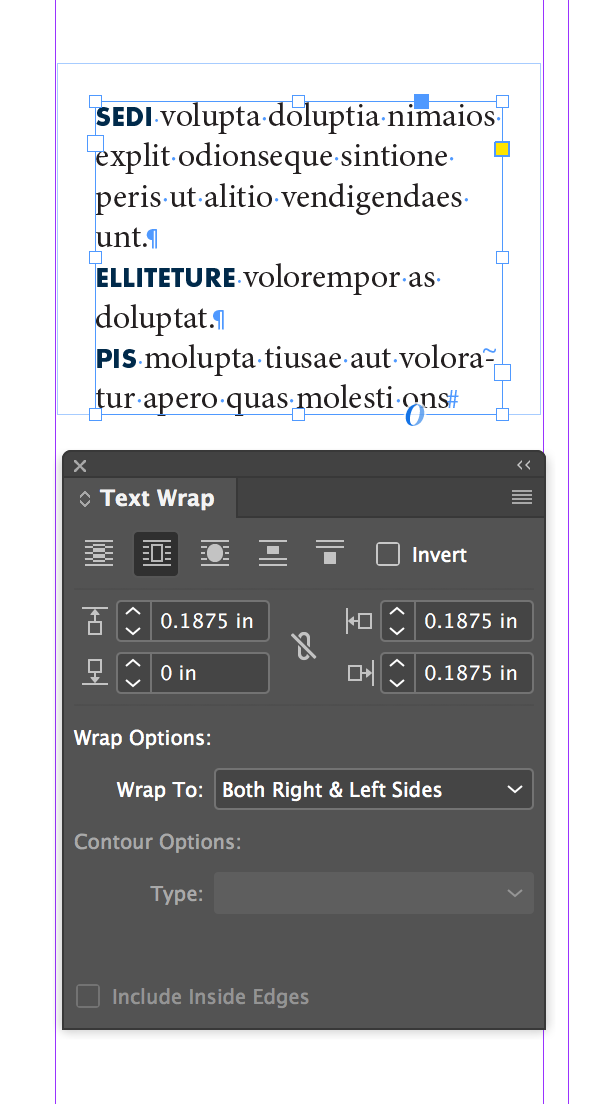
Here some screenshots from my German InDesign to illustrate my points:
1. An independent graphic frame (no fill, no stroke) controls the text wrap:

2. Caption frame is set to ignore text wrap:
Regards,
Uwe
Copy link to clipboard
Copied
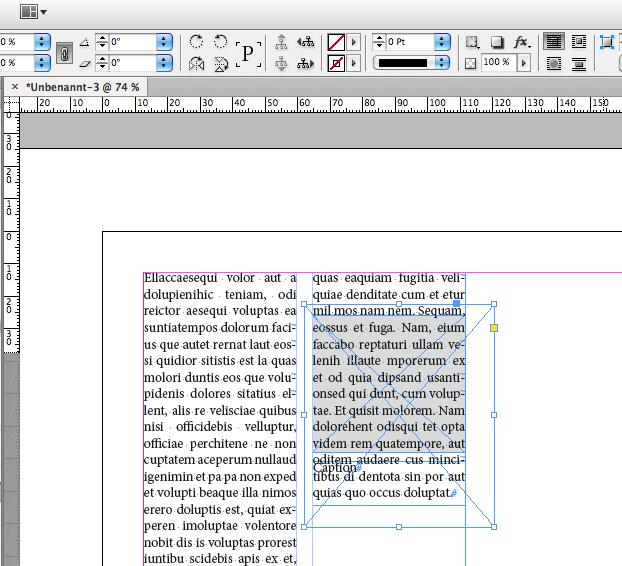
Okay I am on another image now. I created your blank graphic box and have it behind my photo and it give me a nice white border. I then placed my caption text box below with 'ignore text wrap' under object frame.
Only problem is again I have in one column only a gap:

Copy link to clipboard
Copied
I'm not sure, but it might be, that the line of text that is showing the gap is not exactly on the same horizontal value than the one right to it. You could change the frame's height that is doing the wrap a tiny bit…
Regards,
Uwe
Copy link to clipboard
Copied
I took the caption away and the gap is still there! And when i expand the empty graphic box the gap is still there too!

Copy link to clipboard
Copied
Ah. Your text does not follow any baseline grid. And that's the main problem.
You could workaround and use yet another, smaller frame with text wrap, but it would be beneficial to set up a baseline grid in InDesign's preferences that fit your needs and let all your text work with it.
Regards,
Uwe
Copy link to clipboard
Copied
I will look at that in the morning when I am fresh! Thank you so much for all the assistance.
Copy link to clipboard
Copied
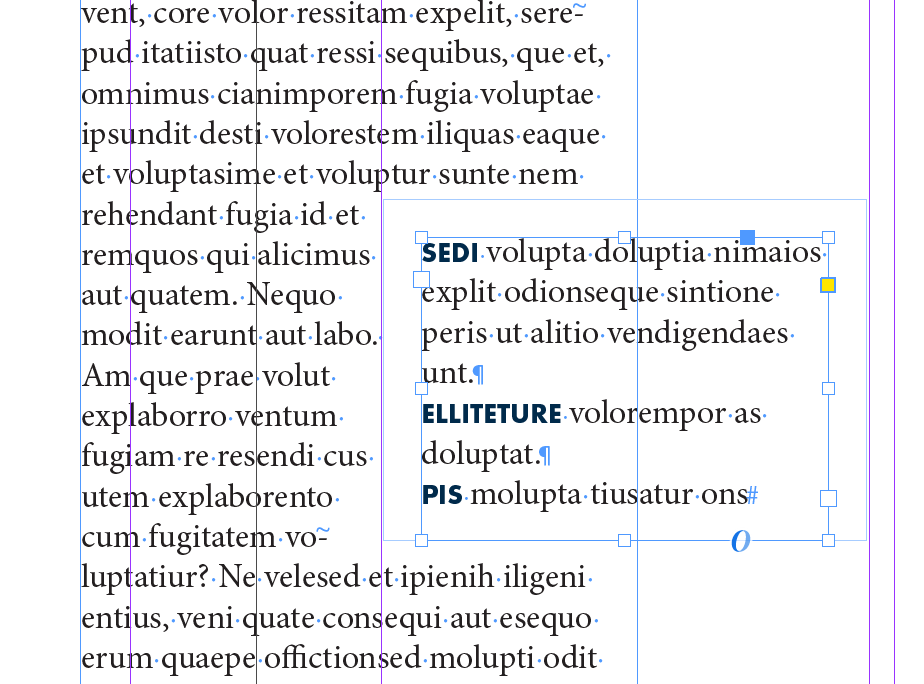
I'm unclear if you fixed the first caption, but here is what Uwe is talking about in the second caption. The baselines do not align across columns. See how much higher "had" is than the line to the right? It doesn't fit under the caption, so the text wraps to the next line.
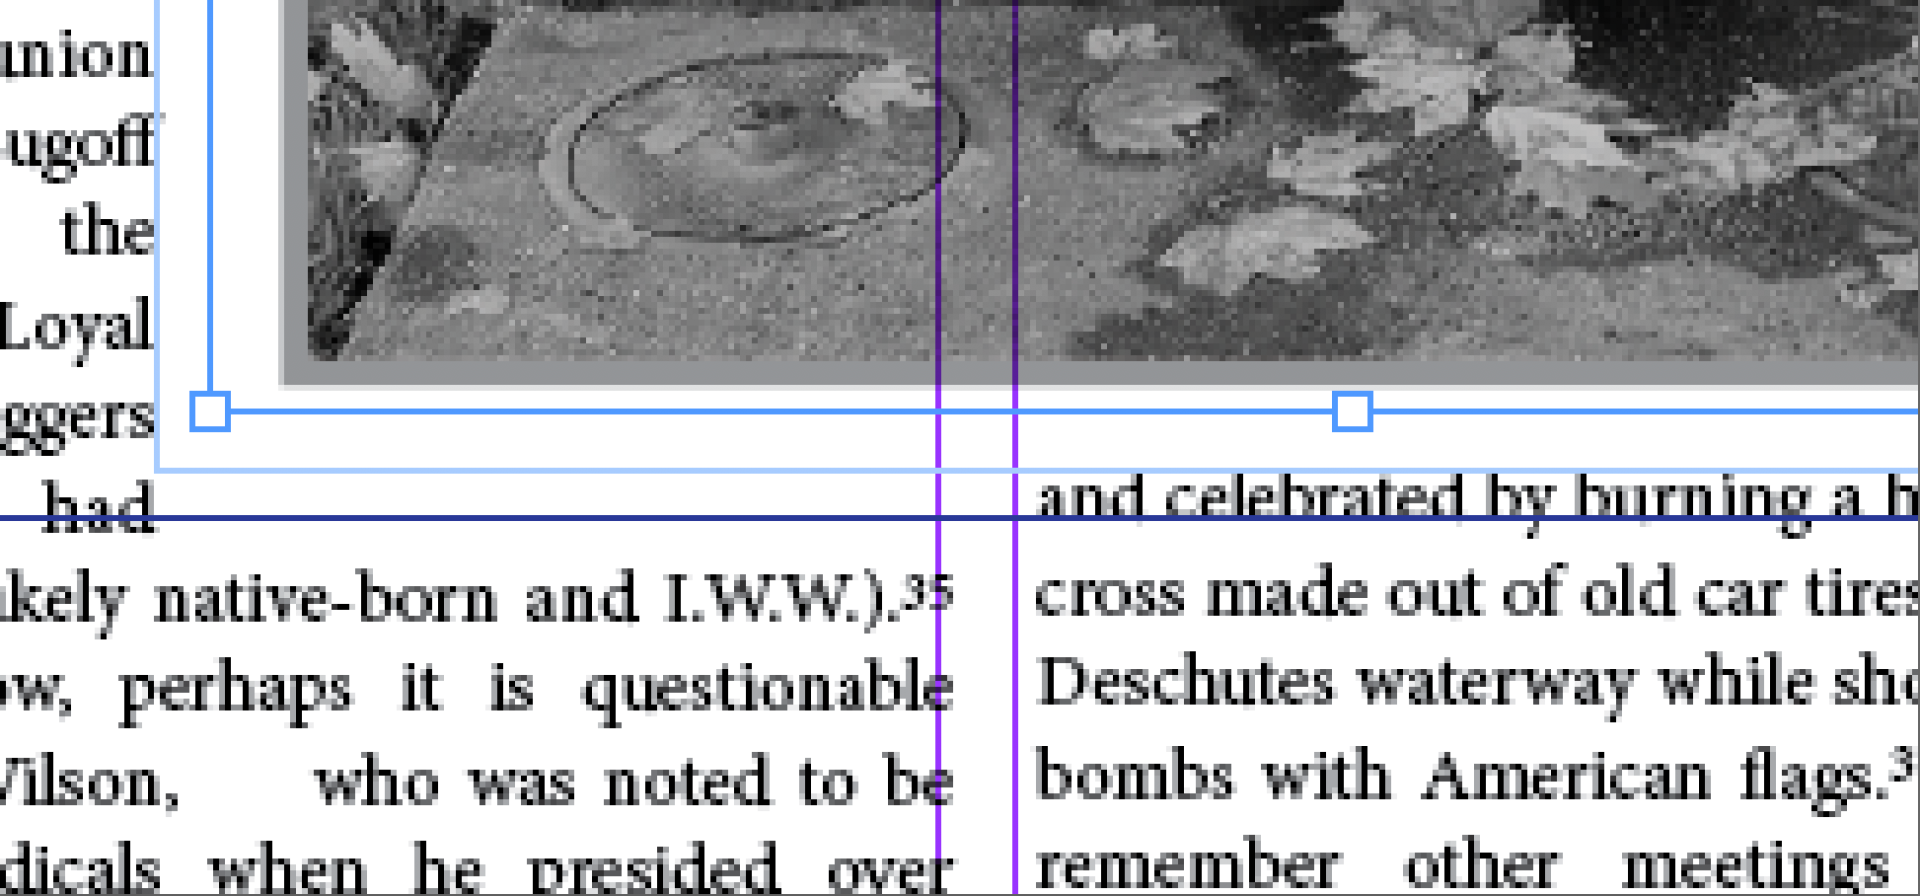
An easy approach would be to increase the bottom text wrap offset until both sides move down. A more thoughtful approach would be to set up a baseline grid and snap the body text to the baseline grid. It's a 3-step process and the basic idea is as follows:
- Set up a baseline grid in preferences, that starts at the top margin, and where the increment value is equal to the body text leading.
- You can show the grid with View > Grids and Guides > Show Baseline Grid—you may have to zoom in to see it.
- Finally, select the body text (or preferably, the body text style) and snap it to the grid.
Here are the details:
There's a bit of a learning curve to using these grids, and they do limit your spacing options. You might want to find some tutorials online that explain this more thoroughly. Lynda.com is a good place to start. If you don't have a subscription, you can start a free trial.
Copy link to clipboard
Copied
I found it - Control B

 AdChoices