More Space Around PDFS
Copy link to clipboard
Copied
I would like to some help.
My client wants to have their PDFs with a larger white border around the outside of the printed area so they can easily see the content when viewed in Acrobat.
What I currently do is put a page border around the A2 page so they know where the page finishes.
If I print and click scale to fit onto an A4 I have add 20mm bleed to the page to give me the white area, but this includes all the graphics that bleed off the page.
Is there a way or print a document onto a small page and include extra white without including the bleed..
They also want the slug included too.
Any thoughts?
Regards Christopher
Copy link to clipboard
Copied
Add a bleed and include it when exporting the PDF or simply add the bleed in the export settings.
Copy link to clipboard
Copied
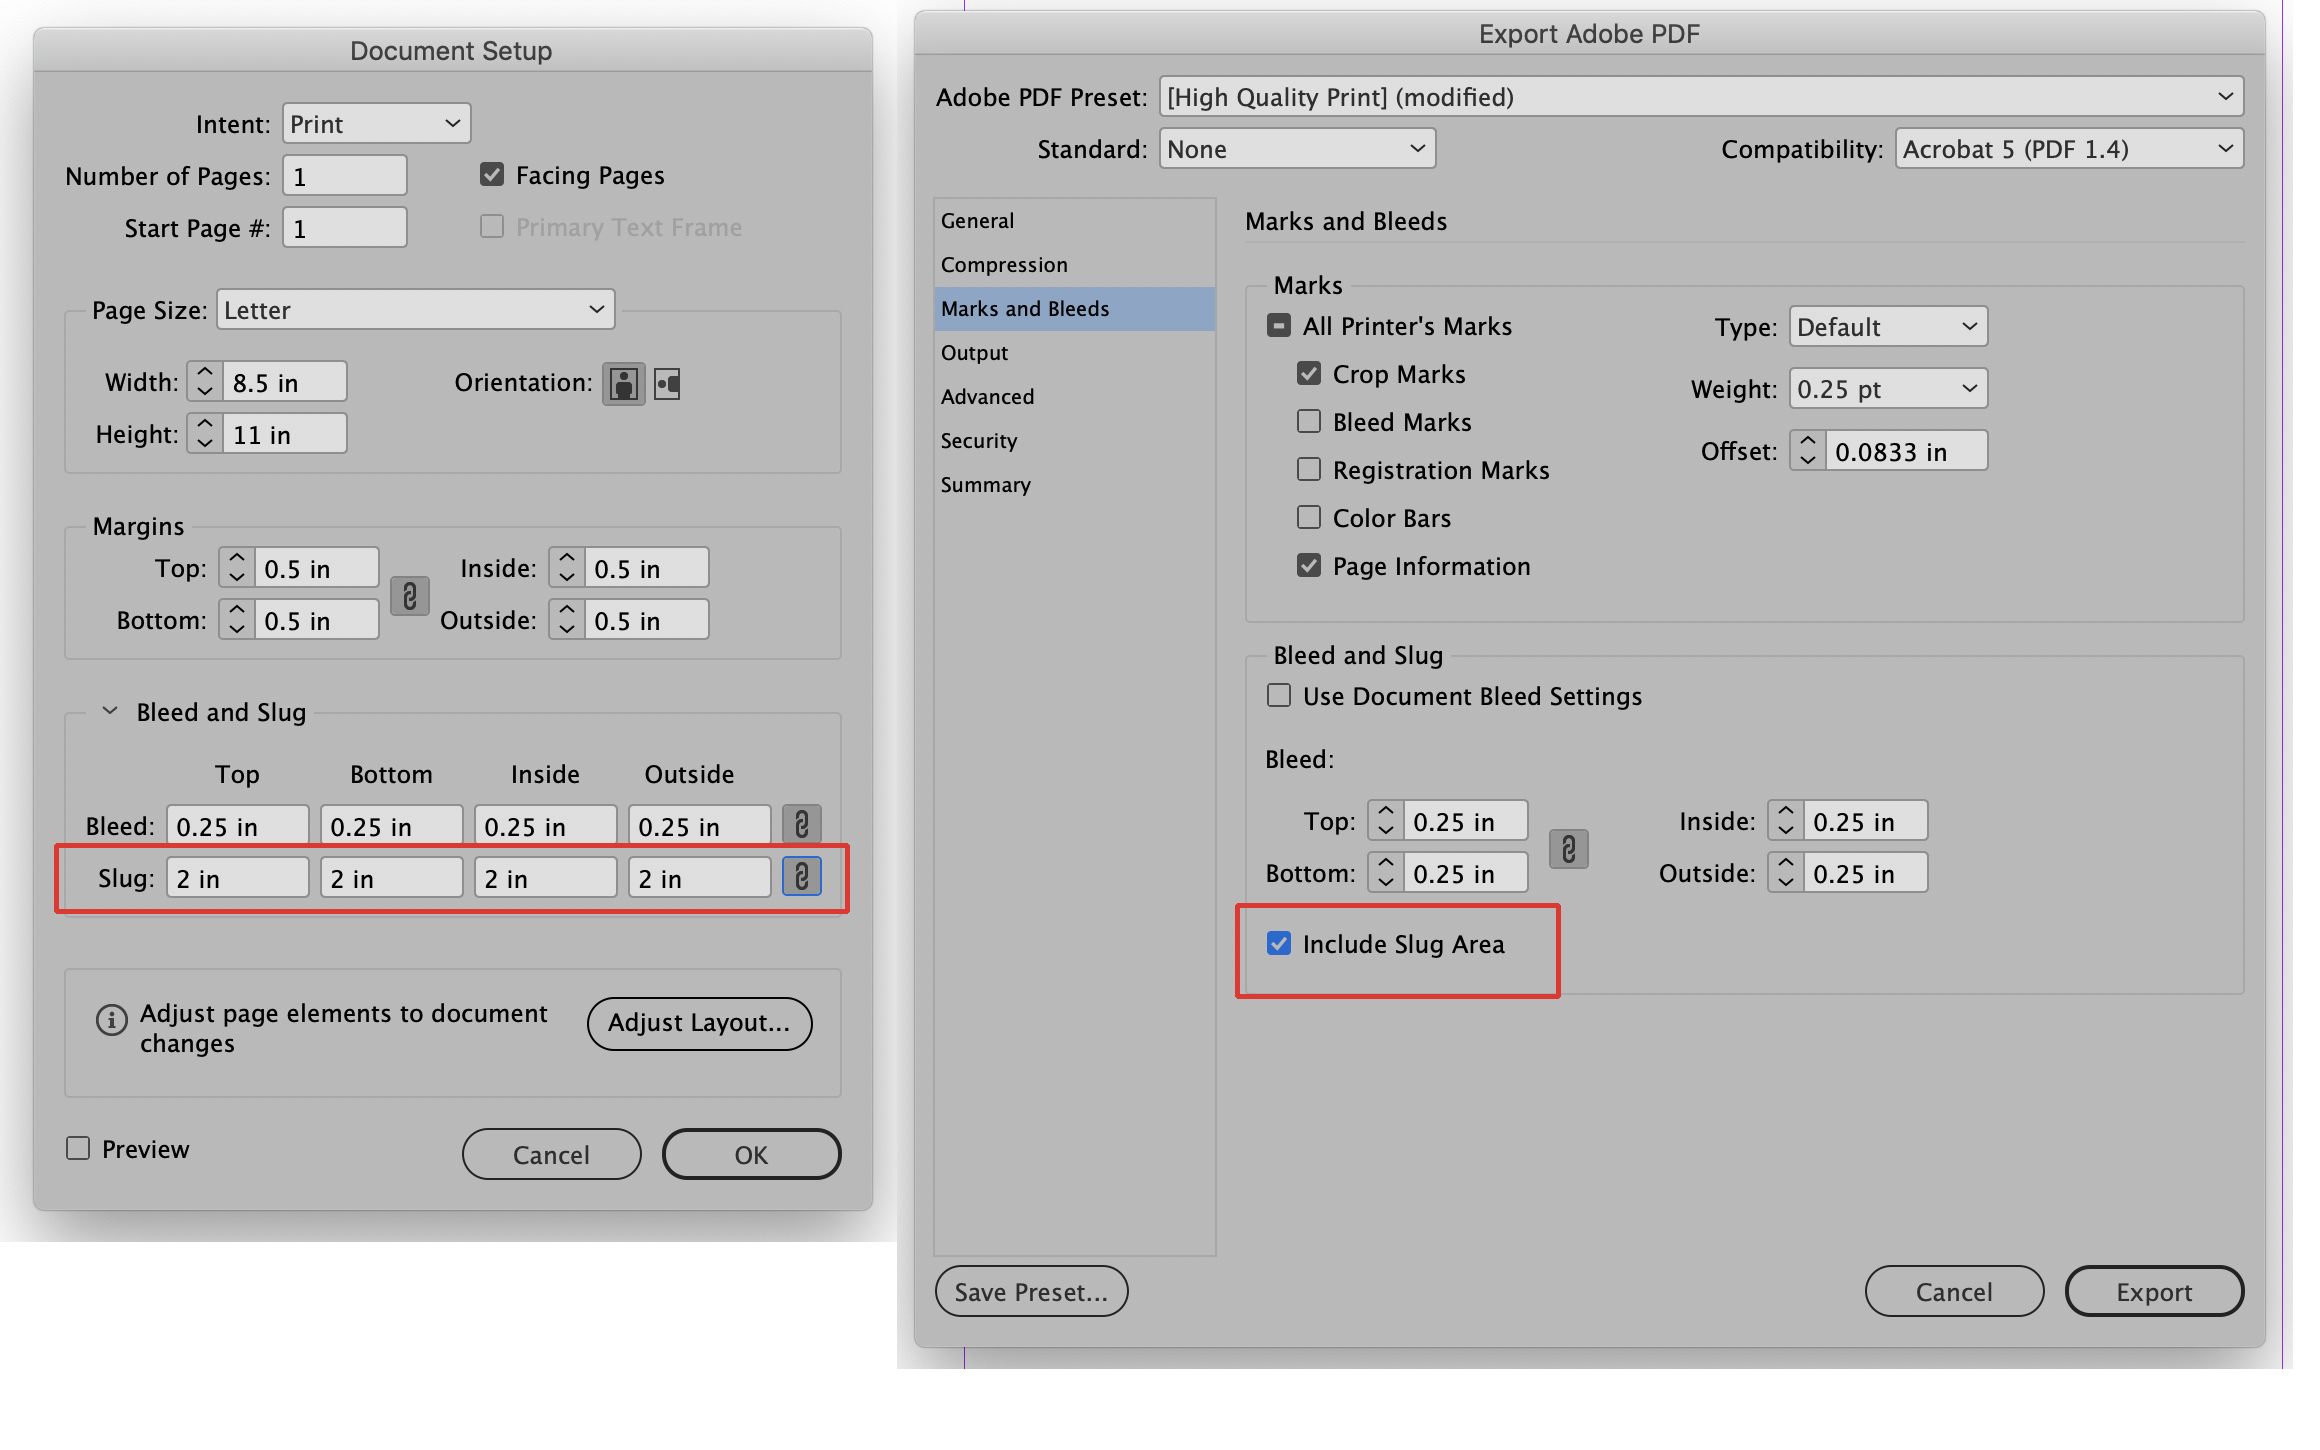
You can add the white space you need without affecting the bleed by adding a slug area to your document. Whatever amount you define your slug as will be the amount of white space that will appear around the image area in the PDF. Use the Document Setup dialog (File>Document Setup) to set the amount of slug needed and then when creating the PDF go to the Marks and Bleeds section of the Export Adobe PDF dialog window and check "Include Slug Area".
Copy link to clipboard
Copied
Thank you for this, great idea, but it still gives me bleed. I want the page to just have white around the area, no bleed. The document does have bleed for printing but I want the customer to just see the trimmed area in a white surround with slug below. Any thoughts? My customer can't visualise the finished item with bleed showing.
Copy link to clipboard
Copied
neoguy32 wrote
I want the page to just have white around the area, no bleed.
All you have to do then is make the bleed settings zero and uncheck Crop Marks and Page Information (see the right picture of the Export Adobe PDF window in my first post).
Copy link to clipboard
Copied
It does not seem to work, it is like the slug will include anything in the slug area area.
0 bleed
included slug
20mm slug all round
I still get bleed items showing.
Copy link to clipboard
Copied
Try also setting the bleed to zero in the Document Setup dialog window. If that does not work, please upload a screen shot of your Document Setup and Export Adobe PDF (marks and bleeds section) dialogs so we can see that all settings are correct.
Copy link to clipboard
Copied
Does not work, if I include slug in printing it will include anything that is in that area.
Copy link to clipboard
Copied
There might not be a way to get what you want without some manual work, and perhaps different versions of the artwork for client display vs. hand-off for print.
In that context, you could pretty easily crop out all that unwanted bleed matter just using frames. Images can be cropped to the trim (or bleed) just the way they are (frame adjusts independent of the image), and other elements can be pasted into one or more frames using Edit Paste Into, after which they can be frame-cropped just like images.
Copy link to clipboard
Copied
If you have already done many PDF and you don't want to remake them to add the slug area (best way to make it right away), you may add that space by altering the CropBox in Acrobat (not Reader).
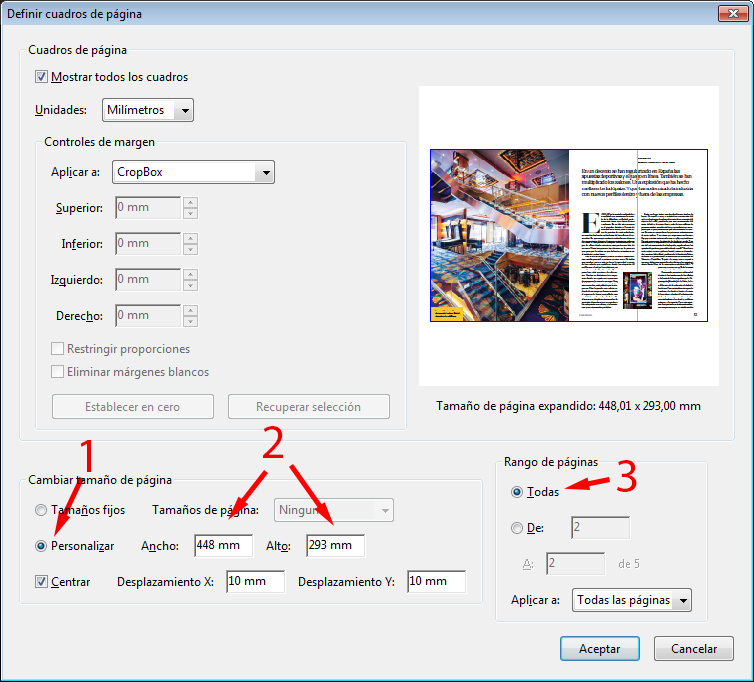
Just go to tools in Print production area and select "Set page Boxes). There, change Page size as custom (1), Add the needed excess (20 mm for 10 mm, etc.) to the new page size (2), select all pages (3).
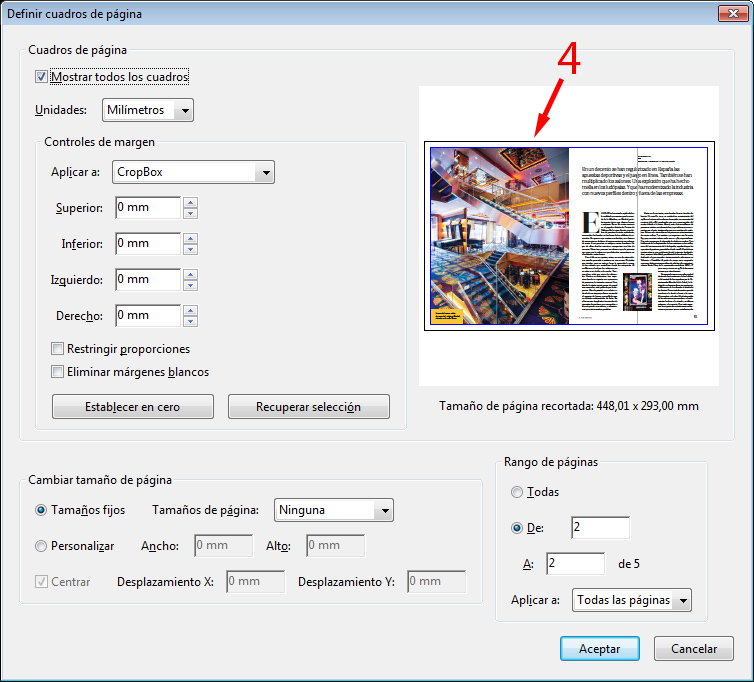
There you are (4)
Copy link to clipboard
Copied
Thank you for all your advice.
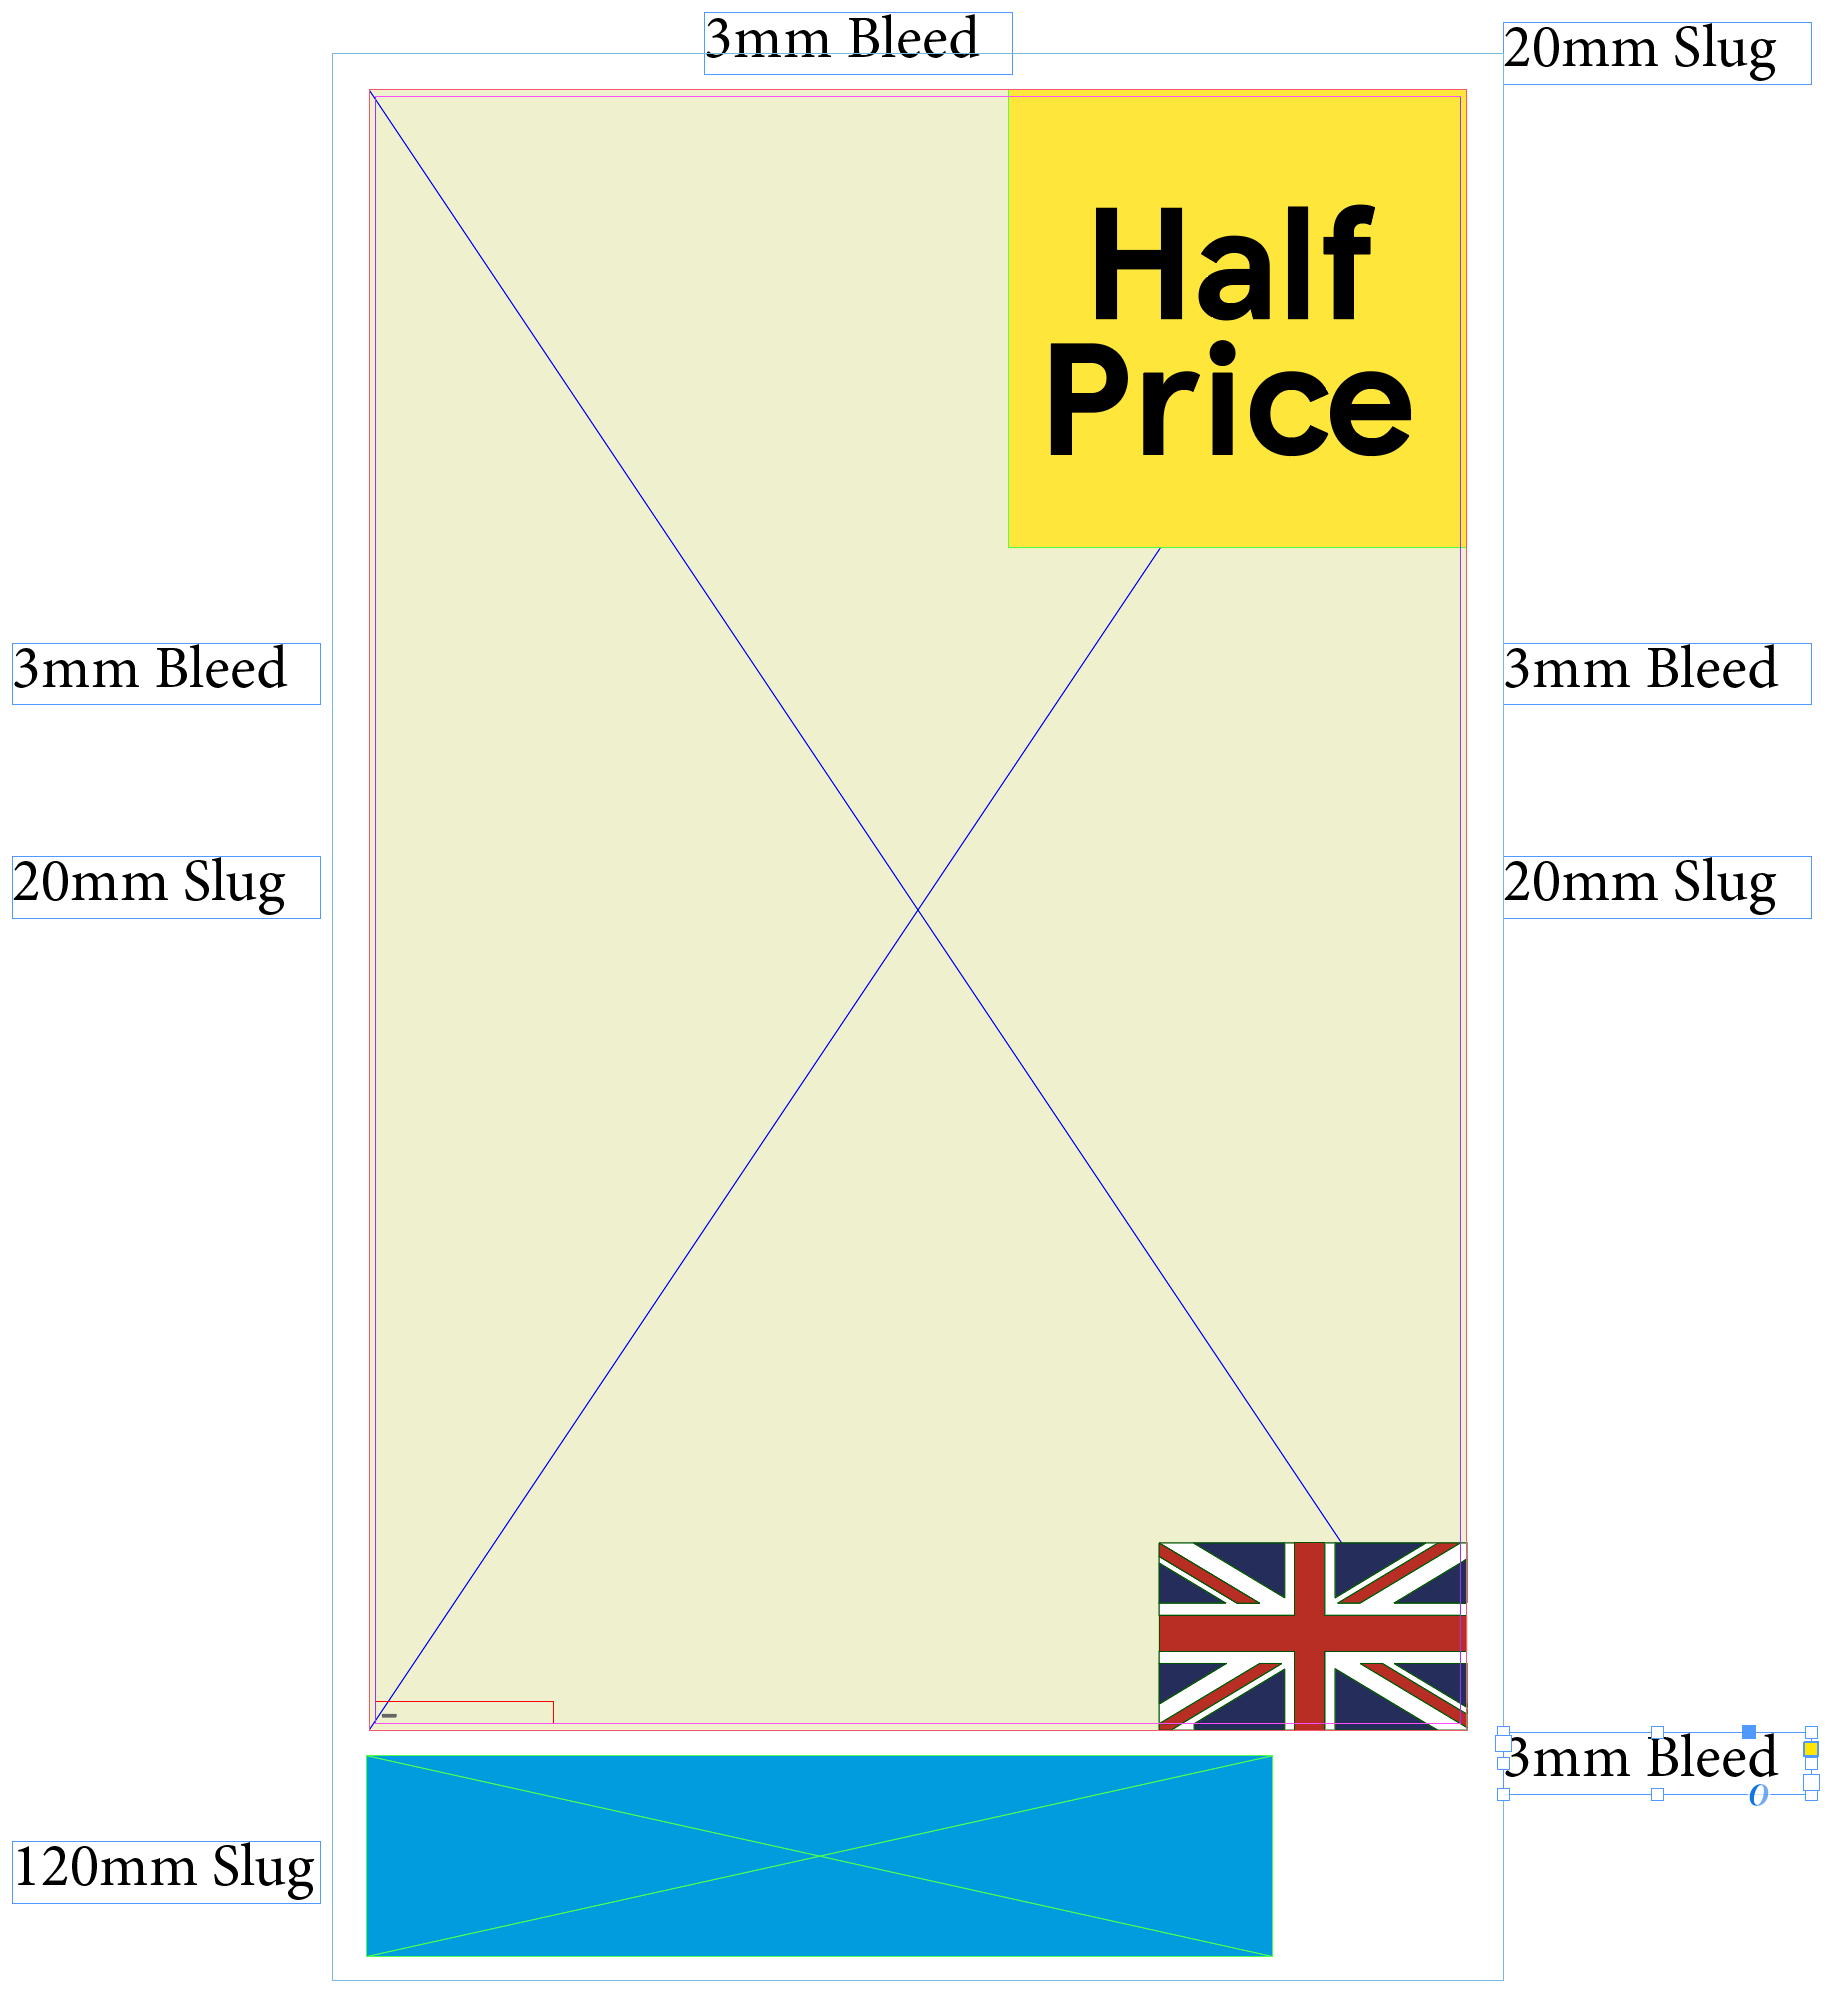
This is what my customers wants from me as a final pdf. No bleed, white around the edges to clearly see the final print.
And each artwork to fit onto an A4 regardless of shape and size.
I have a script to add borders.
A lot to ask I know, any ideas?
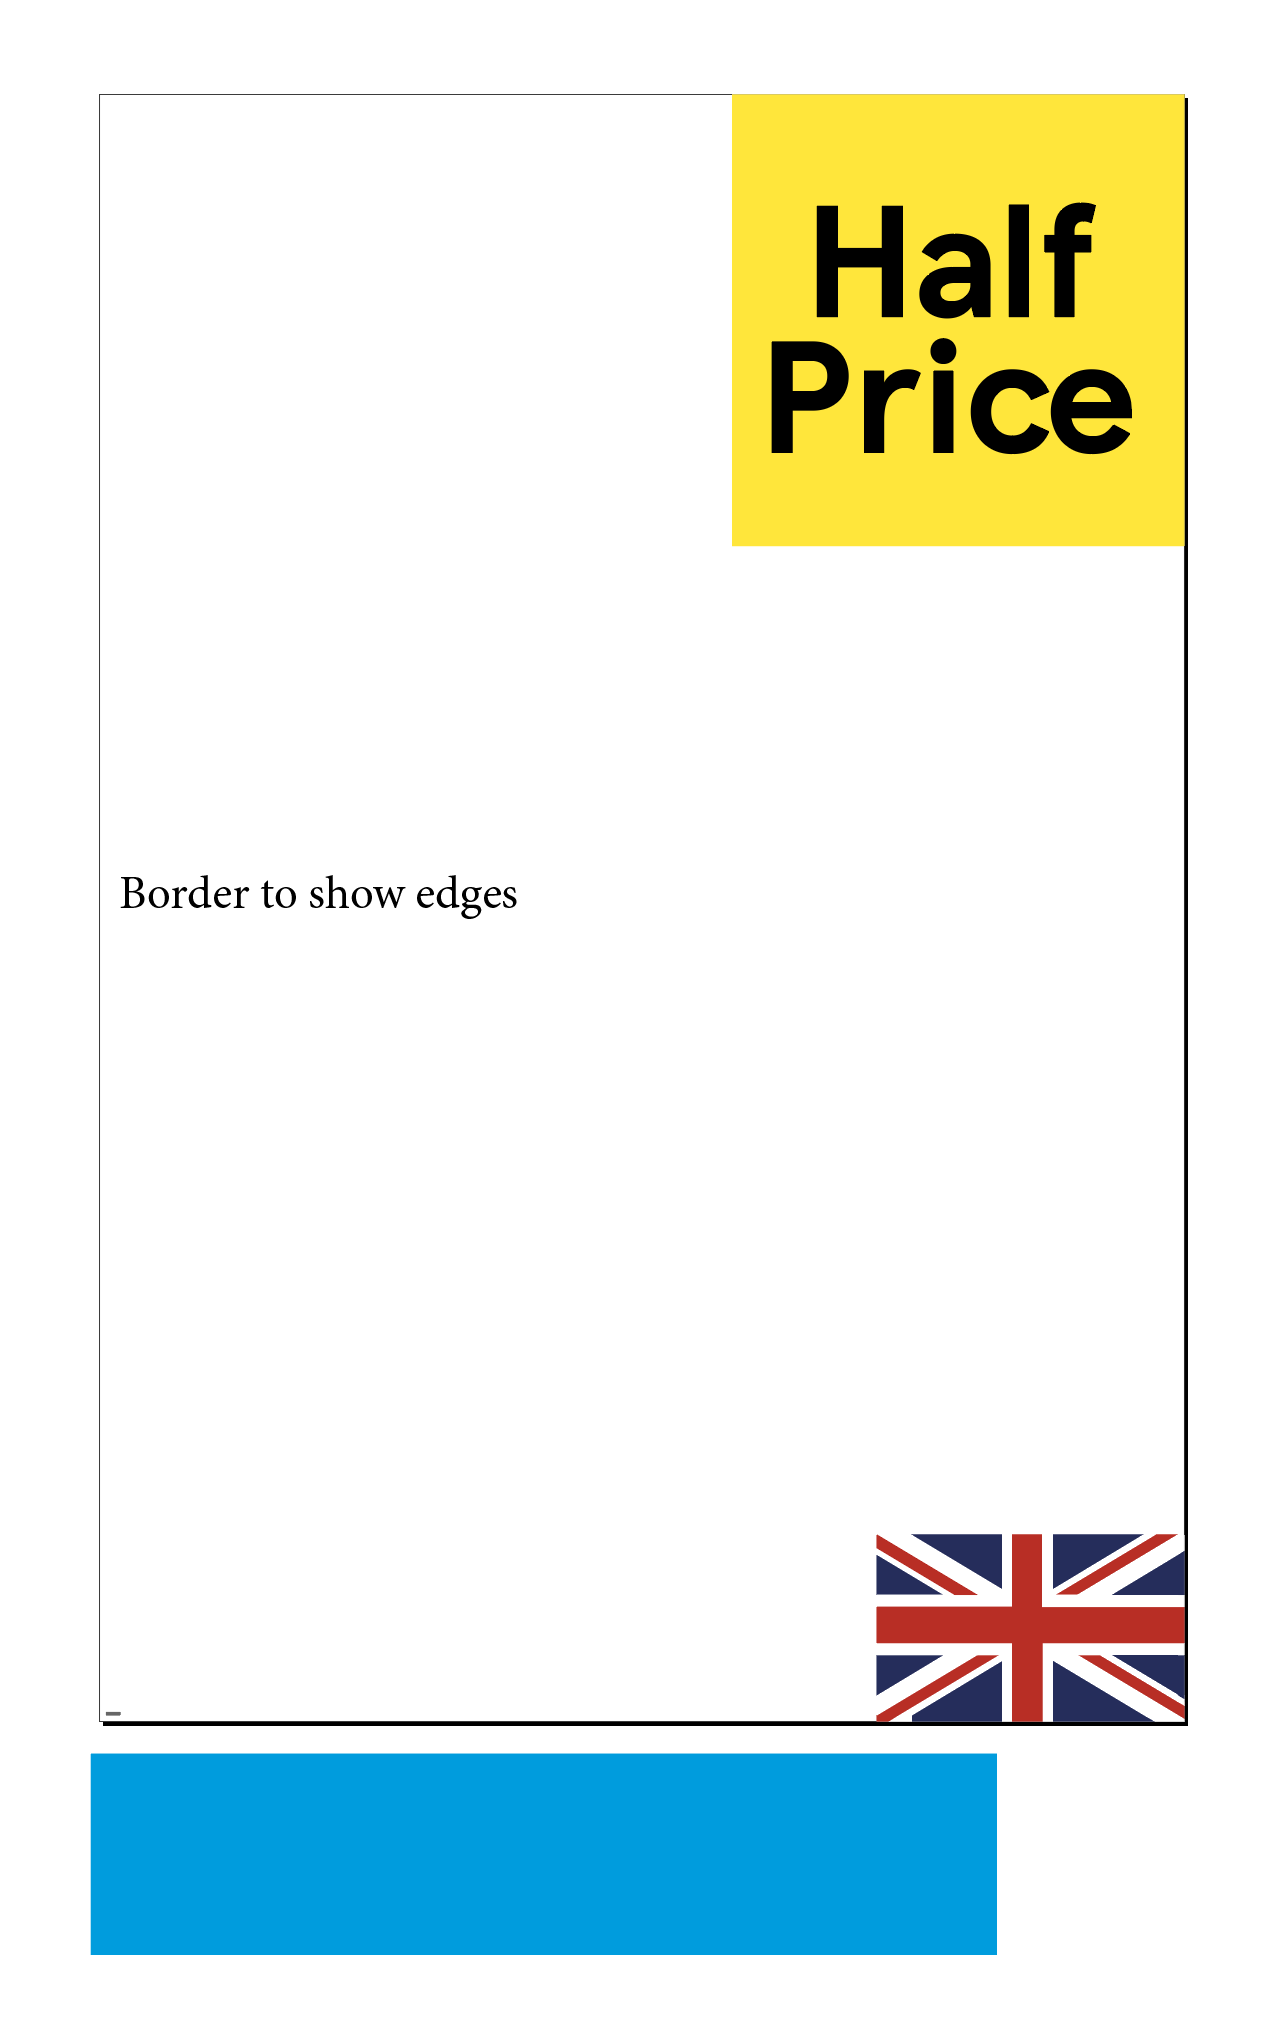
Final output must be all A4 PDFS for proofing, regardless of size of artwork.
Copy link to clipboard
Copied
Use Acrobat to change CropBox and add "Displacement Y" as needed.
Best regards


