

Multiply function in effects

Copy link to clipboard
Copied
Hi. In InDesign, when I set an image to Multiply (in effects), all images screen back.
Why do images screen back when using the multiply function?


 22
Replies
22
22
Replies
22

Copy link to clipboard
Copied
Do you have a screenshot you can share to understand what's happening exactly. I'm not sure what you mean by screen back.
Copy link to clipboard
Copied
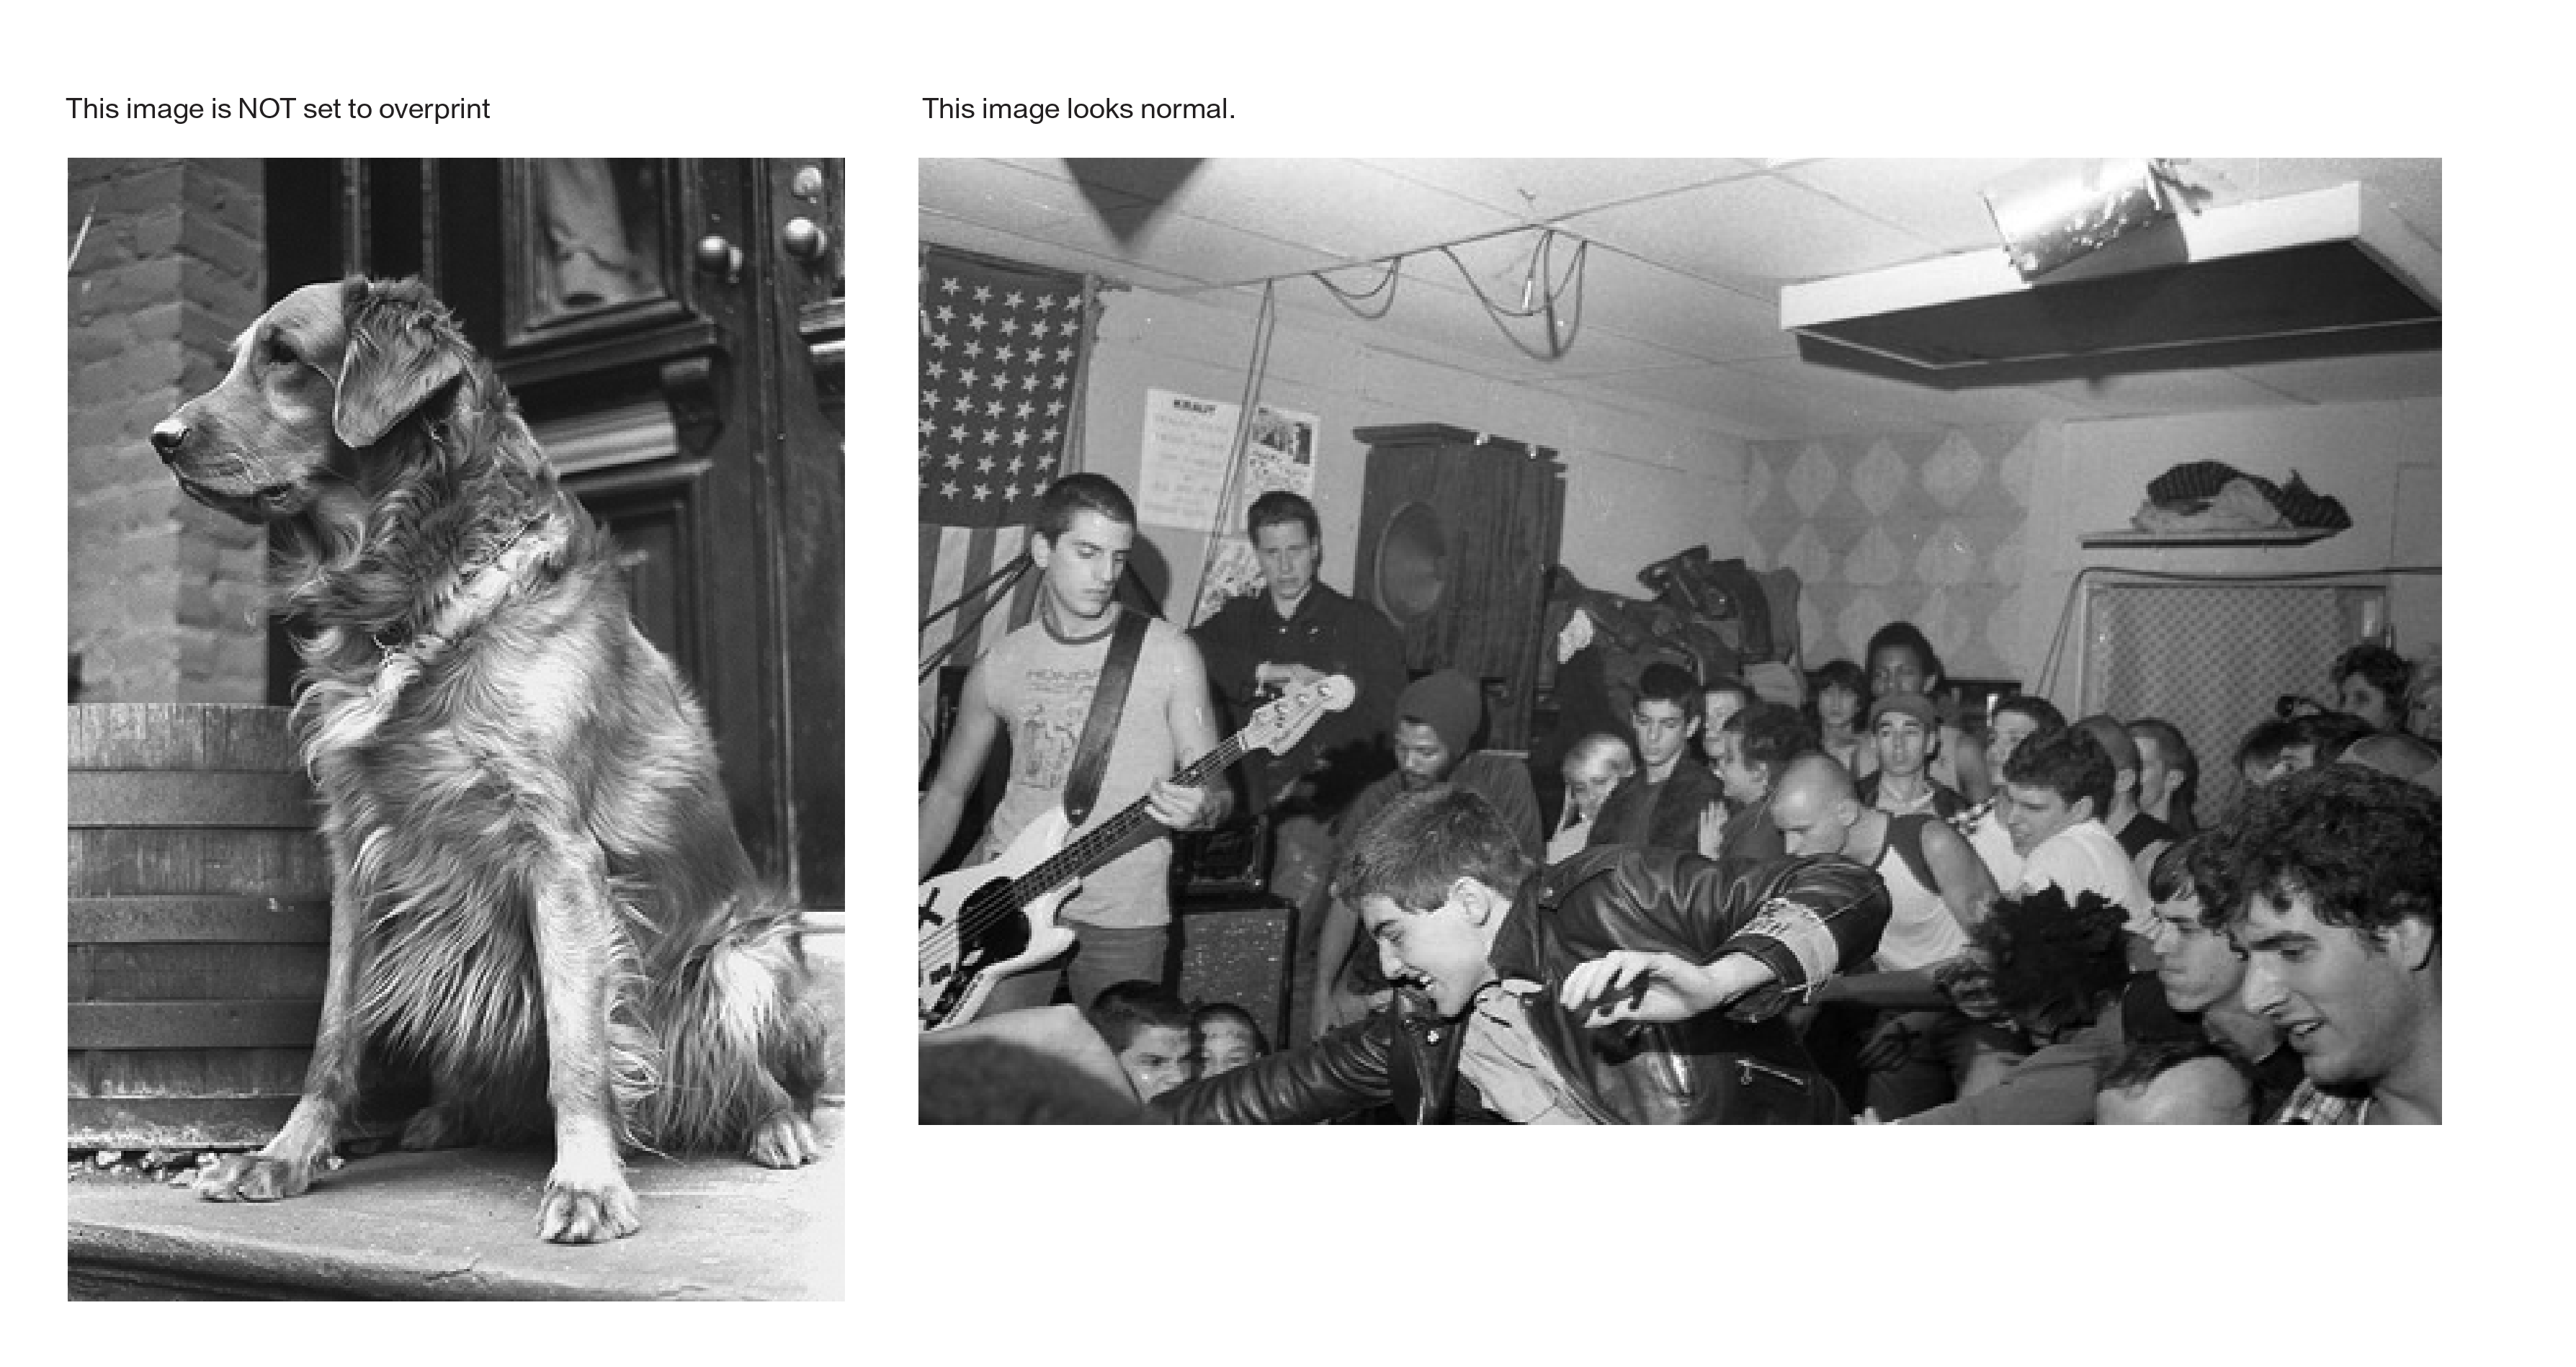
Hi. here are two screen grabs. The first, the dog image is NOT set to multiply. Both images are accurate.
The second image has the dog image set to multiply. Both images now appear lighter than they actually are.
Conny
~~~~~~~~~~~~~~~~~~~~~~~~~~
[Personal info removed by moderator]
~~~~~~~~~~~~~~~~~~~~~~~~~~
Copy link to clipboard
Copied

Copy link to clipboard
Copied
Both images are grayscale images.
It doesn't happen with CMYK and RGB images. Only grayscale images.
Copy link to clipboard
Copied
I can see now.
Thank you for sharing the screenshots.
I believe your images are tiff grayscale images and the color you're choosing to fill those images is in Pantone Spot color?
If so, it will be only a preview issue, sometime it can be fixed by moving out one of the images to the pasteboard.
Copy link to clipboard
Copied
Hi. Do you know if there is a way to make InDesign preview the images correctly?
Copy link to clipboard
Copied
Usually overprint preview will help previewing the images better.
Copy link to clipboard
Copied
Do you mean that this is not just an on-screen effect? InDesign is actually altering these image, making them a lighter (screened-back) version of themselves?
And, thanks so much for the help!
Copy link to clipboard
Copied
on screen effect is related to the color profile of the application it self. some use different ones, so in some applications you will see them different from each other.
The image you are using is a single color tiff, so the color you pick for it in InDesign is the one you will see.
So if you pick black (100k) you will see it in black, or if you pick some Pantone color you will see it in that color.
It will help me if you can select the image with the direct section tool and take a screenshot showing the color palate too.

Copy link to clipboard
Copied
InDesign is actually altering these image, making them a lighter (screened-back) version of themselves?
If you keep the blend space as CMYK, Overprint Preview is just showing you a more accurate press preview, the grayscale values will export or print unchanged to the Black CMYK channel.
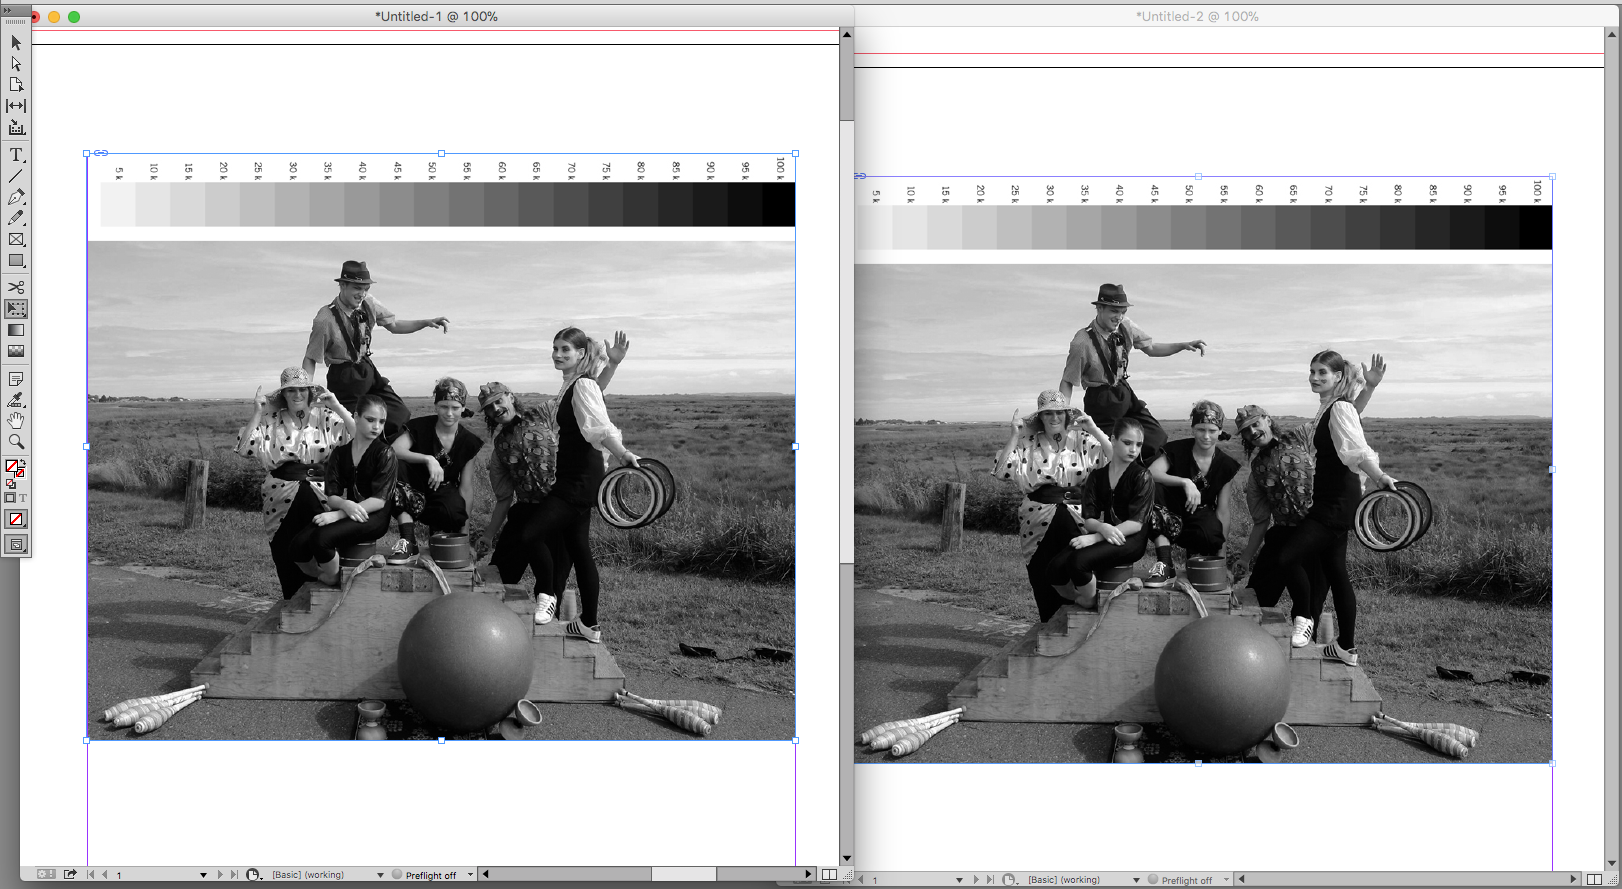
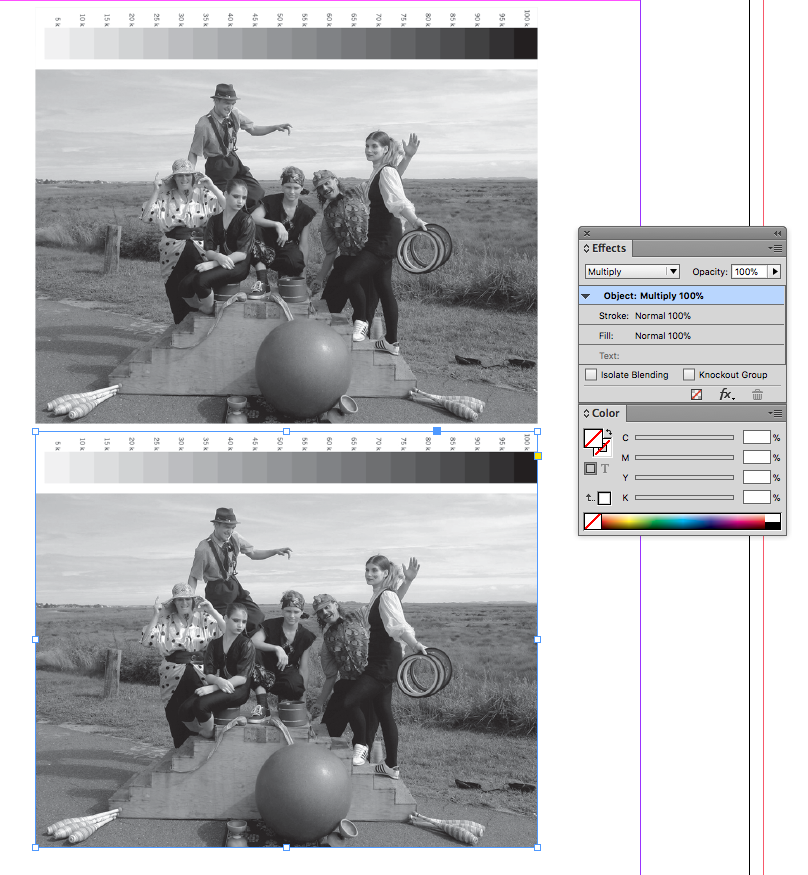
This shows the effect of the assigned CMYK profile when OP Preview is on. On the left the profile assignment (Edit>Assign Profiles...) is US SWOP Coated, on the right it's US Newsprint SNAP. The preview is showing me what is expected to happen if I print the same grayscale values on the black plate under the two different press conditions

With OP Preview off I get the 2.2 Gamma (sRGB, or sGray) screen preview—the output values are not changing, just the preview.
Copy link to clipboard
Copied
Both images are grayscale images.
When there's a transparent object on the page and your Transparency Blend Space is set to CMYK, or you turn on Overprint Preview; grayscale images display using your document's CMYK profile. The preview might change depending on the assigned profile.
With Overprint or Separation Preview turned off grayscales preview as 2.2 Gamma or sGray. The dual preview helps if you are designing for screens and you don't want the press CMYK preview.
You can also set your Transparency Blend Space to RGB and your Multiply example won't change, but it will convert to 4-color CMYK if you export for print.

Copy link to clipboard
Copied
Hi Stephen:
Let's back up a second and talk about blending modes: they blend the pixels on top with the pixels underneath to produce a new effect. Multiply will darken the dark pixels and leave the light ones alone. It's a common technique used in Photoshop to enhance the contrast and pull out details in old faded b/w photos (but my screen shots are in InDesign since that is where you are working).
Original photo:
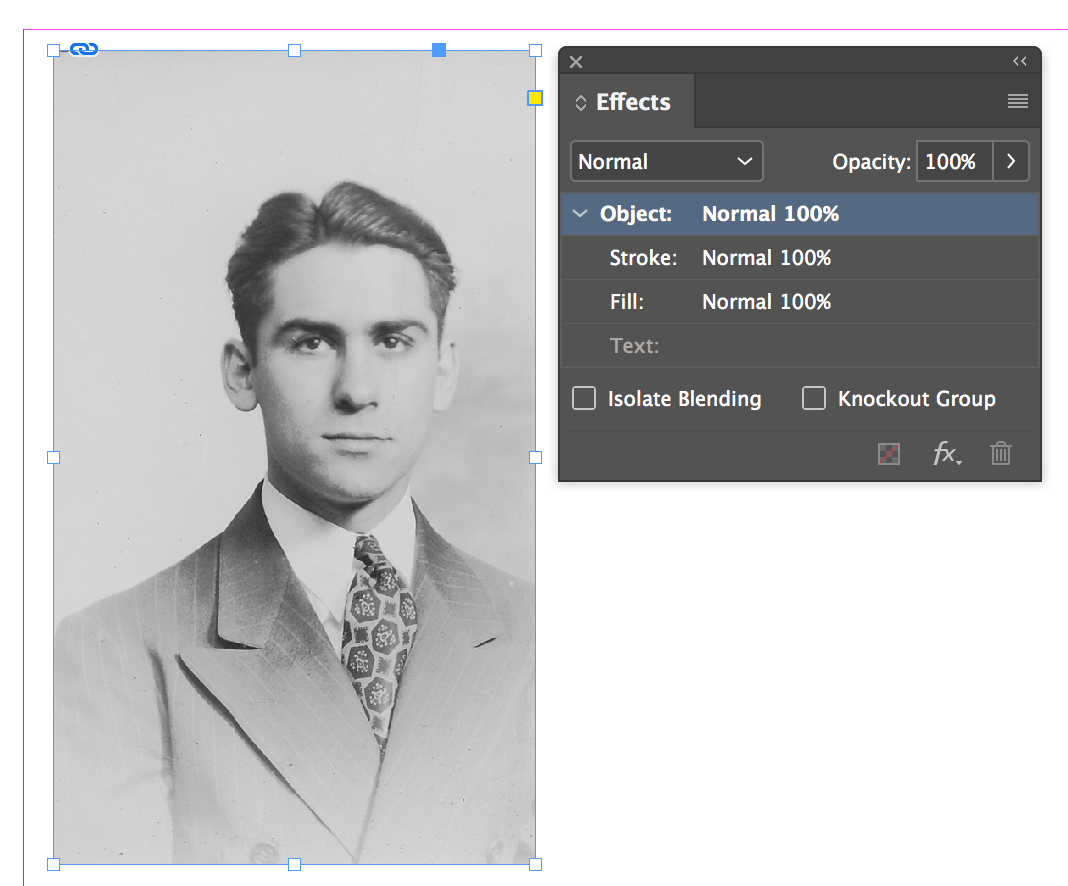
Duplicate copy on top, blending mode set to Multiply:
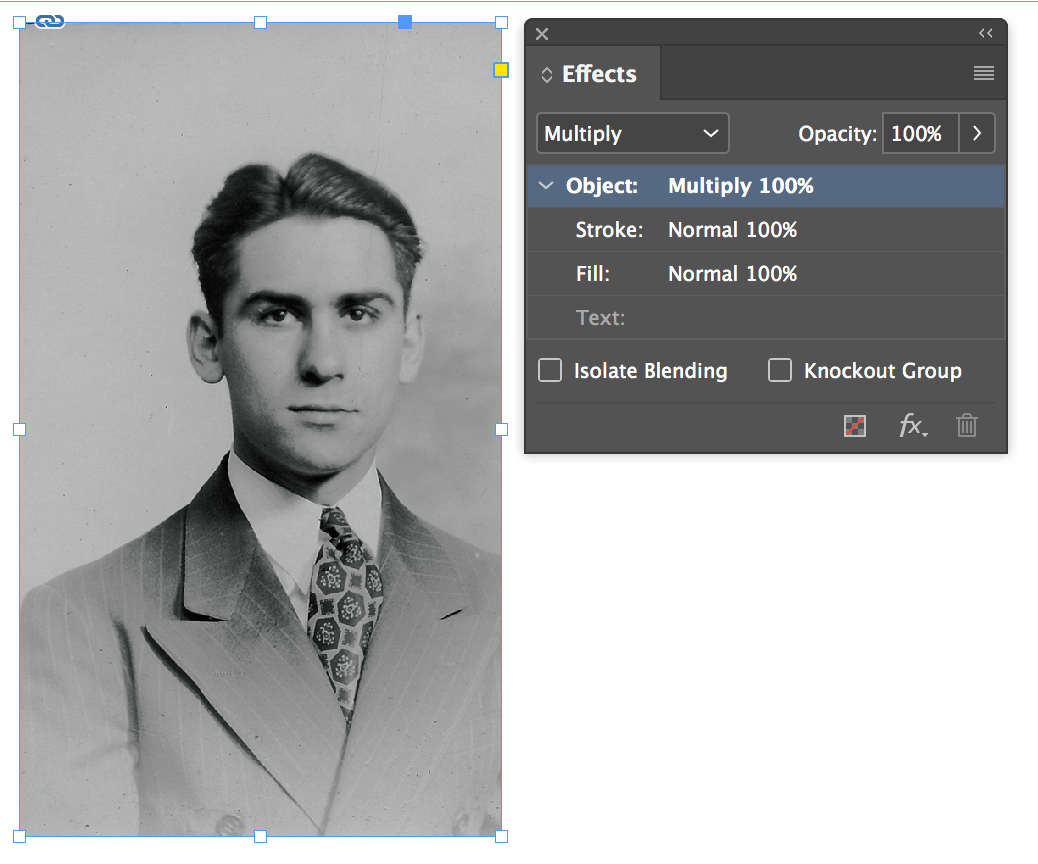
Multiply always darkens, which you seem to understand, so I'm curious Stephen, what is under your b/w images—what are you blending with?
~Barb
Copy link to clipboard
Copied
Barb, your image's container frame must have a color fill that the image is multiplying with?
If I set the fill to [None] there's nothing to multiply and the images preview the same:
Here Multiply changes the image, but only because I have a 21% K fill behind the image

Copy link to clipboard
Copied
Yes, Multiply has to interact with something. That's what I was trying to figure out—what is Stephen multiplying with first, and second how is Multiply screening back the images. I suspect your first responses are going to be the correct answer, but I was trying to go to back to figure out the workflow, which doesn't make sense to me, yet.
~Barb
Copy link to clipboard
Copied
I think the multiply part in this case is a bit of a red herring—it's invoking the CMYK Transparency Blend space which is going to change the way the page previews. The dual grayscale preview in InDesign can be pretty confusing.
Copy link to clipboard
Copied
so I'm curious Stephen, what is under your b/w images—what are you blending with?
Try placing a grayscale image with your Transparency Blend Space set to CMYK and then either add a transparent object to the page or turn on Overprint Preview. That should change the preview of any grayscale images.
Unless your Appearance of Black Preferance is set to Display Blacks as Rich Blacks
Copy link to clipboard
Copied


Copy link to clipboard
Copied
It also happens when the "A" and "B" drawings are grayscale JPEG files.
Copy link to clipboard
Copied
It's expected behavior with grayscale images.
Set your Transparency Blend Space to RGB and the preview won't change, but if you are outputting separations for a printing press the RGB blend space will convert the grayscale to 4-color CMYK. You can use the Separation Preview panel to check the expected output values.
Here are a couple of related threads on grayscale color management:
Copy link to clipboard
Copied
Hi. How do you adjust your Transparency Blend Space?
Copy link to clipboard
Copied
Edit > Transparency Blend Space
Copy link to clipboard
Copied
Hi. How do you adjust your Transparency Blend Space?
Just keep in mind the RGB blend space will convert all grayscales on a spread with any transparency, visible or not, to RGB. If the destination is a printing press the output values will no longer be the original gray values.

Find more inspiration, events, and resources on the new Adobe Community
Explore Now
 AdChoices