

- Home
- InDesign
- Discussions
- Re: Add Full Date to Indesign layout, one page at ...
- Re: Add Full Date to Indesign layout, one page at ...
Add Full Date to Indesign layout, one page at a time

Copy link to clipboard
Copied
Hello,
I am a complete newbie to Indesign. I am trying to make a very simple journal, and I have my pages laid out as I want. I would simply like to add the dates at the top of each page. I have 365 pages, and I would like to start at Jan 1 and end at Dec 31 2018. I just want to add one date to each page. I would like to add them in the top left corner of each page, and I would like the format to be January 1, 2018, January 2, 2018 (etc).
I have absolutely no idea of how to do this. Can someone please help me figure this out?
Thanks


 6
Replies
6
6
Replies
6

Copy link to clipboard
Copied
See if this script can be of use: Calendar Wizard Home

Copy link to clipboard
Copied
Or, if you have Excel (or a friend with Excel) and don't want to spend any money...
- Use Excel to type in the first date, format.

- Use the Autofill handle to duplicate.
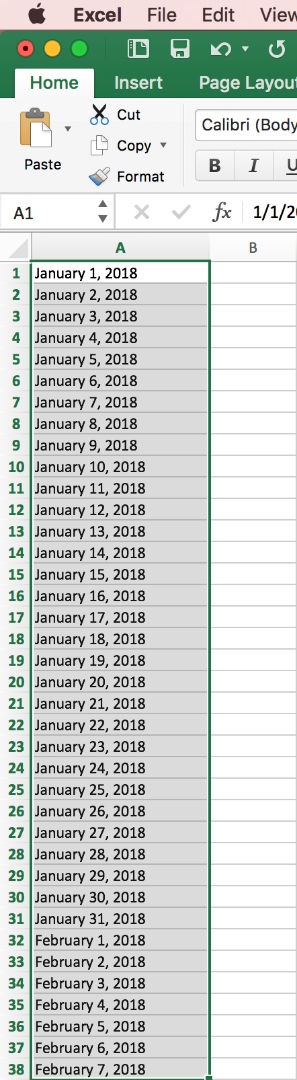
- Save as a text format (not as an Excel spreadsheet or worksheet).
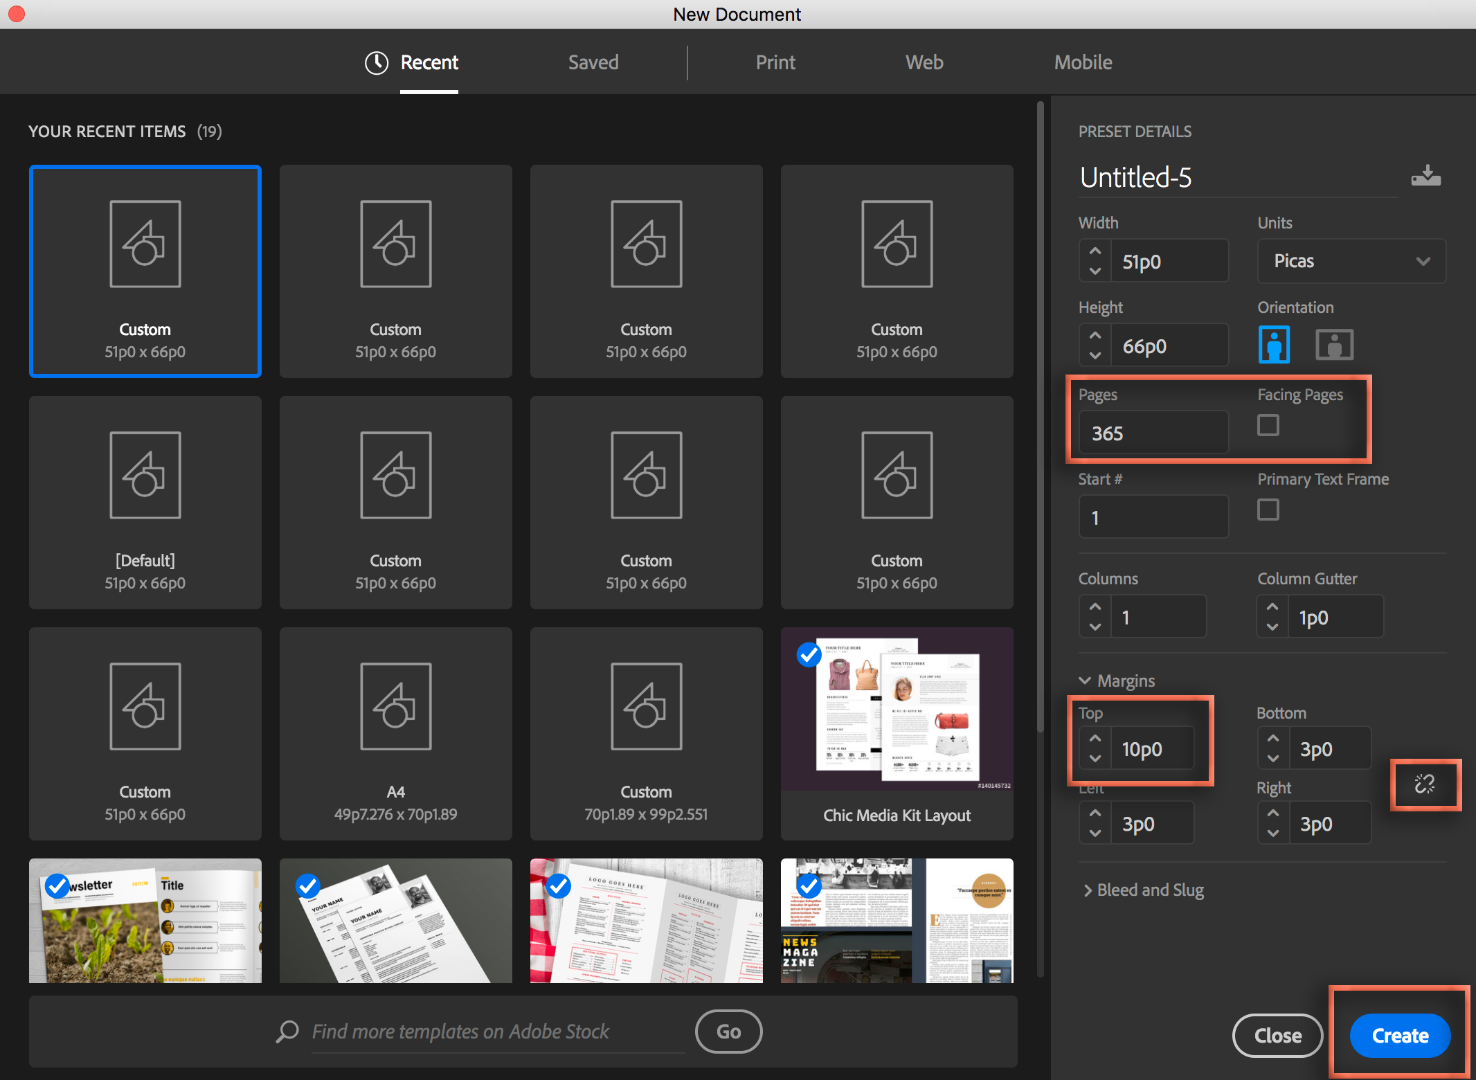
- Open InDesign, and create a new document with 365 pages and a large top margin:
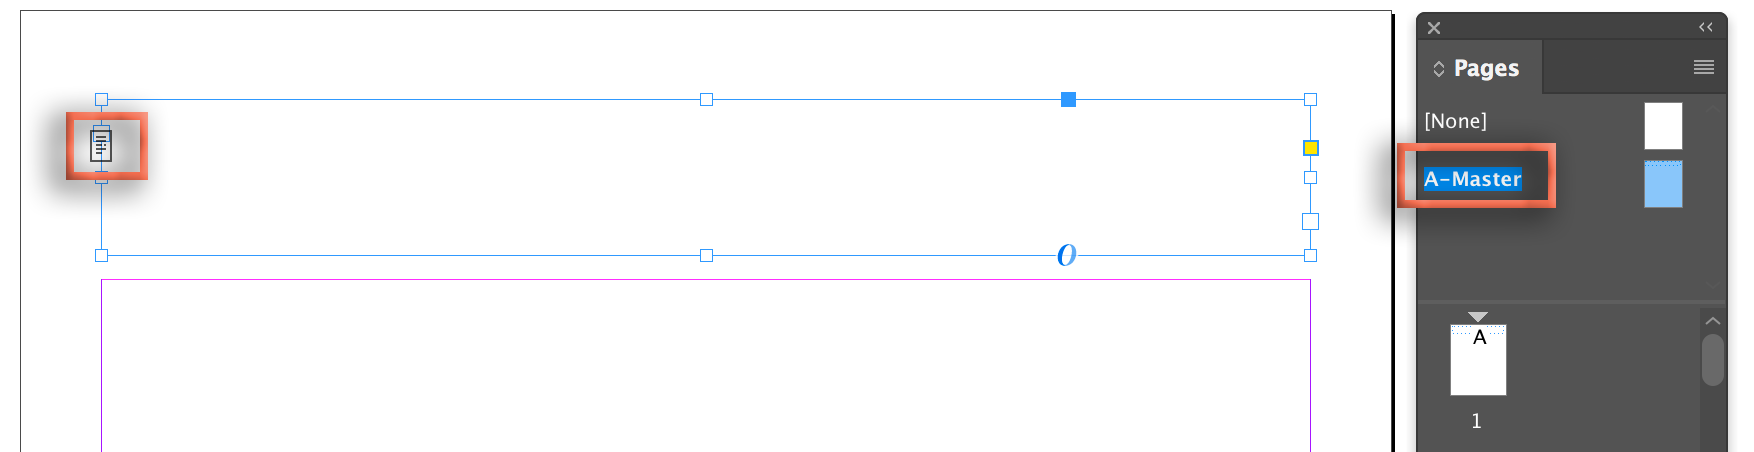
- In the new document, double click A-Master in the Window > Pages panel. Use the Type tool (the T) to add a text frame at the top, and click the grey icon to designate the text frame to designate it as the document's primary text flow. This frame will hold the dates.
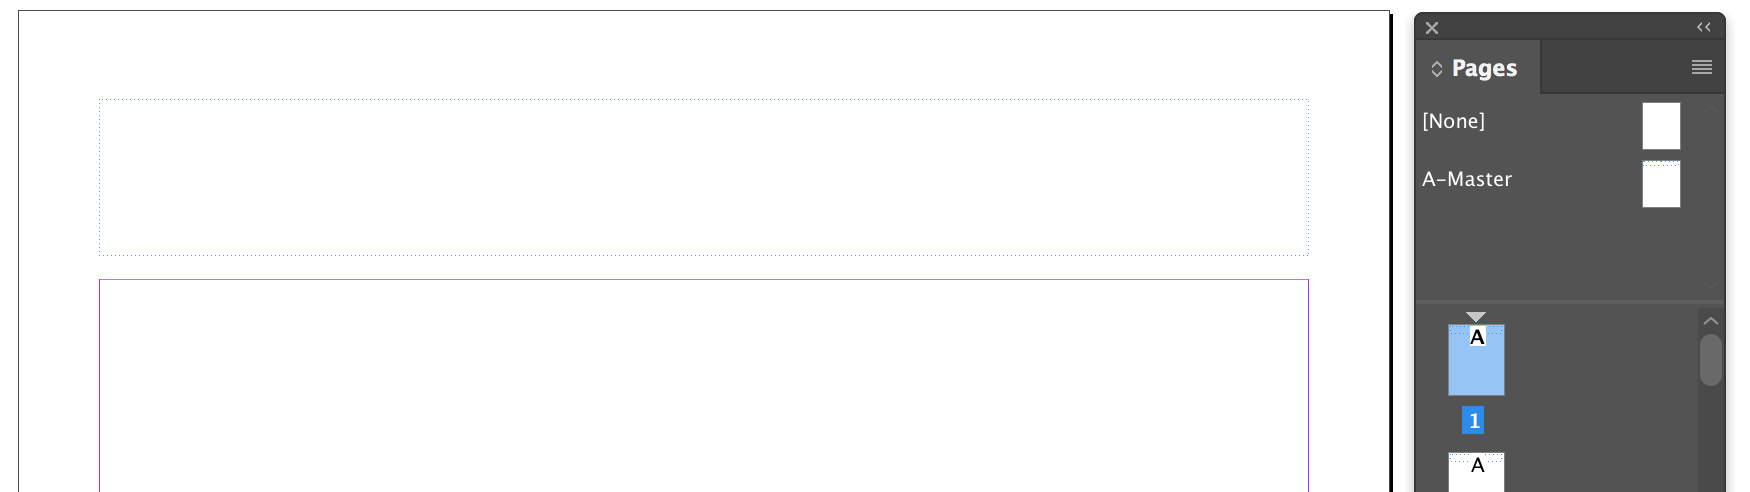
- Double click on the page 1 icon in the Pages panel to return to body page 1.
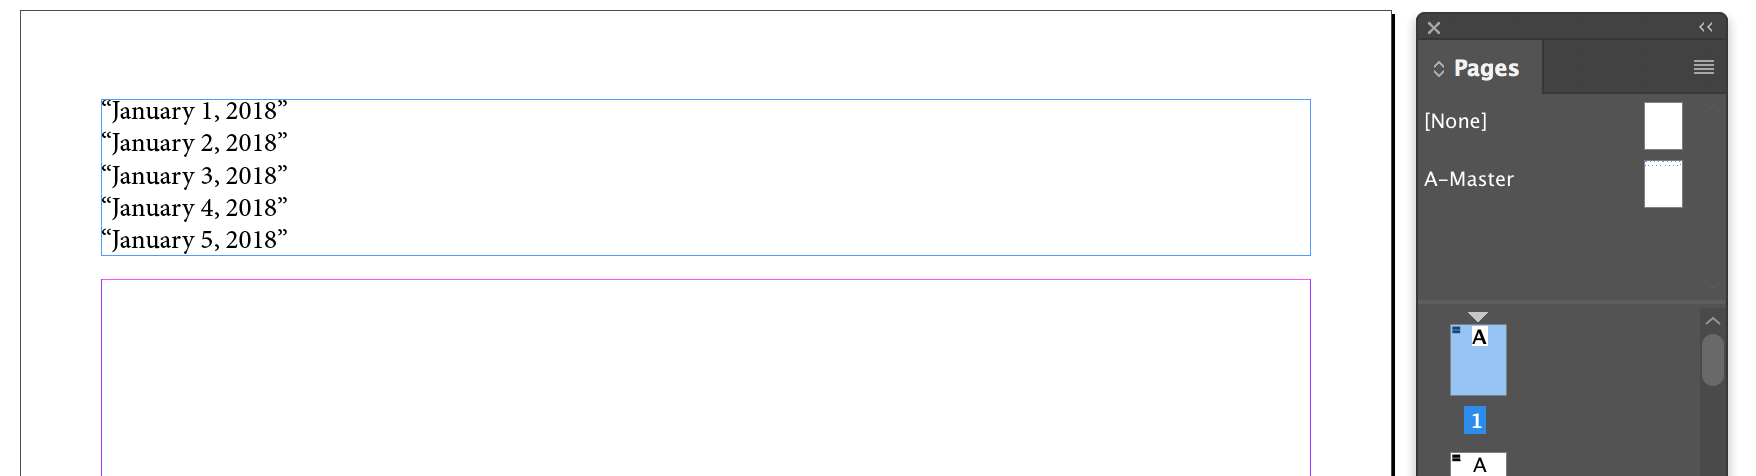
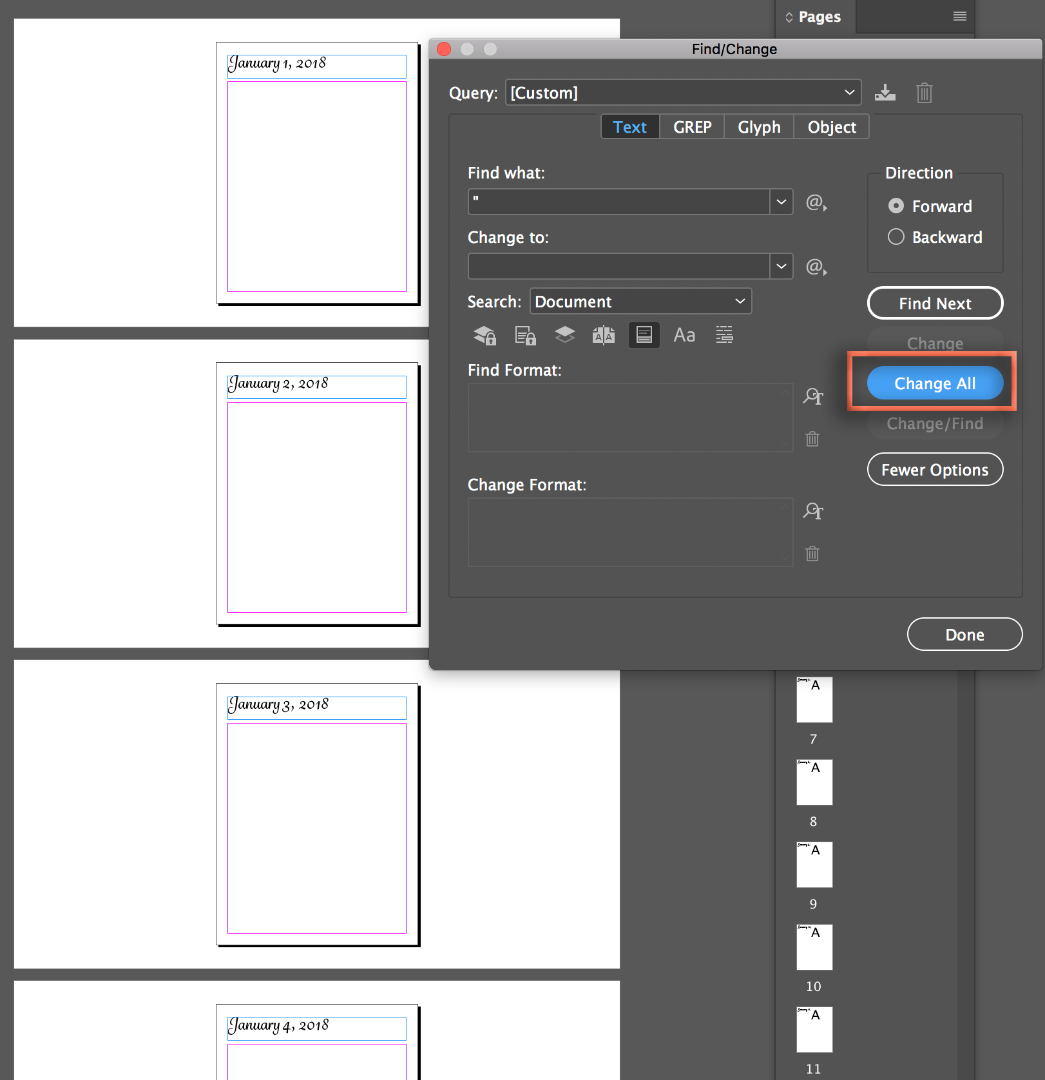
- Choose File > Place and select the text version of the Excel file. Shift + Click over the text frame on page 1 to auto-flow the entire file. (Note that the dates appear in quotes. I don't know Excel well enough to have already removed them, so I'd just remove later them via find/change in InDesign. )
- Click on the text with the Type tool (the T) and choose Edit > Select All.
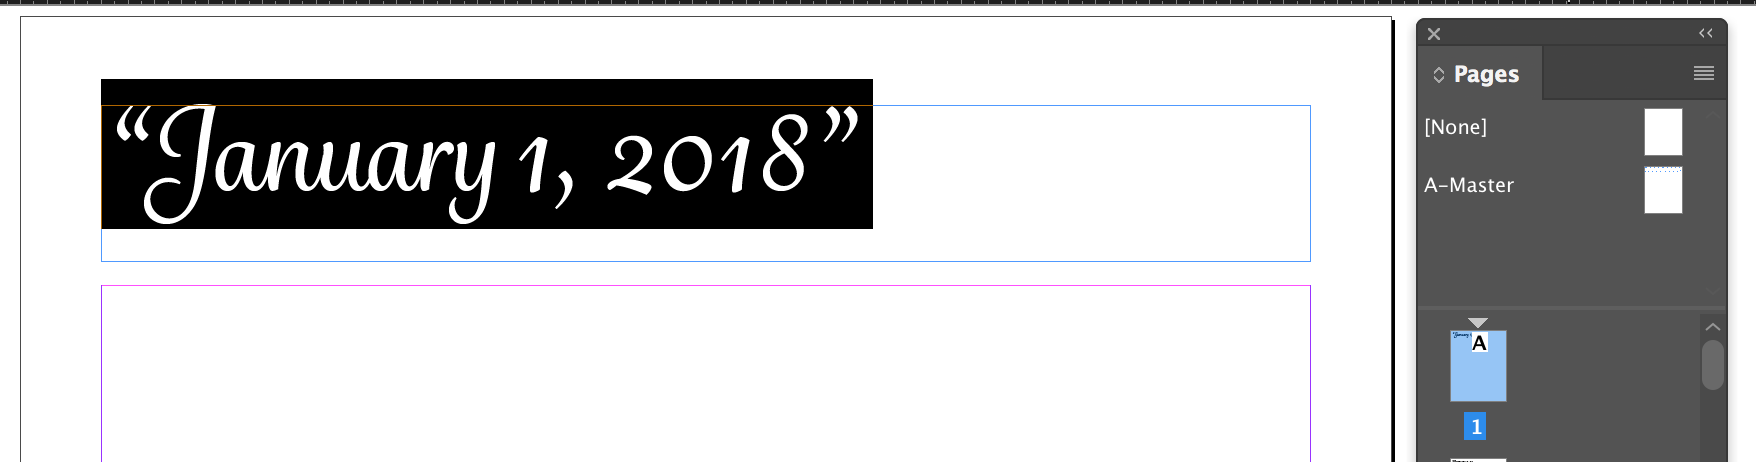
- Format as desired. I made my text large enough that just one date appears in the frame. You could also add a Start Paragraph at Top of Frame in Keep Options, or return to the A-Master and make the primary frame smaller.
- The dates now appear on each page automatically.

- Finally, if necessary, remove the quotes with Edit > Find/Change:
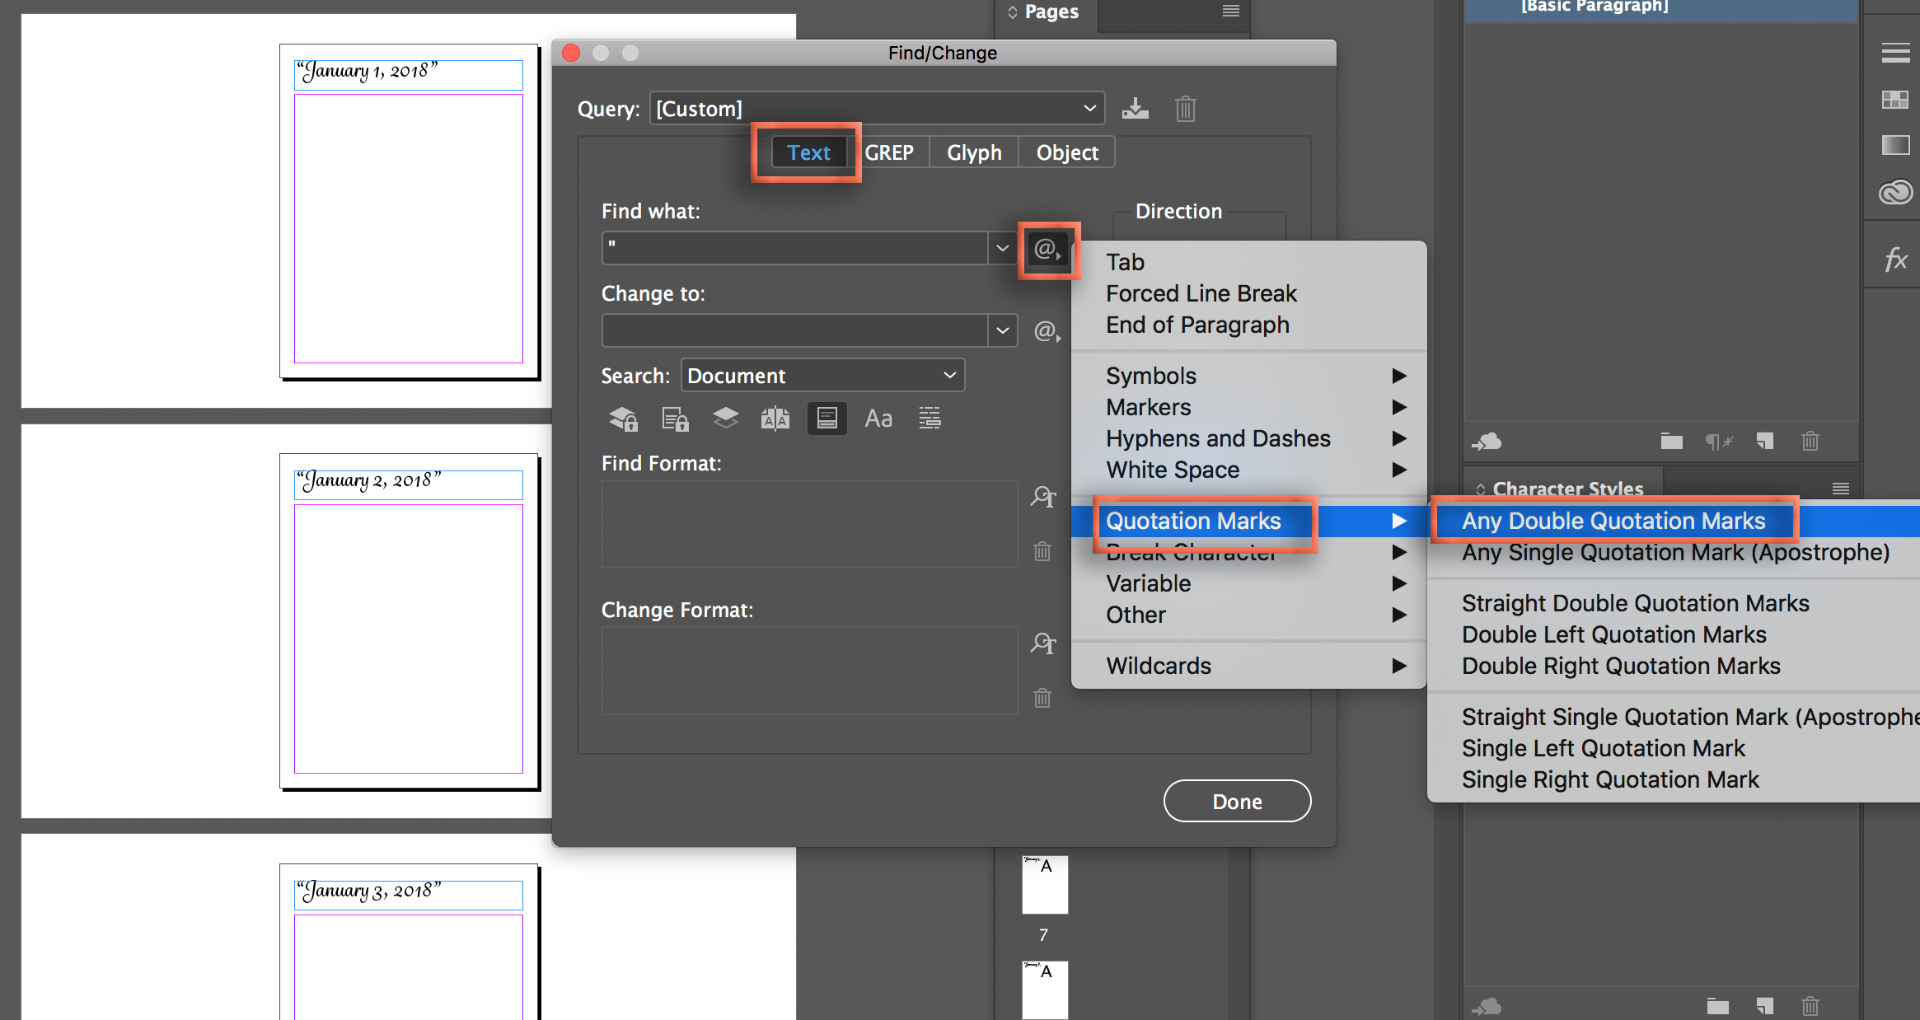
- Change All.
~Barb

Copy link to clipboard
Copied
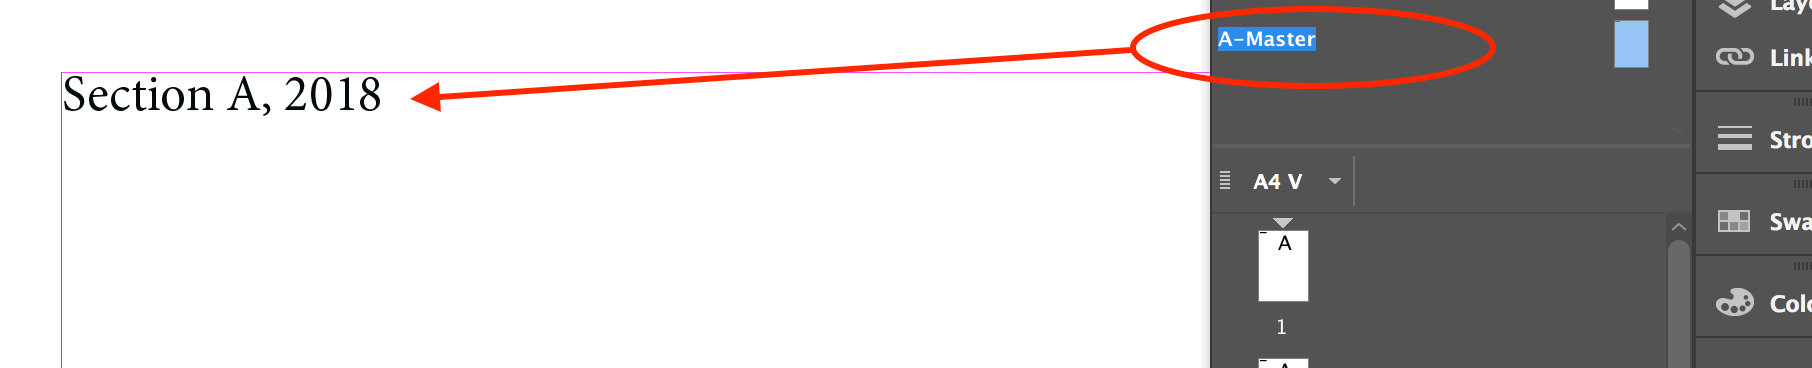
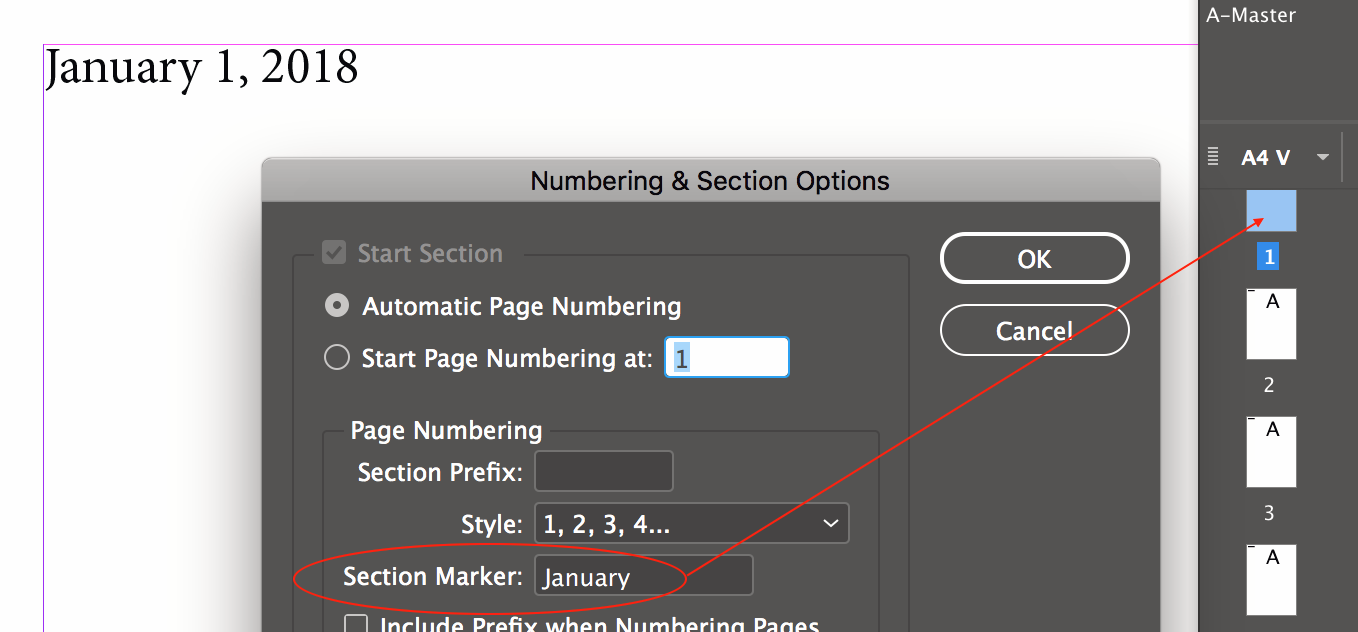
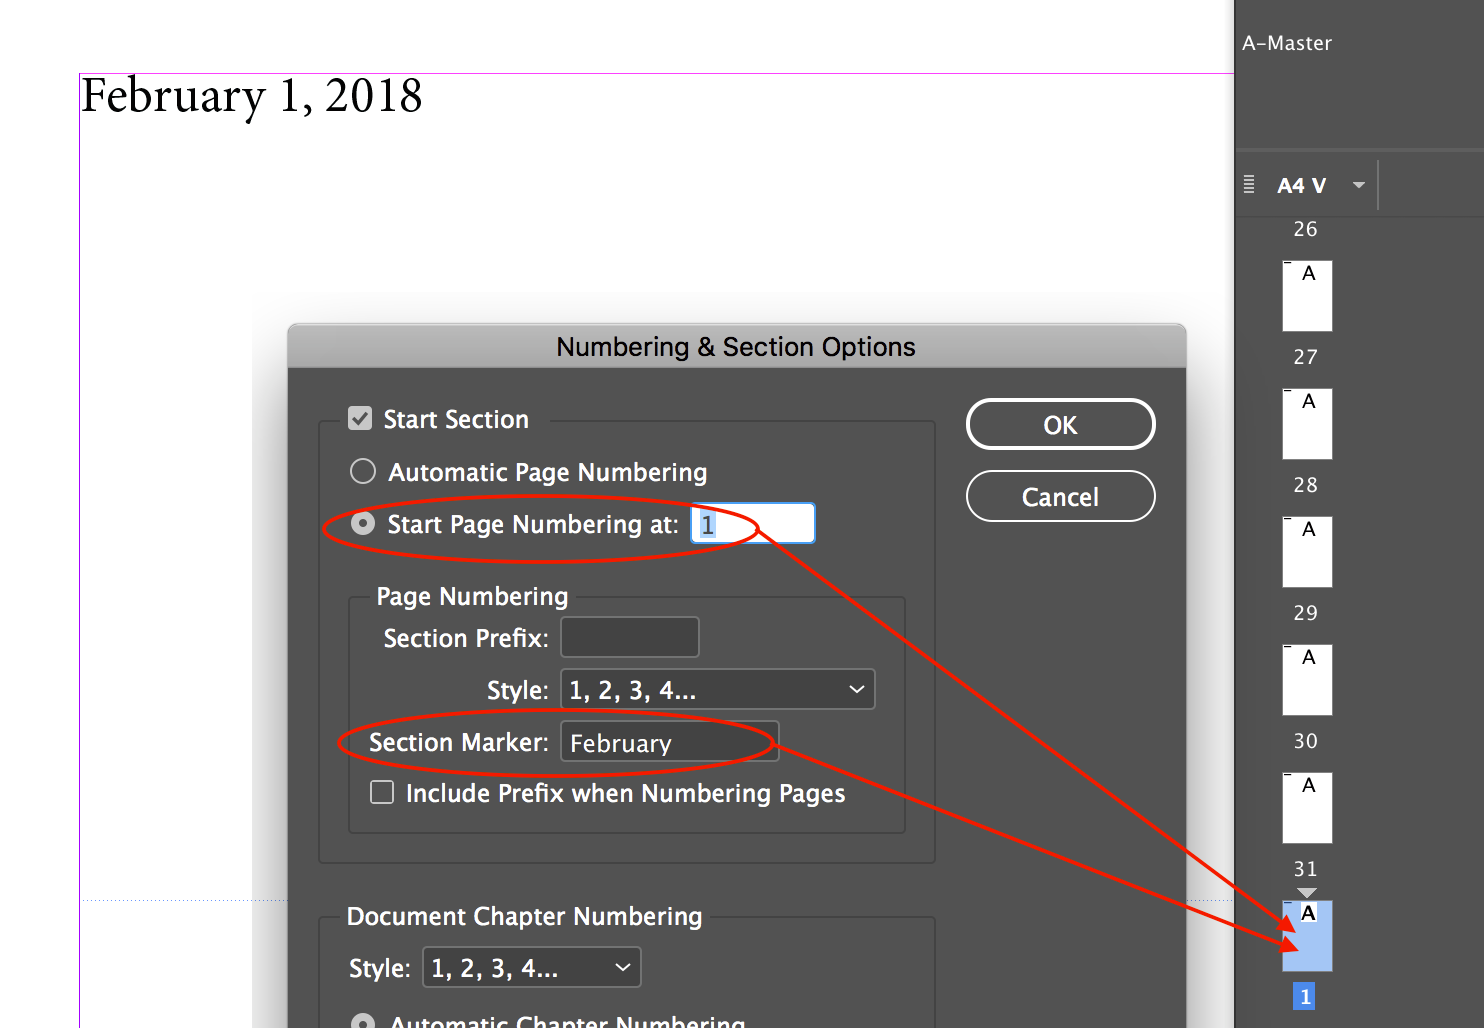
For an InDesign only solution, I’d use a combination of master page item text that referenced current page markers for the page number and section markers for the month (with some fixed text, commas and spaces and the year). i.e. Type > Insert Special Characters > Markers.
Section specific numbering overrides would be used to restart the page numbering and name for each month (Numbering and Section Options). This requires manual work to go to each new month and reset the section marker and page numbering (this only has to be done 12 times).


Copy link to clipboard
Copied
Another way is possible if you are sure that you need exactly 365 pages with different data markers — use Data Merge utility.
1. Prepare the list in Excel like BarbBinder says. The first line must be a title (for ex. Dates). Save your file as .csv or .txt file
2. Create a one-page document and define the place and formatting for your data marker. You can better do it on the Master page.
3. Open Data Merge panel (Window > Utilities > Data Merge). Choose "Select Data source" command from the panel menu.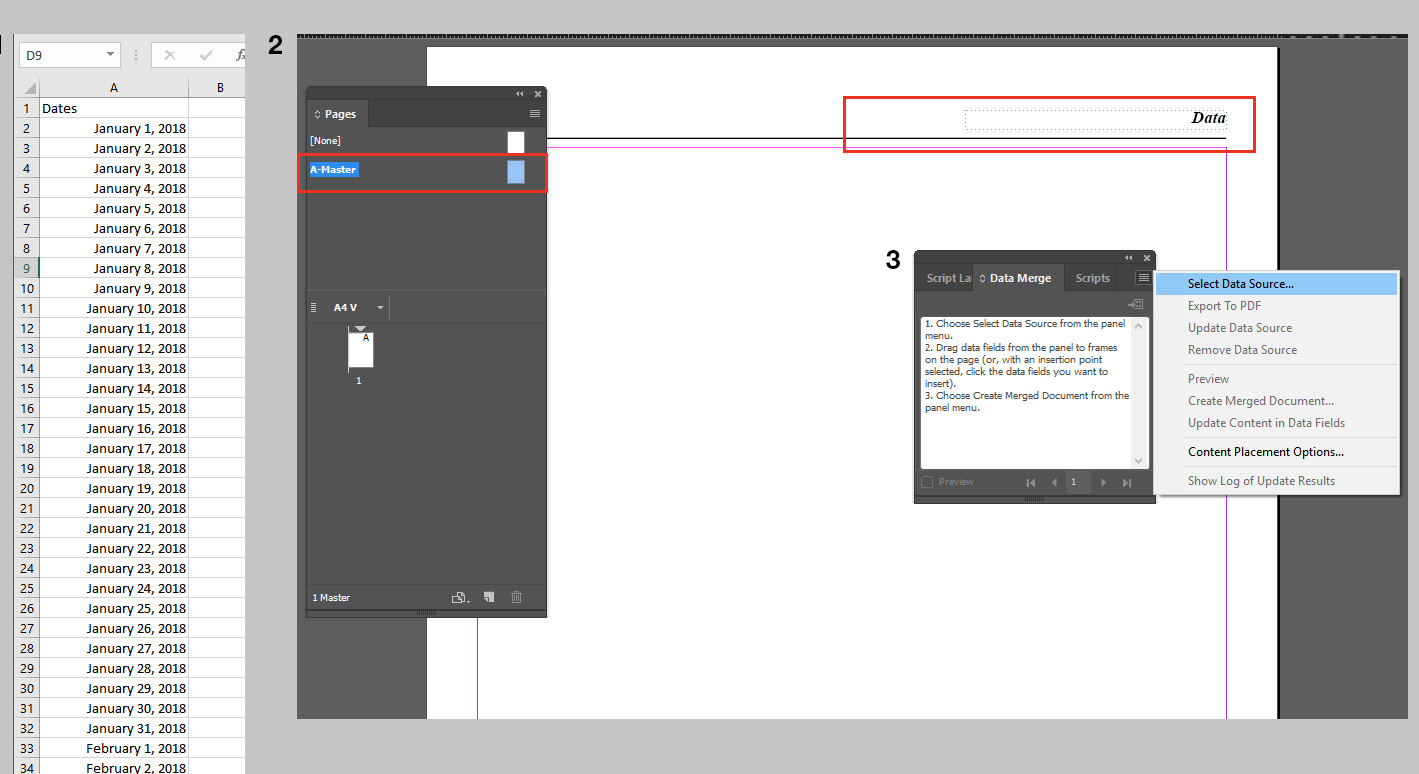
4. When the source will be linked, the available text field will appear in the panel. Select your text and click on the field line.
5. Click on "Create merged document" button and set your merge options.
6. You will get the new document with 365 pages, numbered by your data.

This way decreases a bit the manual work and allows you to do what you want in a new doc.

Copy link to clipboard
Copied
Perhaps look at this "Christmas Gift" I prepared on my website (it's at the end of the article) - https://colecandoo.com/2017/11/20/my-calendar-caffuffle/ - it's a javascript where a start and end date are typed in, and it outputs an InDesign file with one date to a page, the formatting is up to you.
Copy link to clipboard
Copied
Thank you for sharing Colin!

Find more inspiration, events, and resources on the new Adobe Community
Explore Now
 AdChoices