

Selecting multiple objects on the same spread

Copy link to clipboard
Copied
Hello Adobe Forums!
After some extensive research going through hit-and-miss results, i've decided to post here to see if you can help my workflow problem.
We print a lot of pictures on A3 paper and we send these files to be printed to our printer from InDesign (where we can most easily collate these images to print in sequence). So, our template setup is 99 blank pages with bounding boxes (the blue ones with diagonal lines) placed in every page. On each line (or spread) there are 10 pages. Say I needed to print 20 images. I'd drag in everything I need and place them individually into each bounding box (so I have two lines, or spreads, of 10 images). Now, this is the part where I need some scripted help from the wizards around this forum...
Each image has to be resized to fit the frame equal to all the other images. To do this, I select all the objects (by clicking the circular button in the middle of the object, holding shift, then clicking each object thereafter) and then input the following shortcuts:
CMD + ALT + SHIFT + E (To proportionately maximise each selected object into that frame) x1
CMD + ALT + , (Pressing this shortcut four times to resize equally with all objects selected) x4
CMD + SHIFT + E (To center all selected objects equally within their frames) x1
My question is can I select the objects within an entire line without having to hold shift and click each one? If so, bearing in mind the resizing of the images is always the exact same shortcut sequence, is there a script to select each object on that line (or spread) and perform the actions above?
I understand it may not be possible to select every single object in the document at once (E.G. all 20 images), but the 10 images on that line (spread) shouldn't be a problem as I can already manually select them. If I go over that spread and select 11 pages, it deselects all of the previously selected objects and selects only the 11th object on the new line. With this in mind, i'm happy using a script that only does one line at a time.
If i'm being unclear at all, please ask me to elaborate, but I hope it's enough to gain some assistance - this would greatly help my workflow.
Thank you very much in advance!


 15
Replies
15
15
Replies
15
Copy link to clipboard
Copied
I think it would help a lot if you provided a screen capture of what you're trying to do. You can attach it to your message in the forum editor with the "Insert Image" icon above the editing window.
Copy link to clipboard
Copied
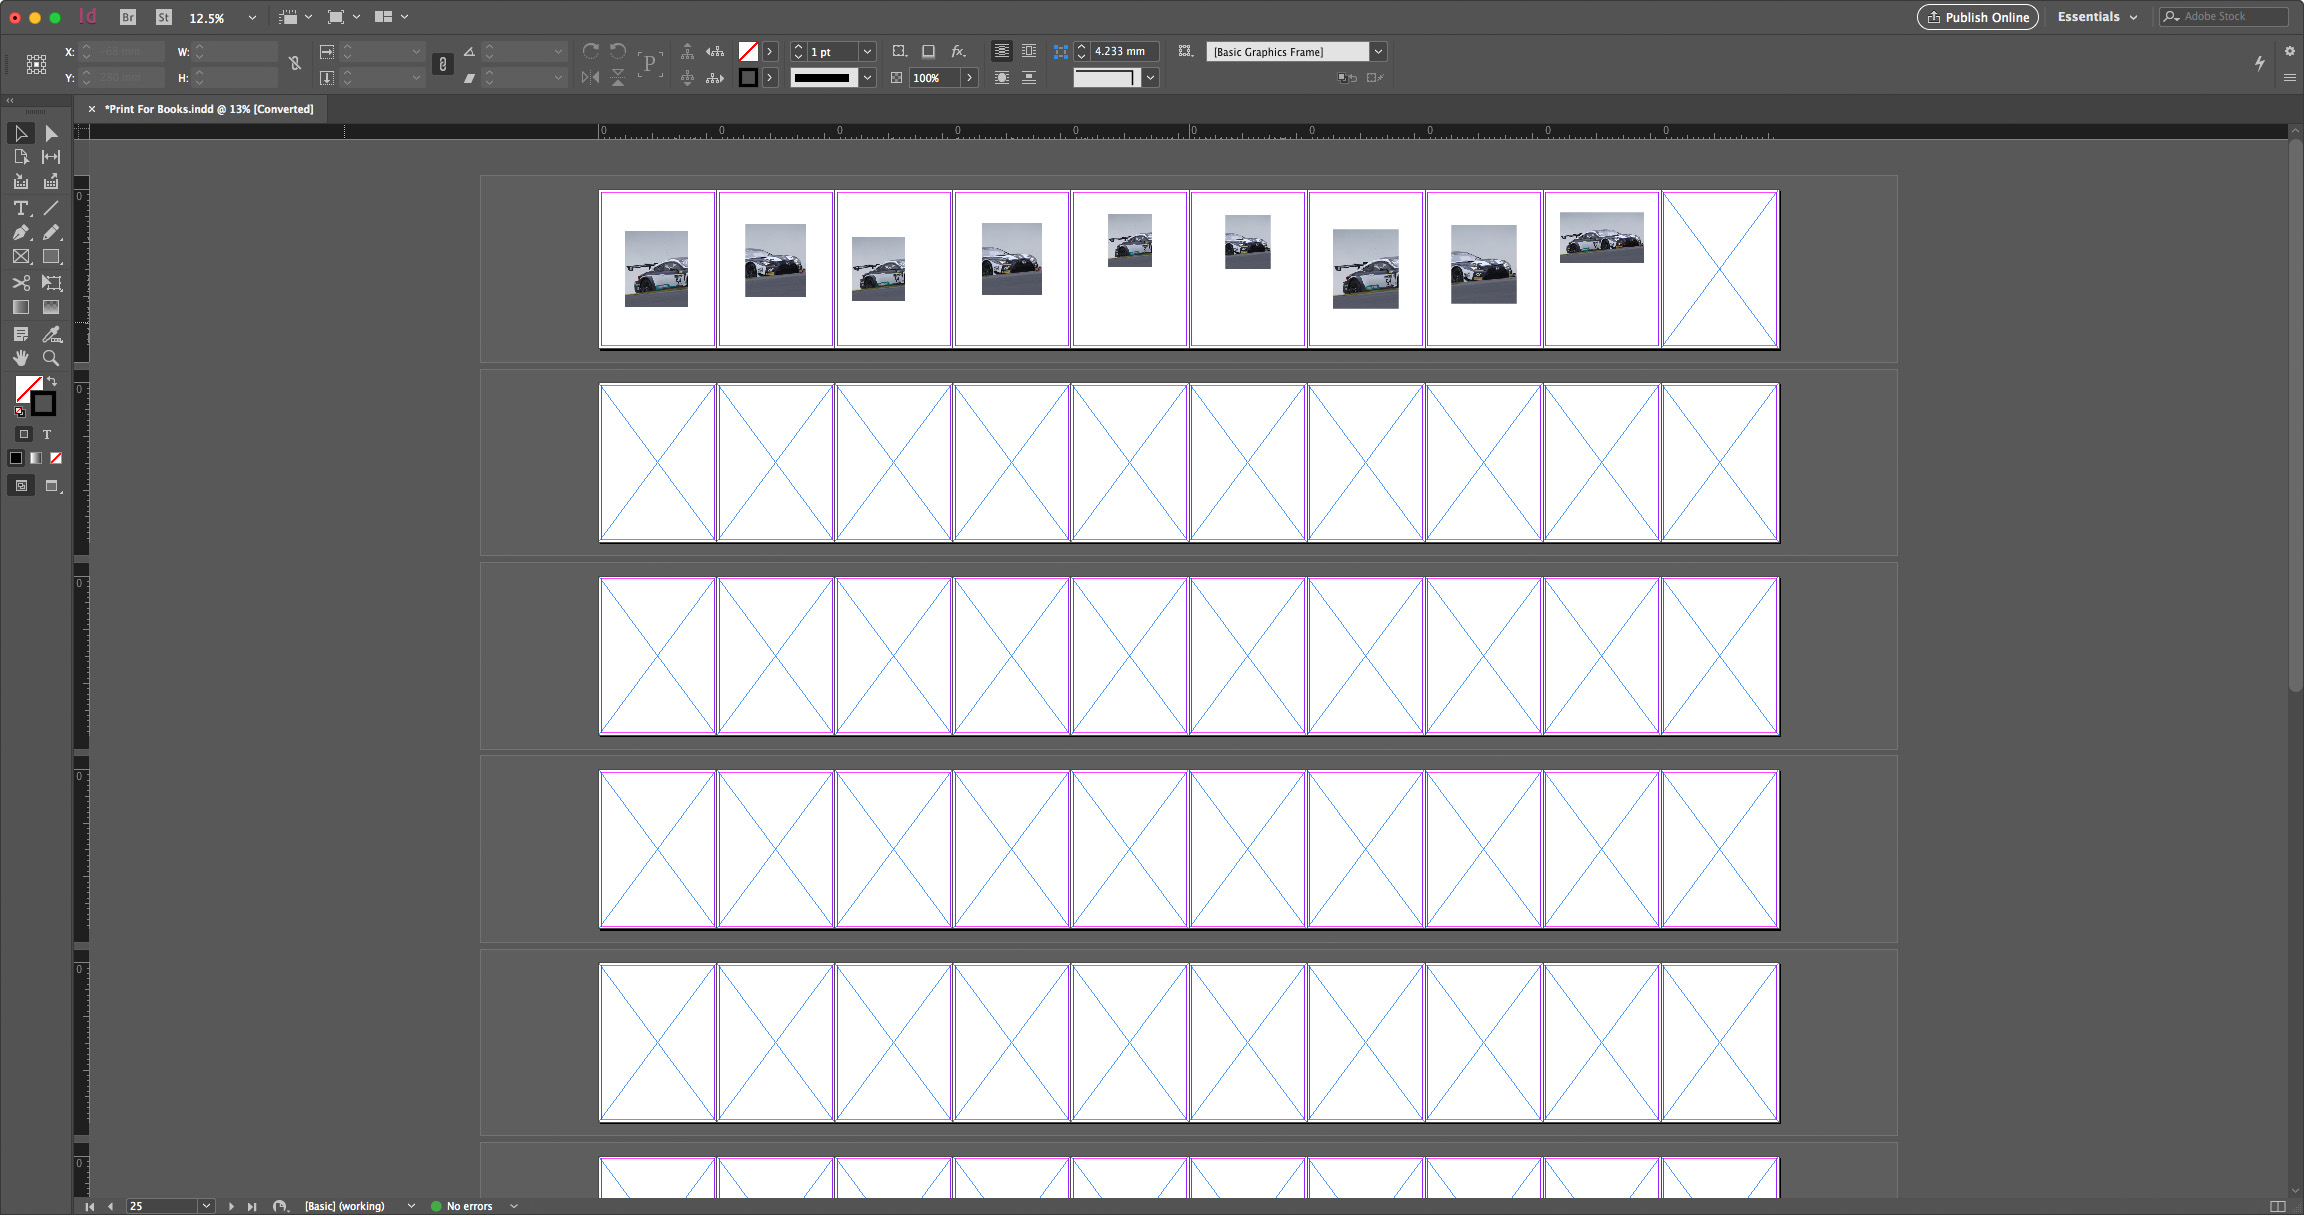
Stage 1 (placing each high resolution image into the boxes, I have used a picture of a car in example)
Stage 2 (after selection of each single image and application of the shortcuts mentioned in my OP)

Stage 3 (landscape format images must take two page sizes, so the empty bounding box on the right is removed, the bounding box with the landscape image inside is stretched to fit over onto the next page and the shortcuts from my OP are used again to produce this result)

Hopefully now you can see the affect my shortcuts have on the images, and why I would want to position them all the same. This is for printing high resolution images onto separate sheets of paper, so there needs to be many pages. Imagine there are now up to 100 images, you can see this would take some time to do manually.

Copy link to clipboard
Copied
Let me know if I'm missing something, but from what I can gather, you're placing multiple images into existing frames, then using a sequence of Fitting commands to get them to fill the frames proportionately, and centre them in those frames.
If so, it might be easier to apply an Object Style to the frames, with Frame Fitting Options specified, like so...


Copy link to clipboard
Copied
Let me know if I'm missing something
You're not, I only brought up image catalog because it seems like the real time is spent placing the 100+ images
Copy link to clipboard
Copied
Hi Danny, thanks for joining the discussion!
That's definitely helpful, but what I need is to fit to frame proportionally (CMD - OPT - SHIFT - E), then downscale each image (CMD - OPT - <) by 20% and finally center the content (CMD - SHIFT - E) collectively. Correct me if i'm wrong, but I don't think these specifics are available in the Object Style Options dialogue.
Copy link to clipboard
Copied
then downscale each image (CMD - OPT - <) by 20%
Why not reduce the frame size by 20%
Copy link to clipboard
Copied
Good thinking Batman! Ok, so we've got the frame fitting options pretty much sorted, so now it's bearing down on the DPS issue where I need landscape images to lay over into a second page (printing this way removes any bleed or crop from the center of the image on two portrait A3 sheets). Any ideas?
Copy link to clipboard
Copied
It would be scriptable, but probably not for free—ask over in the scripting forum. Can you sort out the crossovers and keep them in their own template?

Copy link to clipboard
Copied
I have read and re-read this, but I don't understand this:
Each image has to be resized to fit the frame equal to all the other images.
I am also unclear on what your second shortcut (pressed 4 times?) is doing.
Copy link to clipboard
Copied
You might want to look at the image catalog script that ships with InDesign. In your Scripts panel look in the Samples folder, there's both an AppleScript and JavaScript version. It lets you select a folder of images and will make a document with the images placed in a specified grid.
The dialog:

Copy link to clipboard
Copied
Thank you rob day,
I tried this but it puts it all on one page and is not suitable. Please find my response to Steve Werner above.
Copy link to clipboard
Copied
If you set the columns and rows to 1 the image catalog script will place 1 image per page.
It uses your default document setup for the page size and margins.
Set the New Document defaults to your desired page size and margins:

The catalog setup with no Labels


The script doesn't run spreads, but it would be easy to select a range of 10 pages with Allow Selected Pages to Shuffle disabled and make the 10 page spreads:

Copy link to clipboard
Copied
Thanks for your response, Rob.
I tried this and it's definitely a step in the right direction. I do have some follow-up questions:
1. How can I set the frame (blue box with diagonal lines) to be a certain dimension (162.2mm (W) x (H) 243.4mm) and fit the images proportionally, whilst keeping the [Default] template for my A3 canvas?
2.
- A) What can be done about my Double Page Spread (DPS) issue, where I need landscape images to lay over two separate pages with one stretched bounding box?
- B) If nothing can be done to lay these images over 2 pages, then this method is unsuitable and would require an alternative (such as a script for the template I have already with 99 pages)
3. How can I set the default values in the "Image Catalogue" dialogue box to what I need instead of editing them every time I open that script? Can I just edit the script in ES Toolkit?
Although this is a good way of processing single images, 90% of the time I will receive an archive with at least 1 - 7 DPS pages which have different parameters of placement. Is there really no way of slightly altering my current template to accomodate a quality of life improvement?
Copy link to clipboard
Copied
The sample script isn't going to help you with the crossovers.
For the frame size all you would need to do is adjust the margins of the default document. The script draws the image frame to the margins so if you want the frame to be 162.2 x 243.4 on an A3 page this should work—297-(67.4x2)=162.2:

Copy link to clipboard
Copied
3. How can I set the default values in the "Image Catalogue" dialogue box to what I need instead of editing them every time I open that script? Can I just edit the script in ES Toolkit?
Setting the document size and margins is relatively easy. If you open the JavaScript ImageCatalog in ESTK, try inserting this code after this line on 237
var myDocument = app.documents.add();
with (myDocument.documentPreferences){
pageWidth = "297mm"; pageHeight = "420mm"; pageOrientation = PageOrientation.portrait; facingPages = false;
};
with (myDocument.marginPreferences){
top = "88.3mm"; left = "67.4mm"; bottom = "88.3mm"; right = "67.4mm";
};

 AdChoices