• Global community
    • Language:
      • Deutsch
      • English
      • Español
      • Français
      • Português
  • 日本語コミュニティ
    Dedicated community for Japanese speakers
  • 한국 커뮤니티
    Dedicated community for Korean speakers
Exit
0

Wrapping text around a graphics frame with Corner Options

Engaged ,
Jan 22, 2021 Jan 22, 2021

Copy link to clipboard

Copied

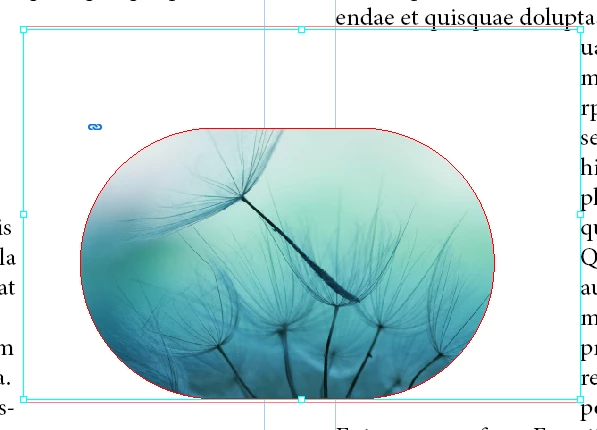
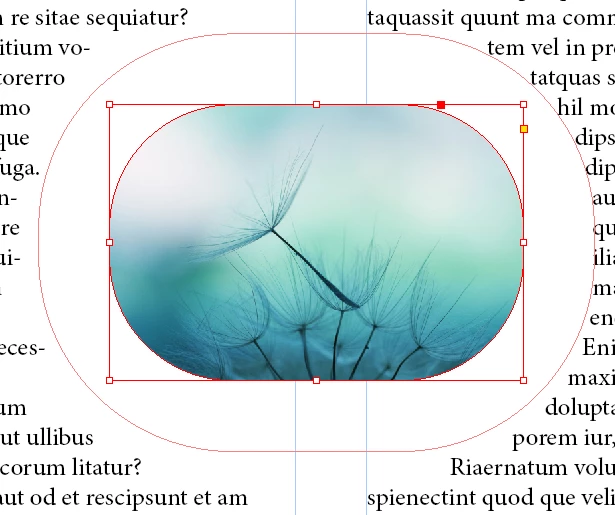
This has bugged me for years. When a graphics frame (i.e. an image) has rounded corners (Corner Options) and text is wrapped around it, the wrap doesn't follow the corners. It works fine for a rectangle shape created in InDesign, but not for an image. This screenshot shows the photo I want to use today and a rectangle I created just to demonstrate:

wrap around corners.png

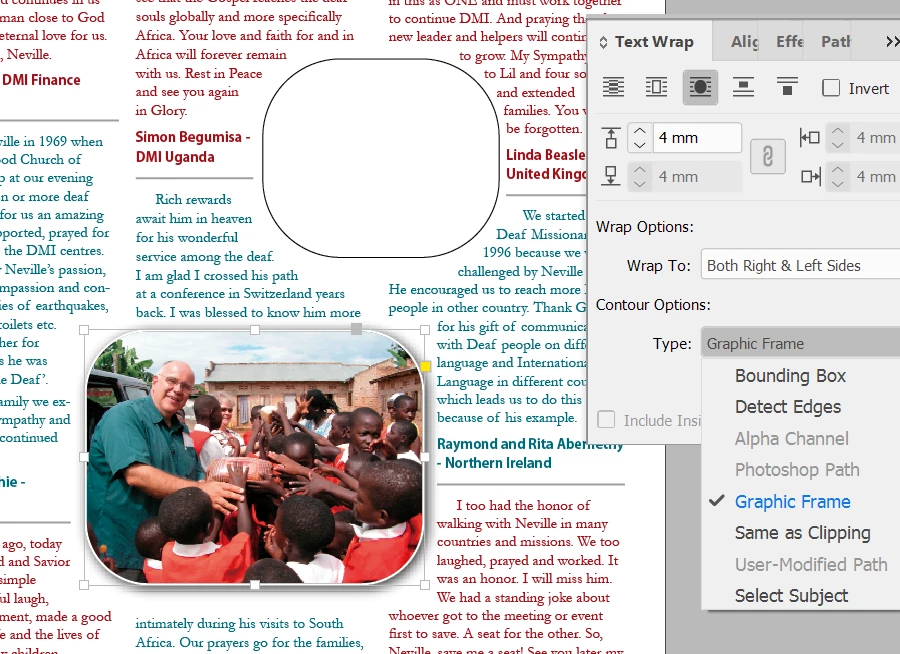
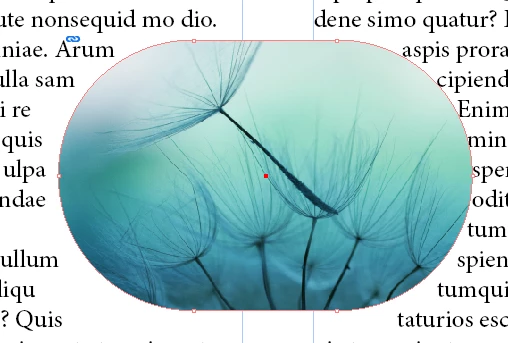
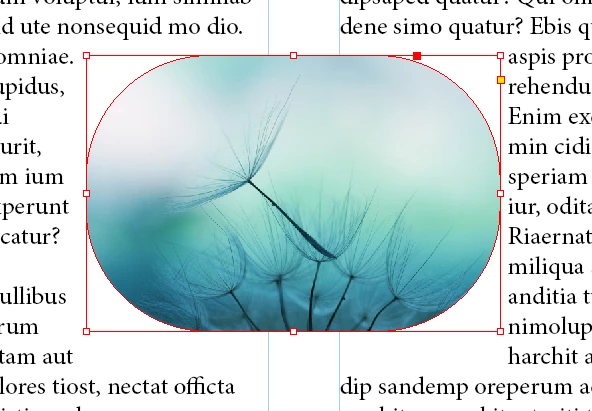
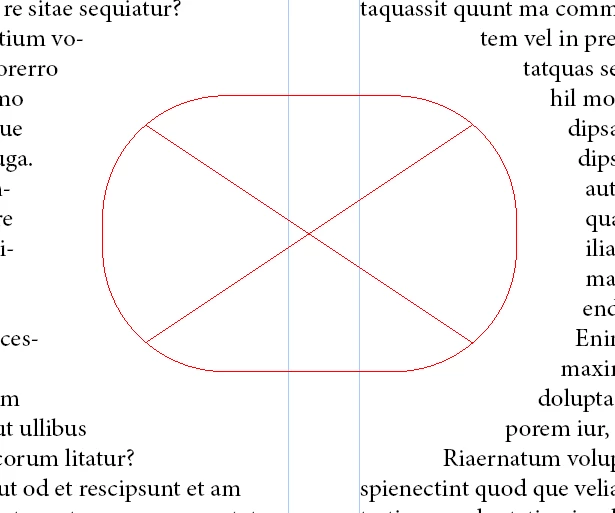
No matter whether I choose Bounding Box, Detect Edges, Graphics Frame, or Same as Clipping, the wrapping is square at the corners. My workaround has always been to make a rounded rectangle with no fill or stroke the same size and shape as the photo and apply the wrap to the rectangle instead of the photo, but that's extra work every time I adjust the photo in any way.


Is there a way to do this without the additional object? Diligent searching off and on over the years has has turned up any chatter about this.

TOPICS
Bug , Feature request , How to

Views

950

Translate

Translate

Report

Report
Community guidelines
Be kind and respectful, give credit to the original source of content, and search for duplicates before posting. Learn more
community guidelines

correct answers 1 Correct answer

Community Expert , Jan 23, 2021 Jan 23, 2021

Essentially - the middle option uses the graphic frame to make the wrapping path. 


Graphic Path.PNG


It's because a Rounded Frame is not truly a rounded Frame - it's using Round Corner Options.


You can turn it into an actual rounded frame - but this removes options to reformat the round corner.

Use the pen tool to click anywhere on the frame edge.


You will notice the corner nodes disappearing.


graphic frame.PNG


Alternatively - to keep the corner nodes.

Copy the original frame with the image


original frame.PNG


Select your image wit

...

Votes

Translate

Translate
Community Expert ,
Jan 23, 2021 Jan 23, 2021

Copy link to clipboard

Copied

Essentially - the middle option uses the graphic frame to make the wrapping path. 


Graphic Path.PNG


It's because a Rounded Frame is not truly a rounded Frame - it's using Round Corner Options.


You can turn it into an actual rounded frame - but this removes options to reformat the round corner.

Use the pen tool to click anywhere on the frame edge.


You will notice the corner nodes disappearing.


graphic frame.PNG


Alternatively - to keep the corner nodes.

Copy the original frame with the image


original frame.PNG


Select your image within the frame and CUT it - leaving just the frame.


remove image from frame.PNG


Edit>Paste Into


paste into.PNG


What you end up with is the image pasted inside the oval - giving you what you want.


result.PNG


You can also start with the oval frame with the text wrap 

Place your image you want


start.PNG


Select the graphic (not the frame) and cut it 

Delete the remaining original frame that it was in.


Then choose the original round cornered frame

And choose Paste into


I would like to say - this is how the feature works - I don't it's a bug

You can use this site for feature requests

https://www.adobe.com/products/wishform.html


Votes

Translate

Translate

Report

Report
Community guidelines
Be kind and respectful, give credit to the original source of content, and search for duplicates before posting. Learn more
community guidelines
Engaged ,
Jan 23, 2021 Jan 23, 2021

Copy link to clipboard

Copied

"It's because a Rounded Frame is not truly a rounded Frame" - haha, no wonder I'm confused! 🙂


Your idea worked eventually after some trial and error, so I have one additional tip for those who come after me looking for this. Before you cut the graphic out of its original frame, you must turn off wrapping for that frame. If you don't, the wrapping information (including its square shape) somehow gets carried along with the graphic and the new frame inherits the wrapping characteristics you are trying to shed. But if you select the image's frame, set wrapping to none, then select the graphic only, then cut, then select the empty rounded frame, then Paste Into, it works.

Votes

Translate

Translate

Report

Report
Community guidelines
Be kind and respectful, give credit to the original source of content, and search for duplicates before posting. Learn more
community guidelines
Community Expert ,
Jan 23, 2021 Jan 23, 2021

Copy link to clipboard

Copied

Yes, - might be a good idea to raise this in the Feature Request in the link I mentioned 🙂

Votes

Translate

Translate

Report

Report
Community guidelines
Be kind and respectful, give credit to the original source of content, and search for duplicates before posting. Learn more
community guidelines
Engaged ,
Jan 25, 2021 Jan 25, 2021

Copy link to clipboard

Copied

Okay, done. If others find this thread and agree that this is an issue, please vote to show Adobe your interest: https://indesign.uservoice.com/forums/601021-adobe-indesign-feature-requests/suggestions/42530287-te...

Votes

Translate

Translate

Report

Report
Community guidelines
Be kind and respectful, give credit to the original source of content, and search for duplicates before posting. Learn more
community guidelines
Community Expert ,
Jan 25, 2021 Jan 25, 2021

Copy link to clipboard

Copied

LATEST

Thanks I've upvoted and commented - and shared via Twitter. 

Votes

Translate

Translate

Report

Report
Community guidelines
Be kind and respectful, give credit to the original source of content, and search for duplicates before posting. Learn more
community guidelines