

- Home
- Lightroom Classic
- Discussions
- Re: Automotive photography and editing
- Re: Automotive photography and editing
Automotive photography and editing

Copy link to clipboard
Copied
Hey everyone! I'm looking to improve my photography and/or editing, and I was hoping for some tips and tricks.
I think my photos come out as a bit painting-esque or overedited sometimes. I've seen some people make lovely photos with like a nice soft liquid paint and soft lighting, giving a really nice feel. It's hard to describe, so I'd rather show it;
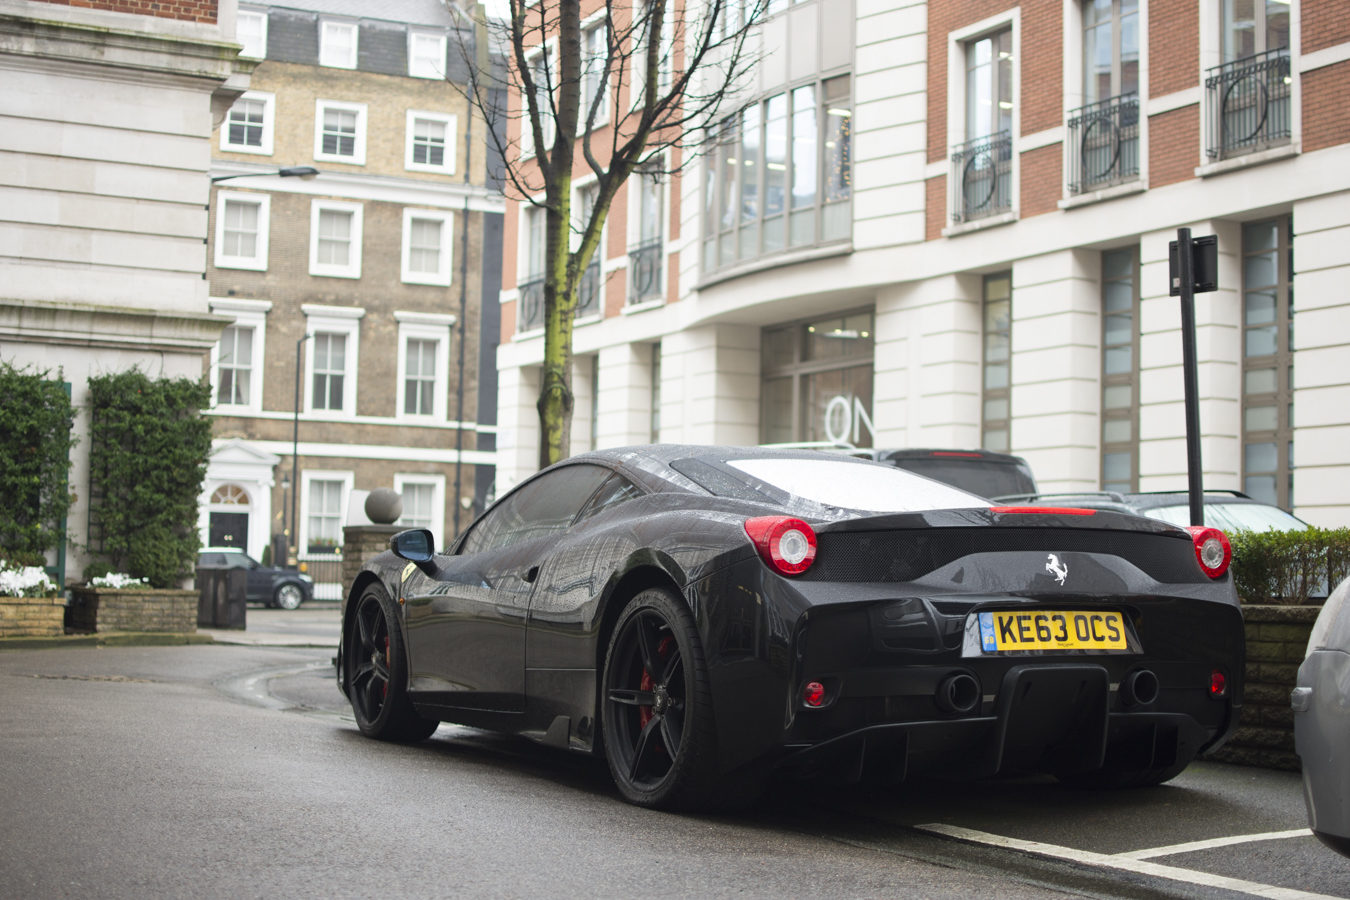
My photo:
The effect I'm after:

(picture borrowed from @KluGE_cars on instagram)
It has this nice warm glow to it without looking fake, nice liquid paint and is contrasty without being too much. I can't seem to find the balance, and i'm hoping for some ideas as to what i'm doing wrong / could do differently.
Thanks for your time 


 8
Replies
8
8
Replies
8

Copy link to clipboard
Copied
The difference is in the lighting mostly. From the position of the shadows, the desert image looks like it was done early morning with direct morning light filtered by a bit of haze. So you get nice highlights that are not overly harsh and good warm light. Yours is done in overcast conditions. That alone will cause a big difference in light quality.
Copy link to clipboard
Copied
Thanks for the advice on lighting, I will keep that in mind!

Copy link to clipboard
Copied
It may simply have been shot with a telephoto lens (85-100mm) and wide aperture (F 1.4, 1.8, 2) to narrow the depth of field. Here's a shot using an 85mm lens @F2.2 on a full-frame body.

You can get a similar effect inside LR using the Adjustment Brush to paint in negative Sharpening & Clarity. Add some Basic panel Tone adjustments and you can achieve almost any "look" you want.
Copy link to clipboard
Copied
I know that the desert image is shot with a 35mm f/1.4 on a full frame body, mine is shot with a 35mm f/1.8 on a crop. I still think my images very quickly look very "harsh" when i'm playing around with clarity/contrast/blacks etc, where others seem to achieve that nice crisp look without it being too much. Another example:

I can't tell if he's lifting the blacks to "increase" the dynamic range a bit or blowing out the highlights in the background on purpose. But it might just have to do with the lighting as suggested
Copy link to clipboard
Copied
christianl57112138 wrote
I still think my images very quickly look very "harsh" when i'm playing around with clarity/contrast/blacks etc, where others seem to achieve that nice crisp look without it being too much.
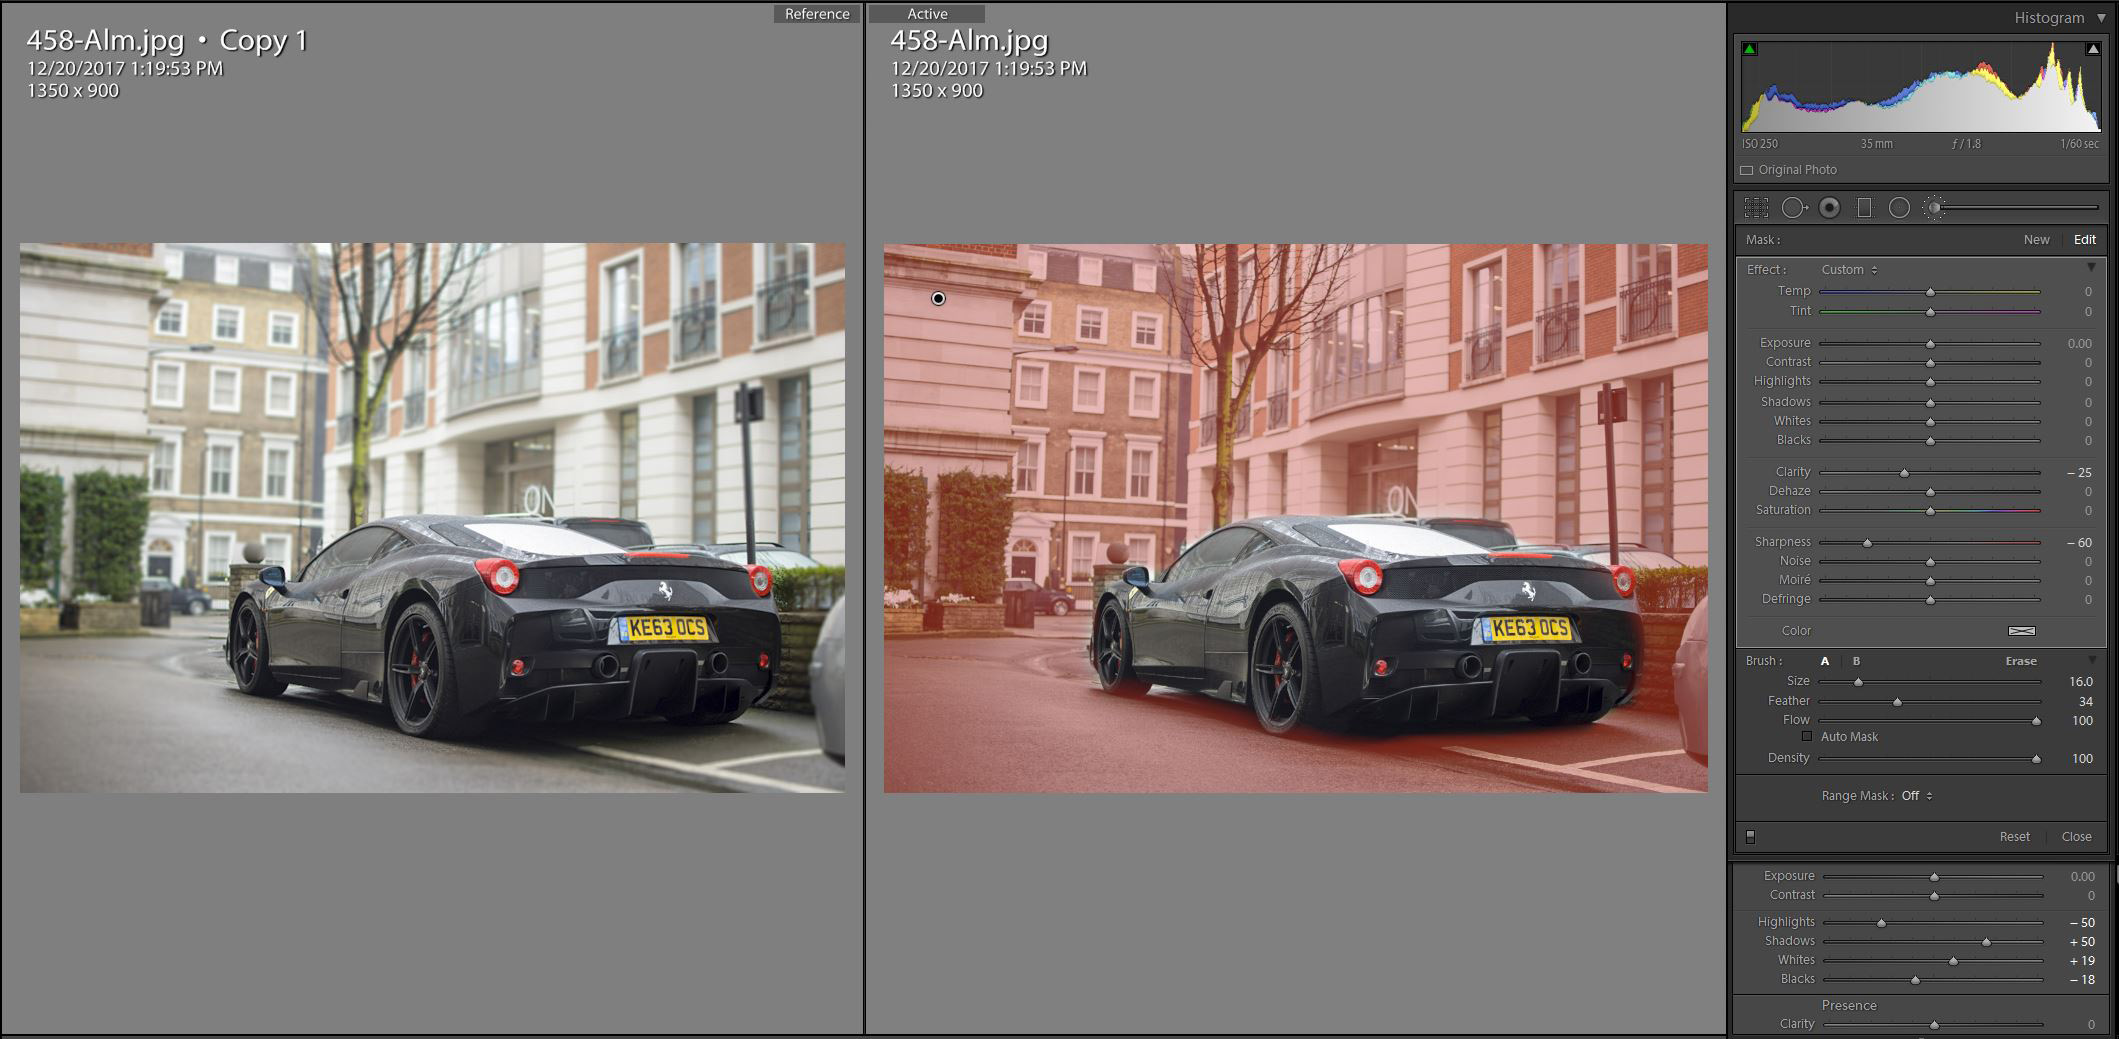
What camera profile are you using? Try Adobe Standard or a profile named "neutral" or "faithful," which will have lower contrast. I suggest also simply applying -50 Highlights and +50 Shadows and then readjust the other settings. This helps remove the shadow blocking and highlight clipping and adds "microcontrast." I have Develop presets with just -Highlights and +Shadows for just this purpose. It generally works best to apply equal and opposite settings. Be careful with Clarity, which I rarely push higher than 25. It tends to block-up the shadows detail. You can download a PV2012 Tone Control tutorial I created here:
Dropbox - Lightroom PV2012 Basic Tone Control Adjustments.pdf

christianl57112138 wrote
I can't tell if he's lifting the blacks to "increase" the dynamic range a bit or blowing out the highlights in the background on purpose. But it might just have to do with the lighting as suggested
Yes lighting helps, but you can always alter the background any way you like using the Adjustment Brush as in my example.
Copy link to clipboard
Copied
Your shot.
Rainy day, Overcast skies (Gray Day), wet car, wet pavement, Parked along some street with other cars parked around it, taken from the rear of the car.
The other shot.
Set in a dry parking lot of some type, No other cars or anything else around it, brighter but possibly slightly overcast day (IE No Bright sunshine causing blown highlights), interesting but not to much background and background out of focus, shot from the front of the car.

Copy link to clipboard
Copied
I think as the others have said, it would be best shot in brighter conditions. The reflections should be better and could be enhanced with contrast etc. There are limited possibilities in Lightroom with this image. You could use Color Range Masking to deepen the blacks or even go for a matt black effect. The background could be blurred with the radial filter and negative contrast, dehaze etc.


Copy link to clipboard
Copied
christianl57112138 wrote
..... and i'm hoping for some ideas ....
Hope it is OK to put some samples on your topic. It is an "extreme" Photoshopped approach. It is a way to make it all about the car.
I was at a vintage car and hot rod show in a Arizona mall parking lot. Light was "high noon". People, buildings, pavement, ordinary cars were everywhere. It dawned on me that the "art" was the body and paint work. Everything else got in the way and was a distraction. A side benefit is that there is some hidden art in the reflections. .jpg)
.jpg)
.jpg)

Find more inspiration, events, and resources on the new Adobe Community
Explore Now
 AdChoices