

- Home
- Lightroom Classic
- Discussions
- Re: Darker images in develop than library
- Re: Darker images in develop than library
Darker images in develop than library

Copy link to clipboard
Copied
I having difficulties with the brightness of my images when I go between LR library and LR develop. The images become significantly darker when I go to develop then return to the original quality when I go back into library. I'm not sure why this is happening. Does anyone else have this problem?


 17
Replies
17
17
Replies
17

Copy link to clipboard
Copied
This is often caused by a display profile that is incompatile with LR or doesn't conform with industry standards (a problem that's more common on Windows than Mac). To test this quickly:
https://www.lightroomqueen.com/how-do-i-change-my-monitor-profile-to-check-whether-its-corrupted/

Copy link to clipboard
Copied
I'm having the issue and I'm on an iMac with a 4k Retina Display. I'm sure it conforms.
Copy link to clipboard
Copied
I came here because of the same issue. I edited a photo how I wanted it in develop, but the image isn't only brighter in the Library module, it also exports as the brighter version, which I don't want... This is causing problems since I can't tell what the end product is going to look like. Screen shots attached.

Copy link to clipboard
Copied
Copy link to clipboard
Copied
"I'm having the issue and I'm on an iMac with a 4k Retina Display. I'm sure it conforms."
The display profile (sometimes called an "ICC profile") assigned to the display in System Preferences > Display > Color may or may not be compatible with LR. See the help article linked above for details on how to check that in two minutes. Incompatible profiles occur more often on Windows than Mac, but it's easy to check
Copy link to clipboard
Copied
I tried that out and it made no difference. I've realized that the histograms on the library version and the develop version are different... So, it's something unrelated.
Copy link to clipboard
Copied
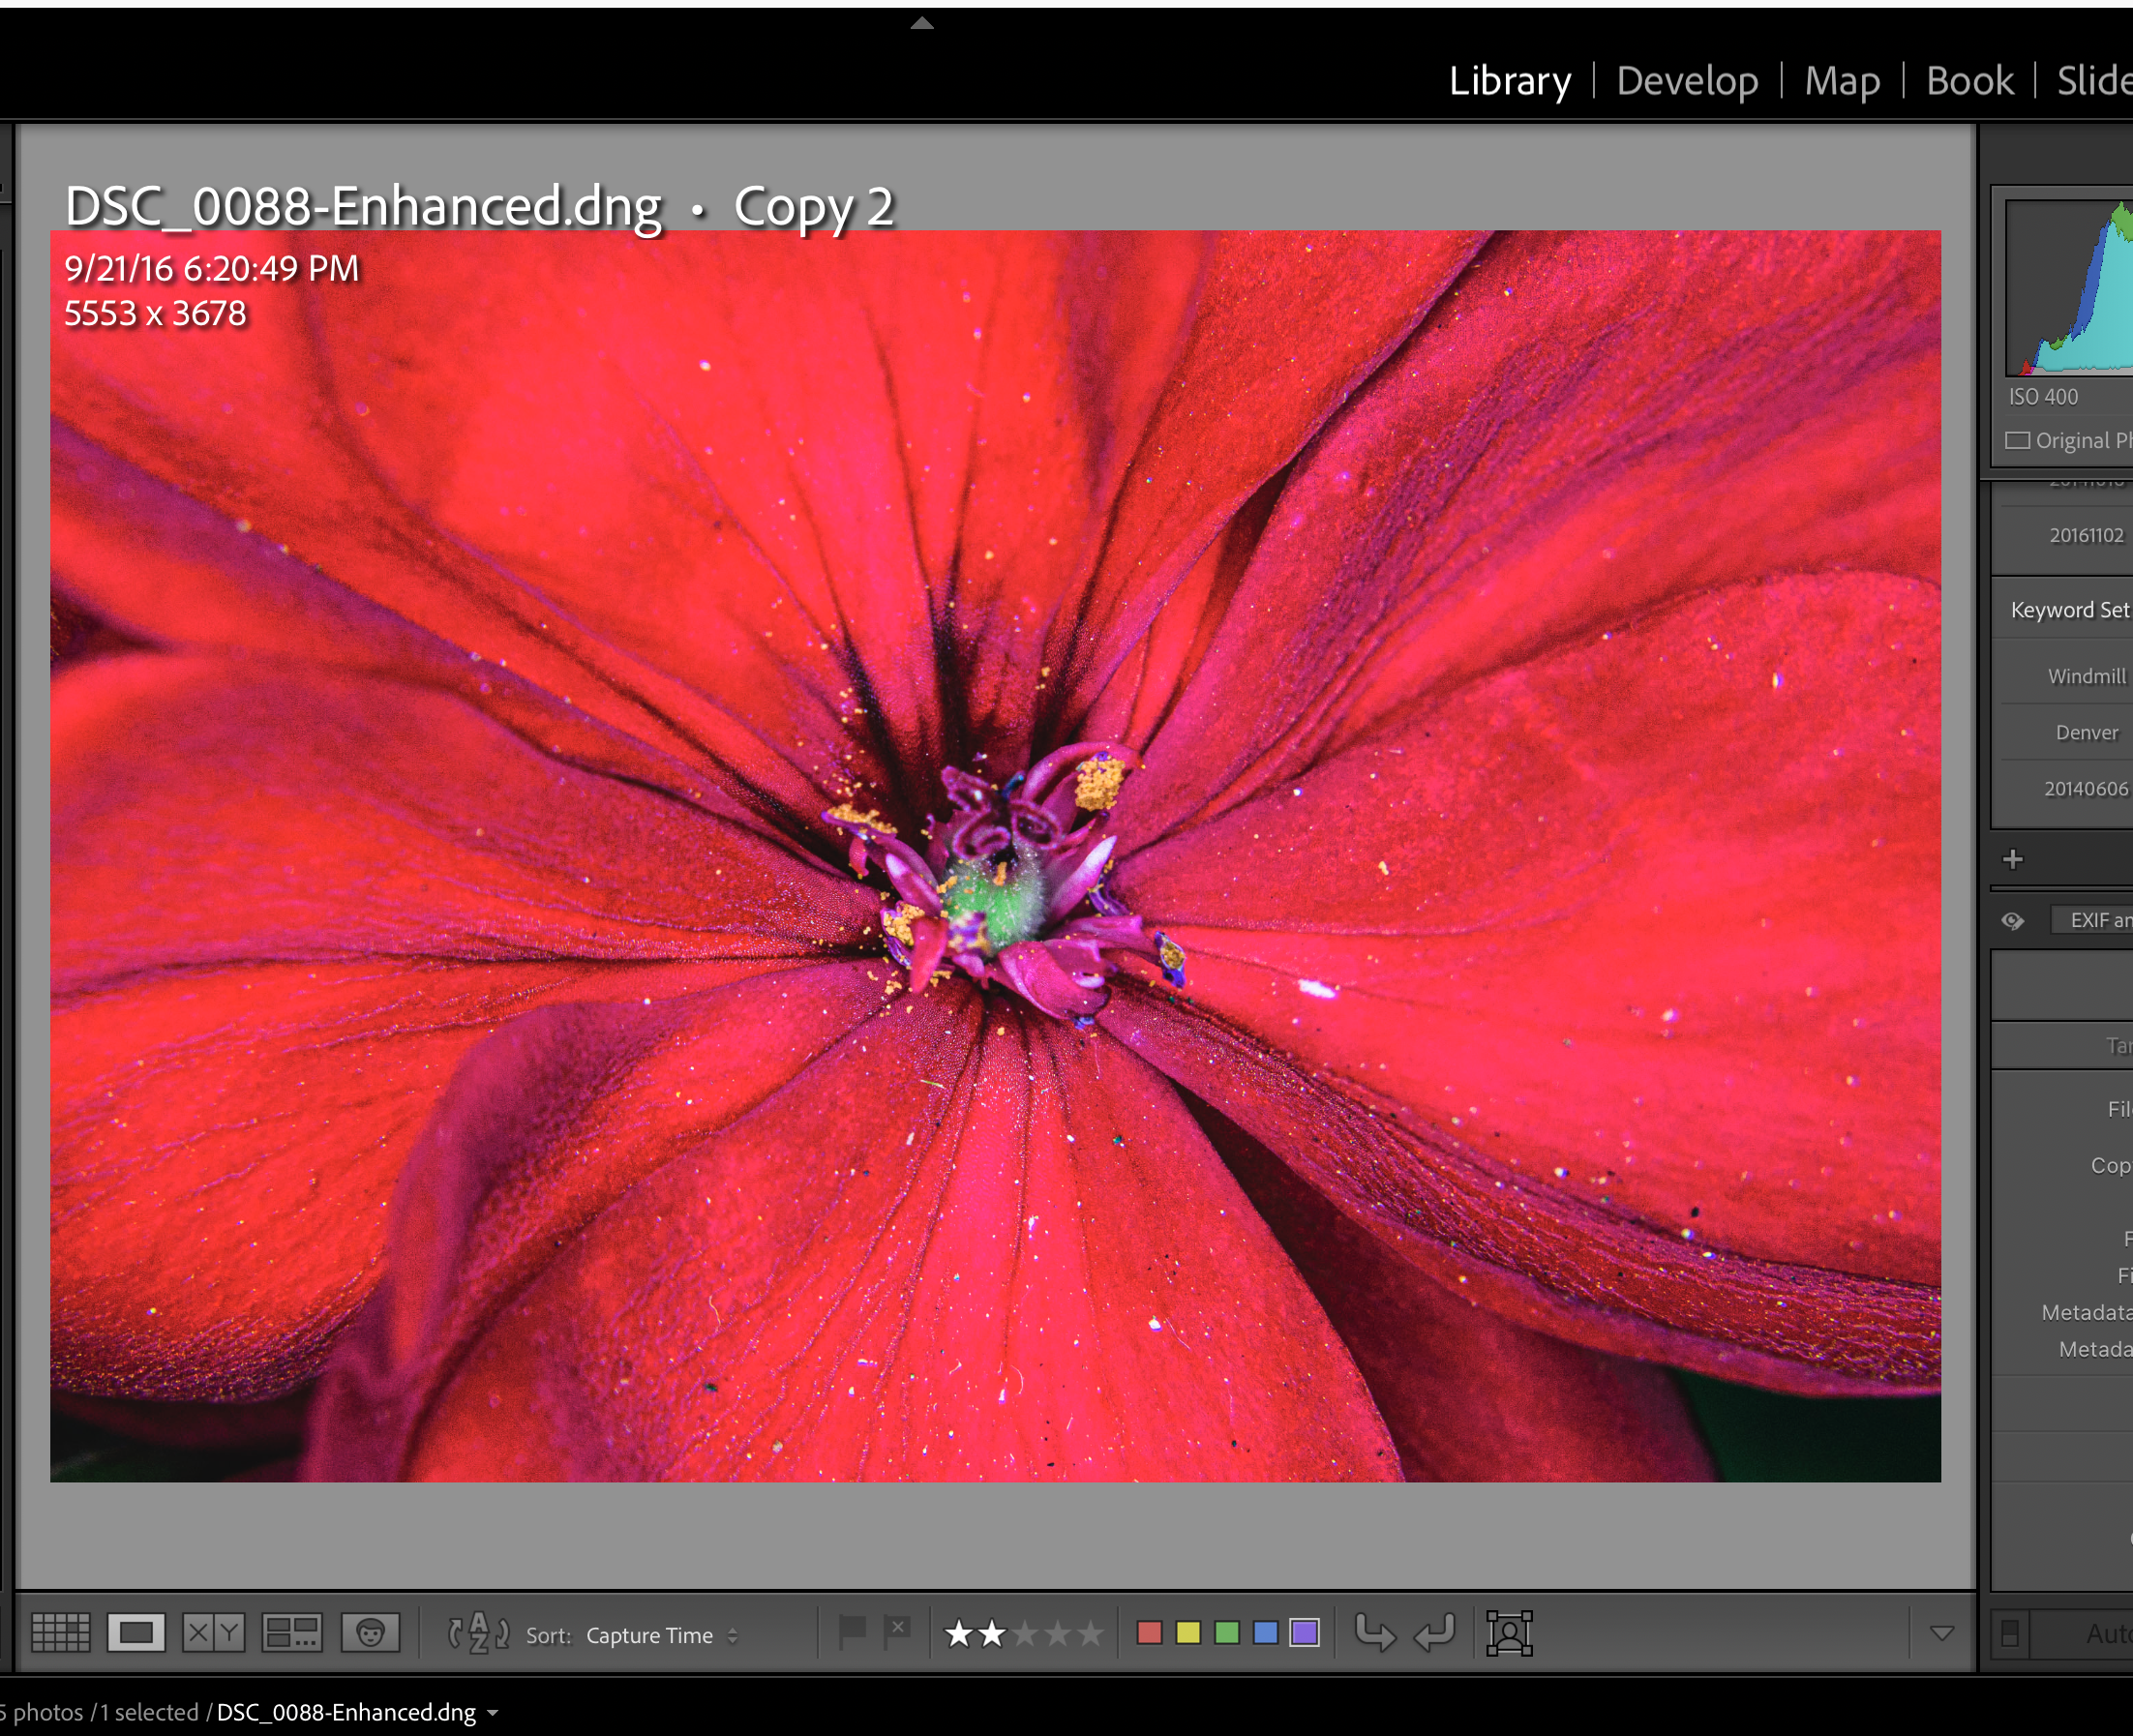
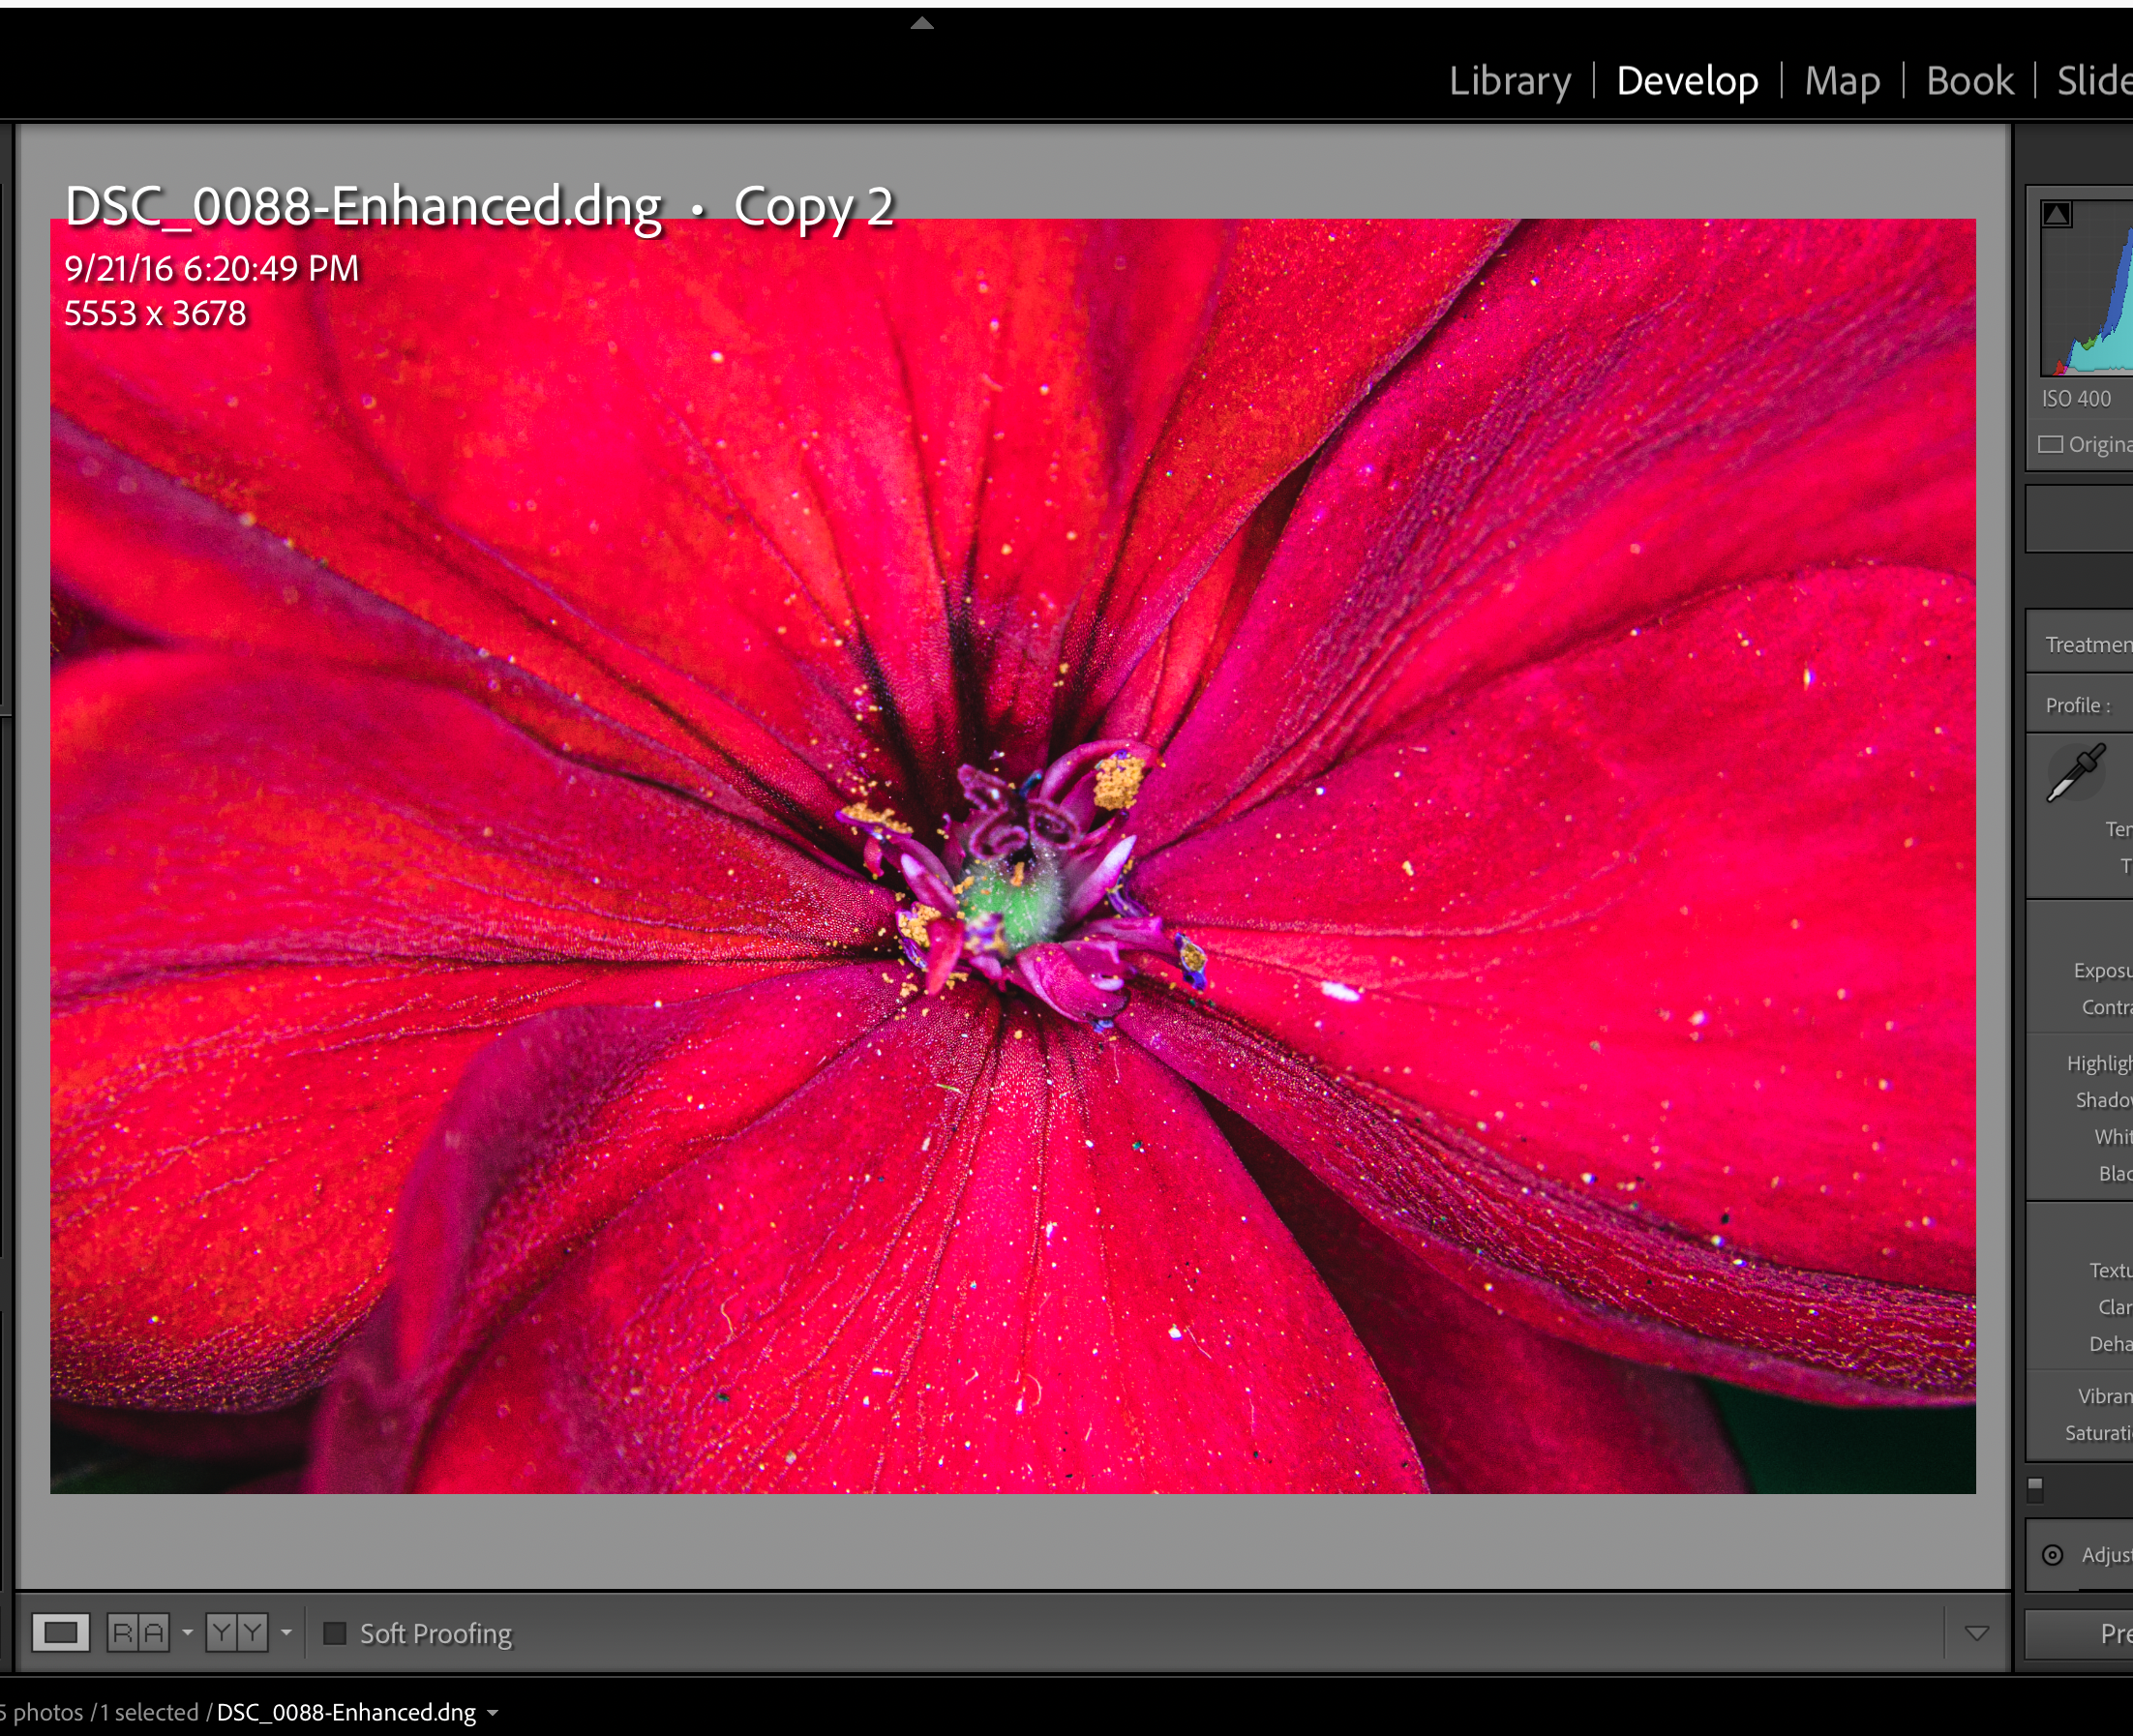
While flipping back and forth between the Library and Develop modules, I realized that the histograms on the image were differnt. I used the new masking tool while editing and I'm wondering if those edits didn't stay with the photo. I'll paste the screen shots here of the histograms.
So, not a display issue. Maybe an issue with new features?

Copy link to clipboard
Copied
There is heavy clipping in that red color, and if you soft proof to Adobe RGB it should be evident in the histogram (high red and/or low green). If you have a DCI-P3 display, I suspect you're seeing the difference between that and Adobe RGB (the Library previews).
Mind you, not a difference in how the color is reproduced as such - but different clipping points.
You need to bring that red down to a realistic level for any kind of output. Gamut remapping in practice.
EDIT: here's the Library screenshot. It was untagged as you posted it, but I assigned Adobe RGB in Photoshop. See the extreme clipping in both the red and green channels? There's no way you can output this in any medium.

Copy link to clipboard
Copied
After spending some time with Google, I understand everything you said there and it makes complete sense. Thank you for the explanation.
This was the first time I've seen Lightroom do that in the seven years I've been using it. Until tonight, I'd never even used soft proofing. Since I seem to be capable of making pretty obnoxious edits with the new masking features, it's probably a good time to start using that more often.
Thanks again!
Copy link to clipboard
Copied
I'm not following this, and the issue I am having was not resolved by running the original test mentioned above. Furthermore, the images have not been touched up in any way and are imported into Lightroom as RAW images, and STILL, they appear darker in the develop tab and lighter in the library tab.
When I export, they come out darker like the version in the develop tab. I am able to know what they will look like when exported so I can make it work, but it is very annoying that I can't view them as they would appear post-export when viewing them through the library tab. I attached this in the above comment as well, but below is a screen recording of the issue.

Copy link to clipboard
Copied
You've imported the photos using the 'Embedded & Sidecar' option, which means that the Library previews are based on the JPEG preview embedded by your camera. However, when you switch to the Develop module it's the Adobe colour rendering that's used. To get a better match between the two modules you should select all of the images (Library module Grid view), then choose 'Build Standard-Sized Previews' from the Library > Previews menu.
In future, I suggest you choose the 'Standard' preview option in the 'Import' window (see below screenshot)


Copy link to clipboard
Copied
I am currently experiencing the same problem, which is that theres a huge difference between my JPEG preview (aka Embedded Preview) in the Library Tab and the real RAW image in my Develop Tab. To me, it looks like the RAW is usually underexposed (for some reason). And that the JPEG is usually very nice and normal looking. But I really don't get why my camera let's me expose the way it does when that means that my RAWs get so much darker.Some photos are even hard to recover because they're THAT dark in the Develop Tab.
So if anybody knows how I can work on a version of my picture that looks like the JPEG preview but is a RAW file, let me know pls
Copy link to clipboard
Copied
There should be little, if any, difference between the embedded preview and Lightroom's own previews. If you're seeing a big difference, then first check that you're not applying a Develop preset during the import process or that you haven't changed your Camera Defaults in Lightroom. I've attached screenshots below that you may find helpful.
If above isn't the reason for your drak images, then it may be due other factors. For example, some lenses produce significant vignetting (darkening of corners). If you haven't enabled a lens profile, then try this as may well help with the dark images you mention. That being said, if your camera is of the mirrorless type, the lens profiles are usually applied automtically and can't be enabled/disabled by the user.


Copy link to clipboard
Copied
To me, it looks like the RAW is usually underexposed (for some reason). And that the JPEG is usually very nice and normal looking. But I really don't get why my camera let's me expose the way it does when that means that my RAWs get so much darker.Some photos are even hard to recover because they're THAT dark in the Develop Tab.
So if anybody knows how I can work on a version of my picture that looks like the JPEG preview but is a RAW file, let me know pls
By @GermanCutter1
You don't mention what camera you're using, but many cameras have a setting that lifts the shadows in the image. (Nikon calls it Active D-lighting) The image on the camera monitor and the embedded jpg preview will have lifted shadows and mid-tones. This gives you the impression that the image is correctly exposed when it in fact is underexposed.
Camera settings are generally ignored by Lightroom, it doesn't understand them. (there are exceptions – some mirrorless cameras write camera settings to XMP, which Lightroom understands)
I suggest that you go through your camera settings, and set everything to neutral/zero.
If your camera has Picture styles, or something with a similar name, choose a setting that says "neutral" or "normal", or something similar. This should make the embedded preview/jpg match LrC's rendering better.
Copy link to clipboard
Copied
"I am currently experiencing the same problem, which is that theres a huge difference between my JPEG preview (aka Embedded Preview) in the Library Tab and the real RAW image in my Develop Tab."
To verify we're all talking about the same thing, if you go to Library and view the image in Loupe at 100%, does it now closely match what you see in Develop, or is Develop still much darker?

Copy link to clipboard
Copied
This is very frustrating. I have a new M4 Macbook Pro and haven't changed any setting since I got it last month. All of a sudden this morning I started getting darker develop images. I've tried everything that was suggested above and nothing works. Please help.
Copy link to clipboard
Copied
@tim_2646: "All of a sudden this morning I started getting darker develop images"
So if you select the image in Library, do the menu command Library > Previews > Build 1:1 Previews, and then compare the photo in Library Loupe view with Develop, it looks darker in Develop?

Find more inspiration, events, and resources on the new Adobe Community
Explore Now
 AdChoices