

- Home
- Lightroom Classic
- Discussions
- Help! need help fixing ugly carpet coloring
- Help! need help fixing ugly carpet coloring

Copy link to clipboard
Copied
I have been trying to fix the carpets funky color but cant seem to get a smooth even color throughout all of the carpet. Towards the left of the picture near the doorway it is really bad but there are blotches all over that make the carpet look horrible. Any help as to how to get the carpet a nice even color would be much appreciated! If anyone notices anything else that can help sharpen this picture up to please let me know, I am working towards growing my real estate photography business and need as much advice as possible. Thanks in advance!


 1 Correct answer

https://forums.adobe.com/people/Chuck+Uebele wrote
This is really something that needs to be done in Photoshop and not Lightroom.
You can also do this in LR using the Local Adjustment Brush with Auto Mask and The Clone Heal Tool to remove the remaining spots. It's a toss-up as to which method is easiest to use. LR's Auto Mask isn't perfect, but edges can be cleaned up further with Auto Mask unchecked and using the SHIFT key to create straight-line edge corrections. Tutorials here:
How to apply local adjustments to photos in Photoshop Lightroom
... 10
Replies
10
10
Replies
10

Copy link to clipboard
Copied
This is really something that needs to be done in Photoshop and not Lightroom. In PS, you can target the area that are off color easier by using mask and other mean.
By using color range and a curves adjustment layer, you can equalize a lot of the mottled color.

You can then go a step further and sample the rug colors to make a gradient layer with the blend mode set to color. reduce the opacity to taste, and use blend-if sliders with blue channel to eliminate most of the white walls. A mask can clean up the rest.

Copy link to clipboard
Copied
would you be able to give me a step by step on how you did it. My photoshop skills are a little rusty as I have been concentrating on premeire pro and lightroom for a while now. Thanks in advance!
Copy link to clipboard
Copied
Zoom in to to areas that are bad, and use Selec>Color Range to select those areas - selecting the most off colored pixels.

Add a curves adjustment layer. The selection you made with Color Range will be applied to the mask.

You can go back in and add areas to the mask using color range again and then filling those areas in the mask with white, such and the back corner.
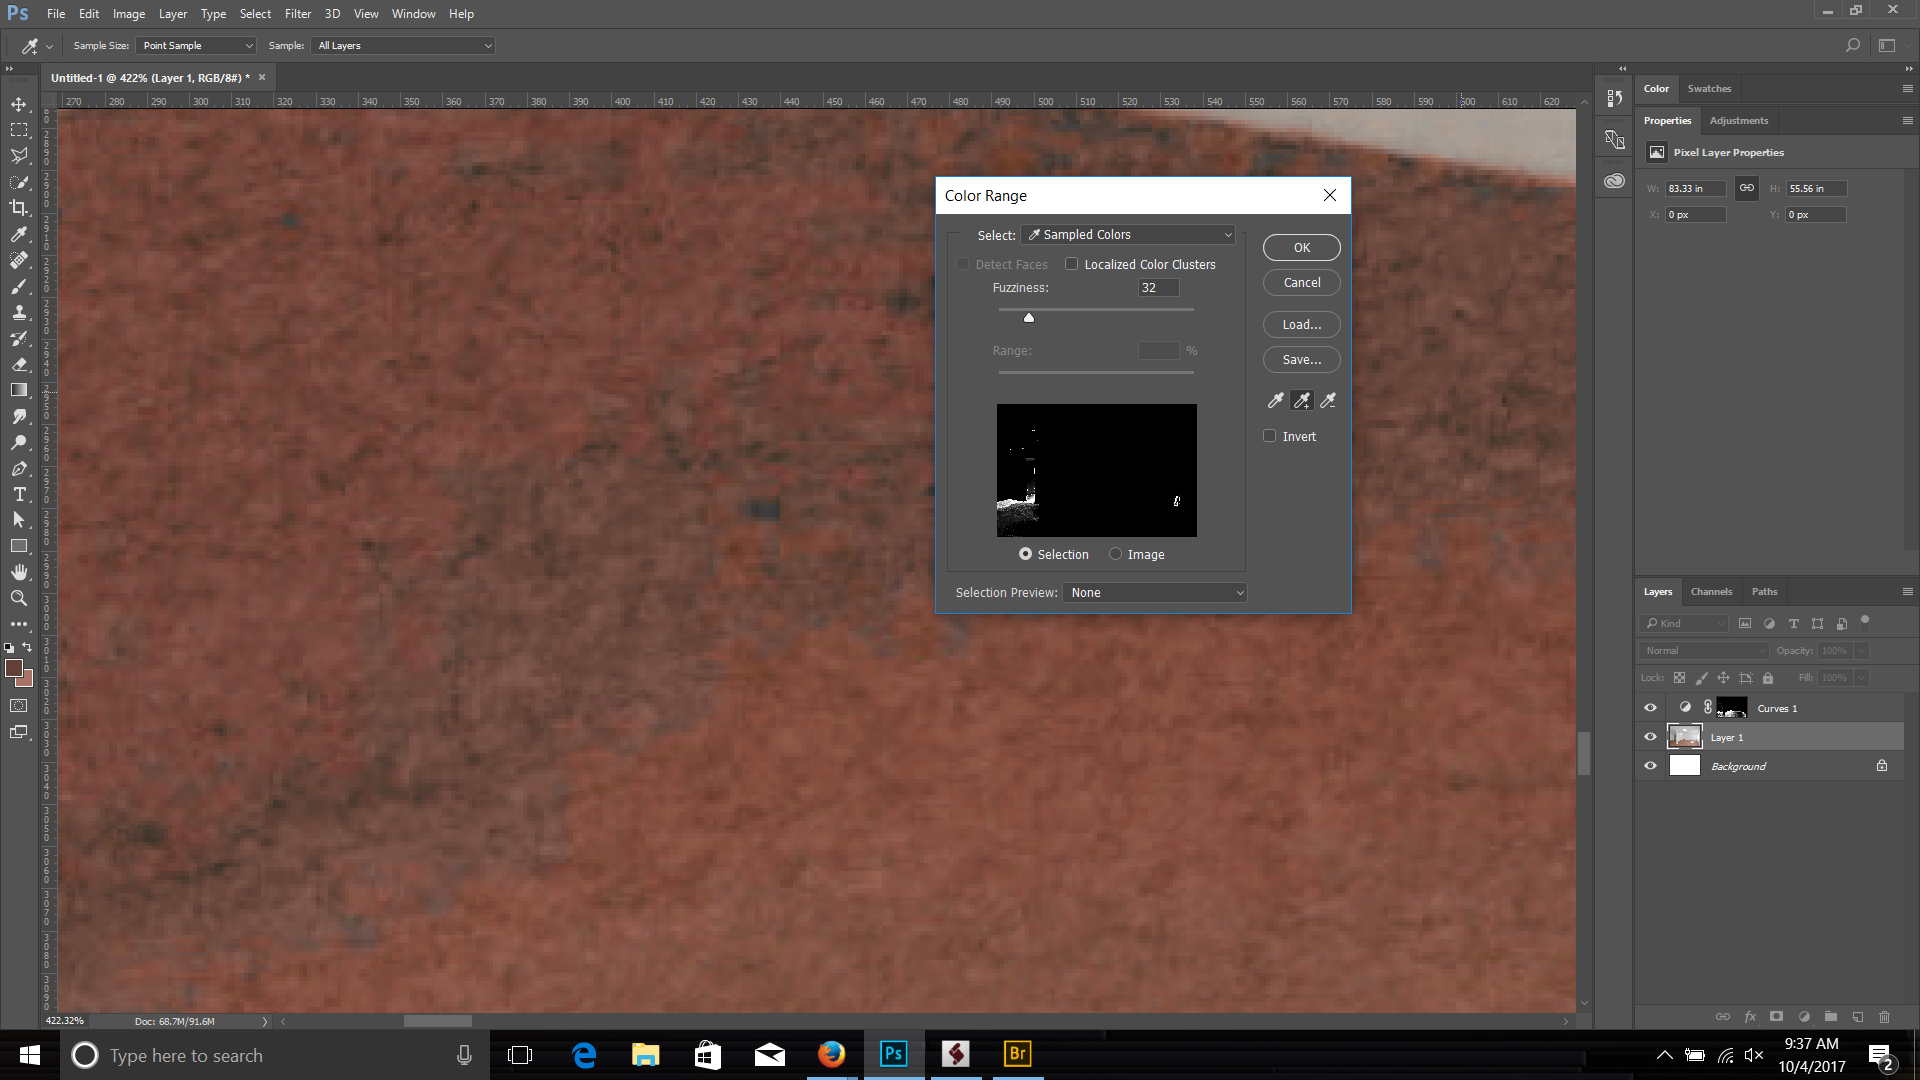
Or you can add another adjustment layer to be more precise.

Using a brush, clean up the white areas in the mask where you don't want the correction, like in the doorway.

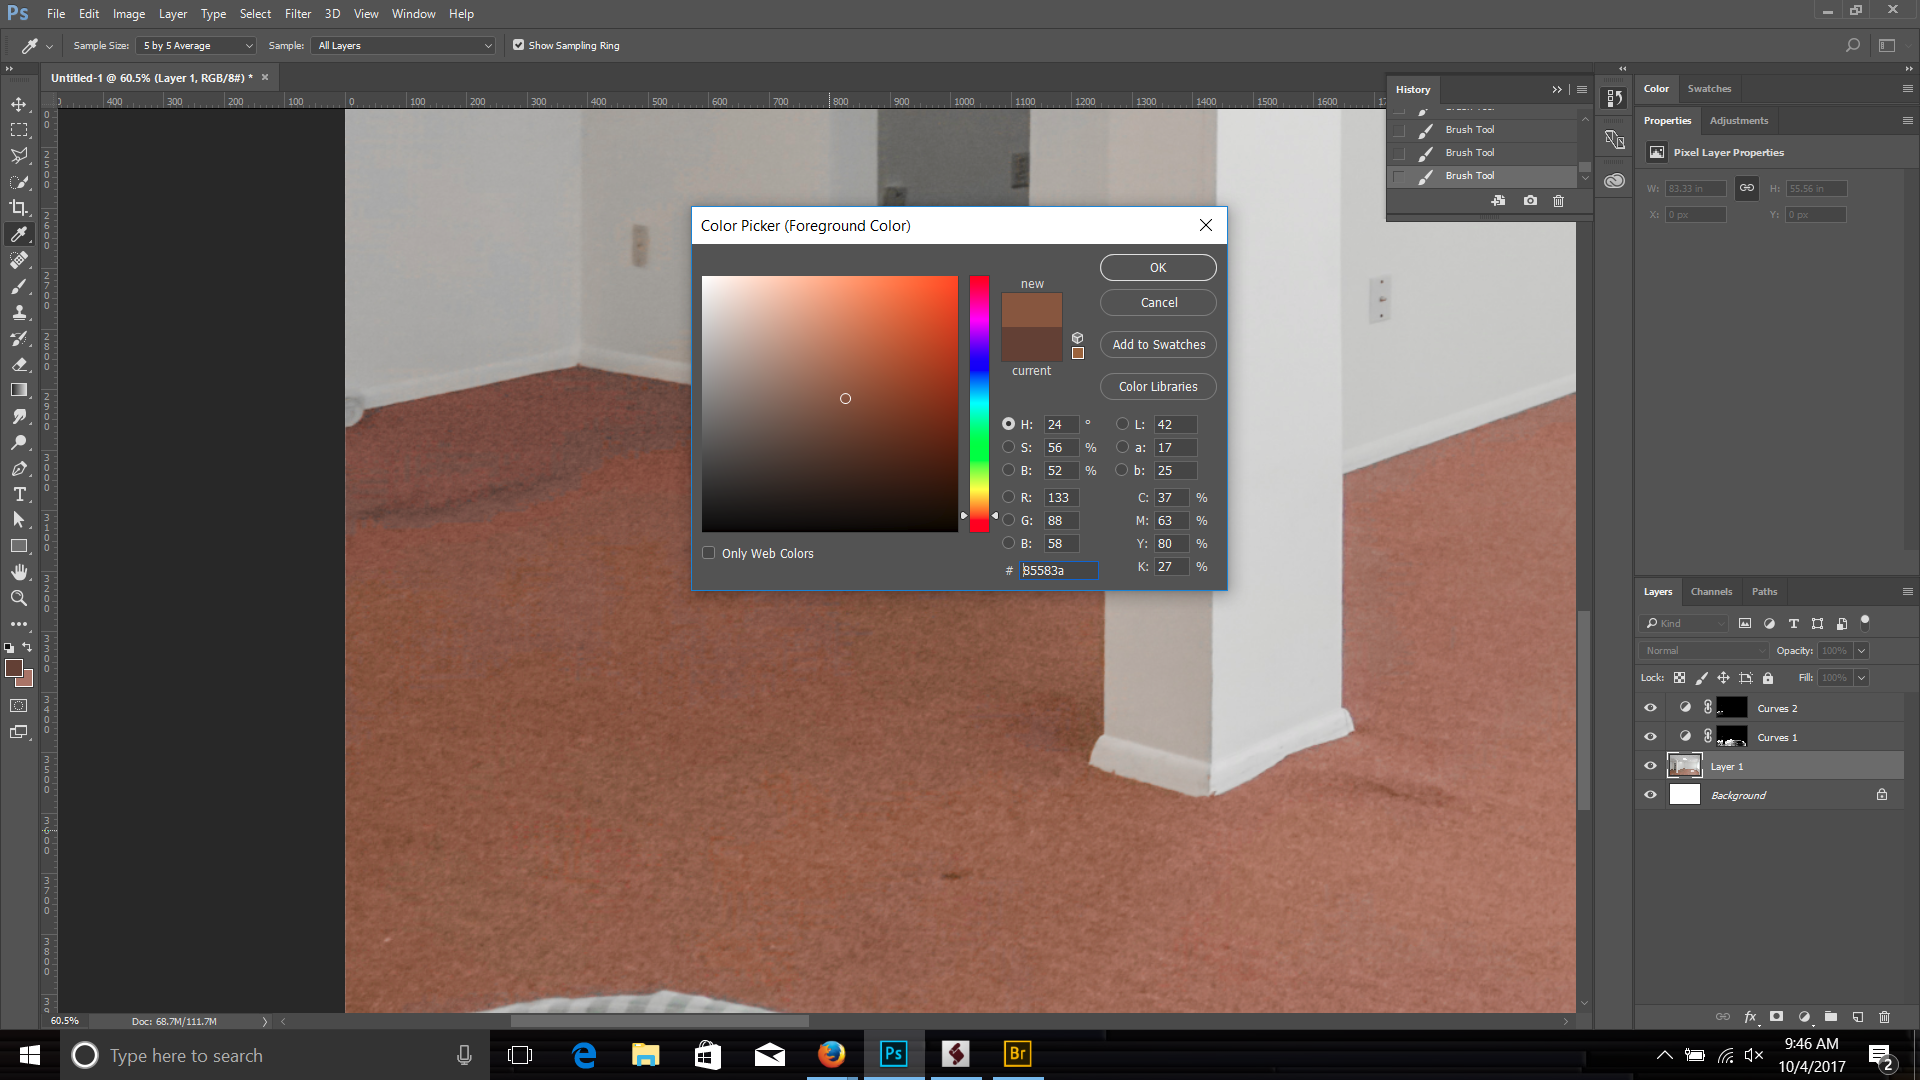
Sample an area of the carpet that is the color you want.

Create a solid color adjustment layer using the color you selected. Change the blend mode to color.
Use the blend-if sliders, selecting the layer below in the UI and the blue chanel to clean up the walls. Press Alt/Opt and drag one side of the slider to split it, to feather the results.

Paint in the mask with black on the areas that weren't eliminated with the blend-if sliders. Adjust the opacity to let some of the original color come though and not have it look so flat.

Copy link to clipboard
Copied
when i make the color range and then create a curve layer, the color from the color range doesnt transfer to the curve layer? the curve layer is at default colors. do i have to play around in the curve to find the right color or should it automatically correct itself

Copy link to clipboard
Copied
Freshshoots,
Chuck Uebele has gone over an above here providing you a step by step customized tutorial for your image. The kind of help you are looking for goes beyond what can be explained and taught here in a user forum. If you are serious about Real estate photography as a business you should seriously consider taking some Photoshop classes to brush up on your photo editing skills. Lr can probably do the majority of what you need for real estate, but there will be times like this when knowing Photoshop is a must.
Copy link to clipboard
Copied
You have to play around with the curves to adjust them they way you want. All part of photography, and correcting an image: knowing how to color balance, and having an eye for it.

Copy link to clipboard
Copied
If anyone notices anything else that can help sharpen this picture up to please let me know, I am working towards growing my real estate photography business and need as much advice as possible.
The image you posted is a jpg shot at ISO 1600. It has lots of noise and jpg compression artefacts.
If you shoot raw files at ISO 100 - 200 (use a tripod), you will see a significant improvement in quality.
Copy link to clipboard
Copied
With a tripod, it is no problem to shoot at ISO100 with any light conditions.
And btw: open holes like under the window are also to be avoided.
And I would highly recommend to book some classes or look at the Adobe TV videos (and other resources like Lynda.com, Youtube etc.).
Lr is the tool I use in 99% of the cases, but when I need to work on things like your carpet, I change to Ps.
[Edited: mistyped ISO as dpi...]
Copy link to clipboard
Copied
https://forums.adobe.com/people/Chuck+Uebele wrote
This is really something that needs to be done in Photoshop and not Lightroom.
You can also do this in LR using the Local Adjustment Brush with Auto Mask and The Clone Heal Tool to remove the remaining spots. It's a toss-up as to which method is easiest to use. LR's Auto Mask isn't perfect, but edges can be cleaned up further with Auto Mask unchecked and using the SHIFT key to create straight-line edge corrections. Tutorials here:
How to apply local adjustments to photos in Photoshop Lightroom
Lightroom Enhanced Spot Removal tool
Here's an example:

Copy link to clipboard
Copied
Nice job. I’m impressed.

Find more inspiration, events, and resources on the new Adobe Community
Explore Now
 AdChoices