FreshShoots
Participant
October 4, 2017
Answered

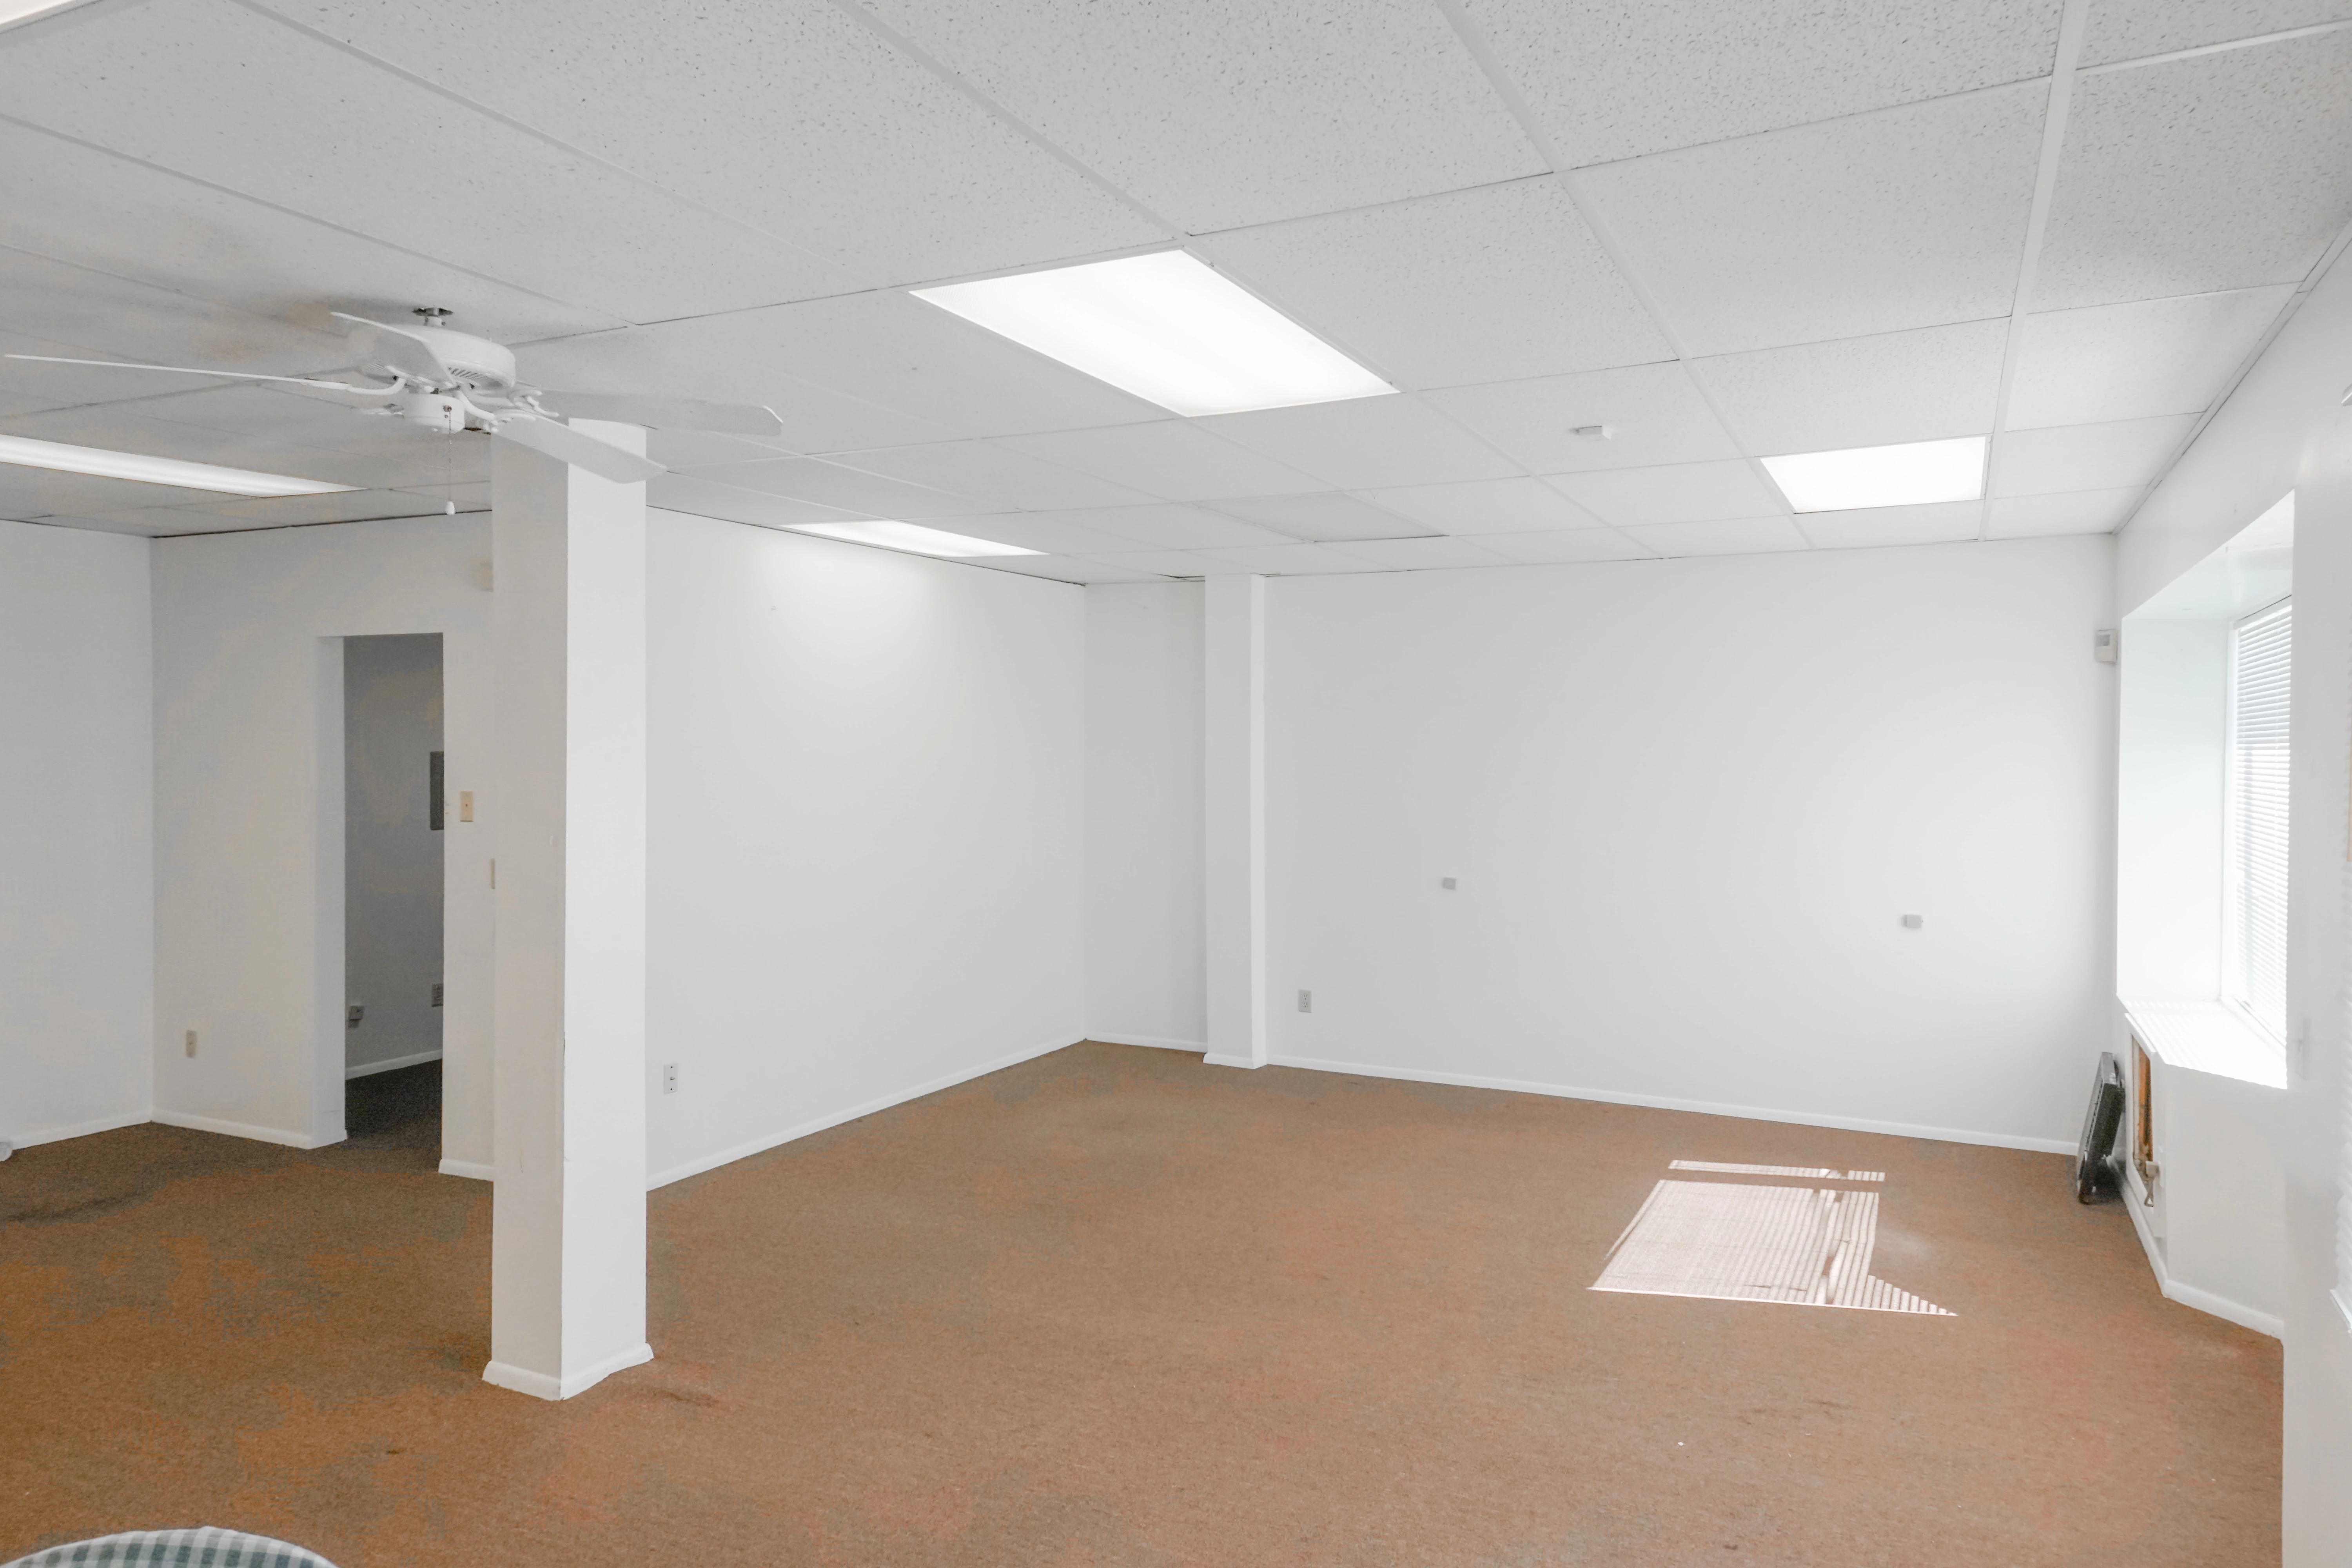
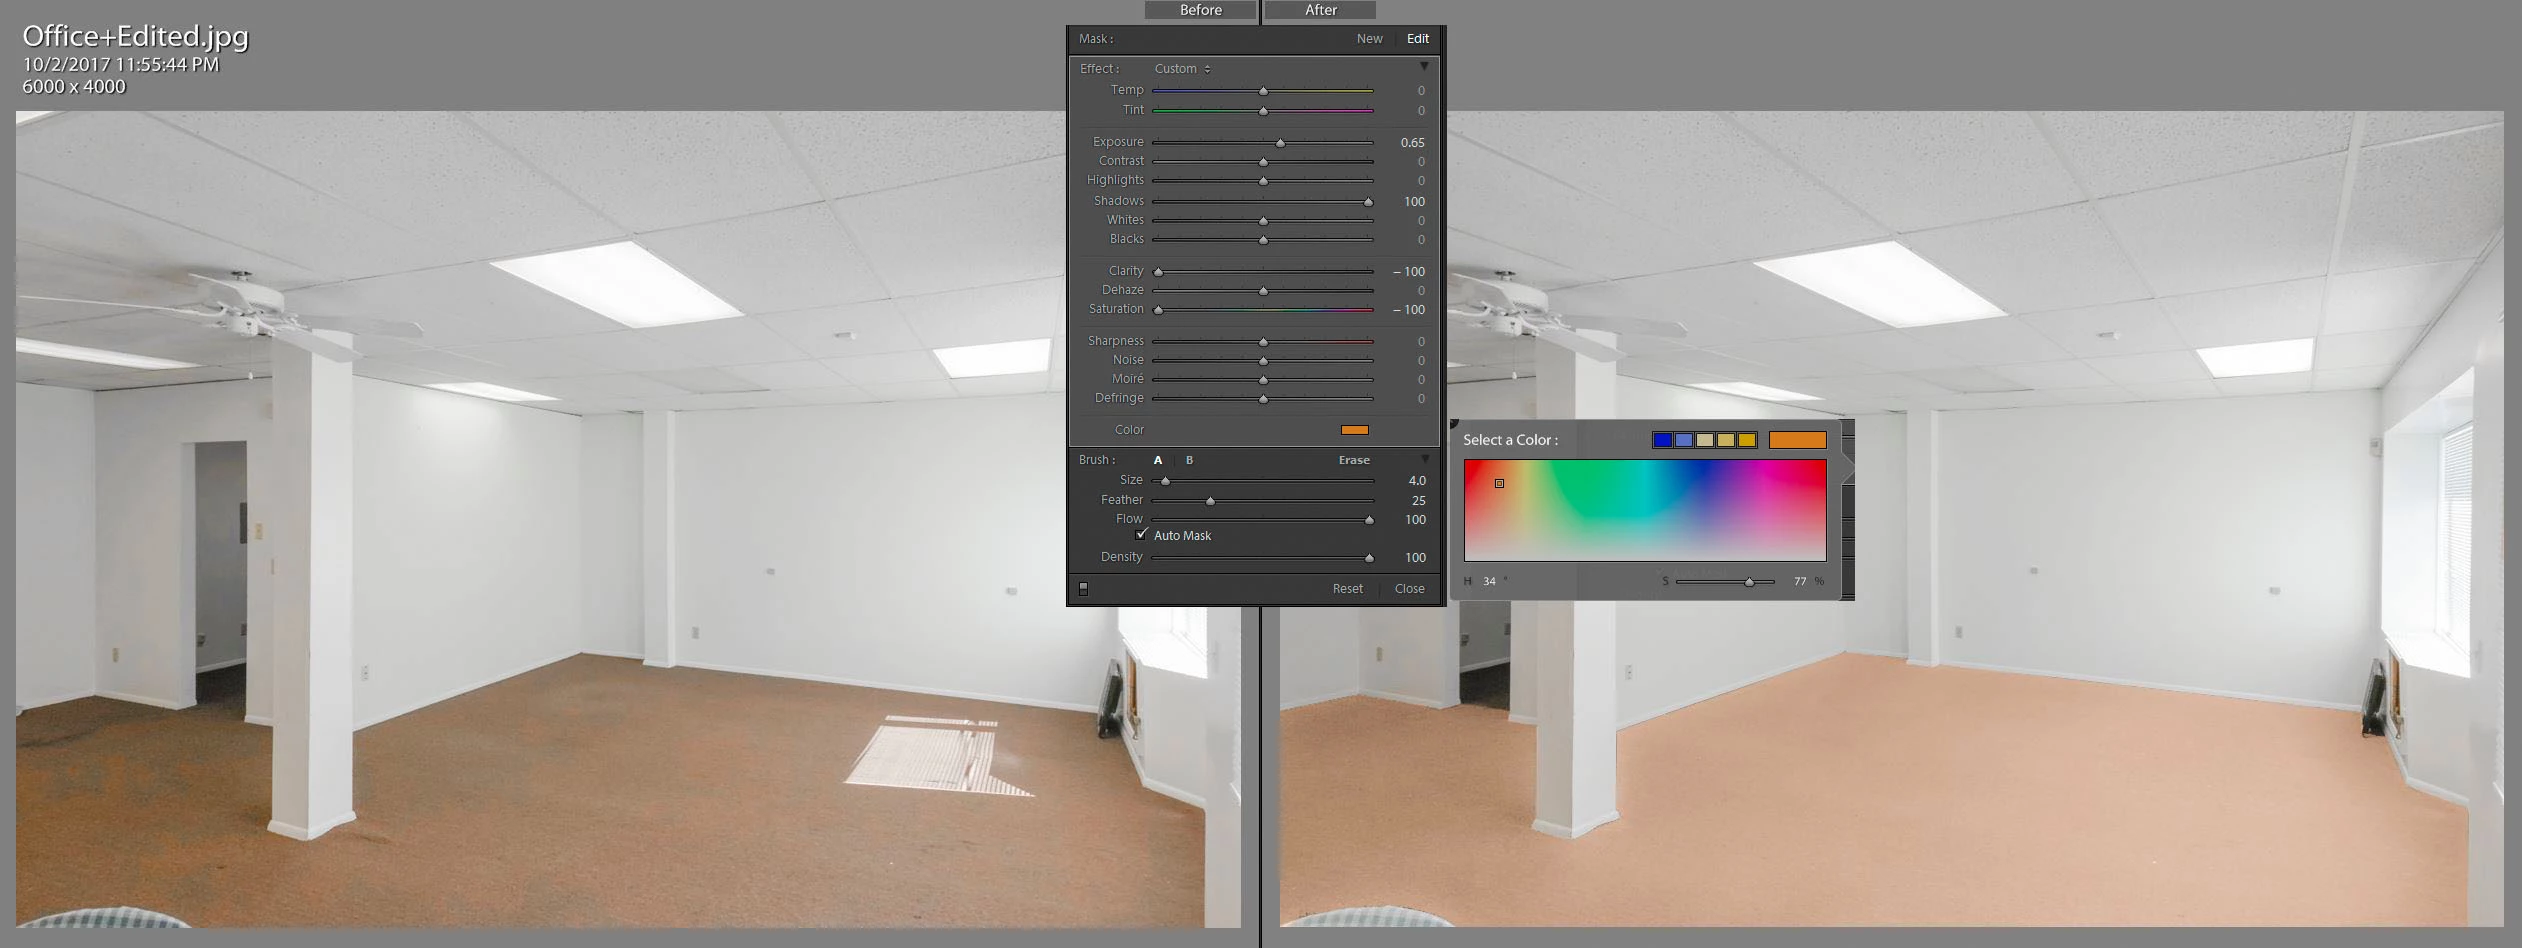
Help! need help fixing ugly carpet coloring

  • October 4, 2017
  • 1 reply
  • 3158 views

I have been trying to fix the carpets funky color but cant seem to get a smooth even color throughout all of the carpet. Towards the left of the picture near the doorway it is really bad but there are blotches all over that make the carpet look horrible. Any help as to how to get the carpet a nice even color would be much appreciated! If anyone notices anything else that can help sharpen this picture up to please let me know, I am working towards growing my real estate photography business and need as much advice as possible. Thanks in advance!

This topic has been closed for replies.
Correct answer Todd Shaner

https://forums.adobe.com/people/Chuck+Uebele  wrote

This is really something that needs to be done in Photoshop and not Lightroom.

You can also do this in LR using the Local Adjustment Brush with Auto Mask and The Clone Heal Tool to remove the remaining spots. It's a toss-up as to which method is easiest to use. LR's Auto Mask isn't perfect, but edges can be cleaned up further with Auto Mask unchecked and using the SHIFT key to create straight-line edge corrections. Tutorials here:

How to apply local adjustments to photos in Photoshop Lightroom

Lightroom Enhanced Spot Removal tool

Here's an example:

1 reply

Chuck Uebele
Community Expert
Community Expert
October 4, 2017

This is really something that needs to be done in Photoshop and not Lightroom. In PS, you can target the area that are off color easier by using mask and other mean.

By using color range and a curves adjustment layer, you can equalize a lot of the mottled color.

You can then go a step further and sample the rug colors to make a gradient layer with the blend mode set to color. reduce the opacity to taste, and use blend-if sliders with blue channel to eliminate most of the white walls. A mask can clean up the rest.

FreshShoots
Participant
October 4, 2017

would you be able to give me a step by step on how you did it. My photoshop skills are a little rusty as I have been concentrating on premeire pro and lightroom for a while now. Thanks in advance!

FreshShoots
Participant
October 4, 2017

Zoom in to to areas that are bad, and use Selec>Color Range to select those areas - selecting the most off colored pixels.

Add a curves adjustment layer. The selection you made with Color Range will be applied to the mask.

You can go back in and add areas to the mask using color range again and then filling those areas in the mask with white, such and the back corner.

Or you can add another adjustment layer to be more precise.

Using a brush, clean up the white areas in the mask where you don't want the correction, like in the doorway.

Sample an area of the carpet that is the color you want.

Create a solid color adjustment layer using the color you selected. Change the blend mode to color.

Use the blend-if sliders, selecting the layer below in the UI and the blue chanel to clean up the walls. Press Alt/Opt and drag one side of the slider to split it, to feather the results.

Paint in the mask with black on the areas that weren't eliminated with the blend-if sliders. Adjust the opacity to let some of the original color come though and not have it look so flat.


when i make the color range and then create a curve layer, the color from the color range doesnt transfer to the curve layer? the curve layer is at default colors. do i have to play around in the curve to find the right color or should it automatically correct itself