Exit
  • Global community
    • Language:
      • Deutsch
      • English
      • Español
      • Français
      • Português
  • 日本語コミュニティ
  • 한국 커뮤니티
3

how to clean thousands of blemishes from a photo, other than one a time

Explorer ,
Oct 08, 2023 Oct 08, 2023

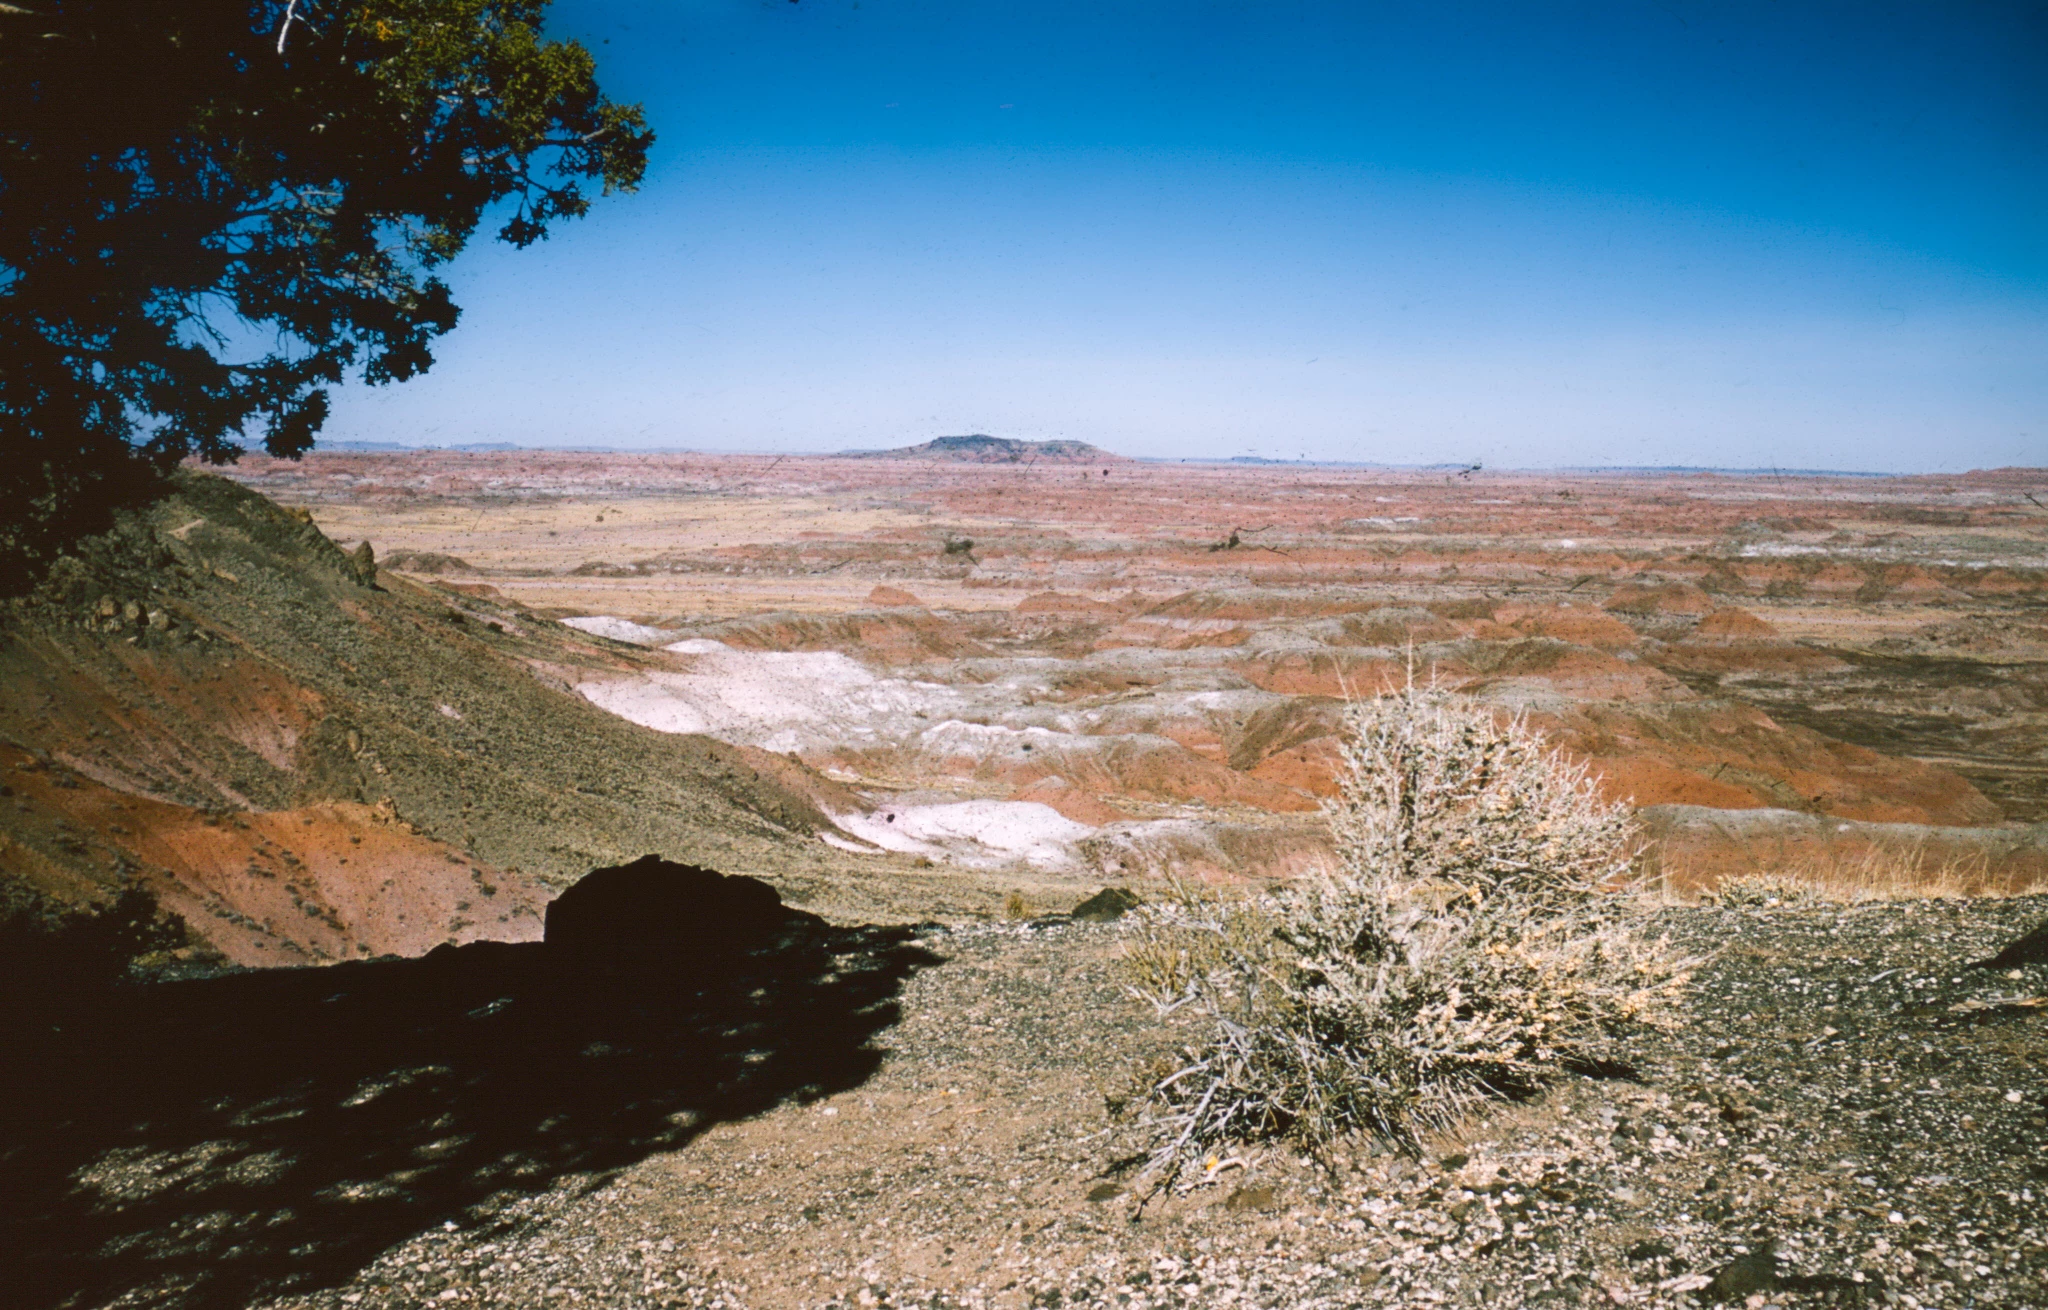
I have about 50 slides mounted in glass with thousands of blemishes.  I


have spent as long as 3 days removing blemishes from one photo.  This involved cleaning up as much as I could until the fix markers got so crowded I couldn't continue, exporting the photo, importing the photo, and cleaning up more blemishes, repeating this cycle several times a day. 


I have also cleaned up an area one blemish at a time, widened the spot removal brush and with the cleaned area as the source, used clone or heal to remove blemishes in other parts of the photo.  This works best in areas with little detail, like a clear sky. 


Is there a faster way in either PhotoShop or Lightroom, other than one blemish at a time, to clean up a photo?

TOPICS
Windows
3.5K
Translate
Report
Community guidelines
Be kind and respectful, give credit to the original source of content, and search for duplicates before posting. Learn more
community guidelines

correct answers 1 Correct answer

Community Expert , Oct 09, 2023 Oct 09, 2023

I imported your image in LrC, and first did some basic adjustments, to make it easier to work with the image.

I expanded the tonal range by setting Blacks to -23 and Whites to 75.

I then set Exposure to 0.40 to make it a bit brighter.

Then I went to Masking and chose Select sky, and set Clarity and Texture to -100.

This removed the majority of the black spots in the sky, and the rest were removed with the Healing brush.

All this took less than five minutes.


There's still some smaller spots lef

...
Translate
Community Expert ,
Oct 08, 2023 Oct 08, 2023

Can you post a typical example here using the Insert Photos button in the forum toolbar?

Translate
Report
Community guidelines
Be kind and respectful, give credit to the original source of content, and search for duplicates before posting. Learn more
community guidelines
Explorer ,
Oct 08, 2023 Oct 08, 2023

Here is an example.

Translate
Report
Community guidelines
Be kind and respectful, give credit to the original source of content, and search for duplicates before posting. Learn more
community guidelines
Explorer ,
Oct 09, 2023 Oct 09, 2023

Here are before (test2.jpg) and after (test2after.jpg) examples.


In short, Photo Restoration removed the fine blemishes, left the large ones untouched, and removed the detail in the photo.  The goal; remove the crud and keep the detail, will be a hard nut to crack

Translate
Report
Community guidelines
Be kind and respectful, give credit to the original source of content, and search for duplicates before posting. Learn more
community guidelines
Explorer ,
Oct 09, 2023 Oct 09, 2023

Scratch reduction by itself didn't remove any significant number of blemishes.  The problem with the photo is the blemishes, not scratches.  I guess this photo hit Photo Restoration where it doesn't excel.

Translate
Report
Community guidelines
Be kind and respectful, give credit to the original source of content, and search for duplicates before posting. Learn more
community guidelines
Engaged ,
Oct 08, 2023 Oct 08, 2023

You may want to give the "Photo Restoration" neural filter in Photoshop a try.

Filter > Neural Filters..., then select Photo Restoration from the list in the right panel.

You can adjust "Scratch reduction".

It's in beta test but works well.  I find the results are not perfect but it's a pretty good start.


As the name implies this is a neural net AI application which is optimized for NVidia GPU's.  I think the filter still works if you don't have a GPU, but it will probably be very slow. 

Translate
Report
Community guidelines
Be kind and respectful, give credit to the original source of content, and search for duplicates before posting. Learn more
community guidelines
Explorer ,
Oct 08, 2023 Oct 08, 2023

Thanks. 

I'll try it.  No Invidia hardware is in the computer. The operating system is Windows 11.

bruceo62291541_0-1696810444582.png


Translate
Report
Community guidelines
Be kind and respectful, give credit to the original source of content, and search for duplicates before posting. Learn more
community guidelines
Community Expert ,
Oct 09, 2023 Oct 09, 2023

I imported your image in LrC, and first did some basic adjustments, to make it easier to work with the image.

I expanded the tonal range by setting Blacks to -23 and Whites to 75.

I then set Exposure to 0.40 to make it a bit brighter.

Then I went to Masking and chose Select sky, and set Clarity and Texture to -100.

This removed the majority of the black spots in the sky, and the rest were removed with the Healing brush.

All this took less than five minutes.


There's still some smaller spots left, and I would use the Spot Healing brush tool in Photoshop to remove these, and the most prominent spots in the landscape.


Test-1.jpg

Translate
Report
Community guidelines
Be kind and respectful, give credit to the original source of content, and search for duplicates before posting. Learn more
community guidelines
Community Expert ,
Oct 09, 2023 Oct 09, 2023

Here's the image before I selected the sky:


Test-2.jpg

Translate
Report
Community guidelines
Be kind and respectful, give credit to the original source of content, and search for duplicates before posting. Learn more
community guidelines
Explorer ,
Oct 10, 2023 Oct 10, 2023

Per,


Thnks for the help.  That removes about half blemishes.  That helps a lot!

Translate
Report
Community guidelines
Be kind and respectful, give credit to the original source of content, and search for duplicates before posting. Learn more
community guidelines
Community Expert ,
Oct 10, 2023 Oct 10, 2023

That's an impressive technique! 

Translate
Report
Community guidelines
Be kind and respectful, give credit to the original source of content, and search for duplicates before posting. Learn more
community guidelines
Explorer ,
Oct 16, 2023 Oct 16, 2023
LATEST

Per's appraoch worked quite well.  In fact, I used it on some other photos that had similar problems that I've worked on since trying the technique.

Translate
Report
Community guidelines
Be kind and respectful, give credit to the original source of content, and search for duplicates before posting. Learn more
community guidelines
Community Expert ,
Oct 10, 2023 Oct 10, 2023
quote

I have spent as long as 3 days removing blemishes from one photo.  This involved cleaning up as much as I could until the fix markers got so crowded I couldn't continue, exporting the photo, importing the photo, and cleaning up more blemishes, repeating this cycle several times a day. 


By @bruceo62291541


No need to do that. Just turn off the tool overlay in the lower left corner below the image. Set it to 'Never', and the icons will not show on the image.


-- Johan W. Elzenga
Translate
Report
Community guidelines
Be kind and respectful, give credit to the original source of content, and search for duplicates before posting. Learn more
community guidelines
Participant ,
Oct 10, 2023 Oct 10, 2023

I tried using the neural filters->photo restoration option in Photoshop followed by a few spot healing applications. But it seemed to have lost some of the detail in the mountains. It reduced the amount of work but I don't think the results are that great. The feature has worked great on some old portraits for me.

1.jpg

Translate
Report
Community guidelines
Be kind and respectful, give credit to the original source of content, and search for duplicates before posting. Learn more
community guidelines