 Adobe Community
- Home
- Lightroom Classic
- Discussions
- Re: Clone tool not working properly, not cloning 1...
- Re: Clone tool not working properly, not cloning 1...

Copy link to clipboard
Copied
Problem: When I use the spot removal tool in Lightroom Classic version 11 to remove a leaf against open sky after Sky Select was used, Lightroom fails to remove the spot completely. It leaves a light gray version of the leaf behind. See samples below. I checked and opacity is set to 100%.
The problem does not occur if I do spot removal before Sky Select is used.
This is on Windows 10, working on a Fuji GFX 50R RAF.


 1 Correct answer

This is current as-designed behavior.
The workflow is to correct spots (Content Aware Heal, Spot Heal Tool, Clone Tool) prior to using any AI Masking (Sky, Subject, Object, People, etc.)
Using the Healing tools after applying an AI Selection Mask will likely show artifacts where they overlap.
 118
Replies
118
118
Replies
118

Copy link to clipboard
Copied
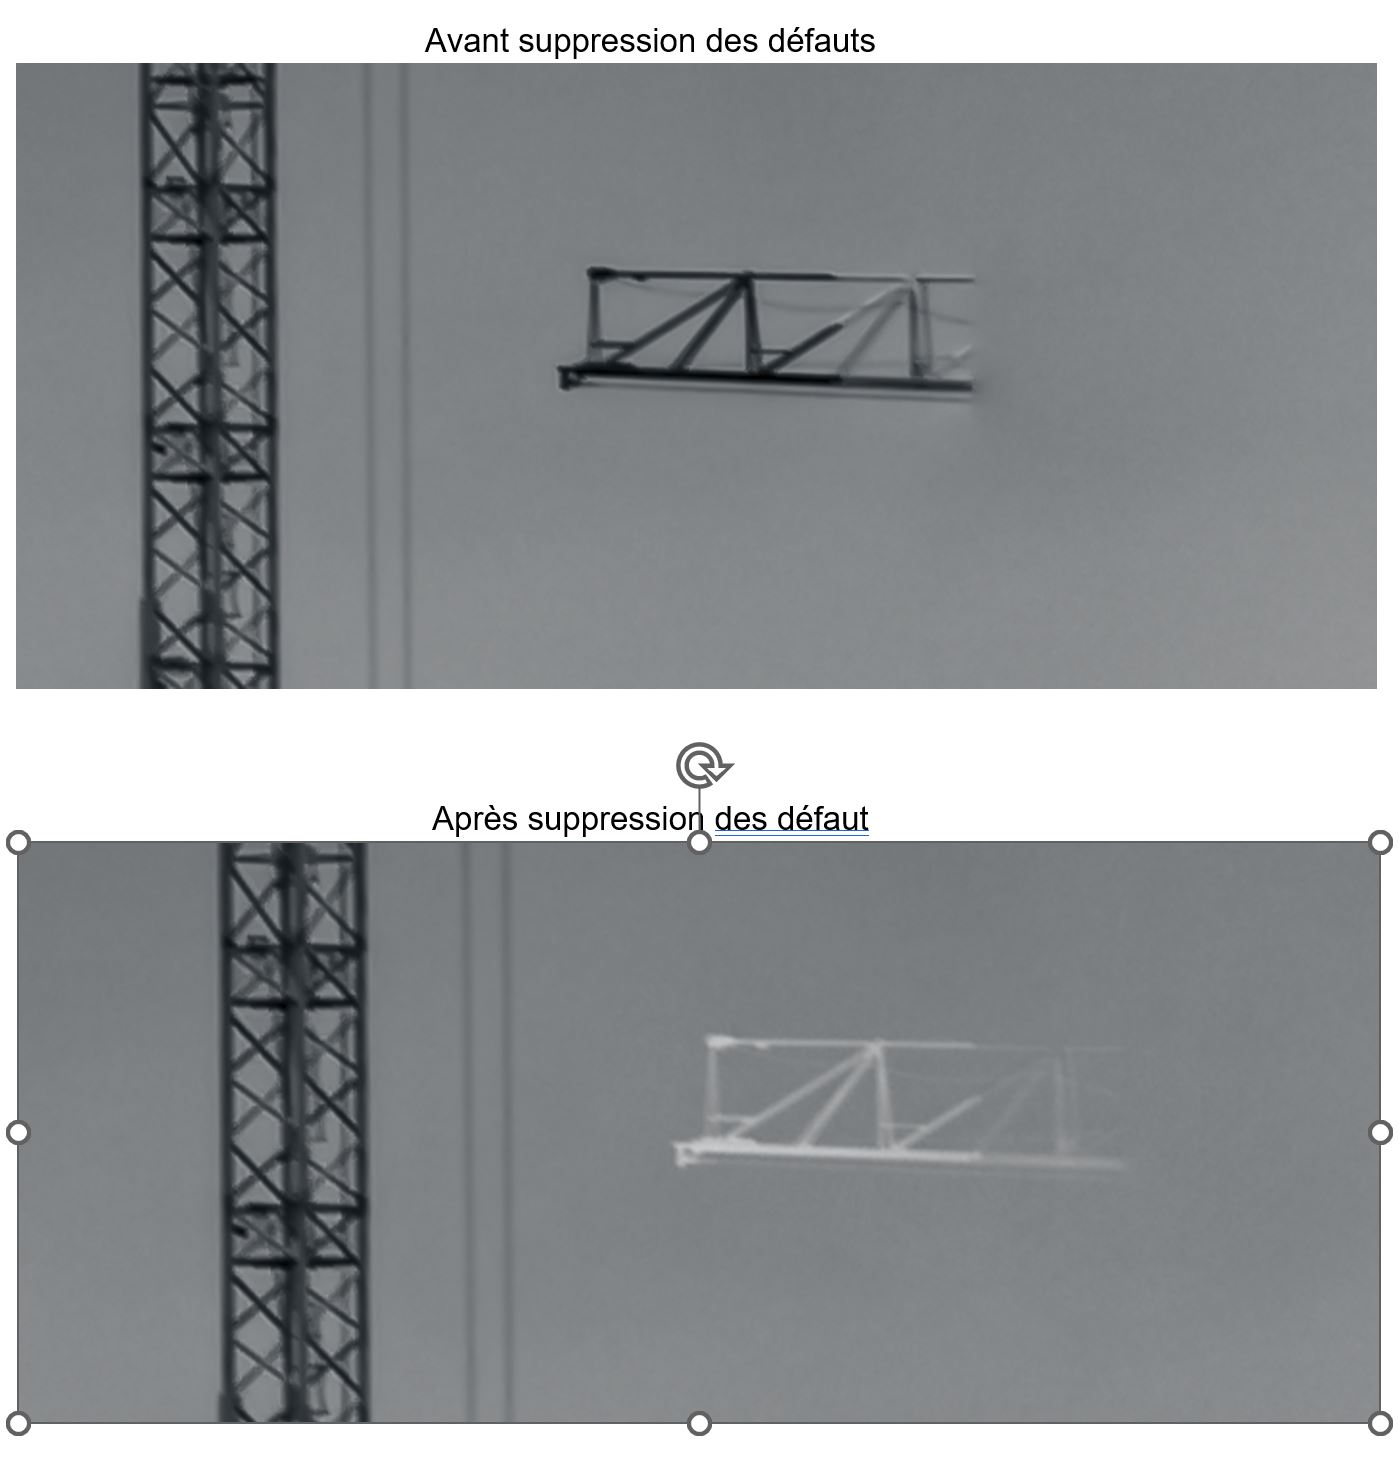
Dans LRClassic 11.5 , la correction de défauts laisse un voile de contour de la partie supprimée (en mode dupliquer ou corriger); cela rend obligatoire le passage dans PS pour supprimer l'élément indésirable de façon invisible.


Copy link to clipboard
Copied
This is a known issue with masks. Make your spot removal first, then add the mask.

Copy link to clipboard
Copied
Hi
I have noticed this issue on different computers. The clone brush does not clone at 100% despite the opacity being set to 100%, some of the underlying image still shows through. Any ideas?


Copy link to clipboard
Copied
In the Masks panel are toggle switches (duplicated at top and bottom) which can temporarily turn off the effect of all local adjustments present on this image.

If when masks are hidden the cloning no longer shows that "shadowed" detail then this is the same issue already discussed here: some mask, e.g. a Subject selection, has been generated using the previous appearance of the image (from before you added this new cloning), hence the out-of-date extent where adjustments are / are not now being applied under the control of this mask, has not taken any account of your newly cloned image.
The answer is either to complete your cloning before generating AI masks that take account of the content of the image (for example, Subject) - or, to re-generate such AI masks when subsequent cloning has made desirable a fresh evaluation of where (e.g.) the "Subject" boundary should now be detected.
It is also possible to have a brushed (non AI) local adjustment mask which when it was originally painted on, took account of the image as it appeared at that time: either manually, or else semi-automatically via the 'AutoMask' brushing option. Such a mask may need to be later updated through new brushing / erasing, in order to once again conform in the desired way to the underlying image content, as that now appears after further work of cloning etc. The same issue in principle, so the same two answers apply.
A local adjustment mask that is selecting its extent "live on the fly" based only on your chosen range of tones or of colours, by contrast, cannot ever be put 'out of date' with the image by new cloning etc.

Copy link to clipboard
Copied
Bonjour tout le monde,
De temps en temps (la joie des problèmes aléatoires !) l'utilisation de la fonction "suppression des défauts" ne fait pas disparaitre le défaut sous la zone recopiée mais le laisse apparent en blanc.
Même en faisant "duppliquer" plusieurs fois, une fois que le défuaut est blanc, imposible de le modifier.
Dubitatif et perplexe, je suis.
Aucune logique trouvée à ce souci.
Merci d'avance pour votre aide.
Cordialement.

Copy link to clipboard
Copied
Copy link to clipboard
Copied
Please help me with my issue: I have read that spot removal was updated... so is it a bug ?
Copy link to clipboard
Copied
Are you sure they have been removed fully in the develop module? Zoom in to 100% and check. And did you use a mask of any kind? If so, remove spots first and add masks after that.
Copy link to clipboard
Copied
Thanks for your answer, yes I did first MASK and then SPOT removal.
Regards

Copy link to clipboard
Copied
Issue:
- Lightroom Classic Version Number: 12.0
- OS Version Number: Windows 10 Pro 21H2
Steps to reproduce:
- Photo with blue sky
- Set the opacity to 100, size to whatever, feather to whatever (even 0)
- Heal or clone a portion of the image, replacing the object (or part of it) with blue sky
- Notice that you can still see some of the object through the blue sky that was added. This was never seen in previous versions of Lightroom
Expected result: With opacity set to 100%, none of the object underneath should show through the blue sky
Actual result: The newly added blue sky has some transparency, showing the object underneath
Copy link to clipboard
Copied
Did you have any masked adjustments already active on this image?
If so: for example, a Select Sky mask that had been put in place before doing this object removal, would have followed the boundary of this object and not treated it as an area of Sky. The adjustments applied by this mask would therefore continue to avoid its area, while applying to adjacent areas of sky, thus leaving a "trace" of that difference.
Working in a changed sequence - so: removing unwanted objects first, and then generating any masks that refer to picture content - will naturally avoid this. Or, forcing a later update of the AI masking - either way resulting in a (e.g.) Sky mask which has taken proper account of your removal of this object.
Copy link to clipboard
Copied
Good call, you nailed it. I had a sky mask enabled, then did the healing brush. The other order works as expected.
Copy link to clipboard
Copied

When an AI mask has been 'invalidated' by subsequent actions, you can click an Update button to re-analyse this mask working from the image as it now appears.

Copy link to clipboard
Copied
You recently changed the way the "Healing" function works on Lightroom mobile app.
since that change, if you try using the "Clone" brush AFTER editing your photo, the clonning brush will show the relevant area BEFORE the edit.
meaning you can't use the Clone brush after editing.


Copy link to clipboard
Copied

All of my software & drives are up-to-date.
Steps:
- Edited a dng in lightroom
- Used Topaz denoise plugin, saved back to LR as a tiff.
- Edited Tiff in Radiant Photo, saved back to LR as a tiff.
- Edited Tiff in Topaz sharpen, saved back to LR as a tiff.
- (all is good so far), then found some more spots to remove. After using the spot healing tool, all areas that were removed (even ones that were done in Step 1) remain highlighted with bright purple circles. They will not go away, even after reboots and a RTX 3060 driver update. They are permanently on the photo. Some remnant of the code to show the circles remains active and does not refresh the area.
System Info below:
Lightroom Classic version: 12.0.1 [ 202210260744-9e008017 ]
License: Creative Cloud
Language setting: en
Operating system: Windows 10 - Business Edition
Version: 10.0.22000
Application architecture: x64
System architecture: x64
Logical processor count: 24
Processor speed: 3.7GHz
SqLite Version: 3.36.0
CPU Utilisation: 0.0%
Built-in memory: 65433.5 MB
Dedicated GPU memory used by Lightroom: 3824.2MB / 12142.0MB (31%)
Real memory available to Lightroom: 65433.5 MB
Real memory used by Lightroom: 2729.6 MB (4.1%)
Virtual memory used by Lightroom: 7473.4 MB
GDI objects count: 840
USER objects count: 2596
Process handles count: 3074
Memory cache size: 0.1MB
Internal Camera Raw version: 15.0 [ 1261 ]
Maximum thread count used by Camera Raw: 5
Camera Raw SIMD optimization: SSE2,AVX,AVX2
Camera Raw virtual memory: 1017MB / 32716MB (3%)
Camera Raw real memory: 876MB / 65433MB (1%)
System DPI setting: 96 DPI
Desktop composition enabled: Yes
Standard Preview Size: 1920 pixels
Displays: 1) 1920x1080
Input types: Multitouch: No, Integrated touch: No, Integrated pen: No, External touch: No, External pen: No, Keyboard: No
Graphics Processor Info:
DirectX: NVIDIA GeForce RTX 3060 (31.0.15.2230)
Init State: GPU for Export supported by default
User Preference: Auto
Application folder: C:\Program Files\Adobe\Adobe Lightroom Classic
Library Path: D:\Pictures\Lightroom\Chris Livingston Photography\ChrisLivingstonPhotography-v12.lrcat
Settings Folder: C:\Users\unfra\AppData\Roaming\Adobe\Lightroom
Installed Plugins:
1) AdobeStock
2) ColorChecker Camera Calibration
3) Flickr
4) Nikon Tether Plugin
5) Pixieset
6) Radiant Photo
7) Topaz Photo AI
Config.lua flags: None
.jpg")
.jpg")

Copy link to clipboard
Copied
Did you apply masking before using the Healing tool? That can create artifacts -- Adobe says to do use the Healing tool first:
Copy link to clipboard
Copied
I was unaware of that. Good to know. It has not happened since. Thanks.
Copy link to clipboard
Copied
These effects must be bugs: I can understand the principle of clone layers and mask layers, but if LR uses layers why can users not access them? I have only just discovered this when I was very puzzled by the cloning action not working as expected. I was delighted when LR introduced the Sky masking tool, but this behaviour is very puzzling. Previously if I wanted to darken the sky a fraction, I would use a graduated filter, and pull down the exposure a tad. Depending on the horizon and subjects against the sky, this sometimes then involved a workaround by lightening certain areas after the graduated filter. So selecting the sky as a whole and applying an exposure adjustment was a great boon. But only after the update to LR 12.2 the Clone/heal tool does not work properly. It worked on top of the sky mask, which showed some marks (dirty sensor I think), cloning the darker sky perfectly. But as soon as I tried to remove some branches silhouetted against the sky, it removed the colour of the branch but left it in white against the sky. So not simply cloning the original under the mask. And utterly useless! It seems that others were having similar problems in the version of LR before the update, so surely this should have been corrected before releasing the latest update.
Copy link to clipboard
Copied
Unfortunately, Adobe considers this "as designed" and not a bug:
You can usually work around the problem by doing Settings > Update AI Settings, rather than redoing the Healing tool and masking.
Copy link to clipboard
Copied
Copy link to clipboard
Copied
@Top Cat2000, I'm just the messenger -- Adobe really does consider the behavior "as designed":
The common workaround is to do the menu command Settings > Update AI Settings when you see this.
Copy link to clipboard
Copied
Yes, I tried that, and it did remove the white image, but left it with a grey ghost of the offending branch, so not a solution sadly.
I think the problem lies in the fact that the clone/heal tool is only working on the sky mask, and the sky mask will be excluding the branch, so the clone tool does not know whats in the branch area as it is only working on the sky mask. Updating the AI settings is then trying unsucessfully to put things right.
As we cannot merge layers, the only work around is to do all your cloning before applying the mask - but as many artifacts only become apparant after applying the mask it makes this tool far less useful.
Copy link to clipboard
Copied
It is not this result, but this sequence and way of using the software, which is not "as designed". This mismatch of mask vs cloned appearance, is simply a natural consequence of how it works.
Copy link to clipboard
Copied
So "as designed" means doing things in a rigid order determined by a software engineer, not intuitively as a photographer? I understand your saxaphone analogy, but this is not about blowing it the wrong way round, but simply using the tools provided to get the effect that you want, and now those tools are becoming less effective. A well designed piece of software will provide the solutions that a user needs: poorly designed software provides solutions limited to what the engineer can easily achieve. Chisels are designed to do a wide range of jobs: its up to the carpenter to how best to use them for his own work. I would expect a developer such as Adobe to do better than this. They clearly have a limited idea of what photographers need.

Copy link to clipboard
Copied
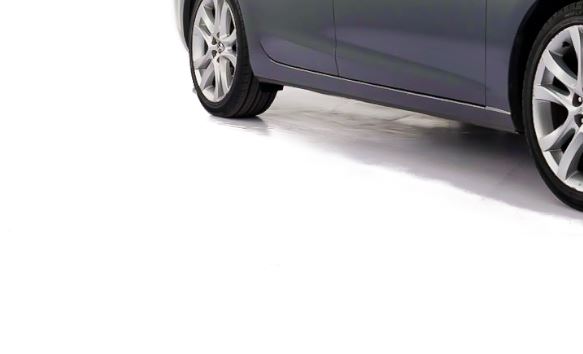
Attached is a screenshot of a portion of a photo I am editing. It's an Apple RAW DNG file. I've seen this primarily on Apple RAW and HEIC files but occasionally on Canon raw as well. No matter which "Healing" option I select (Clone or Heal; Content-Aware Remove does not perform what I need), I get the same thing, which I'd describe as a ghosting artifact of what was previously there. Is there a way to fix or prevent it? In this case, it would be that the darker color of pink sky would appear there instead of the lighter shade that shows the outline of people that I removed...?

 AdChoices