- Home
- Lightroom Classic
- Discussions
- P: Perform Healing Operations ( CAR / Spot / Clone...
- P: Perform Healing Operations ( CAR / Spot / Clone...
Copy link to clipboard
Copied
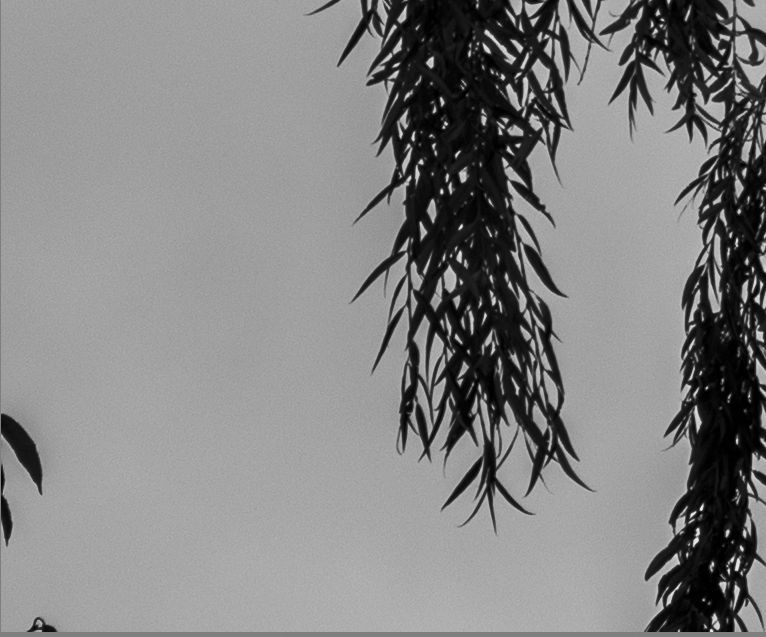
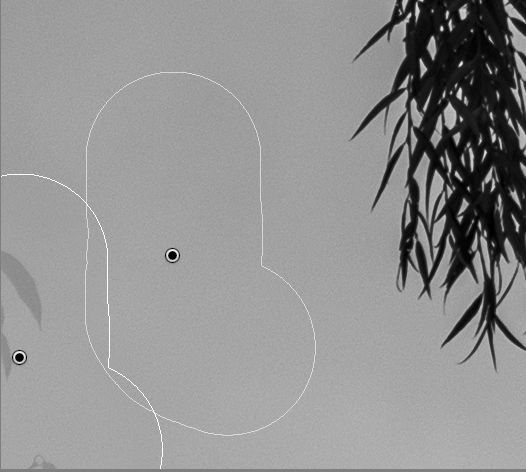
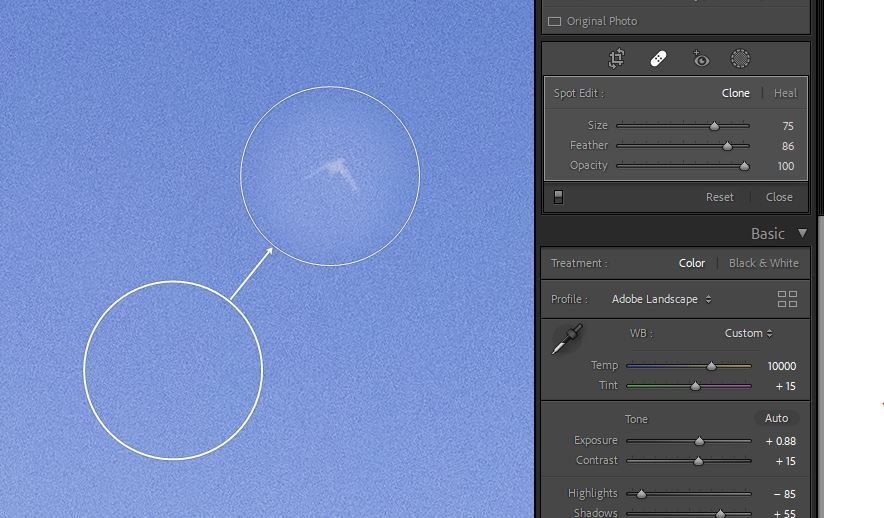
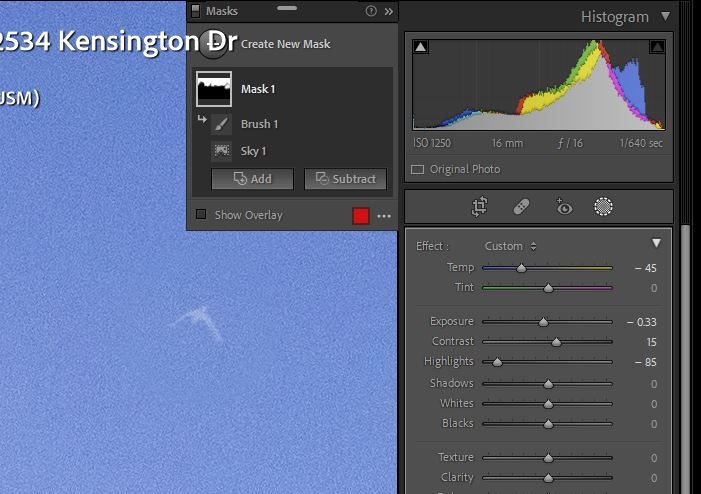
Problem: When I use the spot removal tool in Lightroom Classic version 11 to remove a leaf against open sky after Sky Select was used, Lightroom fails to remove the spot completely. It leaves a light gray version of the leaf behind. See samples below. I checked and opacity is set to 100%.
The problem does not occur if I do spot removal before Sky Select is used.
This is on Windows 10, working on a Fuji GFX 50R RAF.
 1 Correct answer
This is current as-designed behavior.
The workflow is to correct spots (Content Aware Heal, Spot Heal Tool, Clone Tool) prior to using any AI Masking (Sky, Subject, Object, People, etc.)
Using the Healing tools after applying an AI Selection Mask will likely show artifacts where they overlap.
Copy link to clipboard
Copied
Moderators, @Rikk Flohr: Photography, please merge with the existing thread on this issue:
Copy link to clipboard
Copied
RIkk, I think this is a non-answer. If, after making many adjustments to a photo, one finds a spot needing "healing", then in general, the healing tool will leave far more than "artifacts". It doesn't work. If you export the RAW photo to PS, the spot healing tool works fine.
This problem is especially accute after using the dehaze slider. Sensor spots notoriously show up then and they cannot be removed in LR. One must go to PS.
I'm not sure one should call this a bug.... but it is within the relm. It also might not be fixable and the solution is to go to PS.
Respectfully
Jay Avilev
Copy link to clipboard
Copied
Hi,
I've been using masks in the new LRC and find it operates a bit odd with cloning. More likely, I'm not understanding 🙂
So, I have an image where the sky is a overexposed compared to my subject. There are also other objects in frame - the edge of a crane, building etc.
I want to use the "select sky" mask to bring the sky down a bit. Then I'm using the clone tool to get rid of the bits and pieces at the edge.
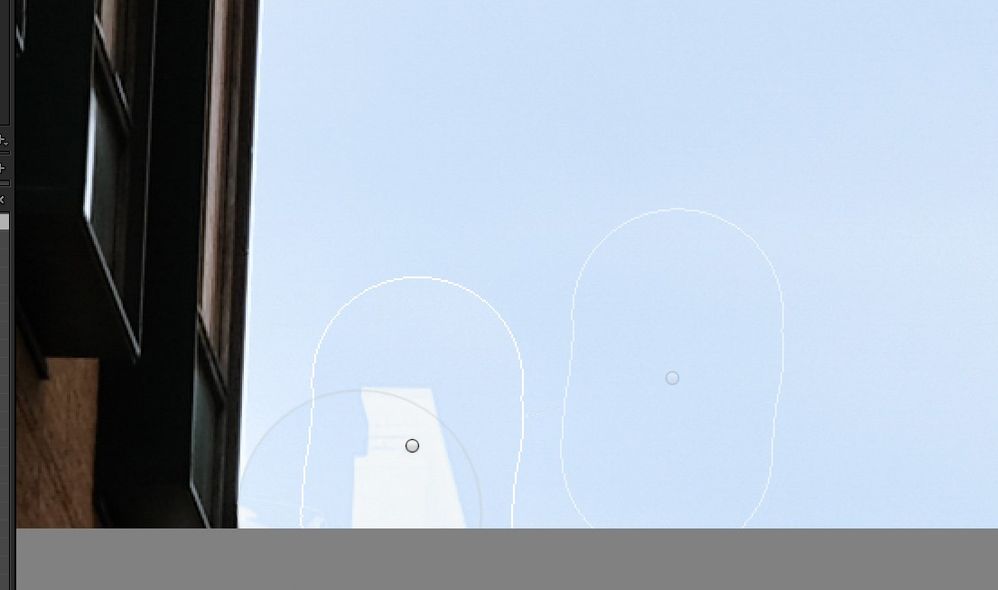
When I use the clone tool it leaves a ghost image. If I switch the sky mask off, it operates as expected.
It feels like I'm probably doing something wrong with masks - and then trying to clone. As if in PS where I'm sampling wrong layers etc.
Thanks for any help.
Copy link to clipboard
Copied
See the article at the link below.
Copy link to clipboard
Copied
Instead of us digging through that big blog, exactly what and where in that link pertains to this issue? It looks like a bug to me.
Copy link to clipboard
Copied
I've looked at the video on masking before. I don't think it addresses clone tool.
I'll have a look at the same operation later in PS - maybe that gives a clue.
Copy link to clipboard
Copied
This is a known issue. The workaround, at present, is to apply the clone/heal tool 'before' the mask.
Copy link to clipboard
Copied
There is an button to re-analyse and update a previous auto-selection of Sky, or else Subject, in case that helps.
Copy link to clipboard
Copied
Thats sounds interesting thanks. I haven't seen that yet - I've seen this feature in other programs where you can ask the app to look again at edges by etc.
Copy link to clipboard
Copied
There is no button to re-analyze a Subject or sky Mask although there should be. The Update button is only shows up when you copy/paste, sync etc a Subject or Sky Mask.
Copy link to clipboard
Copied
I stand corrected, this button to Update the auto mask is only offered in that circumstance.
But after in effect changing the image content one can click to Add a second Sky auto 'layer' to the same containing Mask. This kicks off a fresh Detect Sky operation based on the currently showing image content (including any recently done clone or heal). Then the first, now invalidated sky-mask 'layer' can be deleted.
It's a clunky workaround, no question: far better to Update directly, but I am not seeing any way to do that.
Copy link to clipboard
Copied
...But after in effect changing the image content one can click to Add a second Sky auto 'layer' to the same containing Mask. This kicks off a fresh Detect Sky operation based on the currently showing image content (including any recently done clone or heal). Then the first, now invalidated sky-mask 'layer' can be deleted...
By @richardplondon
Thanks, Richard. Thats a good workaround in case one (such as myself) forgets to do the spot healing until after finished editng. 🙂
Copy link to clipboard
Copied
That's a work around with a lot of extra steps.
Alternately, you can just go into the existing sky mask and add a brush stroke to it that covers the area of the Spot Removal. (A thing I learned this morning when my issue got merged with this thread and I learned the underlying problem - which is that the Spot Removal worked perfectly, but the area of the object is outside the sky mask. Adding a brush stroke was a super quick fix.)
Copy link to clipboard
Copied
Both the clone tool and the mask tool are overlays. They lay an edit over the image, as if you are working with layers. Apparently the clone tool ignores the mask overlay, possibly because its layer lies below the mask layer. So it always clones from the original image, even if you clone after you applied the mask. If you apply the clone tool first, then the mask tool will overlay the cloned image and the effect is what you would expect. I assume that Adobe can change this in an update, so the order of things is no longer an issue.
Copy link to clipboard
Copied
It's a known issue (i.e. a known bug) reported at least twice, confirmed as a bug, and the 'official' workaround is as I described in my previous post.
Copy link to clipboard
Copied
@Ian Lyons wrote:
It's a known issue (i.e. a known bug) reported at least twice, confirmed as a bug, and the 'official' workaround is as I described in my previous post.
I know and I didn't suggest otherwise. I just speculated how this bug came to be. Bug aren't always code errors. They can also be caused by a faulty design of a feature.
Copy link to clipboard
Copied
I thought it was a bug at first too, but after finding this thread and realizing the underlying problem, I'm confident this is not a bug. It may have some design flaw, but if so it would be faulting the designers for failing to develop an AI that decides when to extend masks automatically - and to develop that AI without imparting unintended consequences.
The issue here is that the mask (in this case a sky mask) has a hard boundary, and the Spot Removal operation happened on an area that spanned both inside and outside the mask. I'm sure if you would have drawn a mask with a hard edged brush in an earlier version of LR and Spot Removed at the border of that mask you would have seen the same effect. There are a bunch of complex solutions presented here, including being mindful of your edit order of operations, and making new sky mask layers. But really all you need to do is add a brush stroke to the mask that spans your Spot Removal location and the problem is solved.
Copy link to clipboard
Copied
If one were to consider how best to clone and adjust in Photoshop, the ideal layers to have (from the bottom up) may be IMO the original unadjusted image as Background, then a cloning layer onto which you have in effect copied and pushed around bits of the unadjusted Background, and then on top of that some Adjustment layers which will always modify the appearance of whatever is underneath, regardless whether a given bit of the photo has been cloned or not. So you can then freely update cloning the content of the photo (sample set to "layers below", in other words never incorporating the effects of tone or hue adjustment). And as a separate matter you can freely update the adjustments applied over the top, without needing to deal differently with areas that have or have not been cloned.
IMO it makes sense for Lr Classic and ACR to employ this same internal logic regardless of the order of actual working. The only issue is when Sky Detect (say) refers to the current processed appearance of the photo - is done on demand at a certain moment. That requires an ability to repeat AI detection, on demand, and this is purely a matter of providing the button or menu entry for invokiing this. We already have such a button for when masks are Synced between images.
Copy link to clipboard
Copied
Thanks for the input.
The interesting thing is that my sky background "layer" is white-ish (ie blown out).
With my adjustment mask, the sky is now blue.
As you can see on the image, the clone tool gets the background right based on the layers (ie blue) but then gets the brick building outline wrong and renders it as white.
I tried this same thing in Capture 1 and it also gets confused. Maybe it suffers the same layering confusing and the slickness of LR & C1 can't cope with the layers system like PS can. Dunno!
Copy link to clipboard
Copied
I have found something unusal when using the new masking tool and spot removal. I have a photo with a clear blue sky and an unwanted bird in it. If I go to mask the sky (to darken it and add a bit of saturation) and Select Sky and then close the masking tool, and then use the Spot Healing brush to heal out the unwanted small bird, I'm left with a bright spot where the bird was.
This may not be a bug, but it did surprise me. I'm guessing it was because the Select Sky mask selected the bird in addition to the blue sky around it and when I tried to heal out the bird, it replaced it with a bit of sky that did not have the adjustments I made when I applied the Select Sky mask. But I would have thought that the healing brush would have "healed" the bird using the sky in the state it was in after I added the mask.
I also did another test where I darkened and saturated only a portion of the sky around the bird using a Brush. When I then applied the healing brush to the bird, the healing action gave me a result I expected: the bird was replaced by a darkened, saturated sky. So maybe there's a problem with the Select Sky tool.
Mac Big Sur 11.6.1
Lr Classic 11.0.1
Copy link to clipboard
Copied
I recently updated to LR Classic 11.0
Working in Windows 10 Pro (OS Build 19042.1348 if that matters)
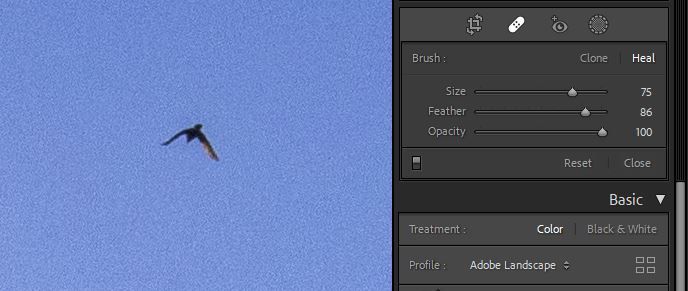
I tried to clone a bird out of a blue sky. Instead of removing the bird (as Spot Removal would have done in LR Classic 10 and earlier), it inverted the black bird on the blue sky and made it a white bird on the blue sky. I tried multiple variations.
I tried both Clone and Heal options - no difference in the bird (slight difference elsewhere, but not the bird)
I tried changing opacity - as I ran the opacity slider, the bird transitioned from black to white, but never went away.
I tried changing the target location from which I was cloning - no difference.
I tried a 2nd and 3rd layer of spot removal over the top of the first - no difference (interestingly, it kept the white bird in all instances, rather than inverting the bird every time)
I tried changing the Size of my spot removal brush - no change.
I tried changing the Feather of my spot removal brush - no change.
This absolutely feels like a bug. A bug that makes the spot removal tool useless, at least for this image.
Bird in the sky
Spot Removal with Clone
Spot Removal with Heal
WAIT - I just spotted the source of the bug. It appears to be a bug at the intersection of the Spot Removal and the new Masking tool. I have a mask changing white balance and reducing exposure in the sky. It appears that the black bird has been replaced with the un-masked version of the sky (brighter and more yellow temp).
Clone showing mask settings
Clone properly executed when I remove the mask.
Bottom line: There is a bug in LR 11.0 in the Spot Removal tool where it does not interact well with the new Mask tool. This is a new problem that did not exist with the prior Spot Removal and Mask tools in LR 10 and earlier.
Copy link to clipboard
Copied
This is a known issue. For now, you have to clone/heal first and add your masks later.
Copy link to clipboard
Copied
After this thread was merged with another (which had not turned up in a search for "Spot Removal"), I looked at some of the replies there and realised this is not an issue at all. I cloned an item in a place where a sky mask had been applied. I did not need to change my Spot Removal vs. Mask order. I simply needed to add a quick brush stroke to my mask and.... VOILA.... I got the results I wanted. Offered in case someone else is having this same problem.
TLDR: No need to change the Mask & Spot Removal order. Just edit the mask to include the apparently incorrectly removed spot.
Copy link to clipboard
Copied
That doesn't work in the latest version of LrC (11.0.1 with CR 14.0). I've just subscribed having stuck with LR6 until a week ago. I was dismayed to discover this behaviour.
When I read your post, I thought I would be able to update the mask, as you say and the problem would be resolved. However, the mask updates appear at the top of the History stack and thus any changes between Select Sky and (say) a brush update mean that the ghost effect still occurs.
Copy link to clipboard
Copied
I should add that I understand the performance implications of updating the mask retrospectively and admit that the current behaviour may be the best compromise. However, there should be a way for the user to say that they need to update the original mask and take the one-time performance hit.
It's a real pain to discover that one needs to edit something out after a lot of editing and then discover that these artefacts are unavoidable. In a real world workflow, it's likely that a need to do this will crop up from time to time.
