

- Home
- Lightroom Classic
- Discussions
- Re: Print Module - How to calculate even borders?
- Re: Print Module - How to calculate even borders?
Print Module - How to calculate even borders?

Copy link to clipboard
Copied
Hello, I'm getting a bit confused. Let's say I want to print on A4 ( will want to print the same pic on various sizes)
The dimensions ratio is different than what I shoot which is 3:2.
What I want is to make a 2cm border top, right and left, and a 3cm border on bottom.
How do I calculate the actual borders so that it comes out that way?
I think the left and right bleed to the edge, but the top and bottom have a bit of a border due to the different in ratios of the print and paper.
So I guess I would add 2cm to left and right, but how do I calculate the top and bottom?
(on a separate note, when I go to page setup, there is an A4 paper size, but it is a hair off the standard size. I can't seem to duplicate it an edit it, so I tried to create my own, but here too I wasn't sure if I was doing it right, or why i should have to create one. must be I'm not understanding something. feel I should be using the default size.)


 14
Replies
14
14
Replies
14
Copy link to clipboard
Copied
You have two types of control in LR, for layout in the Print module: page based, and image cell based.
There are three choices for page layout method: the Single image / contact sheet option is best for this purpose.
Page based margins are measured from the edge of the paper. There may be a printer-imposed unprintable edge (assuming you are not set to "borderless" printing - it is simpler to NOT use borderless if you can). That unprintable edge is included within the page margin that LR sets. So you can directly set whatever you want at left, right, top, bottom.
LR also reports an image cell size. This can be smaller than the space within the page margins, or the same, but not bigger. (The same is true for each cell of a layout grid, when you subdivide that space into rows and columns.)
So if you enlarge the image cell size as much as LR will let you, by dragging those sliders, it will occupy all of the space inside the page margins.
Now your image sits inside the image cell, centred, as large as it can be accommodated. You choose whether LR is allowed to rotate it when that would make it bigger, or whether LR should respect its orientation. Obviously a portrait image fitted into a landscape space will have to leave big white spaces either side.
The shape proportion of the image (as currently cropped) and the shape of the image cell, will very often differ when you carry out your page layout in this way.
In that case an image will touch two sides of the cell and sit clear of the other two, leaving gaps, when it's "Zoomed to Fit" within this cell.
If you instead select "Zoom to Fill", LR auto-trims the image on the fly so that it shows the same shape as the containing cell. This permits LR to show it bigger, completely filling the cell leaving no gaps. This happens without needing to alter the Crop of the image concerned, in Develop: it is purely applied to the output and has no other impact. If the way this has been done is compositionally unsuitable you can "slide" the image within its cell in that 'loose-fit' direction only (since it is 'tight-fit' in the other direction, that won't slide).
hth - RP
Copy link to clipboard
Copied
Thanks for the answer! But I don't want to zoom to fit. I want the full image, that when stretched out like you say, leaves a white space above and below. What I want to do is make a 2cm border all around.. Left and right seem easy enough, but how do I calculate the the top and bottom border is, so that, including the white that's already there, will be 2cm.. the answer will be 2cm minus X. How do I solve for X?
(and I'm still not clear why when I choose A4 and print to a file, and then open it in Photoshop, it's slightly off, and more importantly how I can solve that by either creating a new page size (but not sure the values to put in w/ margins, etc), or editing the default (though I don't see how to do that), or creating borderless page (where is that set?), etc.)
Thanks!
Copy link to clipboard
Copied
As I said, unprintable hardware margins are included within whatever page margin LR lets you set. So if you want a finished margin of X cm, you set X cm.
If the unprintable hardware margin is reported broader than X cm on a given side, that is the smallest figure you can set on that size: because the hardware physically cannot achieve X cm there.
Note: very often paper is not manufactured precisely to size - for a stated nominal format, such as A4 or 5" x 7". Believe it or not the width and height that say "A4" paper is even stated as can vary, over and above particular paper physically measuring different than it has been stated.
The print driver just works with whatever dimensions it's been told, communicating those into LR also on the presumption that they are correct. Then the images are sized, sent, and the printer sprays the ink, accordingly. If the trailing paper edge is going to turn out in practice not to arrive the expected distance after the last of the inked area rolls through, the printer has no way to know nor to do anything about this - and neither does the layout as seen in LR.
Borderless mode is set within a print driver dialog (if that printer offers such a mode). Even if you are in fact "printing" to JPG, LR has always based its page layout on some real world printing configuration.
If this printing configuration includes the selection of borderless as well as all the other print specific configuration including page size - then LR adopts a hardware print margin of zero all round. This permits the LR page margins to go down to zero (they won't do this by themselves). Then you can switch your print job from "to printer", so that it "prints" to JPG instead. Many printer drivers internally scale-up images when configured to "borderless" in order to ensure a full bleed - for practical reasons, but at the cost of dimensional inaccuracy - though some print drivers can be specially configured not to do so.
When it comes to image shape either your crop perfectly matches the aspect of the stated paper size or not... but small errors of one or two pixels are to be expected sometimes.
Copy link to clipboard
Copied
thanks! but why when I output with a page setup of A4, and then open it in photoshop, the size is off by a fraction of an inch or cm. seems if the page is set to A4, which is 210 x 297 mm, I shouldn't be getting an output of 209.89 x 297.01. (or if I change one dimension to 210, then the other is 297.17 -- still slightly off). Should I create my own A4 template and if so how (and what settings) and what's the difference. Any ideas on why this is happening?
best,
R
Copy link to clipboard
Copied
Are you defining the image resolution in pixels-per-inch? If so, there's an intrinsic source of conversion errors.
Perhaps try a round number of pixels-per-cm. An image cannot contain partial pixels in order to come out exact; and neither can your LR cropping which is limited to a certain number of significant figures precision.
Or... just not worry about it if it's not causing any actual problem (that's my own preferred solution!) Any usage at 1:1 scaling will produce the needed result in effect; subject to physical output's much larger routine inaccuracies in any case. Hence bleed and trim, masking etc.
It sounds as if we are dealing with a 3:2 image anyway. What's your use case that requires an A4 dimensioned digital image?
Copy link to clipboard
Copied
hello. do you mean defining in photoshop? I'm looking at cm and in. in the image size dialogue box--is this what you mean? I want to the image to fit exactly in an A4 frame and using borders to deal w/ the difference between 3:2 and the A4 ratio. (also I like the image with a border around it)... I'm sending the images to an online printer and want them to print exactly A4. They will print exactly the dimensions I give them, but I need to send it to them exactly at size. Just trying to find the best workflow to do this.
attaching an example of what I'm talking about (I made the paper border yellow so it'll show up against the white of the page)... actually i want a bit larger border on the bottom like this, but I want to be exact all around.. the top and bottom border is more difficult to calculate because there is already a bit of border due to the difference in ratios. trying to find a quick way to calculate it for all print output sizes.
best,
R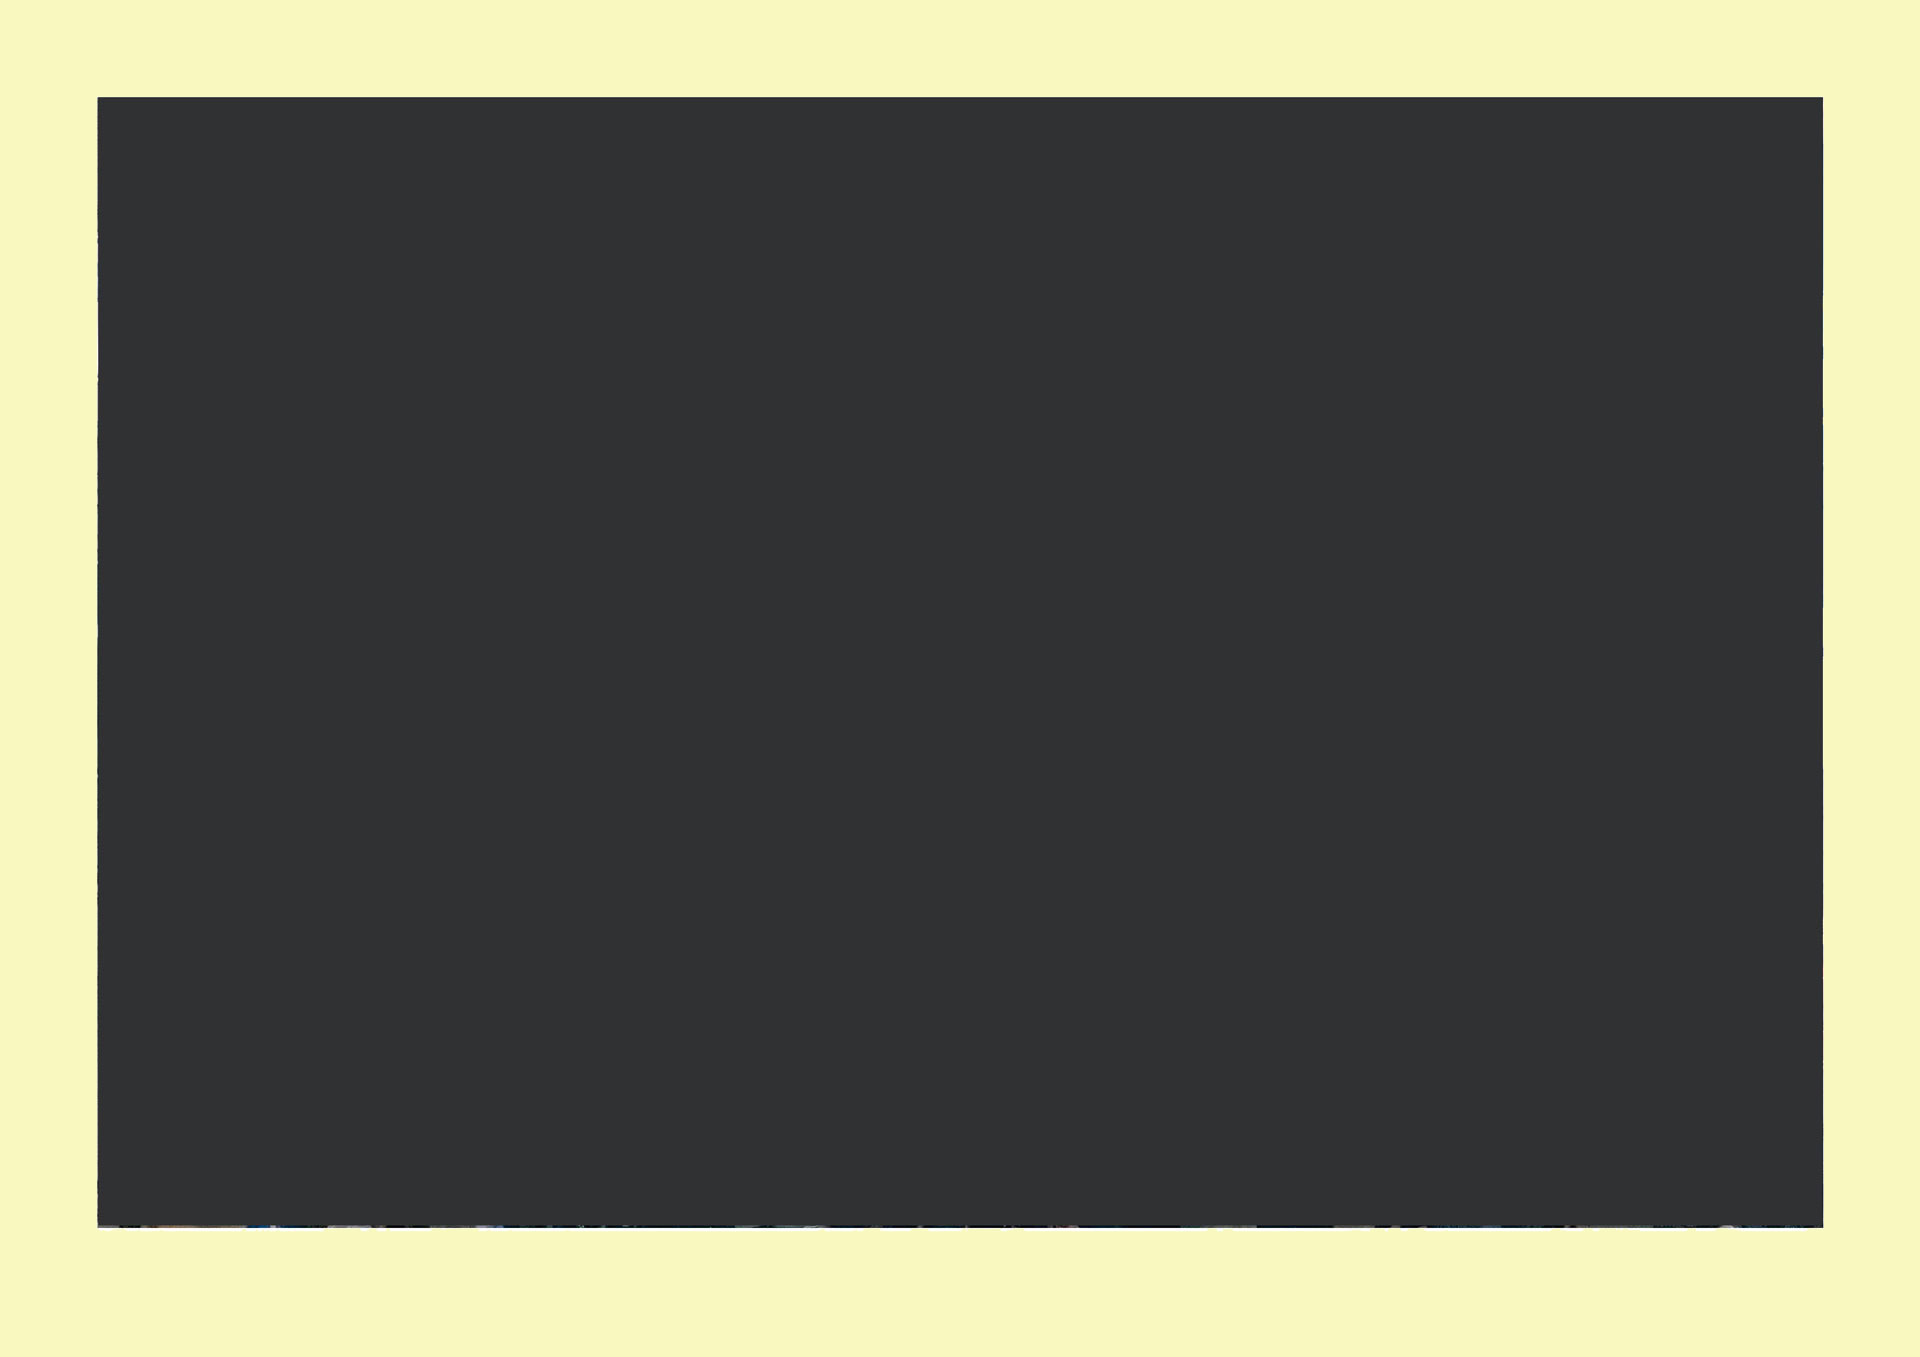
Copy link to clipboard
Copied
Confused: do you want your image to remain 3:2, OR do you want it to match particular margins within A4?
3 x 2 shape works out to 1:1.5 aspect -
21cm minus 2cm and 3cm = 16cm x 29.7cm minus 2cm and 2cm = 25.7 cm …
works out to 1:1.606 aspect.
If you retain 3:2 you are going to see about 3.7 cm at the bottom and about 2.7 cm at the top, measured from paper edge to the printed photo. Lightroom always centres inside a cell, there is no way to make a loose-fitting image 'stick onto' any particular edge of its containing cell (and it always touches those edges to which it is a tight fit).
You can set image cell width/height distinct from controlling that using the page margins. The page margins offer an opportunity to leave a little more space at the bottom than at the top: or otherwise to shift the image's centring on the page. When an image cell is sized smaller than the available space within the page margins, it gets automatically centred between those and then the image sits centred inside that cell.
Copy link to clipboard
Copied
thanks! very helpful.
Copy link to clipboard
Copied
I think my numbers were wrong - sorry:
A4 landscape 29.7cm wide, with 2cm margins left and right leaves 25.7cm wide usable space.
The way to calculate this is divide by 3, multiply by 2 (your 3:2 image proportions) meaning an image trying to fit into that width would come out 17.13cm high.
That leaves space over inside the vertical 21cm dimension, for total 3.87cm - so you fall short of your desired margins top and bottom, cannot even reach 2cm top and bottom. The image is too square for that.
So it crops, or gets narrower.
Working the other way, your page height is 21cm and you want 2cm top and 3cm bottom margins, in which case the image should be 16cm high. Divide by 2, multiply by 3 that is 24cm wide.
If you set 2cm side margins the image won't reach those, because its shape is squarer than this. 24cm inside 29.7cm means the image sides will sit 2.85cm from the paper edges. In which case the top margin of the image will show obviously smaller than the sides will.
In which case you might visually rebalance that by setting a smaller difference between the top and bottom margins. But however you do it, the basic difference of aspect between the margins you want within A4, and the image crop shape you have, will require some such compromise solution.
Copy link to clipboard
Copied
thanks for that explanation... I was hoping there was some quick and easy way to do it, but this helps.
Copy link to clipboard
Copied
Quick and easy way is to not bother so much about the numbers! 
Set the absolute minimum page margins you could accept. Personally I'd build in a 0.5cm difference, not a 1cm difference, for the bottom vs the top and sides. Concentrate mainly on what that does to the centring of the photo on the page, since the page margins are not necessarily going to match where the edge of the photo sits.
Then adjust the width of the image-containing cell by eye - the image scales down, remaining auto centred vertically and horizontally, in the space within your chosen page margins - until you are visually happy with the layout. Adjust page margins as needed if you are unhappy with the image centring. Save this as a named page setup that you can re-use identically in future.
Copy link to clipboard
Copied
If you want to keep the current cropped composition, AND set a certain printed width within the page width, it will be each image's cropped aspect (width : height proportion) that defines what top and bottom margins will then be seen on a given page format. You cannot control this by setting margins. Not unless you zoom to fill and accept that some image content may get masked away. Your alternative is to set a broader than needed image cell such that the top and bottom margins control the image scaling as printed - whereupon the side margins will have to fall where they may.

Copy link to clipboard
Copied
I use a Canon Pixma Pro 100. I have found that it has been necessary to create templates for larger print sizes that have offset borders in order to have "even" borders on the actual print. It was easier to do that than to fight the system. The templates seem to work every time.
Copy link to clipboard
Copied
Thanks! Can you explain how you did this?

Find more inspiration, events, and resources on the new Adobe Community
Explore Now
 AdChoices