Exit
  • Global community
    • Language:
      • Deutsch
      • English
      • Español
      • Français
      • Português
  • 日本語コミュニティ
  • 한국 커뮤니티
1

Spot editing tool not healing specific spot

Community Beginner ,
Dec 02, 2019 Dec 02, 2019

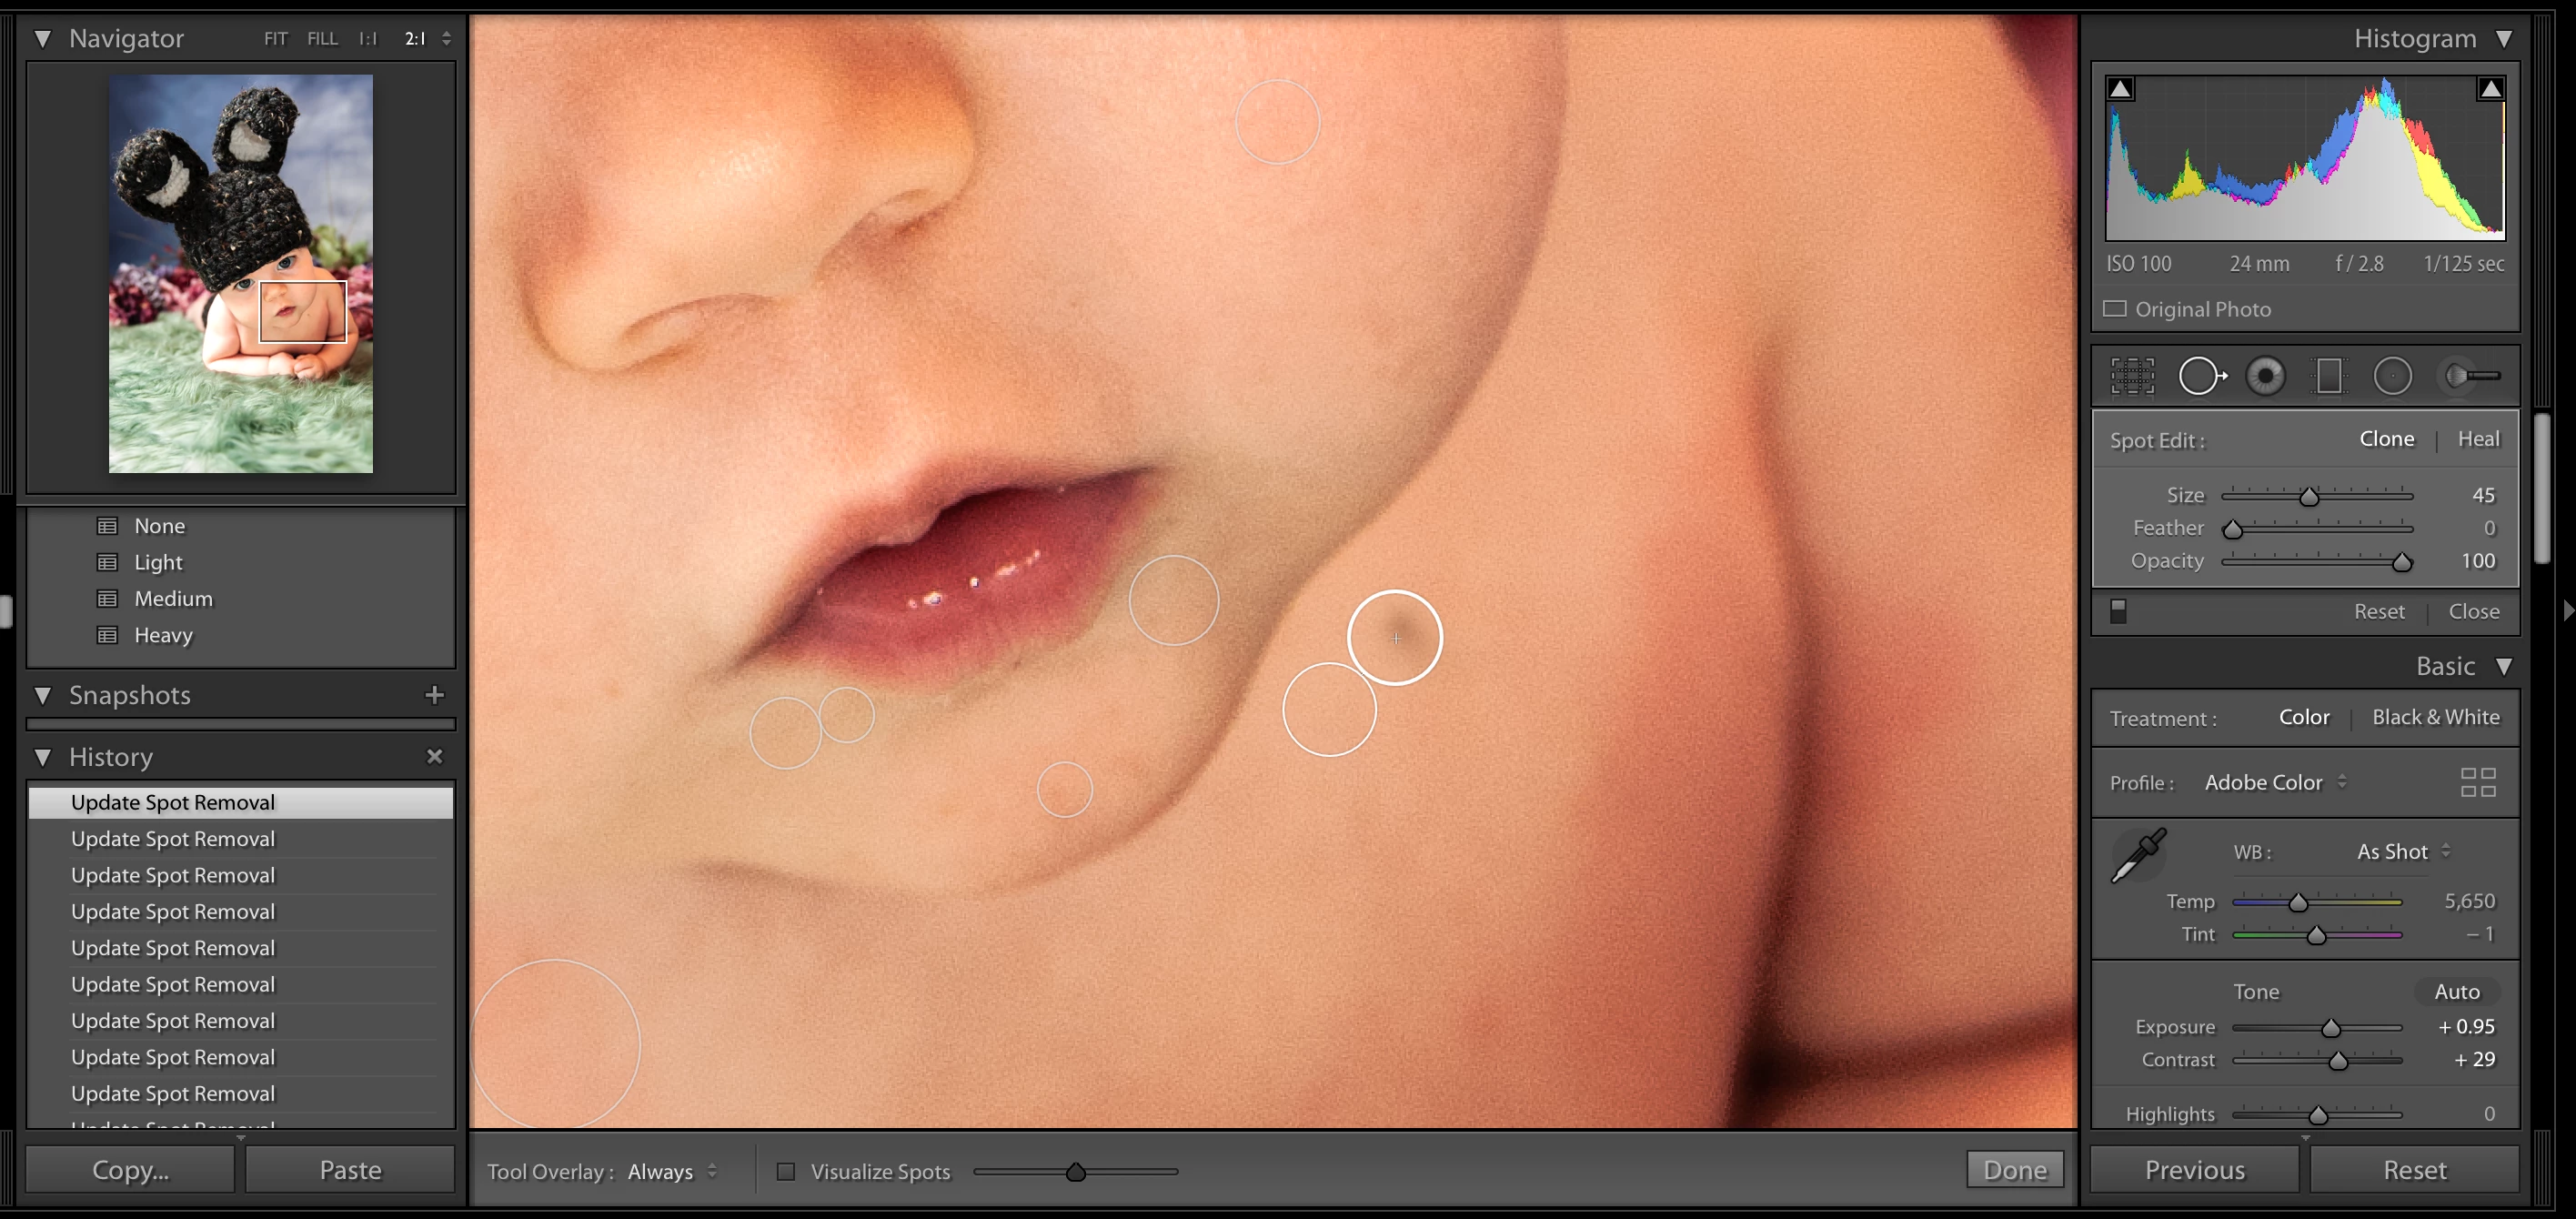
Hey, first time poster. I'm not a professional, but I've been using lightroom for years. I defintiely know the basics of how to use the spot removal, but maybe there's something a little more techincal I'm missing? I was photo editing some baby photos, and I noticed a fuzzy or something stuck to baby's left chest area. I have tried both "heal" and "clone", but neither one works. I've used the spot edit tool in other areas of this photo, so I know it's not glitching anywhere else. The settings are 0 feather, 100% opacity. It just won't go away. I've tried to clone it using a really colorful spot in the picture and I can see it try to alter, but the black spot remains no matter what I use as my healing or cloning area. I use this all the time and I've never had this happen. I've even made sure I've updated to the latest version. What's going on? (p.s. speak very slowly and loudly, I'm not very tech minded :P)Screen Shot 2019-12-02 at 11.35.38 PM.png

1.5K
Translate
Report
Community guidelines
Be kind and respectful, give credit to the original source of content, and search for duplicates before posting. Learn more
community guidelines

correct answers 2 Correct answers

LEGEND , Dec 04, 2019 Dec 04, 2019

Upload a DNG that has your edits to Dropbox or similar so we can try it on our Lightroom.  There are various reasons why spot removal does not do what you think it should.  Usually other local adjustments.

Translate
Community Beginner , Dec 04, 2019 Dec 04, 2019

Oh my gosh! You won't believe it. I wanted to see if the tool would work on the same spot but just in another photo that I took before or after this shot. But when I looked at my other photos, the spot wasn't there. That made me think of your "other local adjustments" comment. So I just went back step by step through all the adjustments I made (that way I didn't lose them but could just scroll through), and found the exact step it appeared. She hadn't been in the right position at the time (funn

...
Translate
Community Expert ,
Dec 02, 2019 Dec 02, 2019

In the first step please try switch off the GPU support from the Lightroom preferences and check if that helps to fix the issue. 

Go to Lightroom > Preferences > Performance tab > Uncheck "Use Graphics Processor" > Restart Lightroom. 

Adobe Lightroom GPU Troubleshooting and FAQ  

https://helpx.adobe.com/lightroom-classic/kb/troubleshoot-gpu.html 

If this doesn't help I would try to reset the Lightroom preferences.

https://www.lightroomqueen.com/how-do-i-reset-lightrooms-preferences/


If this doesn't also helped wee need more information about your environment, like the type of operating system and the version of Lightroom.


My System: Intel i7-8700K - 64GB RAM - NVidia Geforce RTX 3060 - Windows 11 Pro 24H2 -- LR-Classic 14 - Photoshop 26 - Nik Collection 8 - PureRAW 5 - Topaz PhotoAI 4
Translate
Report
Community guidelines
Be kind and respectful, give credit to the original source of content, and search for duplicates before posting. Learn more
community guidelines
Community Beginner ,
Dec 03, 2019 Dec 03, 2019

Hello, I followed your instructions and restarted it. It's still having the same issue. I've included some info below that might help. Like I said, I'm not super tech minded so the info might be overkill. It's really quite strange that this is the first time in like ten years I've ever had this issue. If it makes a difference, I shoot in RAW. Please let me know if I'm missing anything. Thanks so much!


Adobe Photoshop Lightroom Classic 9.0 (just updated it)

My laptop: MacOS High Sierra version 10.13.6 on a 2018 Macbook Pro

Processor: 2.3 GHz Intel Core i5

Memory: 8 GB 2133 MHz LPDDR3

Graphics: Intel Iris Plus Graphics 655 1536 MB

Translate
Report
Community guidelines
Be kind and respectful, give credit to the original source of content, and search for duplicates before posting. Learn more
community guidelines
Community Expert ,
Dec 04, 2019 Dec 04, 2019

Sorry, but I'm don't have any experience with MacOS.

I've been working with Windows and there the spot editing tool is working fine.

I think users with an Mac can say more about this issue. 


My System: Intel i7-8700K - 64GB RAM - NVidia Geforce RTX 3060 - Windows 11 Pro 24H2 -- LR-Classic 14 - Photoshop 26 - Nik Collection 8 - PureRAW 5 - Topaz PhotoAI 4
Translate
Report
Community guidelines
Be kind and respectful, give credit to the original source of content, and search for duplicates before posting. Learn more
community guidelines
LEGEND ,
Dec 04, 2019 Dec 04, 2019

In your screen shot I notice many different circles on the image you posted.

So it seems you have done many spot cloning/healing. In that case LR can slow down and not show the most recent clone/heal.

Translate
Report
Community guidelines
Be kind and respectful, give credit to the original source of content, and search for duplicates before posting. Learn more
community guidelines
Community Beginner ,
Dec 04, 2019 Dec 04, 2019

The dark spot was the first thing I tried to do. I've just made other changes in the meantime while I try to find a solution. There's not so many changes that it would slow it down and usually closing LR down and restarting it will help that for me. I've even considered exporting the file as a JPEG and doing that last spot on the photoshop app on my iPhone but that's not ideal. 

Translate
Report
Community guidelines
Be kind and respectful, give credit to the original source of content, and search for duplicates before posting. Learn more
community guidelines
LEGEND ,
Dec 04, 2019 Dec 04, 2019

If your going to export it do that as a TIFF. But all you really need to do is Eidt In PS to send it to PS and have it returned to LR as either a PSD or TIF depending on your LR Preferences setting in the External Editing tab.

Translate
Report
Community guidelines
Be kind and respectful, give credit to the original source of content, and search for duplicates before posting. Learn more
community guidelines
LEGEND ,
Dec 04, 2019 Dec 04, 2019

Upload a DNG that has your edits to Dropbox or similar so we can try it on our Lightroom.  There are various reasons why spot removal does not do what you think it should.  Usually other local adjustments.

Translate
Report
Community guidelines
Be kind and respectful, give credit to the original source of content, and search for duplicates before posting. Learn more
community guidelines
Community Beginner ,
Dec 04, 2019 Dec 04, 2019

Hmm, that might take some google how-to for me. I don't have a Dropbox account. What are some examples of similar services? Do you simply export the photo from LR as per usual, but choose DNG instead of JPEG from the dropdown menu? Will this retain my edits so that you could view them or is there something else I need to do to include the edits? Sorry, my knowledge is so limited about this. 

Translate
Report
Community guidelines
Be kind and respectful, give credit to the original source of content, and search for duplicates before posting. Learn more
community guidelines
Community Beginner ,
Dec 04, 2019 Dec 04, 2019

Oh my gosh! You won't believe it. I wanted to see if the tool would work on the same spot but just in another photo that I took before or after this shot. But when I looked at my other photos, the spot wasn't there. That made me think of your "other local adjustments" comment. So I just went back step by step through all the adjustments I made (that way I didn't lose them but could just scroll through), and found the exact step it appeared. She hadn't been in the right position at the time (funny how baby models do that - so unprofessional), so there wasn't much light on her. I still wanted to use the photo so I used the dodge tool on just her. When I highlighted the dodged area, it looked like I had gotten everything, but I went over that spot again anyway and lo and behold that one tiny spot had been missed by the tool and that was why it was a dark spot, because everything else around it had been lightened. Ugh. I'm such a pain! Thanks to everyone for taking the time to help me 🙂 This mystery was going to drive me nuts. 

Translate
Report
Community guidelines
Be kind and respectful, give credit to the original source of content, and search for duplicates before posting. Learn more
community guidelines
LEGEND ,
Dec 05, 2019 Dec 05, 2019

In the future there is an Overlay system that Shows you where the cursor has brushed. Hitting the o (that is HO, lower case O (not zero) key turns that feature on and off. And there is a Check Box at the bottom left that also turns it on or off and if you hover the cursor over the edit start pin/point the overlay will show.


2019-12-05 09_02_49-LR Classic V9 Catalog - Adobe Photoshop Lightroom Classic - Develop.png

Translate
Report
Community guidelines
Be kind and respectful, give credit to the original source of content, and search for duplicates before posting. Learn more
community guidelines
Community Beginner ,
Dec 05, 2019 Dec 05, 2019
LATEST

Thank you. When I did have it highlighted, it showed that I went over the area already. However, I think because I'd been using a bit of feathering at the time, it must have gone over it lightly, but not enough. I didn't know I could leave the highlighted overlay feature on. I usually just hover over the initial spot on the photo. That's a great feature. Thanks for showing me that. 

Translate
Report
Community guidelines
Be kind and respectful, give credit to the original source of content, and search for duplicates before posting. Learn more
community guidelines