Copy link to clipboard
Copied
The behavior applies to all selections created from pre-existing content, including masks. The following is just to quickly illustrate the problem. Please don't focus on how I'm doing it.
Scenario
I have a circle, a square below it, and a background. Three layers total. The square is just for visibility.
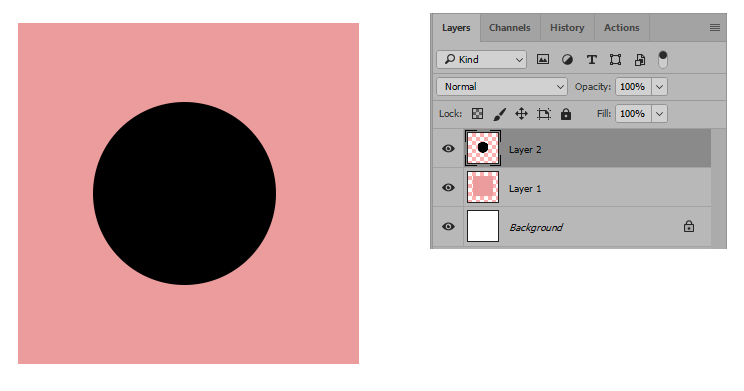
I ctrl+click on the circle layer and it creates a selection based on the contents of that layer as expected.
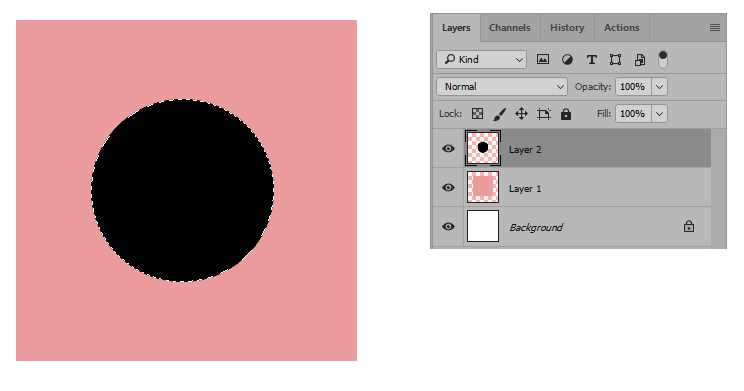
The problem is that the selection doesn't actually match the contents it was created from. It's 1 pixel smaller. To illustrate this, I use the eraser tool on the selection to erase the circle.
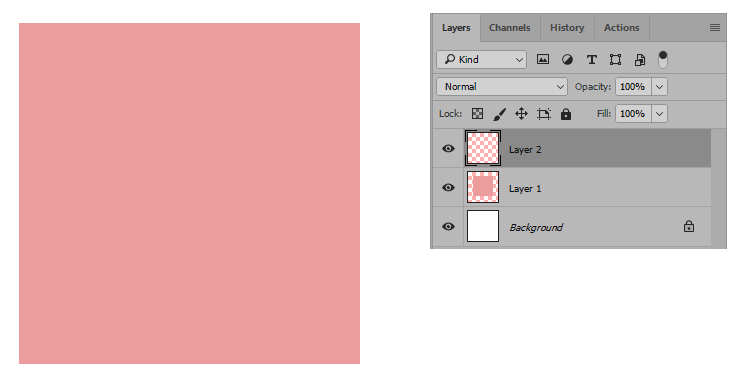
It looks fine at a glance, but once I deselect it, you can clearly see the outline leftover from the 1 pixel difference. The outline is never visible while the selection is active because the marching ants cover it.
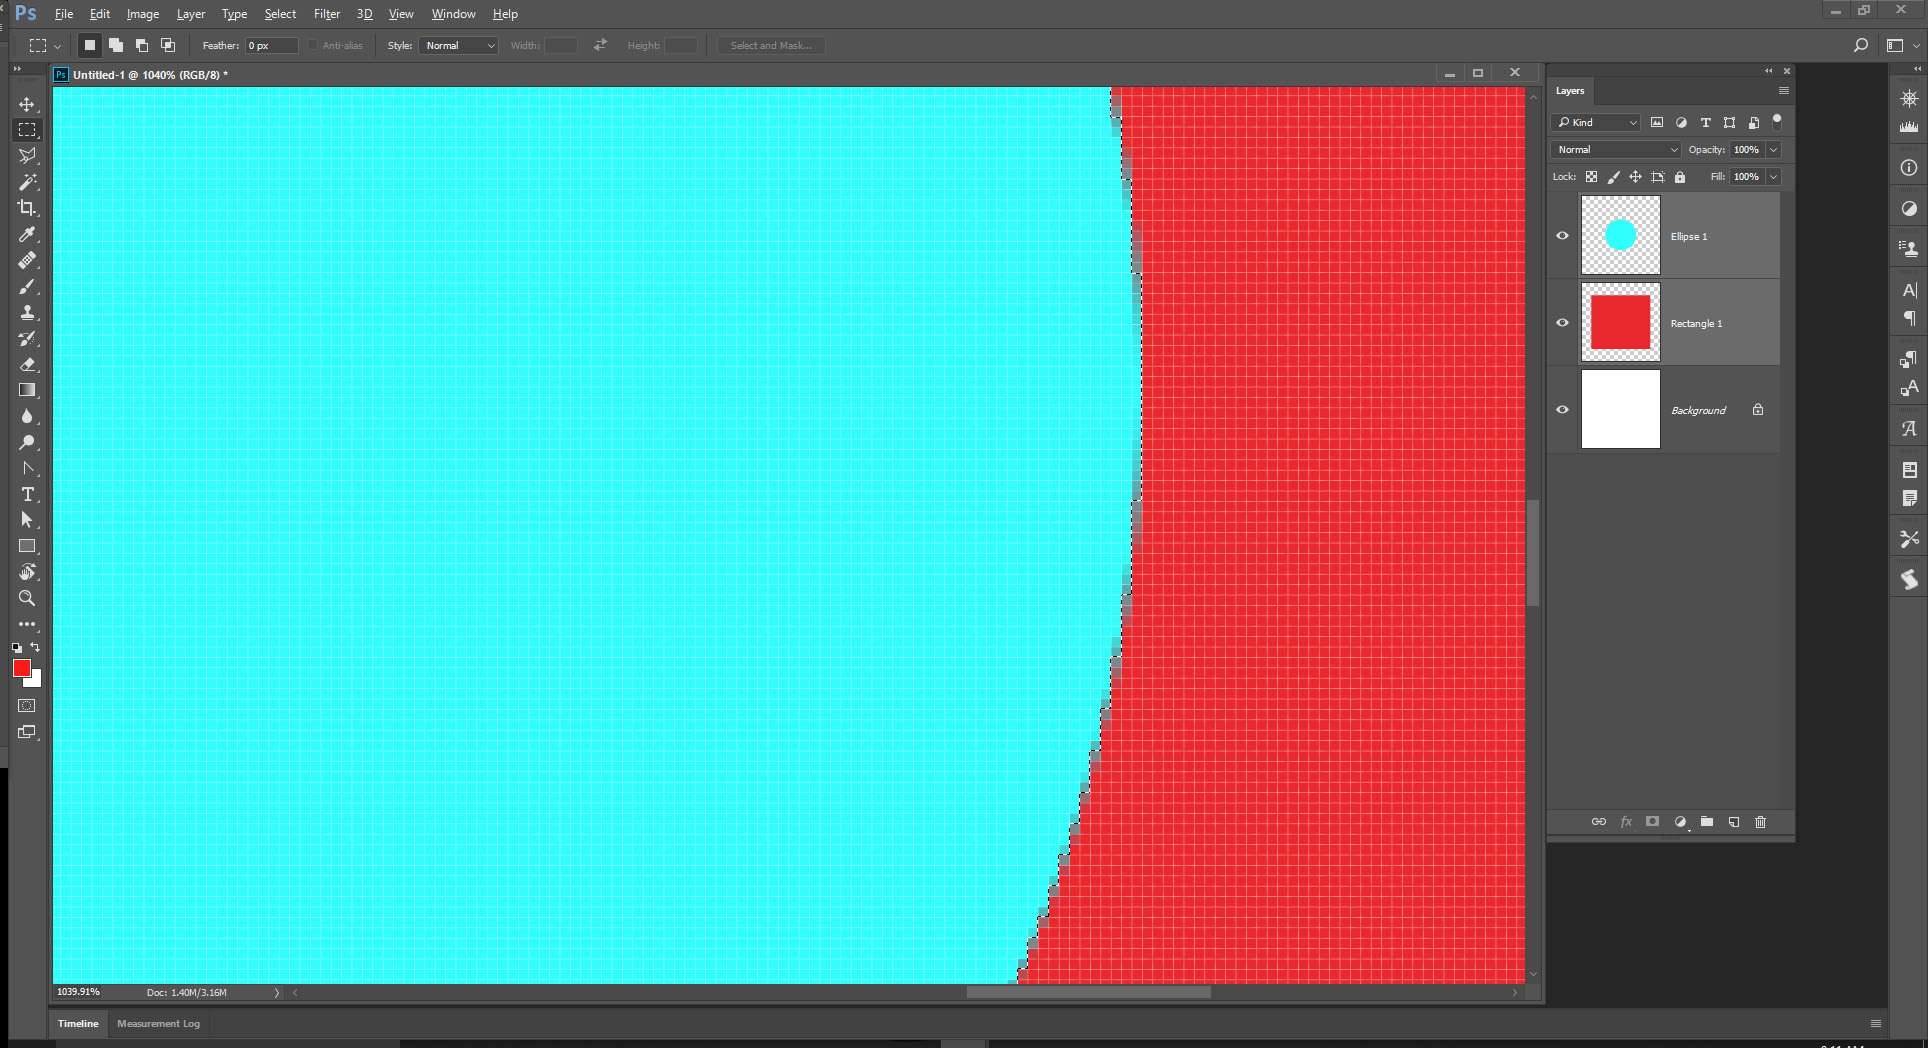
To further prove the difference, I go back to the beginning. This time, after I ctrl+click on the circle layer to create the selection, I increase the size of the selection by 1 pixel using Select>Modify>Expand>1. Then I use the eraser tool on the circle as I did before. As you can see, when I deselect it now, there's no leftover outline.
The work I do needs to be very precise at the pixel level and I depend heavily on masks and selections based on layer content. The ability to ctrl+click on a layer or mask to quickly create new selections on the fly that I can transform and apply anywhere else is in the project has always been a key feature.
This issue breaks that functionality. I can get around it by manually erasing the leftover or by expanding the selections as shown before using them, but both add time and time is money.
Technical Details
The problem isn't recent. I believe it started in the update where the engineers finally included a built-in overscroll option and it's happened ever since. I'm currently on CC 2017. I haven't done the update that just came out yet because I'm in the middle of a lot of projects and want to wait until they're done.
I wonder if it's something on my end rather than a global issue because I haven't seen anyone else mention it. Also, before overscroll was introduced as a built-in option, people would use plugins, scripts, or even make changes in the registry or inside Photoshops's files to enable the behavior.
I implemented one of those non-plugin methods to force overscroll. I don't remember which one or what I did, but I vaguely recall that it entailed telling Photoshop to add or subtract pixels to something in order to force it to scroll over the document bounds.
Because of that, I don't know if this behavior is a bug or if it's tied to whatever I did back then that has somehow never been overwritten or deleted in spite of all of the updates I've been through and me having reset preferences numerous times.
It could be completely irrelevant, so I'd rather people not assume that's the issue. I just thought I'd mention it because it's interesting that I did something on the backend involving pixels to force overscroll and once overscroll became a built-in preference, selections were now suddenly off by a pixel.
This is because of the anti-aliasing of what you are selecting. When you Control + Click on the layer, it loads that layer's transparency. If the layer has anti-aliasing, the edges will be semi-transparent. So, when you load the transparency as a selection, the edges will only be partially selected. Then, when you delete, you are left with the partially selected edge.
To get around this, you can either make you layers with no anti-aliasing, or, after loading the transparency as a selection, enter
...Copy link to clipboard
Copied
Are you sure it does not match. A circle is round its edge is a continuous curve. Pixels are square not curved. Photoshop to make a circle will use anti-alas the staircase edge of your circle layer to help make the staircase edge look smoother. The resolution and radius of the circle play a roll in the size of the staircase. A selection's Marching ants outline all pixels that are more than 50% selected of the anti-alas layers edge which has some feathering. Here I create a circle layer on top of a square layer with contrasting colors. I zoomed in to 1000% so you can see the selection the staircase and the anti-aliasing being done.
If I add an empty Layer and fill the selection with a color it seems to match the circle to me.
Copy link to clipboard
Copied
This is because of the anti-aliasing of what you are selecting. When you Control + Click on the layer, it loads that layer's transparency. If the layer has anti-aliasing, the edges will be semi-transparent. So, when you load the transparency as a selection, the edges will only be partially selected. Then, when you delete, you are left with the partially selected edge.
To get around this, you can either make you layers with no anti-aliasing, or, after loading the transparency as a selection, enter Quick Mask mode, and Image > Adjustments > Threshold on the Quick Mask, using a value of 255. Exit Quick Mask, and then delete.
Copy link to clipboard
Copied
Hey, all! I'll see if the anti-aliasing is the culprit. I didn't have that issue before regardless of anti-aliasing, but it's possible the behavior changed in the version when this started!
@jjmack Thanks, but I was just using a circle for the purpose of this example. This happens regardless of the content being selected.
Copy link to clipboard
Copied
The basic principle here is that ctrl-clicking the layer loads a transparency selection. I'm sure you can see where that's going - if a pixel is partially transparent, it only gets partially selected.
50% of 50% is still 25%.
IOW what you're describing is normal and expected behavior.
Copy link to clipboard
Copied
It's the anti-aliasing.
When you ctrl-click the layer, the semi-transparent pixels at the edge are only partially selected - a 50% transparent pixel is 50% selected.
So there's always a little left. This is the way it has to work to be consistent.
If you Select All and delete, it all goes away.
Copy link to clipboard
Copied
Hey, everyone! Thanks for the replies! I ran some tests and I think I'm going to see if I can script some automation to compensate for the remainder leftover on selections to save time manually expanding it.
It's good to know this behavior is normal, but on my end, it started when I said it did, so something changed. I'm not new to Photoshop. I've been using it for around decade and a half and I immediately notice when things aren't doing what they've always done. Especially when it's following an upgrade.
If this is how it's always worked (and I believe you guys), then some tweaking I'd done in the past to optimize the software for my particular workflow was probably already affecting or obscuring it and the upgrade I'm talking about basically kicked it all back to the proper behavior lol
Find more inspiration, events, and resources on the new Adobe Community
Explore Now