- Home
- Photoshop ecosystem
- Discussions
- Add some directional light or depth to a flat prod...
- Add some directional light or depth to a flat prod...
Add some directional light or depth to a flat product shot?
Copy link to clipboard
Copied
PS 22 CC on a Mac.
Is there a simple way to add some directional light or other lighting effect that would give a bit of depth to a product photo that is a bit flat and dull? I found some videos about the Lighting Effects Filter, but it seems to not work in my copy of PS 22.
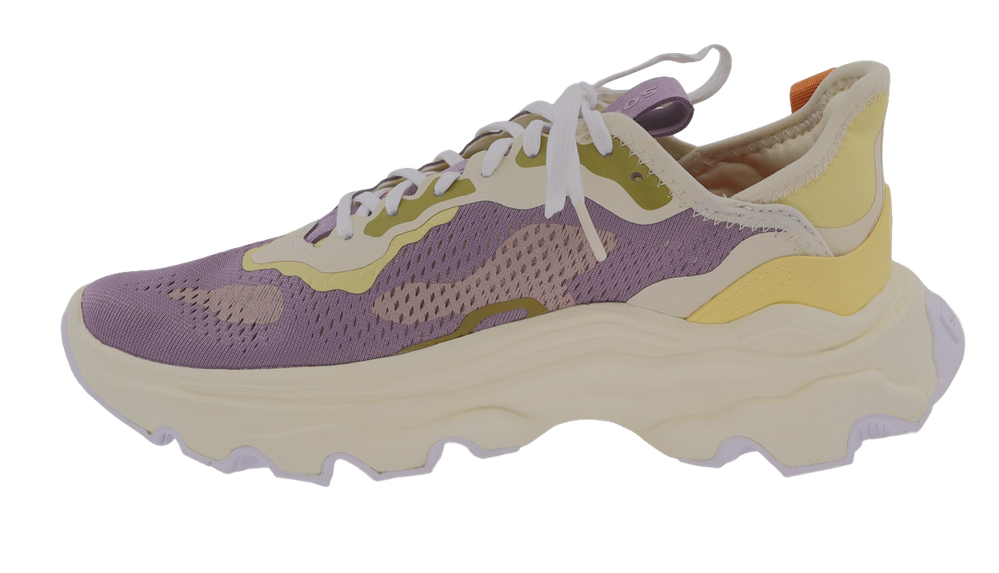
I'm attaching an example of an image that is a bit "meh".
Explore related tutorials & articles
Copy link to clipboard
Copied
Wow, you have some work cut out for you there. It is doable, but will take a lot of work and the Shoot-it-again filter would be quicker and potentially give much better results.
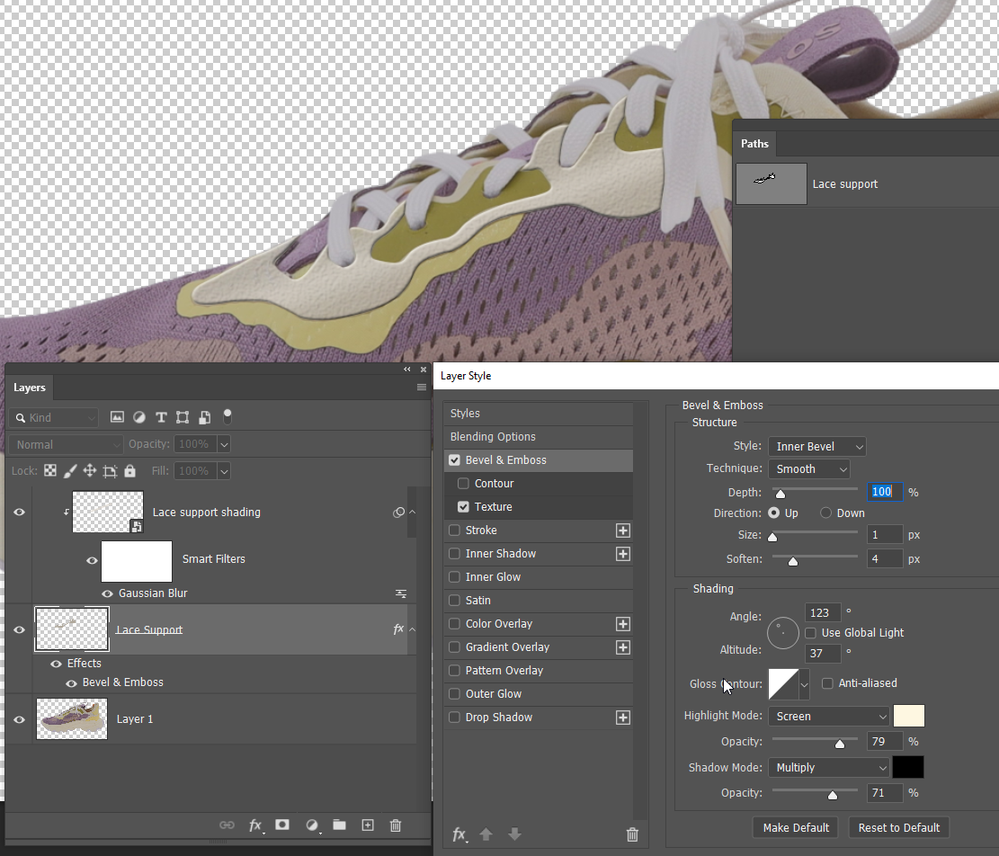
If I absolutely had to rescue that image, the first step would be to separate its elements with the Pen tool, and use effects to give you the depth. I've done it on the leathher(?) lace support and use Bevel & Emboss layer style with Texture to lift it from the background. I have clipped a layer to the lace support layer, ran a lighter beigh along it and blurred to make it look curved. Note: I made that layer a Smart Object so I could fine tune the blur. You'd still need to correct some aspects like painting in shadows on layers further up the stack to hide some of the bevel & emboss.
The problem is that it would take a lot of time, need advanced skills, and you'd still end up with something that looked more like an illustration than a photograph.
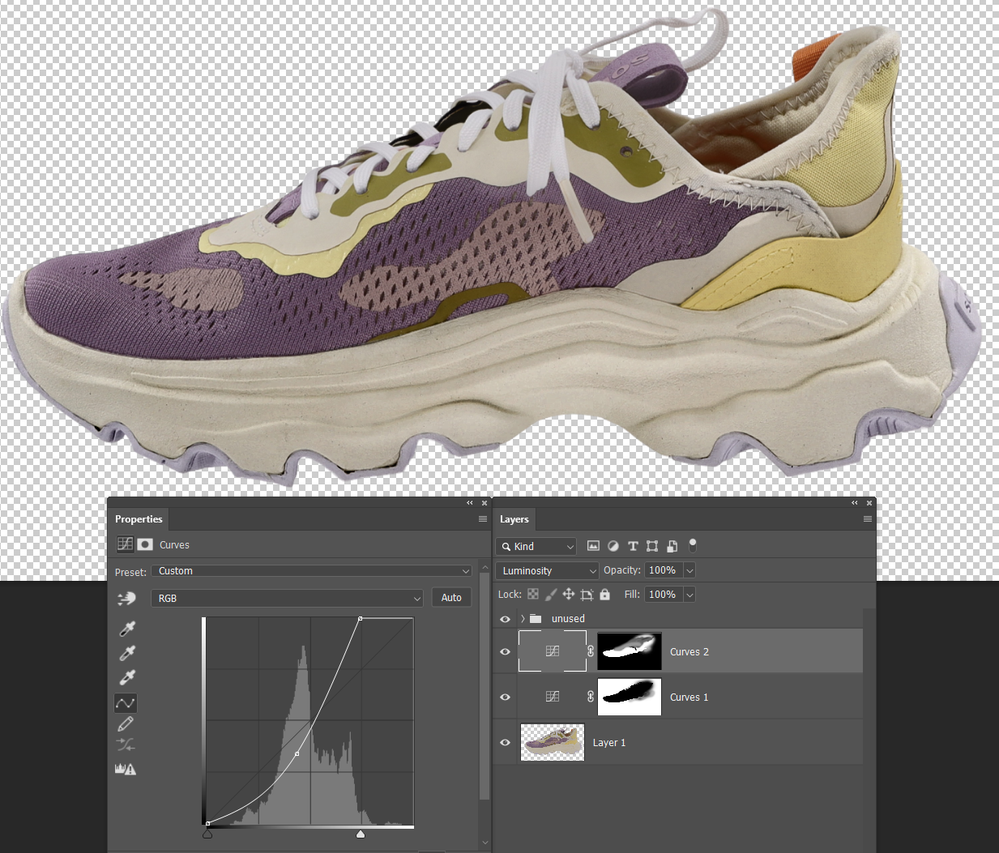
A more realistic approch would be to use extreme Curves layers set to Luminosity. You'd still need to target elements individually using the curves layer's mask, but you can see I have got some life into the sole below.
I have now masked out the upper in the first curves layer. Added another curves layer (also set to Luminosity) and targeted the fabric upper. I used the mask from the first curves layer to mask out the heel, and then used a low opacity brush to mask in/out the upper selectively. It needs more work, but is getting close to a useable image.
Copy link to clipboard
Copied
Looking at this some more, with the extreme settings used I'd be nervous about trusting colour accuracy. Especially if this was a commercial shot destined for advertizing. I'd prefer to have the shoe in my hand to check the colour against, and if I had the shoe I would retake the photograph.
I call this big octo box my secret weapon (the set up below was used to photograph a highly reflective trophy), but if you don't have this sort of kit you can get away with a speedlite and large sheet (or two) of white foamboard.
Copy link to clipboard
Copied
"Shoot-it-again filter"
Love it.
Copy link to clipboard
Copied
The only way to relight that in Ps is to do it manually. You'll to mask off every section, then apply adjustments to enhance, or you'll need to paint in all the contrast by hand.
I'm not sure i've ever seen a shoe lit so flatly though. This came from a real photographer? If so, they desperately need to calibrate their display.
Copy link to clipboard
Copied
EDIT: My first question should have been: do you have a raw camera image (NEF, CR2, ORF etc).
It is always best to get the lighting right at capture, otherwise, there is a lot left to do in post and results may never be as good. That being said, the following is an overall/global exaggeration of texture/tone without any masking, which can be blended back into the original at different opacity in different areas with masks.
Copy link to clipboard
Copied
Agree with all the others.
One, get the basic exposure right. Switch the camera from Auto to Manual!
Two, get a display calibrator so that you see a correct representation on screen.
Adjusting basic exposure with a Curves layer goes a long way, but I still wouldn't put any money on the color here. There seem to be some funky color casts:
Copy link to clipboard
Copied
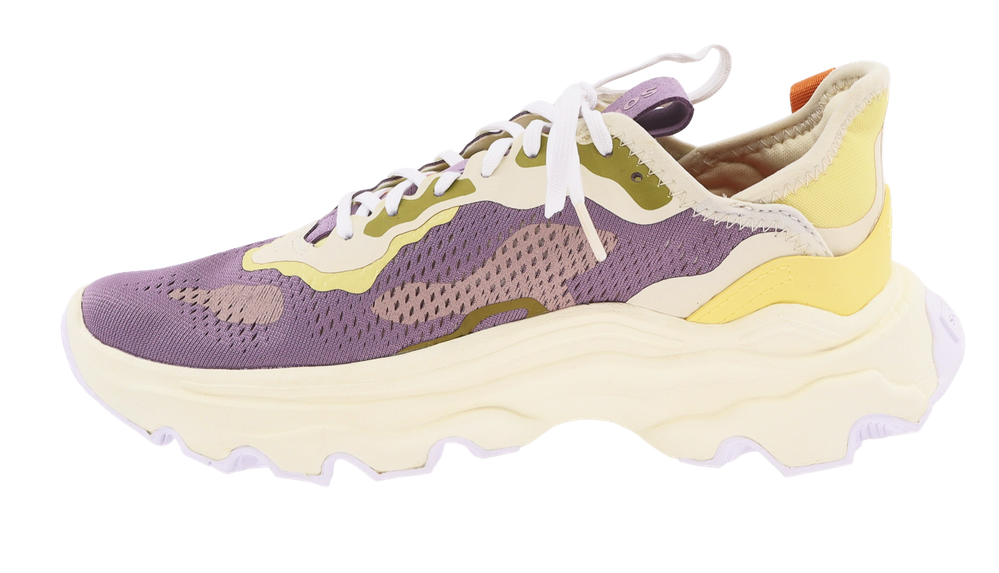
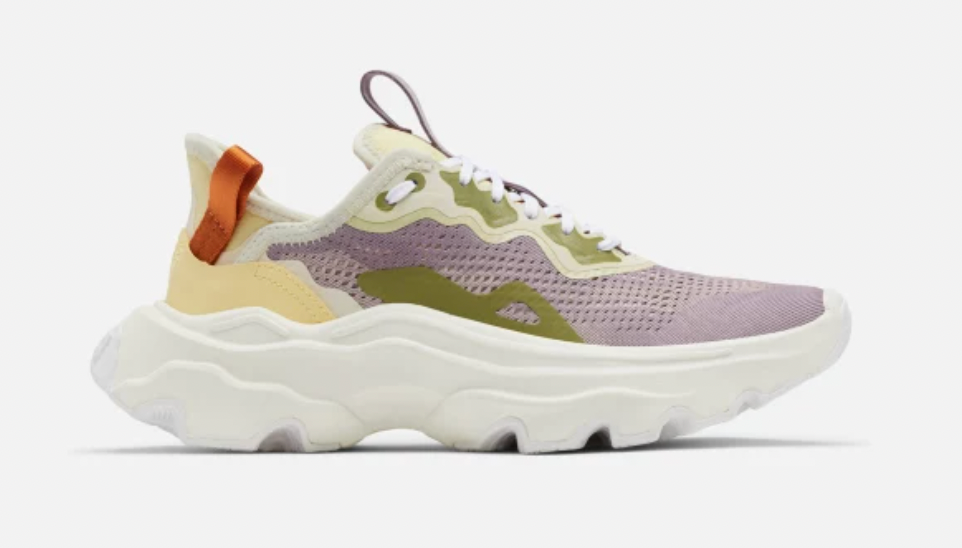
Here is how it looks on the manufacturer's website.
Copy link to clipboard
Copied
The image looks like it's not at full opacity. I'm not sure I understand the purpose here - you say the photo appears on their website, so that must mean you're not the photographer. What's the purpose here? As to the photo, it would have to be reshot. The amount of work and effort it would take to make it look good exceeds the amount ot would take to just reshoot it.
Copy link to clipboard
Copied
Yes, this looks like a lightbox shot taken by someone who has their uncalibrated display cranked up to the brightest setting. It's a fairly common mistake with amateur photogs.
Copy link to clipboard
Copied
With an image like that there is going to be some serious retouching involved to get it to appear to be under directional lighting.
Expert level work IMO
I hope this helps
neil barstow, colourmanagement net :: adobe forum volunteer:: co-author: 'getting colour right'
google me "neil barstow colourmanagement" for lots of free articles on colour management
