- Home
- Photoshop ecosystem
- Discussions
- Adjustments copied onto transparency problem
- Adjustments copied onto transparency problem
Copy link to clipboard
Copied
I don’t know how to solve the following problem:
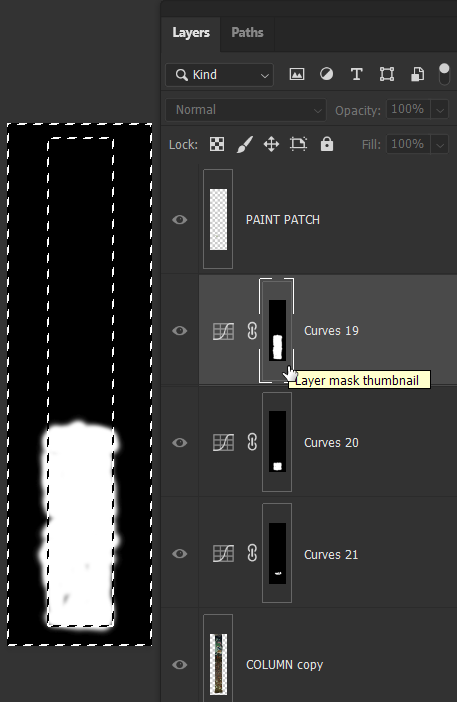
In screenshot 1, I have applied adjustments to the COLUMN copy Layer in Curves 19. Some of the brush strokes have bled over onto the transparent area outside the column.
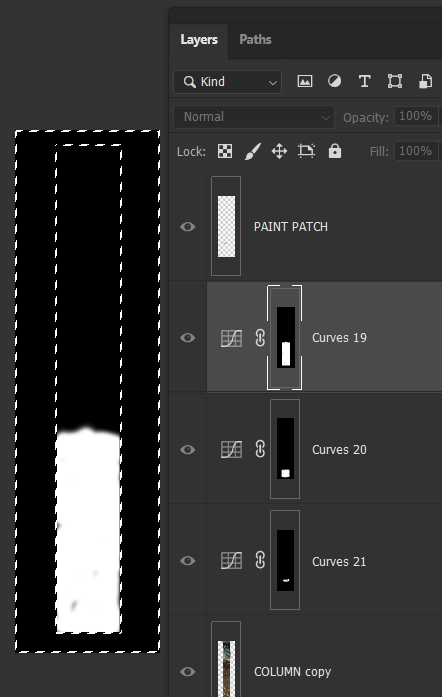
I then selected an area in the column that I copied to a “PAINT PATCH” Layer and moved to the top of the stack (screenshot 2).
The brush strokes I applied in Curves 19 are being reflected in the PAINT PATCH Layer as can be seen in the whitish areas outside the column. Why is this happening and how can I not have these reflected here?
Thanks,
Barton
 1 Correct answer
I first made a selection of the area.
Then chose Select > Inverse to select the area outside the selection.
I Alt (Windows) or Option (Mac) clicked on the Curves 19 layer mask to see only the mask.
Then I filled the selected area of the mask with black.
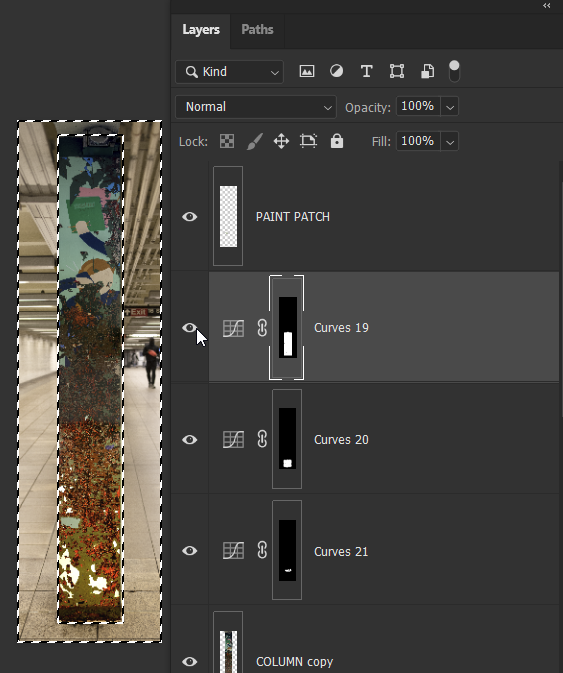
When I click the Eye icon to the left of the Curves 19 layer to make all the layers visible, this is what it looked like:
You can use the same steps to clean up some of the other layer masks that need touchup.
Explore related tutorials & articles
Copy link to clipboard
Copied
Check the layer masks. If a layer mask has gray or white in the area, you will need to make those areas black in the mask.
Copy link to clipboard
Copied
Thank you, Barbara. I'm embarassed to say I apparently don't know what I'm doing here.
In screenshot 1, I have selected the paint patch that I want to modify with an adjustment layer.
In screenshot 2, I have copied it to its own layer and moved it to the top of the stack. I clicked on the mask icon. I painted the mask black. But the whitish areas are still showing at the outside edges of the column.
Is what I need to be doing instead:
1. adding a mask to the COLUMN copy Layer before making adjustments.
2. Making the mask black.
3. Making adjustments to the column.
4. Selecting the paint patch on the column.
5. Copying it to its own layer and moving it to the top of the stack.
6. Applying a clipped adjustment layer to the paint patch.
In screenshot 3, I have painted with black on the mask but it's also painting over the column. What am I doing wrong?
Thank you.
Barton
Copy link to clipboard
Copied
It is difficult trying to follow the many steps you listed and look at a screen capture that is too tiny.
If you could post the Photoshop file itself it would be eaiser to toubleshoot.
Copy link to clipboard
Copied
Thanks, Barbara. The PSB file is 9.7 GB. What would be an alternative to posting this very large file?
Thanks,
Barton
Copy link to clipboard
Copied
You could upload it to a service like DropBox and post the link here.
Copy link to clipboard
Copied
Thank you so much, Barbara. That is exactly what I have done - to WeTransfer. here is the link:
I deleted some extraneous layers to clean up the document and make what's happening clearer, hopefully. You'll see the PAINT PATCH at the top which has brought the brush strokes made on the source Layer (COLUMN copy) showing at the outer edges of the column. I guess when painting white to reveal the adjutsments made to the COLUMN copy Layer, the white filled in the transparency, so the question is - how to hide the white on the transparency? Thanks for your help if you are able to.
Best,
Barton
Copy link to clipboard
Copied
As suspected, the layer masks are at fault.
I will send detailed instructions this evening.
Copy link to clipboard
Copied
Thank you so much. I find layer masks challenging. I am sure your revisions be educating.
Best,
Barton
Copy link to clipboard
Copied
Just know that where a layer mask is black, it hides what is on that layer. Where it is white it shows what is on the layer. Where it is gray it will partically show and partially hide what is on that layer.
Copy link to clipboard
Copied
I first made a selection of the area.
Then chose Select > Inverse to select the area outside the selection.
I Alt (Windows) or Option (Mac) clicked on the Curves 19 layer mask to see only the mask.
Then I filled the selected area of the mask with black.
When I click the Eye icon to the left of the Curves 19 layer to make all the layers visible, this is what it looked like:
You can use the same steps to clean up some of the other layer masks that need touchup.
Copy link to clipboard
Copied
Amazing! Thank you so, so much. I was able to reproduce your steps. One question: How did you fill the selected area of the mask with black? I did it by painting with the brush over those areas. I wondered if there was a more "automatic" way to do it, perhaps.
Copy link to clipboard
Copied
I used a keyboard shortcut. If the default colors are set in the Tools panel, black is the foreground color and white is the background color.
The shortcut to fill with the foreground color is Alt+Backspace (windows) or Option+Delete (Mac -- not Delete on the keypad; Delete next to the += key)
The shortcut to fill with the background color is Ctrl+Backspace (Windows) or Command+Delete (Mac)
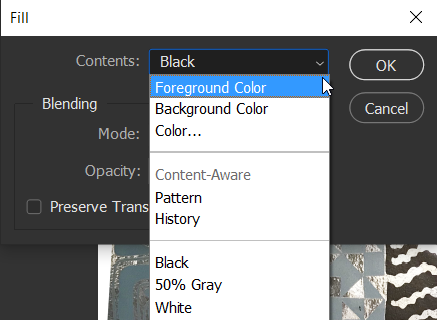
If you prefer to use a menu command, it's under Edit > Fill. Make sure to choose the color you want from the list.
Copy link to clipboard
Copied
Thank you - and just one more question: Similarly, did you use the quick selection tool to initially select the column, or is there a more "automatic" way to do it?
I thought that there was a way to select only pixels in an image. And since the area outside of the column is transparent, that that would select the column automatically. However, I'm not sure there is as I couldn't find such an option under "Select."
Also, I am not sure that I am correct about the column being the only area in the "COLUMN copy" Layer that has pixels. When I revealed my Curves adjustments by brushing over the column with white, aren't those whitish marks outside the column edges white pixels?
Copy link to clipboard
Copied
To select the column I used the Rectangular Marquee tool.
To select only the pixels in a layer you can Control (windows) or Command (Mac) click on the layer thumbnail in the Layers panel.
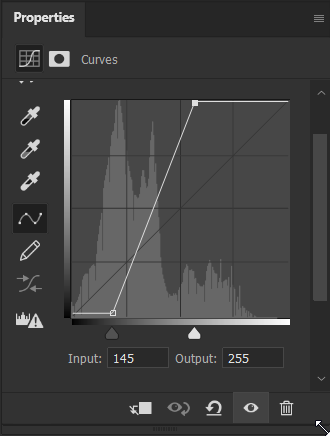
Yes, the whitish marks outside the column edges are white pixels, because the Curves 19 adjustment layer has a curve that dramatically increases the contrast. All pixels from level 145 to level 255 have been changed to white.
Copy link to clipboard
Copied
All very helpful, thank you again!


