BOGLESBY01
Participant
June 19, 2019
Question

Adobe Model Eyes on Photoshop Error

  • June 19, 2019
  • 1 reply
  • 386 views

Hey Everyone!

I'm having a problem with Adobe Fuse and Photoshop. I created my 3D model in Adobe Fuse CC (Beta) 2018 version and when I finished creating, I clicked "Save to CC Libraries" and it save into my library. I opened Photoshop CC 2019 version to use my model for a graphic design project, I clicked on the "Libraries" panel  and double-clicked the file to open the model but when my model uploaded to Photoshop, the model's eyes was white or gray-scale and Photoshop does it to all my Adobe Fuse Models.  And my laptop is a Windows 10, just in case for additional info. Please help.

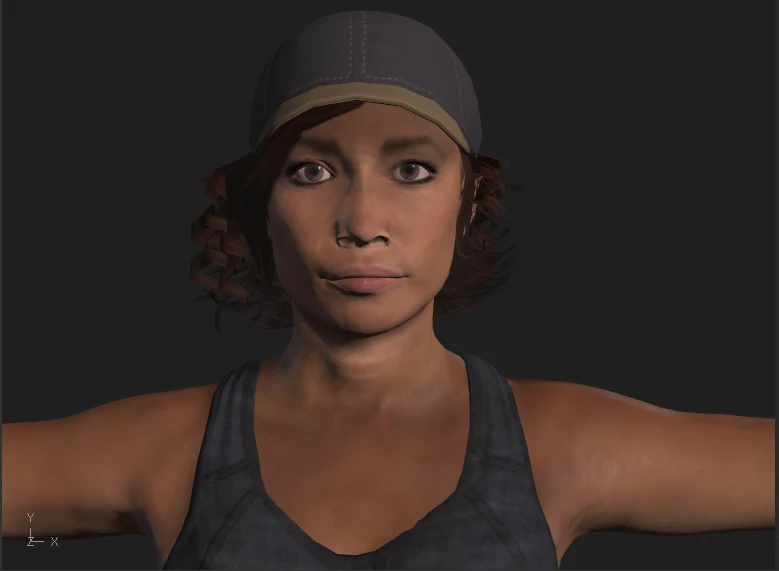
Here's the Model in Fuse:

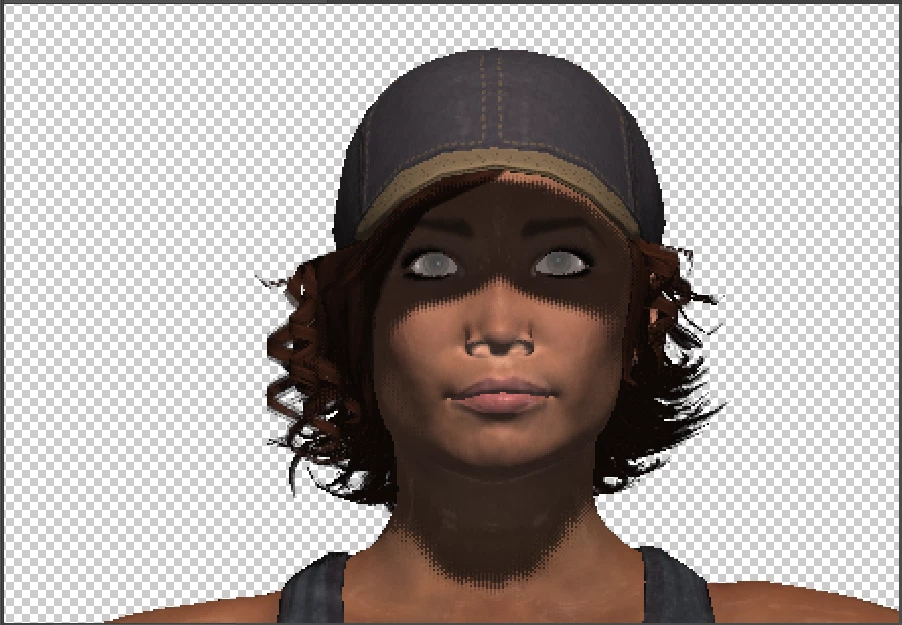
But when I upload it to Photoshop, the eyes looks like this:

    This topic has been closed for replies.

    1 reply

    Mike_Gondek10189183
    Community Expert
    Community Expert
    June 19, 2019

    Try alt dragging from Photoshop library into RGB mode canvas.

    BOGLESBY01
    Participant
    June 19, 2019

    Thanks for replying, i tried that strategy but it still doing the same. I keep considering its a Adobe fuse error but I don't know.

    Mike_Gondek10189183
    Community Expert
    Community Expert
    June 19, 2019

    Take a look at these steps incase you did something slightly different.

    Walkthrough | 3D character animation

    • In the Libraries panel, open the library with which you synced your character. Photoshop displays the Fuse (Beta) character under 3D assets.

    • Double-click the character to open it.

      3D animation in Photoshop
      The 3D asset synced in from Fuse


    • Switch to the 3D workspace if you are in some other workspace. Select Window > 3D.

    • Select the character's skeleton in the 3D Layers panel.

      3D layers panel in Photoshop
      The character's skeleton


      Note:You can right-click on the skeleton bone and choose to center either the character or the face in view for easier navigation.

    • Now, in the Properties panel, choose Body.

    • Search for an Action, such as Dance.

    • Click a thumbnail to apply animation to the model. If necessary, adjust the parameters for the animation.

      TrimAdjust the start and end point of animation. Specify the start point of animation in Min and the end point in Max.

      In PlaceFor animations, such as running, which takes the 3D character out of focus, this setting forces the animation to stay in place.

      MirrorSwitch sides of the animation.

      Arm SpaceAdjust the spread of arms.

      OverdriveAdjust how slow or fast the animation should move.

      3D animation in Photoshop
      Apply an animation


    • Now, in the Properties panel, choose Face.

    • Search for an expression, such as Happy.

    • Click a thumbnail to apply animation to the model. If necessary, adjust the strength of the expression as well as the eye and head positions.

      3D animation in Photoshop
      Adjust the strength of the expression


    Result

    You now have a fully animated and posed character that is ready to be composited into any scene you choose.

    3D animation in Photoshop
    Your 3D character ready for compositing