teachertrev6365250
Participant
February 27, 2019
Answered

Advanced question: Create a tileable texture in Photoshop from a tileable texture created in illustrator

  • February 27, 2019
  • 3 replies
  • 2141 views

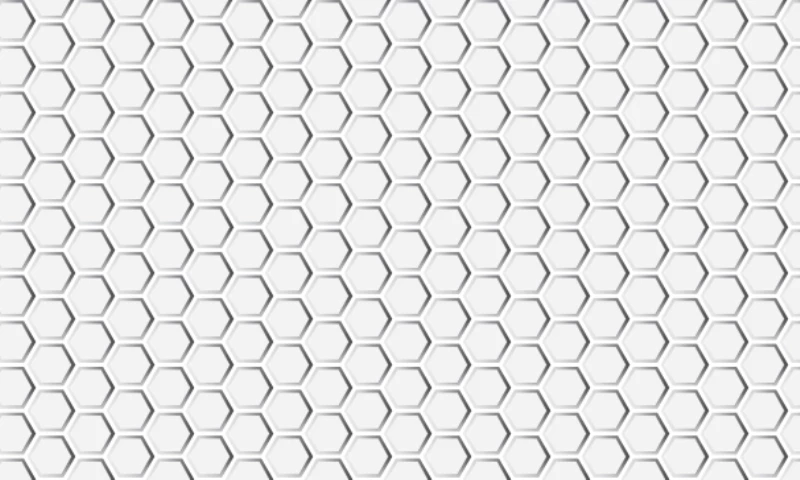
Been using Photoshop 15 years, and finally learned how to create repeatable vector illustrator textures, as it's much easier than doing all the math involved in Photoshop's repeatable patterns, filter >> offset, etc.

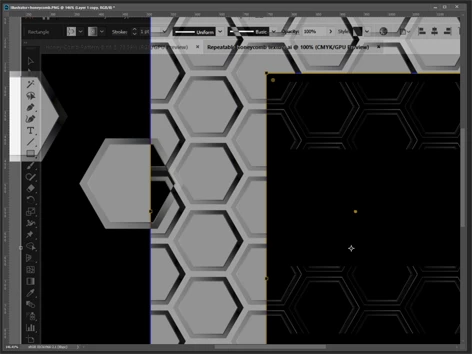
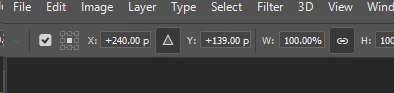
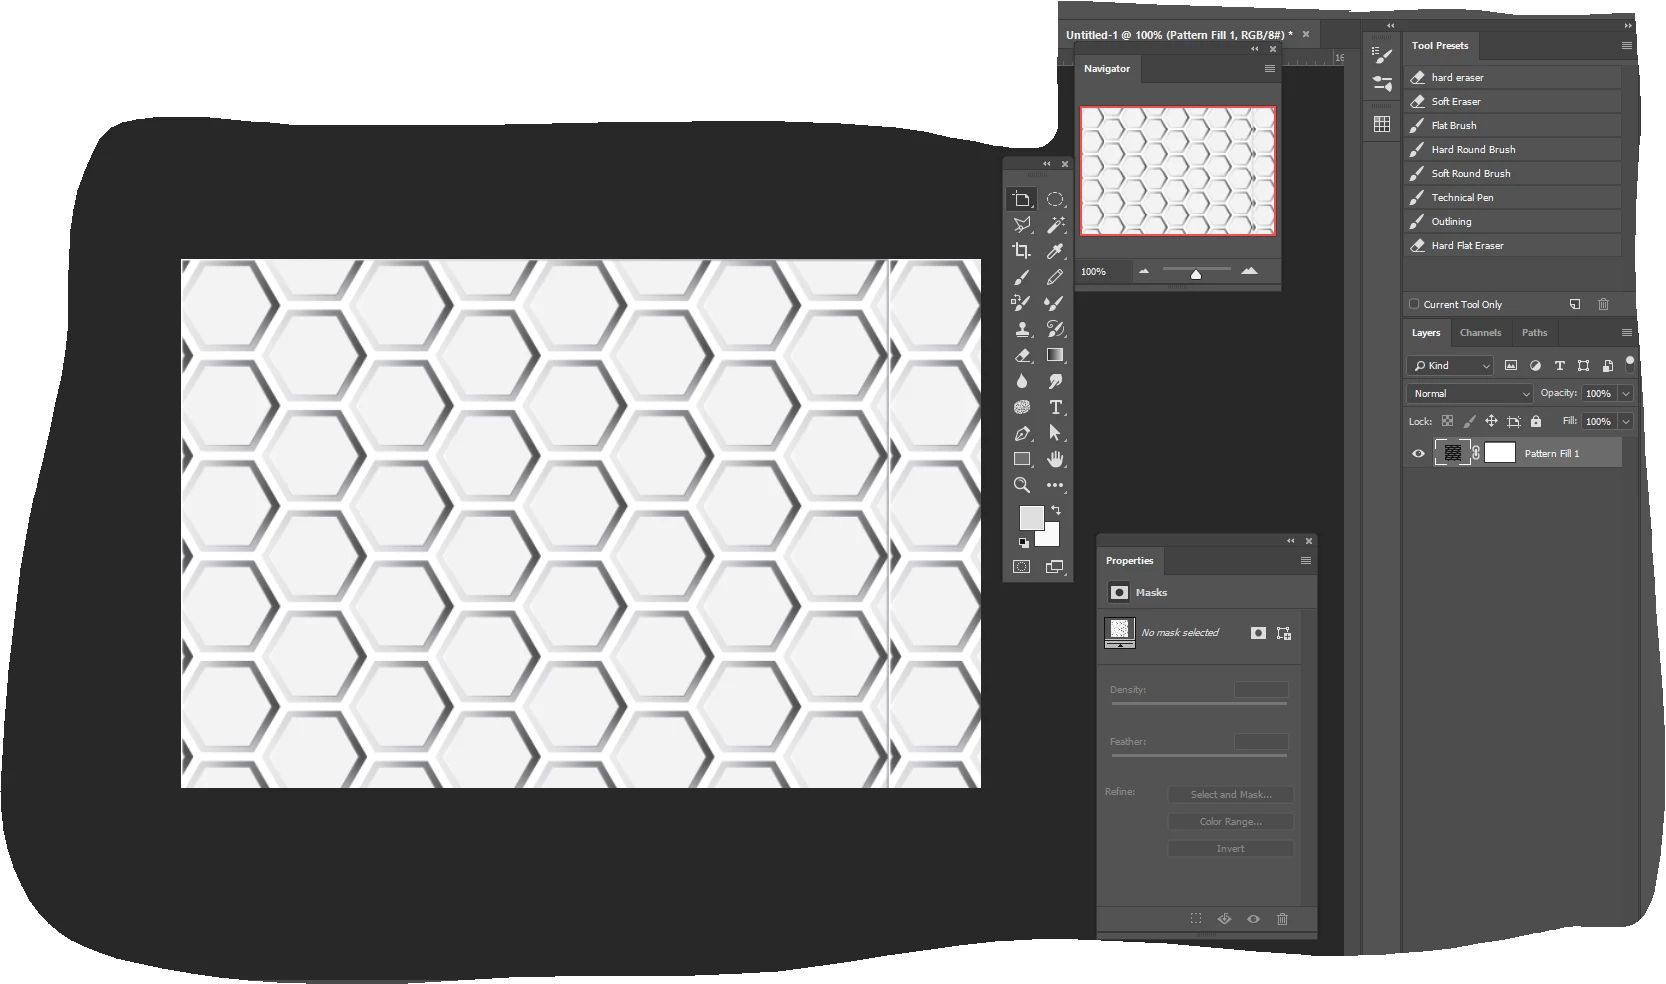
I can bring in an illustrator tile swatch into Photoshop, as a repeatable texture. I can then make it a pattern in Photoshop, edit >> define pattern.

When I then, in a separate file, run the Layer >>New Fill Layer>>pattern, so I can scale the pattern up and down in Photoshop how I want, BUT it then gives me a border edge.

I assume this edge is happening from saving the repeatable texture as a pattern in Photoshop.

Here's my question:

How can I bring in a tileable texture from illustrator into Photoshop, and make it a repeatable Photoshop pattern without the borders.

With all the textures, digital painting, and now the new implementation of 3D models in Photoshop, why adobe hasn't made tileable textures easier in Photoshop like it is in illustrator is beyond me.

This topic has been closed for replies.
Correct answer Semaphoric

Are you bringing a rectangle filled with the pattern from Illustrator into Photoshop? The pattern in Photoshop needs to be equal to the vertical and horizontal offsets of each element of the pattern, which is fairly easy to find.

Make a duplicate of the layer with the pattern you brought over from Illustrator, and set the blending mode to Difference. Edit > Free Transform using Relative Positioning, and use the arrow keys to move the duplicate layer horizontally and vertically until it turns black.


Note the values in the X and Y fields of the Transform options:


Use these as the dimensions for a fixed-size selection, and make a selection on the pattern, and define that as a pattern.


3 replies

Semaphoric
Community Expert
SemaphoricCommunity ExpertCorrect answer
Community Expert
February 28, 2019

Are you bringing a rectangle filled with the pattern from Illustrator into Photoshop? The pattern in Photoshop needs to be equal to the vertical and horizontal offsets of each element of the pattern, which is fairly easy to find.

Make a duplicate of the layer with the pattern you brought over from Illustrator, and set the blending mode to Difference. Edit > Free Transform using Relative Positioning, and use the arrow keys to move the duplicate layer horizontally and vertically until it turns black.


Note the values in the X and Y fields of the Transform options:


Use these as the dimensions for a fixed-size selection, and make a selection on the pattern, and define that as a pattern.


teachertrev6365250
Participant
February 28, 2019

Thanks for the help. I'm stuck on "relative positioning." I think I'm starting to understand it from my reading. Am I flipping the duplicated layer over? Please, and thank you in advance for explaining relative positioning.

teachertrev6365250
Participant
February 28, 2019

Yes, I figured it out just before I saw your post. You helped clarify what exactly it did, so thank you very much.

I figured it out for the fixed selection. Very clever, thank you for sharing as I hate writing down numbers and dividing pixel number units. Just think they should have a better way, and they do, but just in illustrator.

Fixed selection based on the pxl numbers used from the relative position.

still had a hard edge. Something perhaps I missed?


Got it to work. When I zoomed in a see that there was a line caused when the pattern was made in illustrator, which is common and has to be manually fixed. I exported it out as a tiff and that fixed the issue by changing an option in the export in illustrator.

I saw that the tiff had a little edge to it still, so I turned off the difference layer (black one) and just used the arrow keys to bump down the the fixed selection until it was away from the edge. See the picture.

Then make pattern and that did the trick! Thanks again Semaphoric​ for giving me a solution that didn't really require math. Your awesome and thanks for your time and patience!

chanaart
Community Expert
Community Expert
February 27, 2019

The answer below might give you a good workaround but in general when you bring it to Photoshop and capture the pattern it is pixel and all rule are gone!!! it will behave like Photoshop!

Chana

JJMack
Community Expert
Community Expert
February 27, 2019

I found a tutorial once that gave me a good tip.  when I isolate the image I want to define a pattern with like your screen captured polygon to use Filter Offset with wrap around to see how the pattern will stitch together.   Here I see there was a problem with the crop I made of your screen capture. So I used canvas size to crop two pixels from the height top and bottom both need a 1 px crop. the width was good.

Some times a little healing can be used. I made the background vivid to make the problem easy to see.

JJMack
teachertrev6365250
Participant
February 28, 2019

Yes, I've used offset before. I just feel there should be a better way than me having to break out a calculator to figure out how to offset it. Just looking for a faster, more efficient way.