Copy link to clipboard
Copied
I am trying to print my digital art onto 8 x 10 paper. I have done this before and have had no issues but when I'm trying now the image is printing out cropped and the colors are all significantly darker. My printer can do edge to edge printing so that isn't a problem here. I've changed paper settings, color management settings, borderless vs border... and I keep getting the same results. I've reinstalled the printer and software too. I just don't understand how I'm using the same files/paper/printer/settings as I usually do but am not getting the same result. Any insight would be SO helpful!
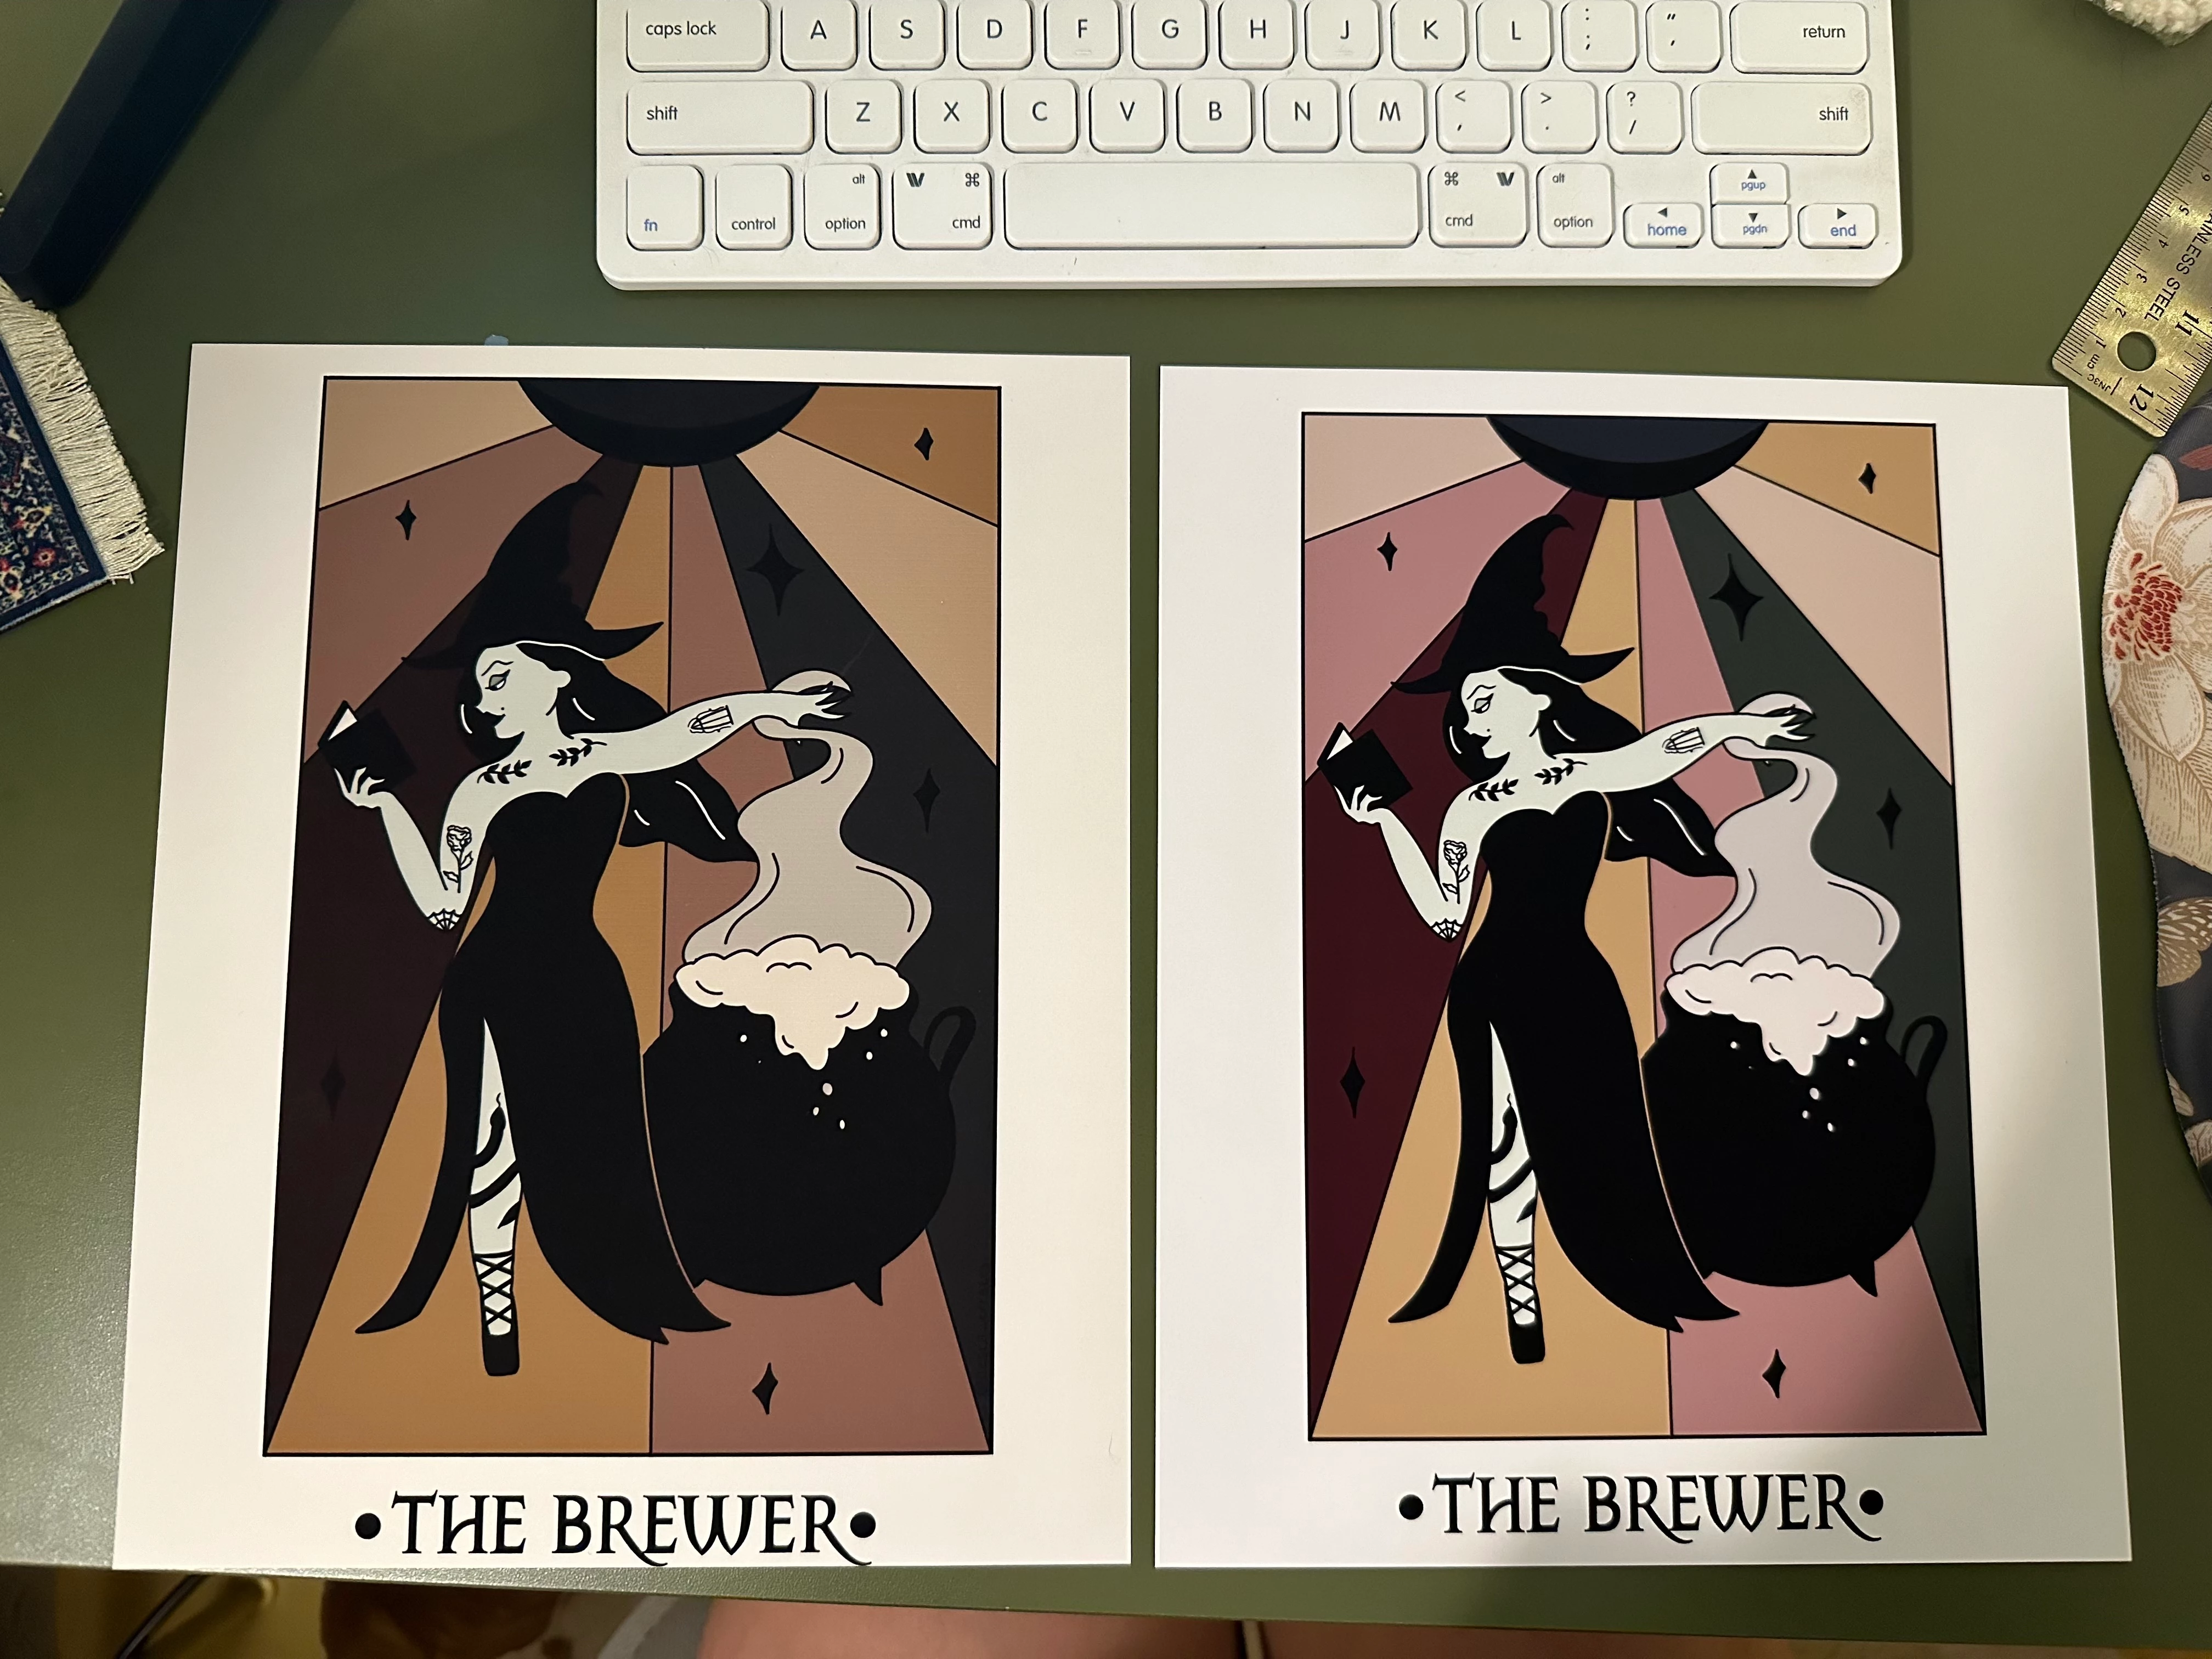
The photo below is an example. Print on the right is what it is supposed to look like, print on the left is what I'm getting right now (darker colors and cropped on the bottom).
Copy link to clipboard
Copied
Some additional info:
My printer is an Epson ET 8550
I'm printing on red river 60lb premium matte plus
These prints were created on a canvas size of 8 x 10
Print settings I usually use and have been trying:
Copy link to clipboard
Copied
1 - Why is the document untagged? You always need to make sure there is an embedded color profile. Without it, the file is undefined.
2 - Why are you using a generic gamma 1.8 printer profile? You need to use the correct profile for that specific paper/printer/ink. Red River will provide this profile. They will also tell what to set as media type in the printer driver with this paper. That controls the total amount of ink. Finally, turn off color management in the printer driver to avoid double profiling.
3 - You need to calibrate your display to match printed output. Monitor white needs to be a visual match to paper white. The actual numbers will vary with your working environment, but is usually somewhere in the vicinity of 100 - 120 cd/m². You set this target in your calibrator. But it can also be done manually - if it looks right, it is right. They just need to match visually, so that you see paper white on screen.
Copy link to clipboard
Copied
Hi, thanks for the advice. I'm new to this. So I followed a couple of your recommendations so far but when I selected the RR printer profile specific for my printer, photoshop says that it can't print without any color management and that I need to use Adobe Color Printer Utility to print. When I looked into that it says its not supported by the latest Mac OS.
When I was looking up how to set up color management the Adobe recommendations talked about selecting an option under Color Settings (no color management, optimize for screens, optimize for printing etc) but when I go into that I don't have a drop down selection like its describing.
Where can I find the settings for my monitor so I can calibrate it?
Copy link to clipboard
Copied
Turn off color management in the printer driver. Photoshop's color management obviously needs to operate.
To calibrate and profile a display you need a colorimeter and profiling software. Any serious Photoshop user will have that. Photoshop's whole architecture revolves around this.
This is a short answer because I'm on my phone and can't type too much 😉
Copy link to clipboard
Copied
It appears you have tried to assign the printer profile to the document. Don't do that! The document needs to be in a standard color space. That's sRGB, Adobe RGB or ProPhoto.
All color management requires two profiles, a source and a destination. Don't mix them up. One is converted into the other. They can't be the same - that cancels everything out and disables all color management.
Never work with untagged files. Always make sure there is an embedded profile. You keep a check on this here:
To get a correct preview on screen, monitor white needs to be a visual match to paper white. If your screen is too bright, your prints will come out too dark. You should see paper white on screen. Having a calibrator will help you get consistent and reproducible results - but in a pinch, you can just use your eyes and adjust the monitor white point visually.
A calibrator will also do a lot of other things, such as write a monitor profile that Photoshop will use to display your files correctly and accurately. A calibrator is essential equipment.
Copy link to clipboard
Copied
Okay Okay I'm getting somewhere!! The colors are still printing a bit muted but WAY better than before. Will need to play around a bit more but not sure what to try next.
So I've been getting the best results in CMYK but when I use that color mode the color profile defaults to the U.S. Web Coated (SWOP) v2 (8bpc) — does this sound correct or should I be choosing a different profile? I'm not sure what to address next to fix the muted color.
I really appreciate you taking the time to help with this!
Copy link to clipboard
Copied
I feel we're going into the very basics of color management here. I'm not sure how much I can do that now, so perhaps you should look up some other sources as well, just to get the fundamentals.
You really need to settle the document profile! You can't "play around" with this. sRGB or Adobe RGB should be safe. Just make a decision, and stick with that. Don't change it randomly, it only gets you in more and more trouble.
An inkjet printer is not a CMYK device. For one thing, it has more inks than cyan, magenta, yellow and black, so CMYK doesn't even make any sense. CMYK is strictly for commercial offset printing. Sending CMYK to an inkjet printer is just one extra unnecessary conversion. Give it RGB data. That's what it expects.
You can either let the printer manage color, in which case the final conversion is performed automatically in the printer driver. Given the problems you're having here, perhaps you should just do that for now.
The other option is to let Photoshop manage color. That's more flexible and potentially more accurate - but then you need to set the correct print profile in the Photoshop print dialog. The correct printer profile is the one that characterizes the actual printer/ink/paper. If you choose this option, you need to turn off printer color management. You don't want it done twice. You also need to set the correct media type in the printer driver. This controls the total amount of ink. You do this in the printer driver, and you get to that by clicking "Print Settings" in the Photoshop print dialog.
And again - make sure your screen isn't too bright. Monitor white needs to look like paper white. Most displays are way too bright out of the box, and then you get dark prints.
Copy link to clipboard
Copied
@francescag54179982 Don't ever use CMYK for an inkjet printer unless it has a RIP driving it.
Ideally, use Photoshop Manages Color and select the correct media profile RGB there.
Now in "print settings" you should disable any color management, but you do need to be sure to select the correct media type because that controls ink laydown in the driver.
As @D Fosse wrote get the document profile right [so appearance on a calibrated screen is right] and then don't switch it, the only time you should have to assign a document profile is if the document is coming in 'untagged'.
OR in really rare cases if it has the wrong ICC profile embedded, very rare that happens.
I hope this helps
neil barstow, colourmanagement net - adobe forum volunteer - co-author: 'getting colour right'
google me "neil barstow colourmanagement" for lots of free articles on colour management
Help others by clicking "Correct Answer" if the question is answered.
Found the answer elsewhere? Share it here. "Upvote" is for useful posts.