Answered

This topic has been closed for replies.
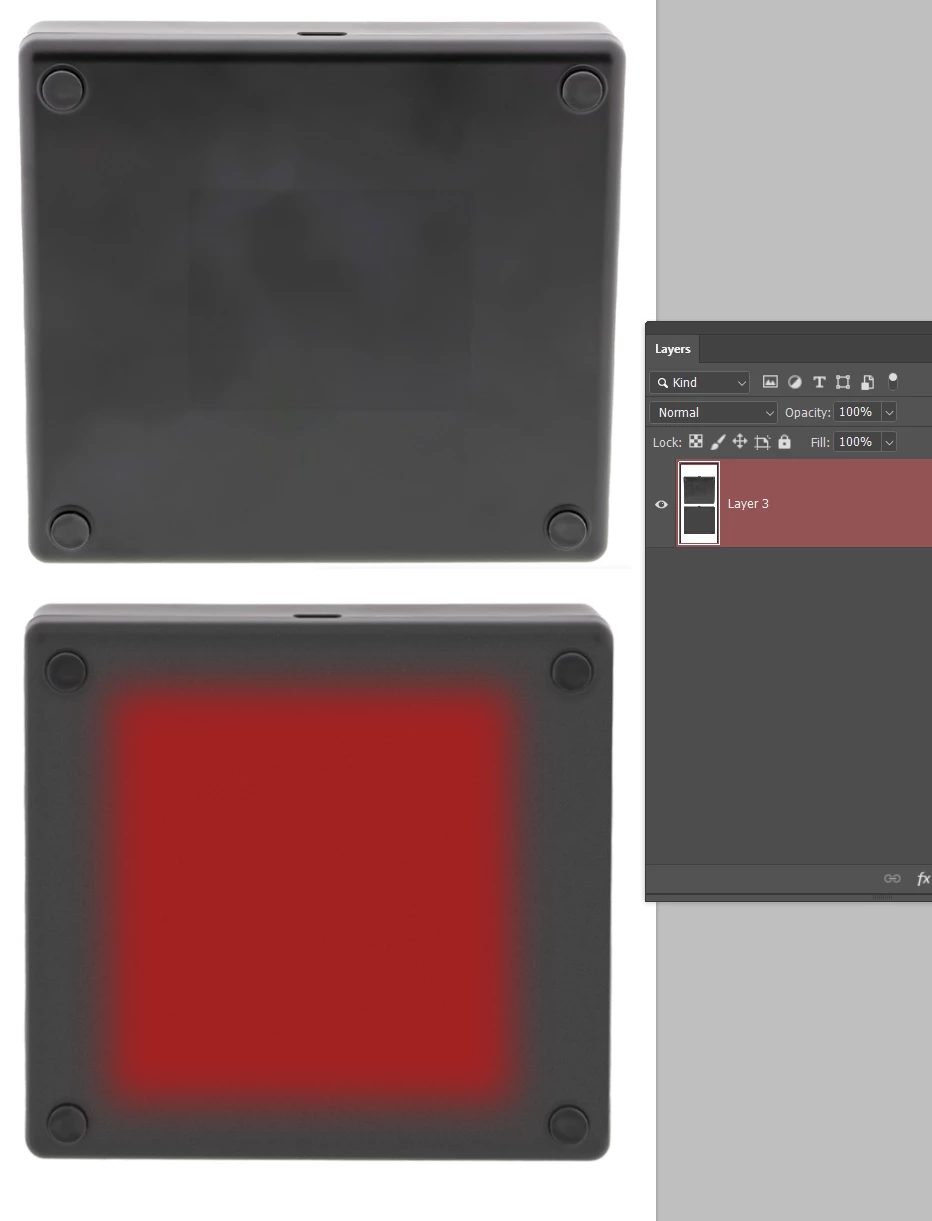
Your version worked best for me. This is the result, what do you think?
But I can't get it to look really professional. You can always see the edges somehow.
The way Lumigraphics described doesn't get me any further. Nevertheless, thank you very much for the information. I have already tried to make it more visible with the help of the adjustment layer, but I can't find a suitable technique to solve the problem.
Thanks again for your help. I didn't mean to be rude, I didn't mean it that way.
That's excellent. No one is going to know that is partly an illustration. Unfortunately, you will occasionally encounter bad advice on this forum. Nowhere close to what you'd see on Reddit and other similar online forums. You can trust input from the Community Experts, and if posters supply screenshots that demonstrate the process as well as describe it, that's a plus.
I'll leave you with a thought that is redunent now, but might be a useful tool to add to your Photoshop box of tips & tricks.
Expand the canvas to make room for your nicelt fixed texture, or an image you have found of a texture that works for you, and add it to the same layer that the blotchy original is on.
Hit Q to enter Quick Mask, and use Gaussian Blur to soften the selection as below.
Hit Q again to come out of Quick Mask, and select the Patch Tool.
Drag the selection to the blotchy original, and release the mouse, and the Patch Tool will blend it in.
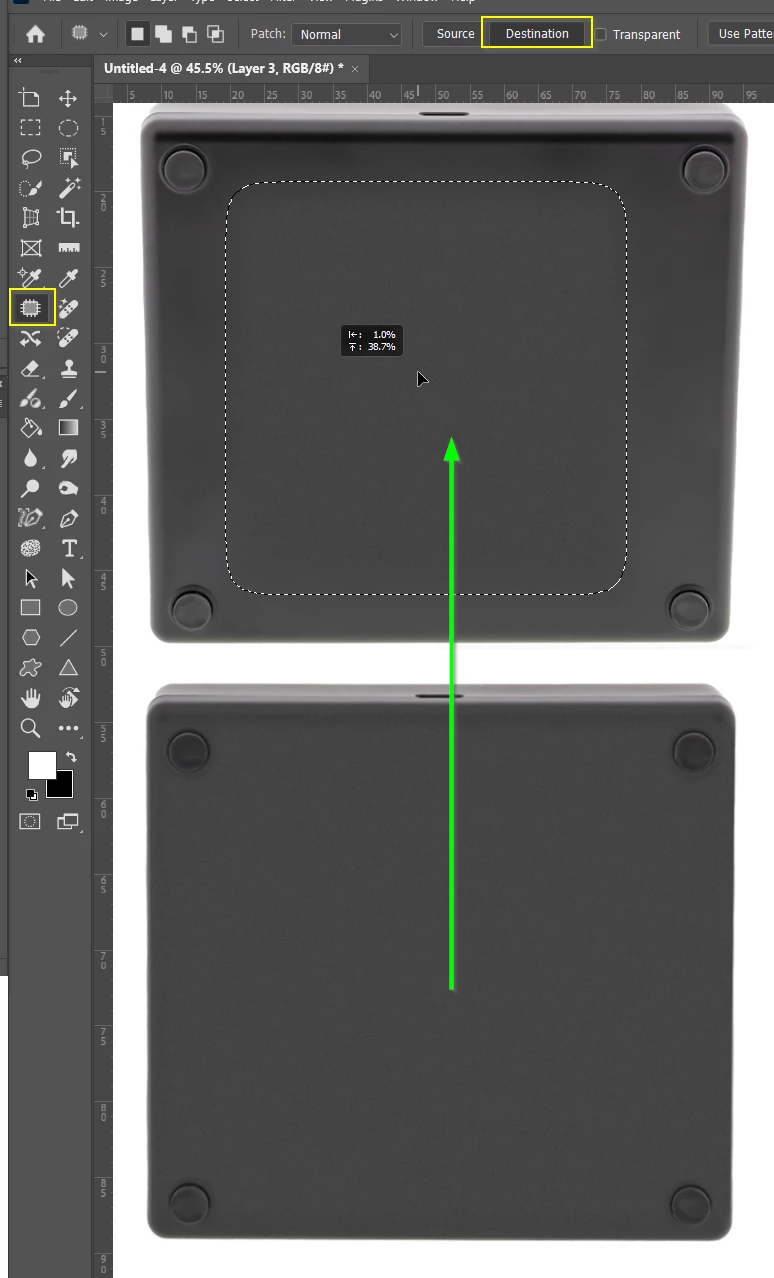
You can only use the Patch tool when you have suitable source pixels, and your original was entirely compromised, but you can use another image if you can find one. In thiis case you could just as easily have composited the new texture, but the point is you now know a way to use the patch tool in teses circumstances.
When I composite in a situation like this I like to use a dummy layer as a clipping mask.
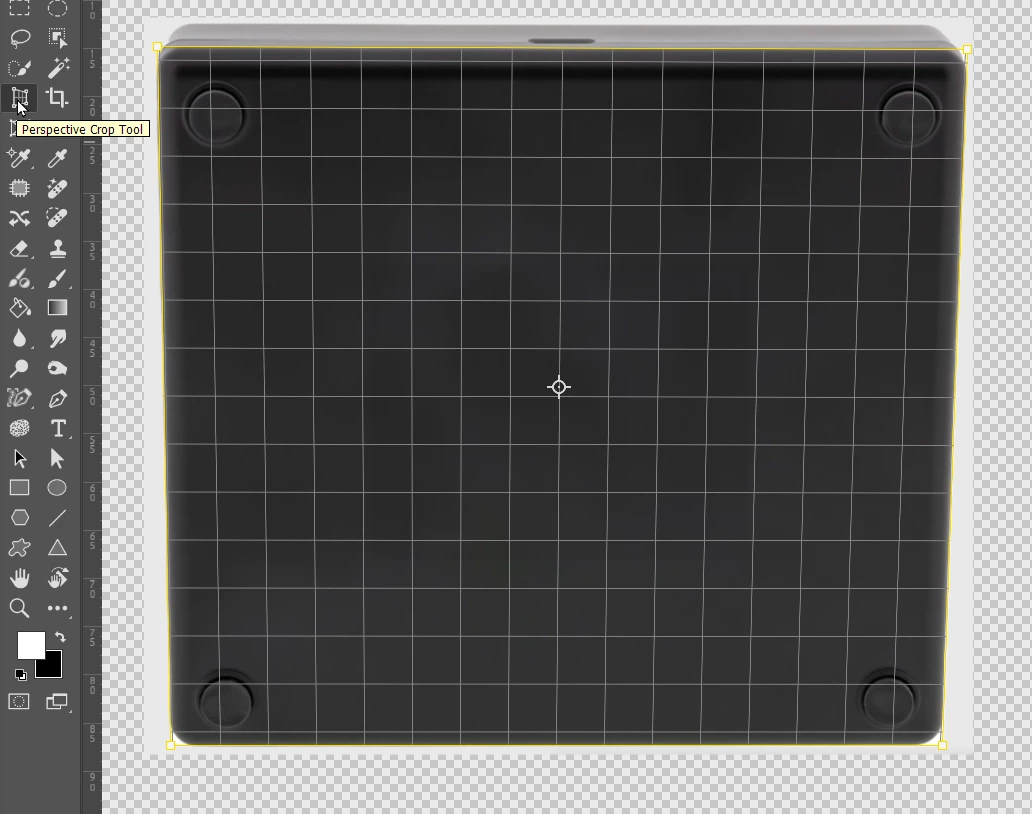
Incidentally, I'd like to square up the front face of your box for my screen shots, and I find Perspective Crop the easiest way to do this.
Make a bit of space around the image, and drag out the Perspective Crop window and align the corner handles.
Now Opt drag the middle of the crop box to give you back the canvas you need and prevent needed pixels being cropped.
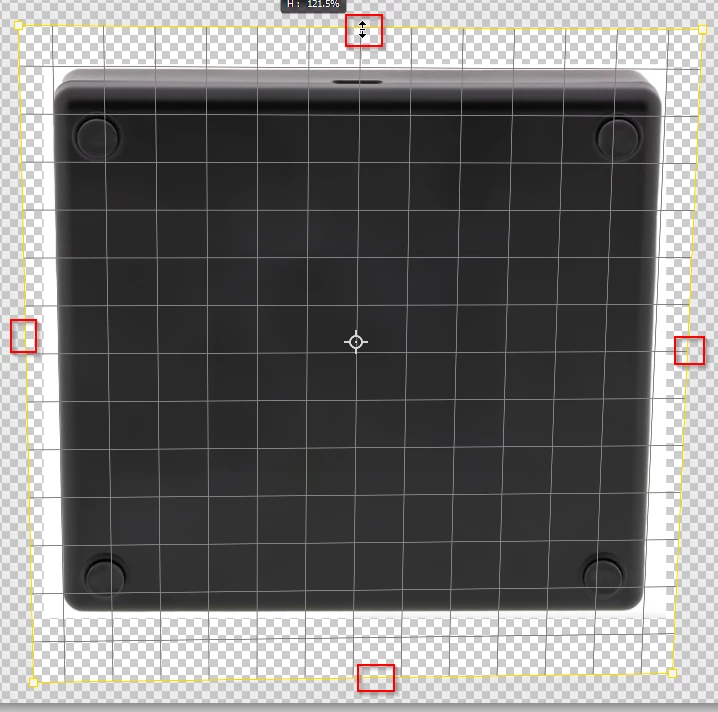
OK the crop
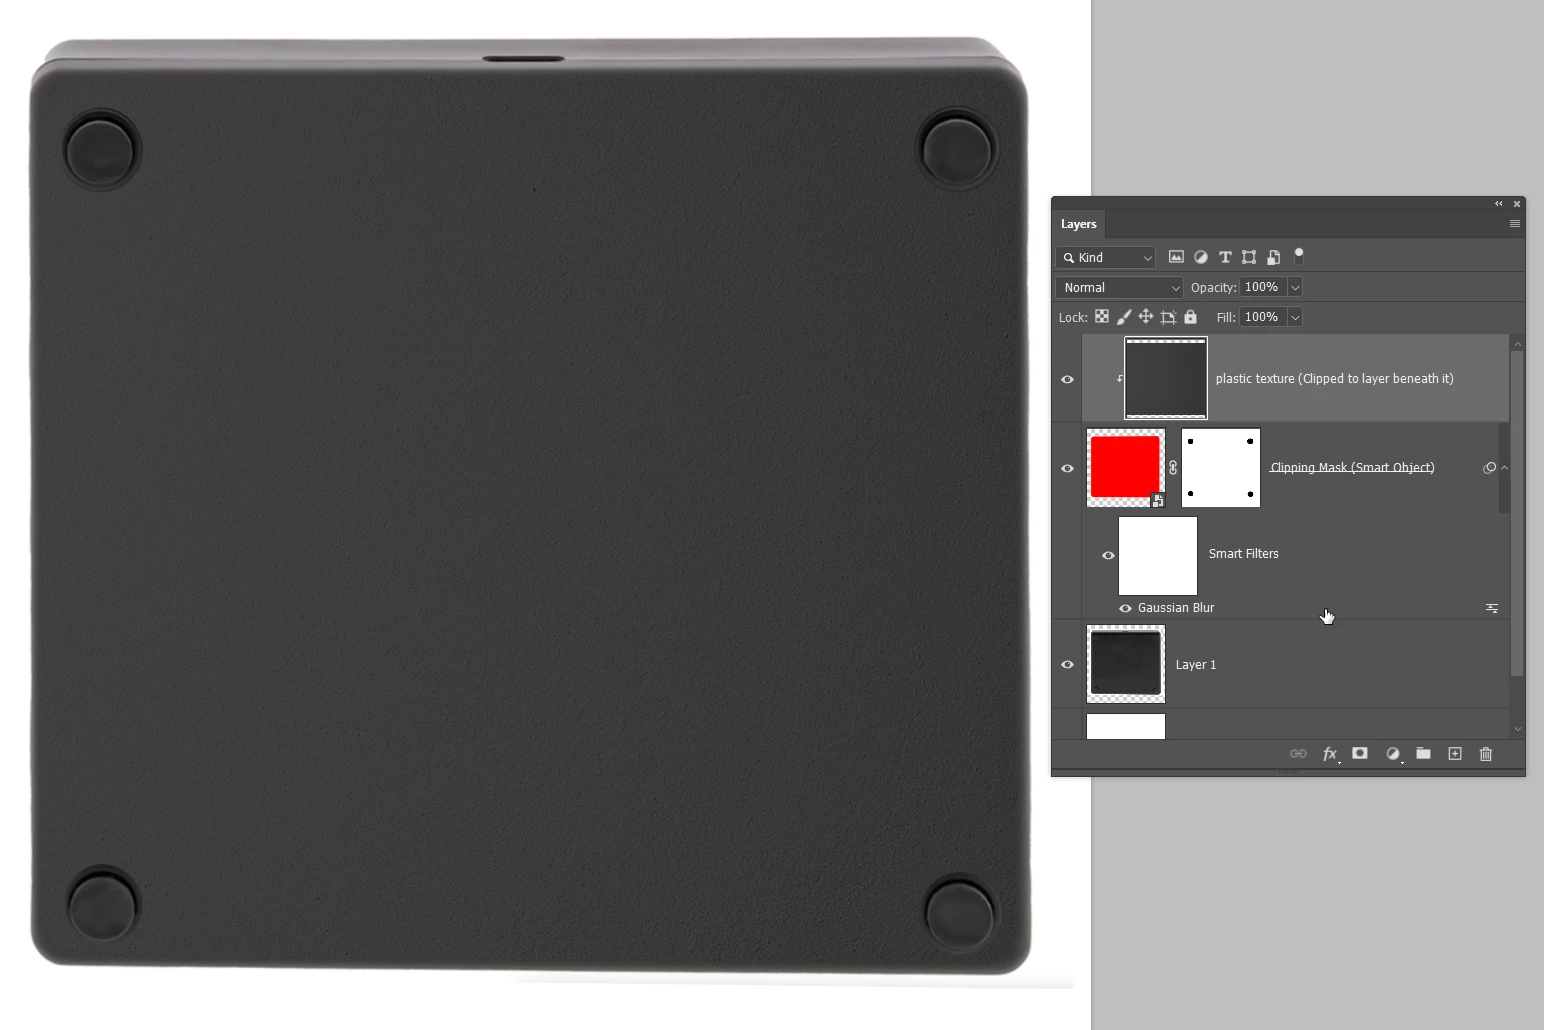
Add a rectangle layer to cover the base (because it is easy to create the corner radii) and make it a Smart Object so we can fine tune the fit and add effects. Colour is unimportant as it is just a clipping mask. Add a layer mask to reveal the feet.
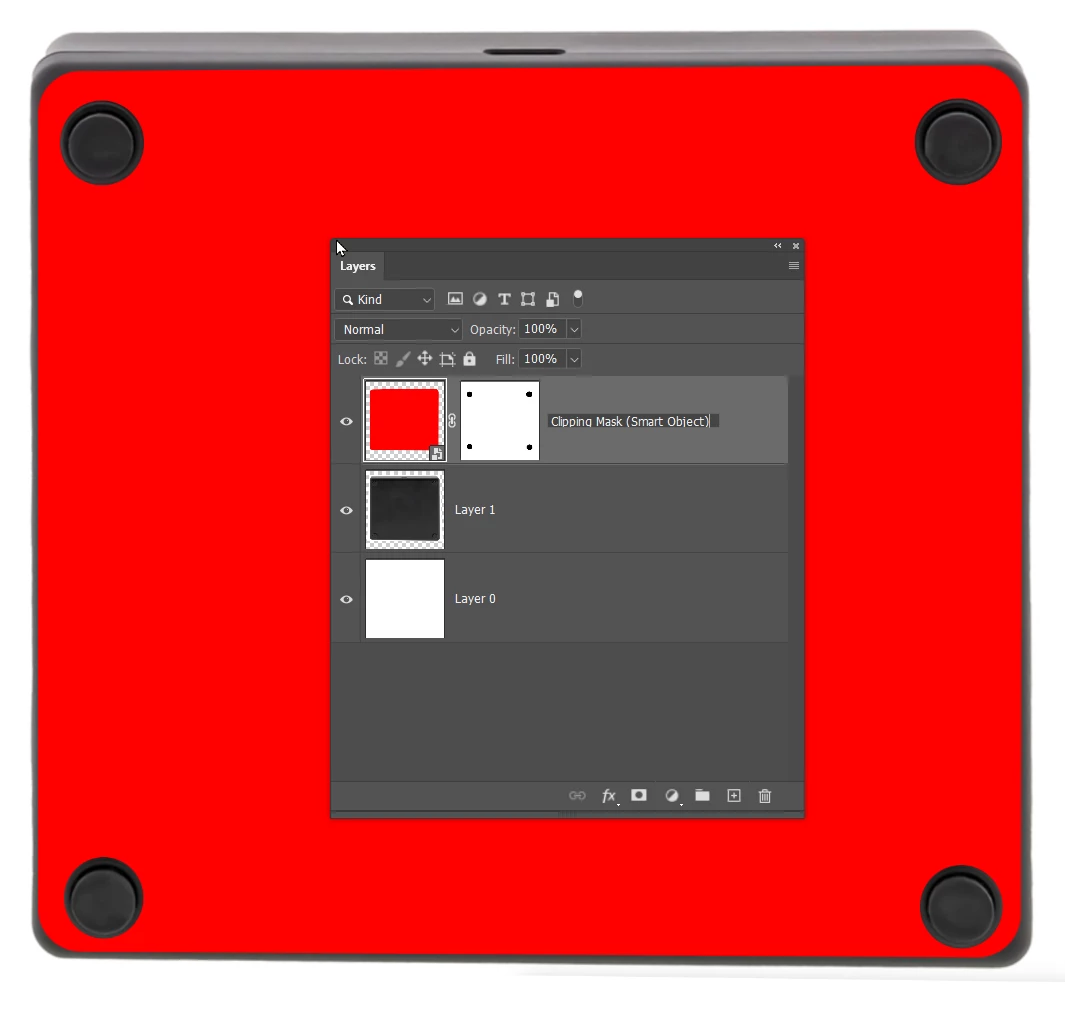
That's it. Easy peasy from here. Find a suitable texture and clip it to the mask layer.
The reason I like this approach is because we have complete control using the clipping mask layer. We can add effects, like the gaussian blur to soften the outerside. We can fine tune position and shape. And we only need to do this once. If you want to use a different texture, just lay it over the clipping mask and it's job done. Way less messy that using layer masks and reworking the texture layer.
I hope that helps, and I hope can spot the bullsh1tters going forward. 😉
Sign up
Already have an account? Login
To post, reply, or follow discussions, please sign in with your Adobe ID.
Sign inSign in to Adobe Community
To post, reply, or follow discussions, please sign in with your Adobe ID.
Sign inEnter your E-mail address. We'll send you an e-mail with instructions to reset your password.