Copy link to clipboard
Copied
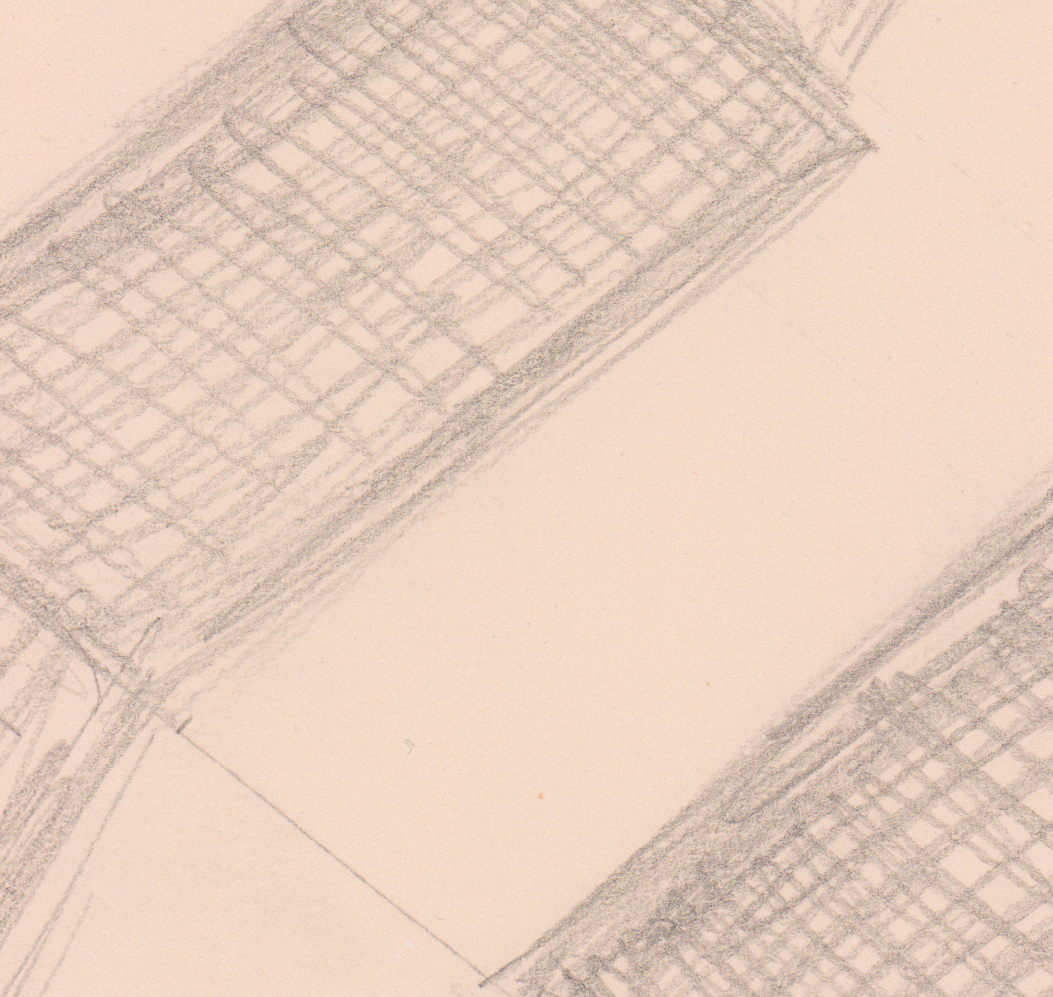
I am scanning graphite drawings on cream-colored paper and can not get "black" blacks. With selective color I add black to blacks and I adjust levels.
Still get colors other than black - typically blues and greens.
 1 Correct answer
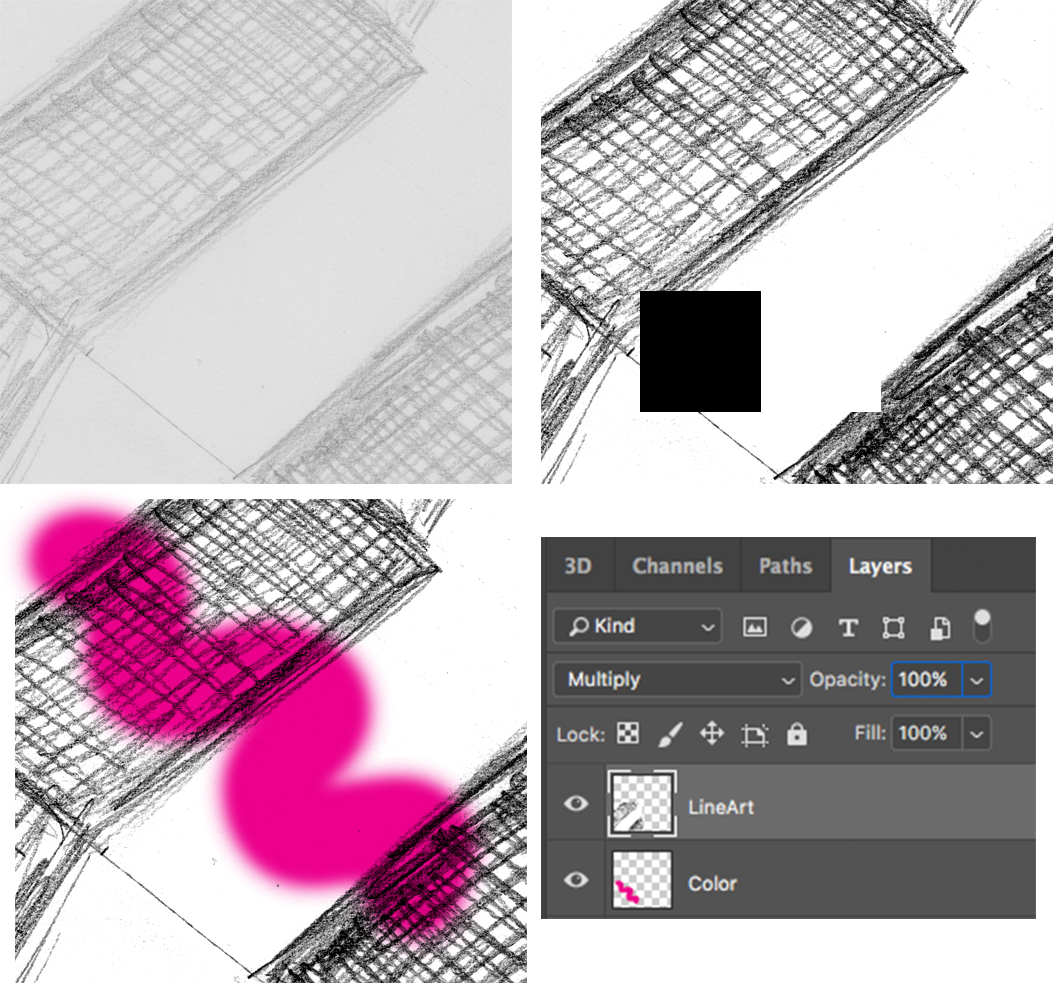
I made a quick little visual-
( this one is tough because theres not a lot of contrast between the art and paper, you may end up with a little extra cleanup )
1. Convert to greys Image>Mode>Grayscale
2. Adjust levels- you can adjust the blacks to be as light or dark as you please, as long as the whites are white.
3. Set that layer to Multiply, and in your case, a layer with the paper color OR a copy of the original paper texture with the artwork clone-stamped out of it
EDIT:
I meant to include this sh
...Explore related tutorials & articles
Copy link to clipboard
Copied
If you are using graphite and cream colored paper, its going to be pretty difficult to get "black" blacks, no matter how much you tweak levels, its still going to be using other colors. The only thing I can think of aside from changing the colorspace to grayscale (which would defeat the purpose of doing the drawing on cream colored paper, unless you want it all in B&W) is to isolate the linework by duplicating the layer with the drawing, using Select>Color Range, have it set to selected color and use the eye dropper to pick the color of the paper, which would select all of that color, delete that, then you're just left with the linework, then you could tweak that, by like lowering the saturation and playing around with the lightness and stuff like that. But its highly destructive since you're deleting elements, albeit on a secondary layer. But even so, like I said, without going into grayscale, its still going to have other colors incorporated and not going to be pure black
Copy link to clipboard
Copied
I'd have to see what your artwork looks like to suggest best selection technique.
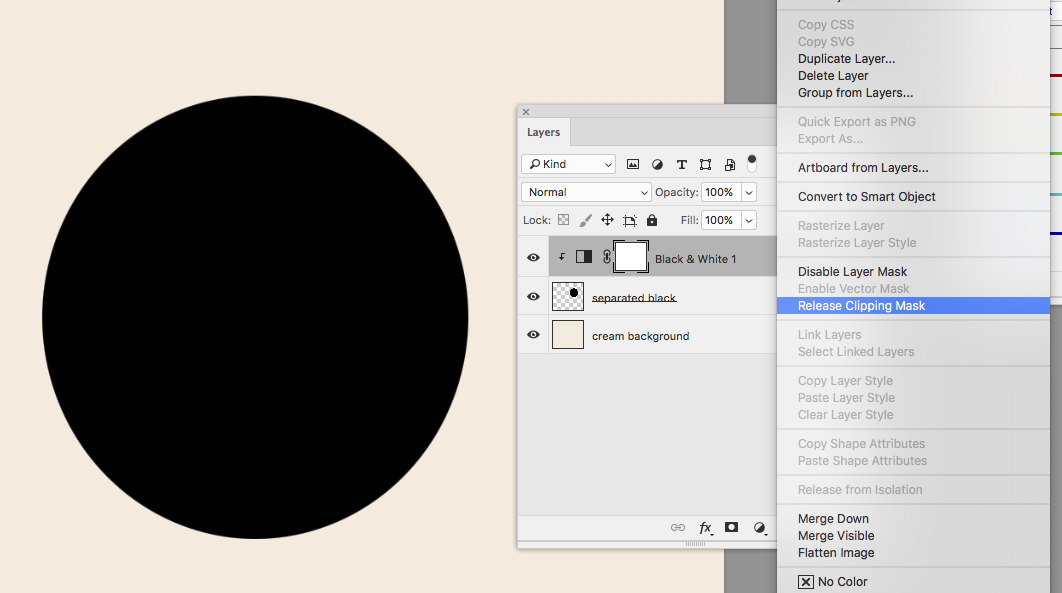
Isolate the black part of the image to a separate layer:
1. Apply Black & White Adjustment Layer
2. Right Click>Create Clipping Mask
Copy link to clipboard
Copied
attached is a section of a scan - could you be more specific in your suggestion. I am fairly new to Photoshop - Thanks
Copy link to clipboard
Copied
Are you wanting to preserve the color of the paper underneath?
Copy link to clipboard
Copied
yes
Copy link to clipboard
Copied
Then you're definitely going to have to duplicate the layer and isolate the linework because with the graphite being so light, its going to be very difficult to make it pure black. I wasn't sure how dark it was because of how vast the range can be with graphite
Copy link to clipboard
Copied
I have been creating a selection of the blacks with magic wand then
adding black to black with selective color.
Copy link to clipboard
Copied
Yeah, I've been trying whatever tricks I can to turn it black while preserving the background color. I'm having a lot of difficulty in doing so and making it look good. I'll keep on working with it and I'll let you know if I can work some magic for you
Copy link to clipboard
Copied
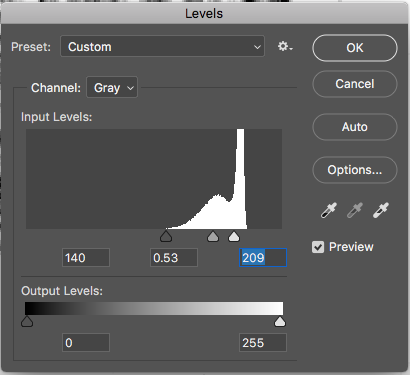
I made a quick little visual-
( this one is tough because theres not a lot of contrast between the art and paper, you may end up with a little extra cleanup )
1. Convert to greys Image>Mode>Grayscale
2. Adjust levels- you can adjust the blacks to be as light or dark as you please, as long as the whites are white.
3. Set that layer to Multiply, and in your case, a layer with the paper color OR a copy of the original paper texture with the artwork clone-stamped out of it

EDIT:
I meant to include this shot of my levels:
Copy link to clipboard
Copied
Could you be more specific in the steps - sorry I am slow
Copy link to clipboard
Copied
Sorry about that, I will try
First please make sure you are saving a copy of your original scan.
To convert to grayscale, Image > Mode > Grayscale. PS will comfirm you want to discard color information, click "yes"
Levels- Image > Adjustments > Levels. Adjust the levels as shown above, but also play with the sliders a bit and observe what they do ![]() * When you are happy with the results hit ok.
* When you are happy with the results hit ok.
Now convert back to color : Image > Mode > RGB Color ( or CMYK Color or whatever fits your needs)
Im guessing your artwork layer is locked and is called "Background" if so, double click it and it will become a regular layer. On the layers panel, to the left of the opacity, is the "transfer mode" dropdown. Select "multiply" and this will allow any colors on layers behind it, to show through, but preserve the line-art
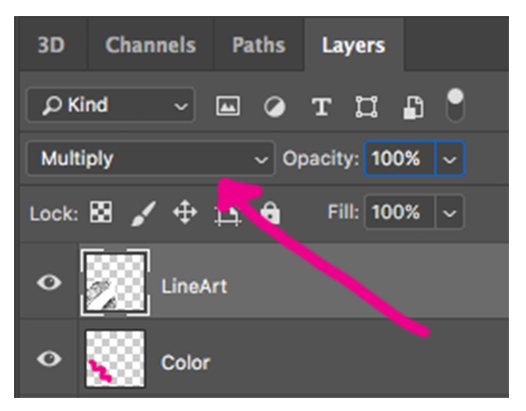
At this point you're good to go. Any new layers you create underneath the line art layer will show through. As far as the paper color you wanted to preserve, you have may options. You can use the eyedropper tool to select the color from the original, and fill a layer one solid color, you can use your original scan, by pasting it onto a layer, or there are many parchment and paper textures available via a google image search.
Copy link to clipboard
Copied
let me make sure I have this correct.
1. copy original file
2. convert entire image to grayscale using Image > Mode > Grayscale.
3. confirm discard color.
4. adjust levels of line work and background paper
5. convert entire image back to color using Image > Mode > RGB Color
Copy link to clipboard
Copied
As a test I created a new layer, change mode to Grayscale then changed
back to RGB. The color was gone when I changed back
Copy link to clipboard
Copied
Keep in mind your printer can also increase the black on the press.
Copy link to clipboard
Copied
I do this all the time with lineart. The first step is always going to be converting to B/W. Then you can crush the levels to get the contrast you are after. You can convert back to color after.
When I am coloring artwork, I just set the line-art layer to multiply and work beneath it. If you need it on transparent, there are many ways to do this, Magic wand, or Alpha channel, etc just be sure to fill the layer with black, with transparency locked, or you will get a white haze around the lines.
Copy link to clipboard
Copied
I'll let Dave take over. Will chime in with any comments:)
Copy link to clipboard
Copied
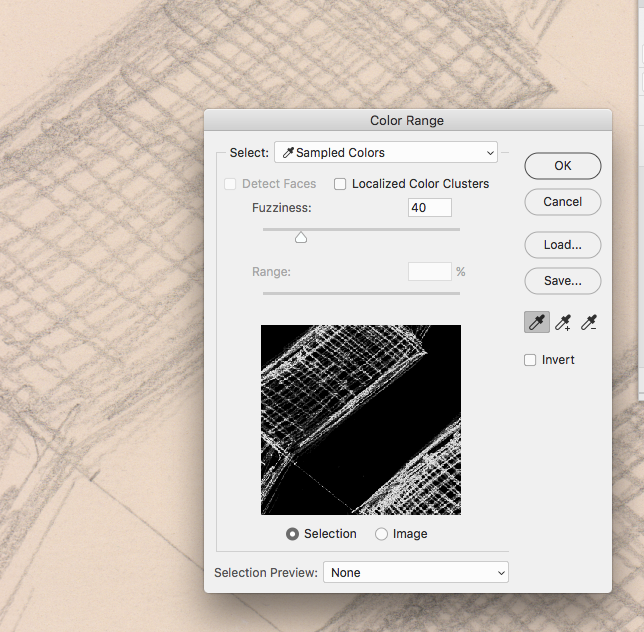
Try Select>Color Range Also
Copy link to clipboard
Copied
That's the route I've been going
Copy link to clipboard
Copied
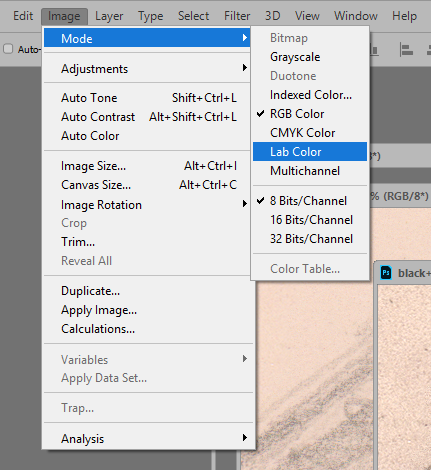
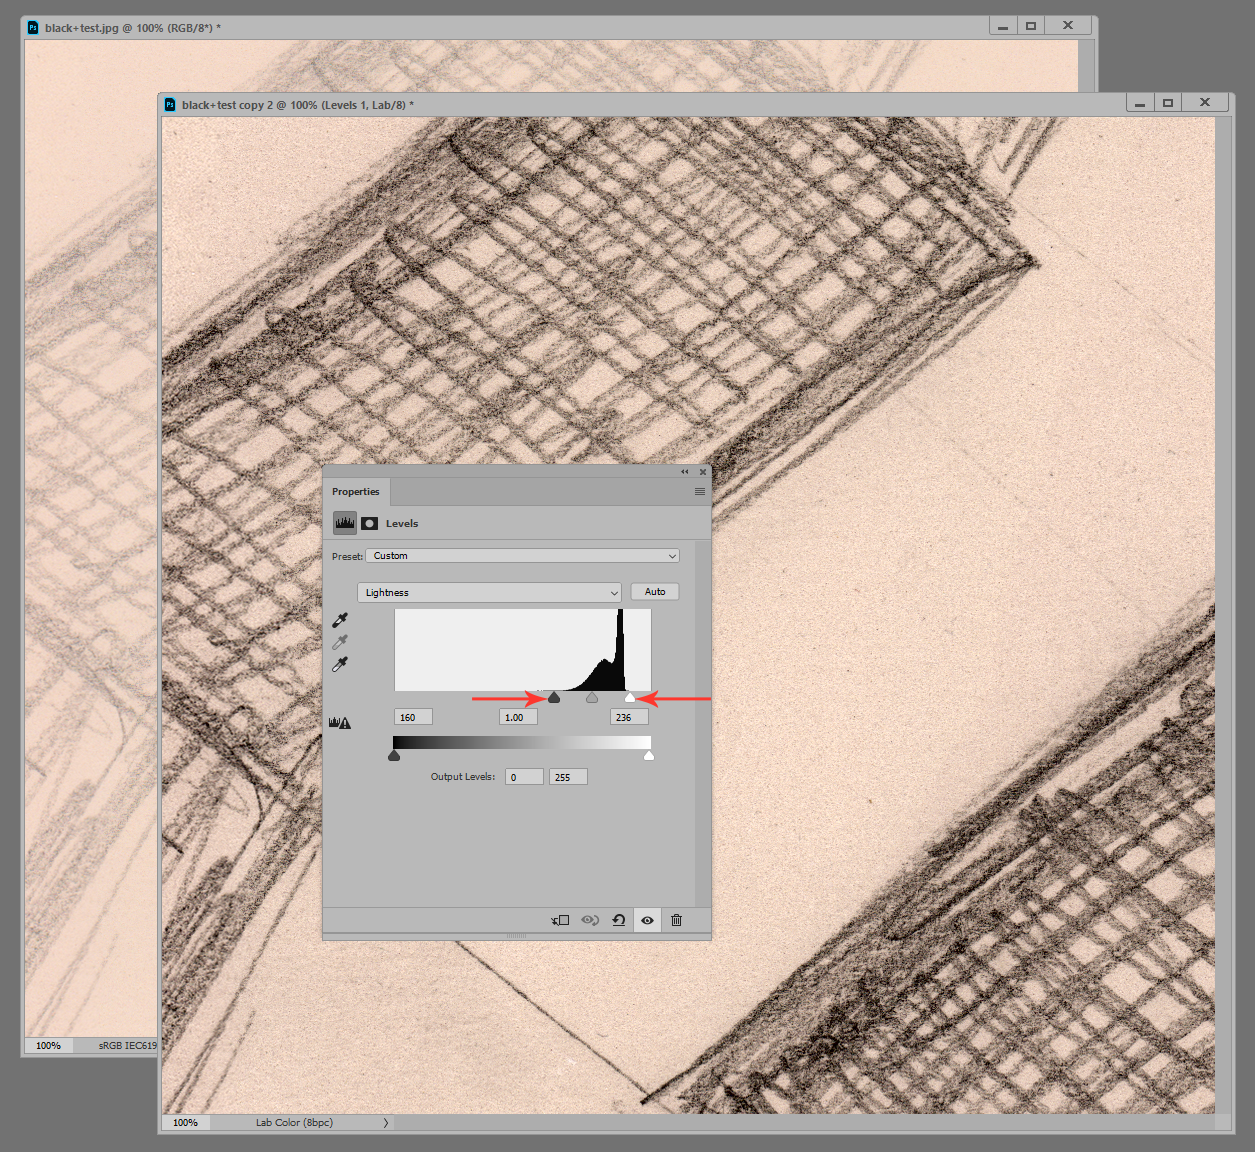
The simplest way is to convert to Lab, where the color and lightness components are separate. Then it's just a simple Levels adjustment:
Copy link to clipboard
Copied
what is Lab?
Copy link to clipboard
Copied
Copy link to clipboard
Copied
thanks
Copy link to clipboard
Copied
That worked slick! - thank you for your patience

