- Home
- Photoshop ecosystem
- Discussions
- Re: Bucket tool not filling up selected pixels.
- Re: Bucket tool not filling up selected pixels.
Bucket tool not filling up selected pixels.
Copy link to clipboard
Copied
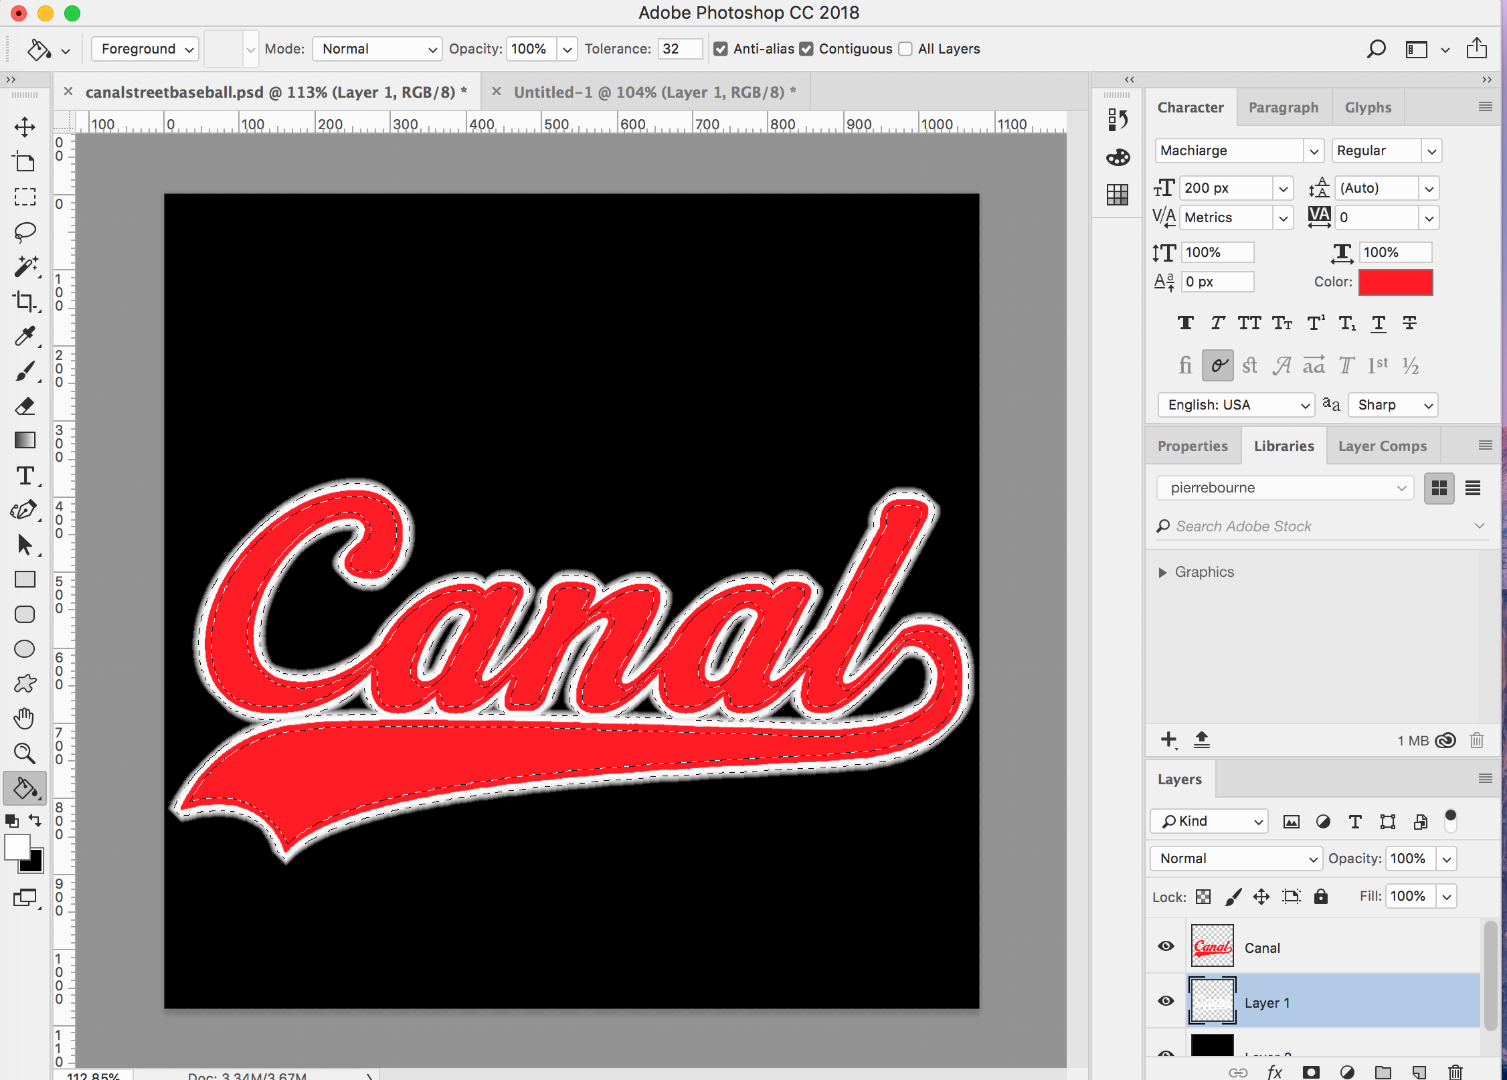
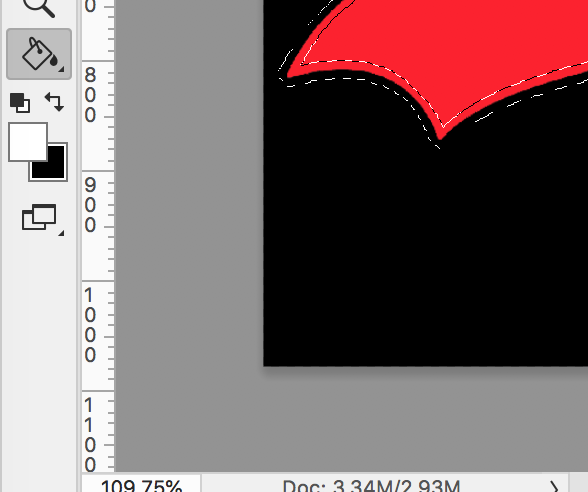
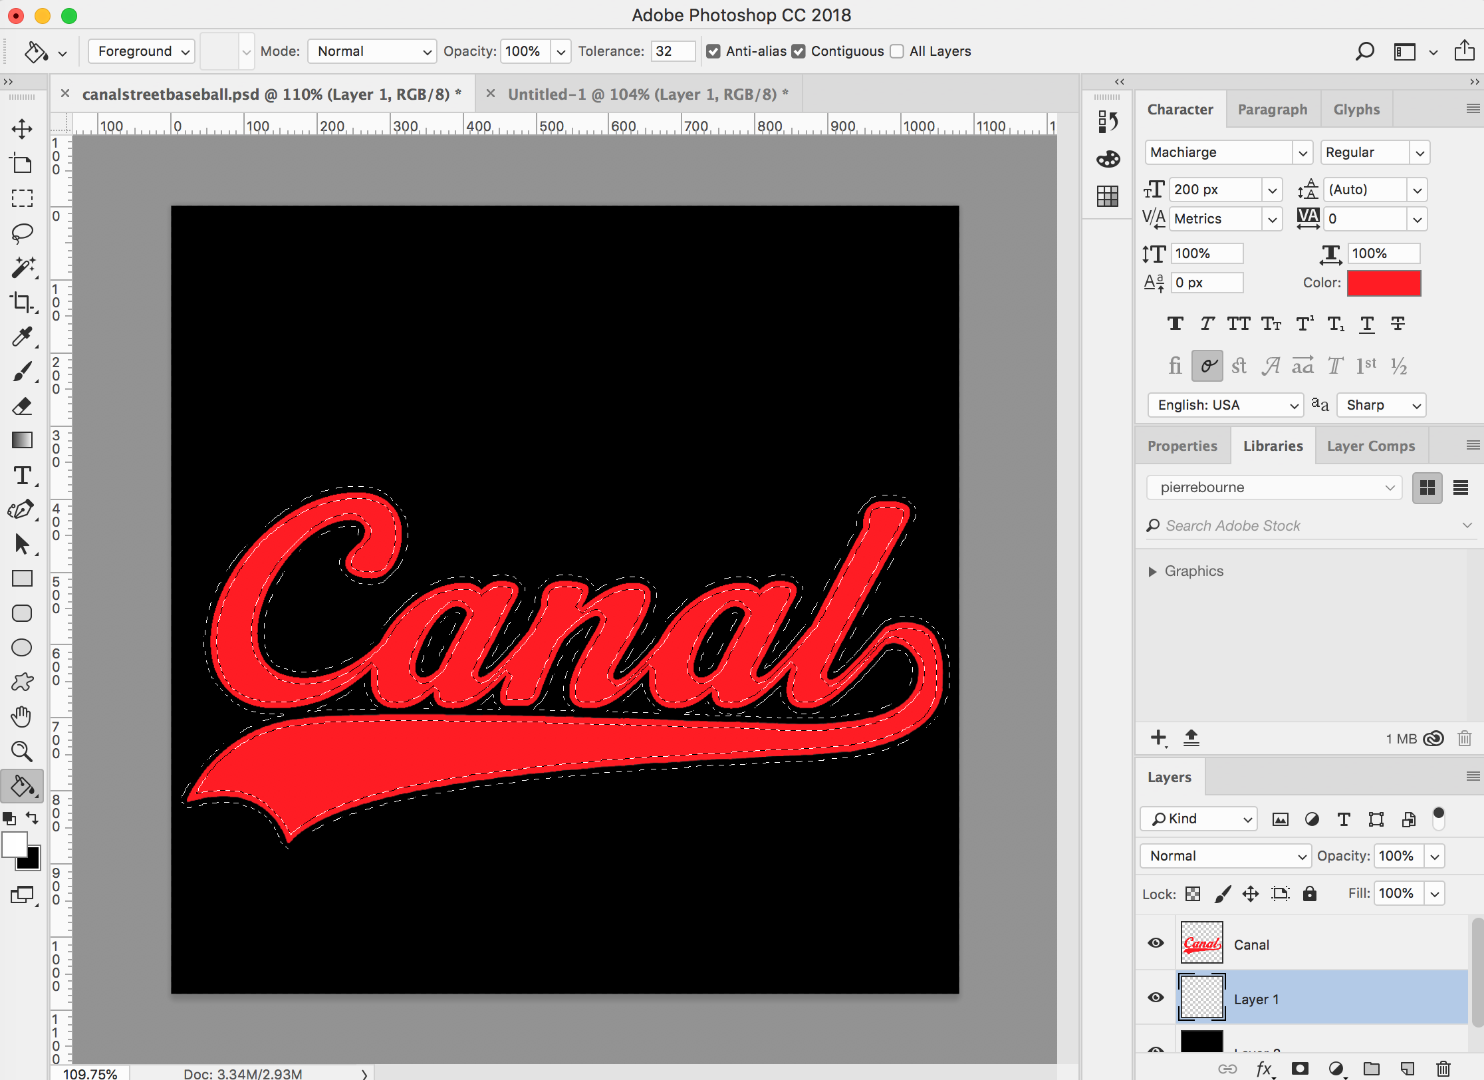
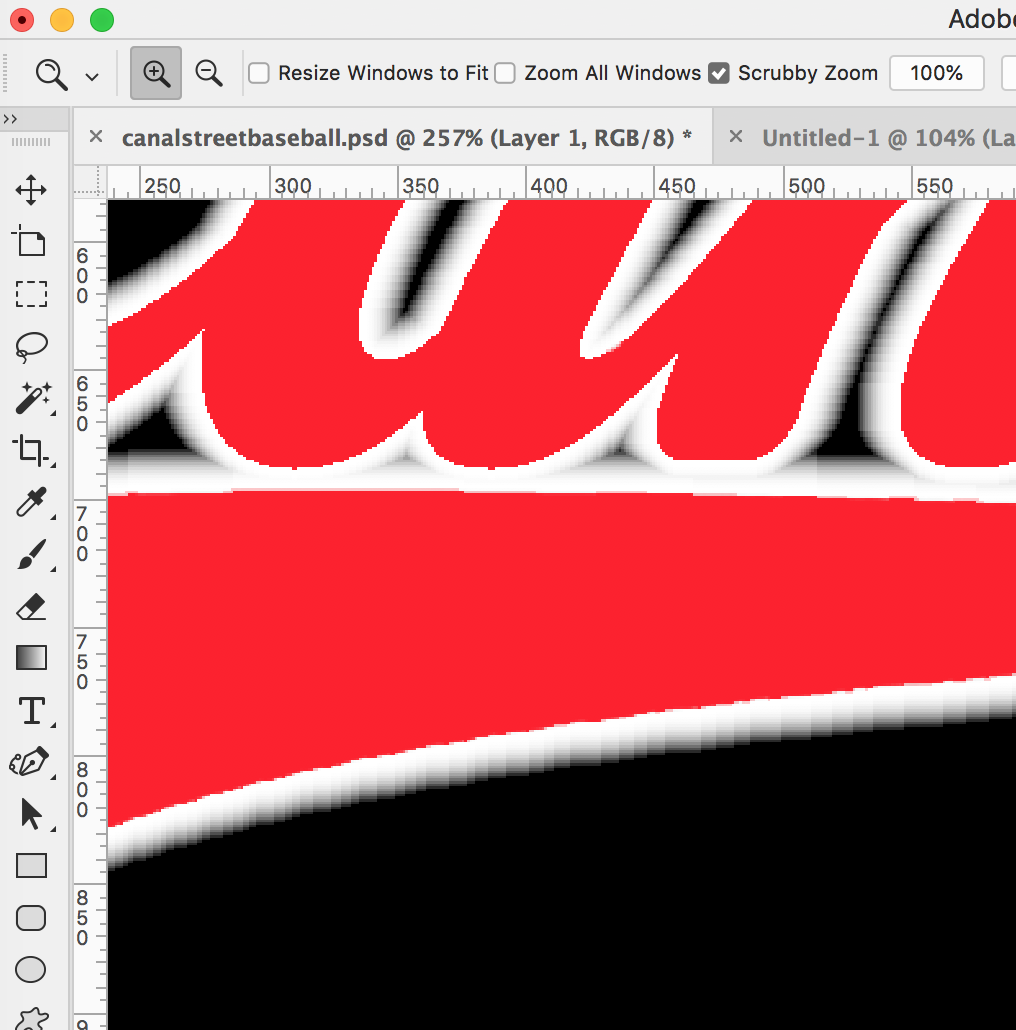
Hi i dont know if im losing my mind or if this is supposed to be like this. I am having trouble filling white in whats selected and i tend to over think a lot and i dont know if thats what im doing right now. Its not filling it 100% i have to click the fill tool more than once for it to fill but then it leaks out of the selected pixels!!!! 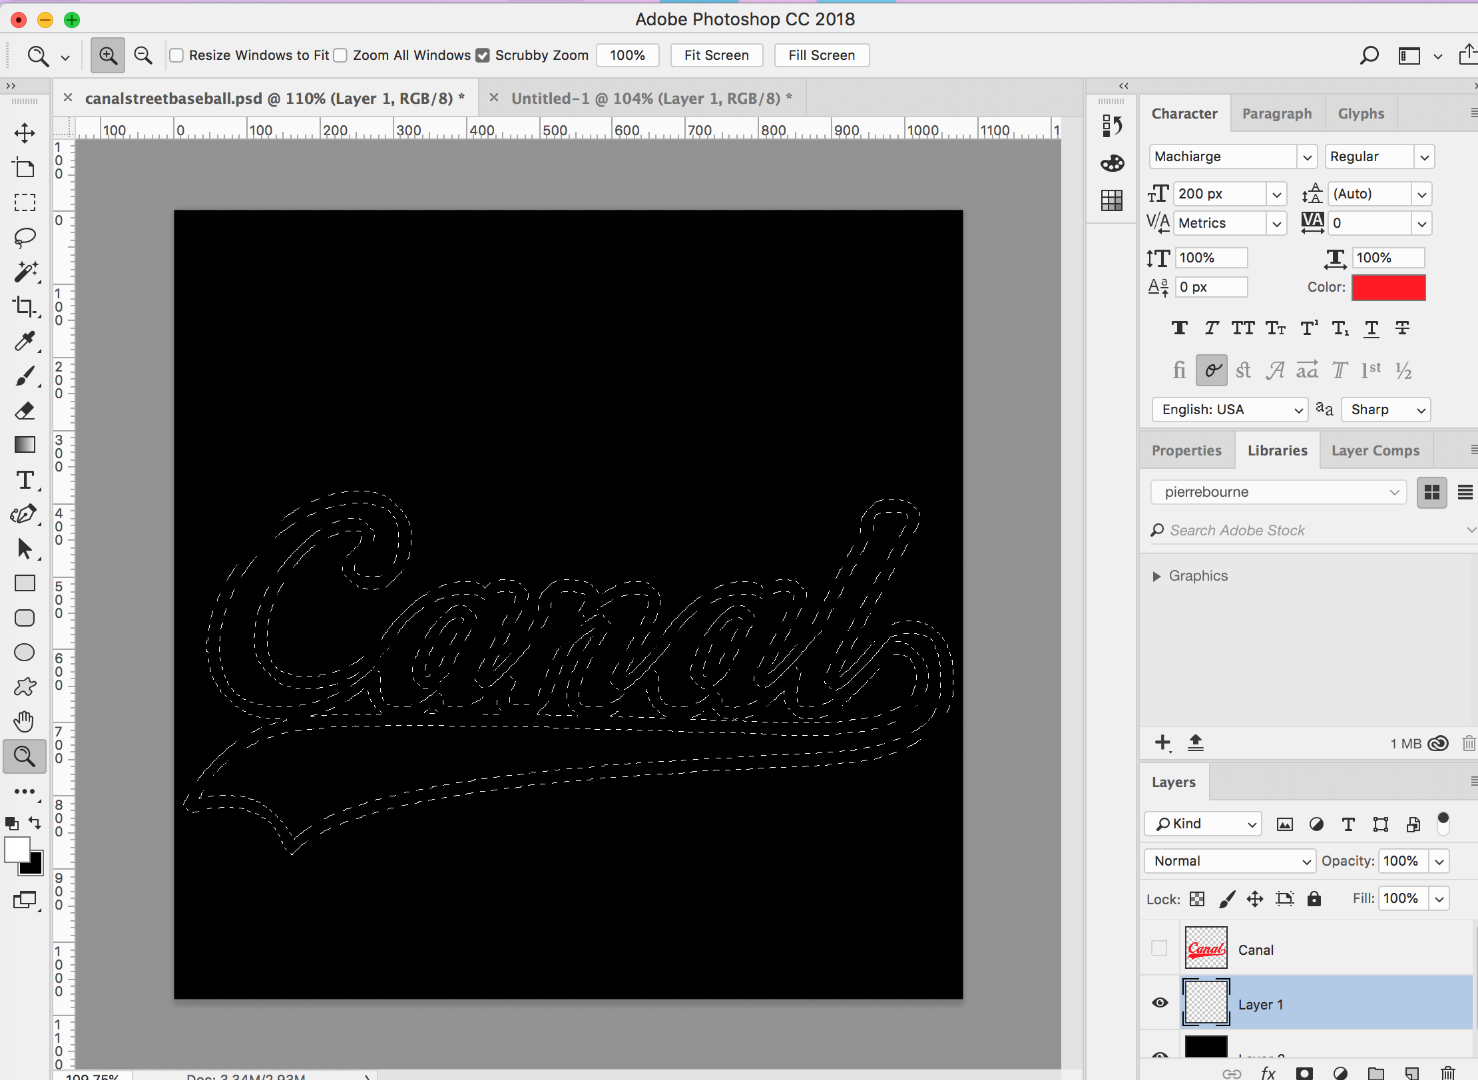
Explore related tutorials & articles
Copy link to clipboard
Copied
If you have a selection made, why don't you just use cmd-backspace or opt-backspace to fill with the foreground or background colors? The magic wand tool isn't all that accurate, and you only had your tolerance setting at 32, when you should have tried 100.
Copy link to clipboard
Copied
Try creating your selection with the Pen Tool then click right click and select make a selection.
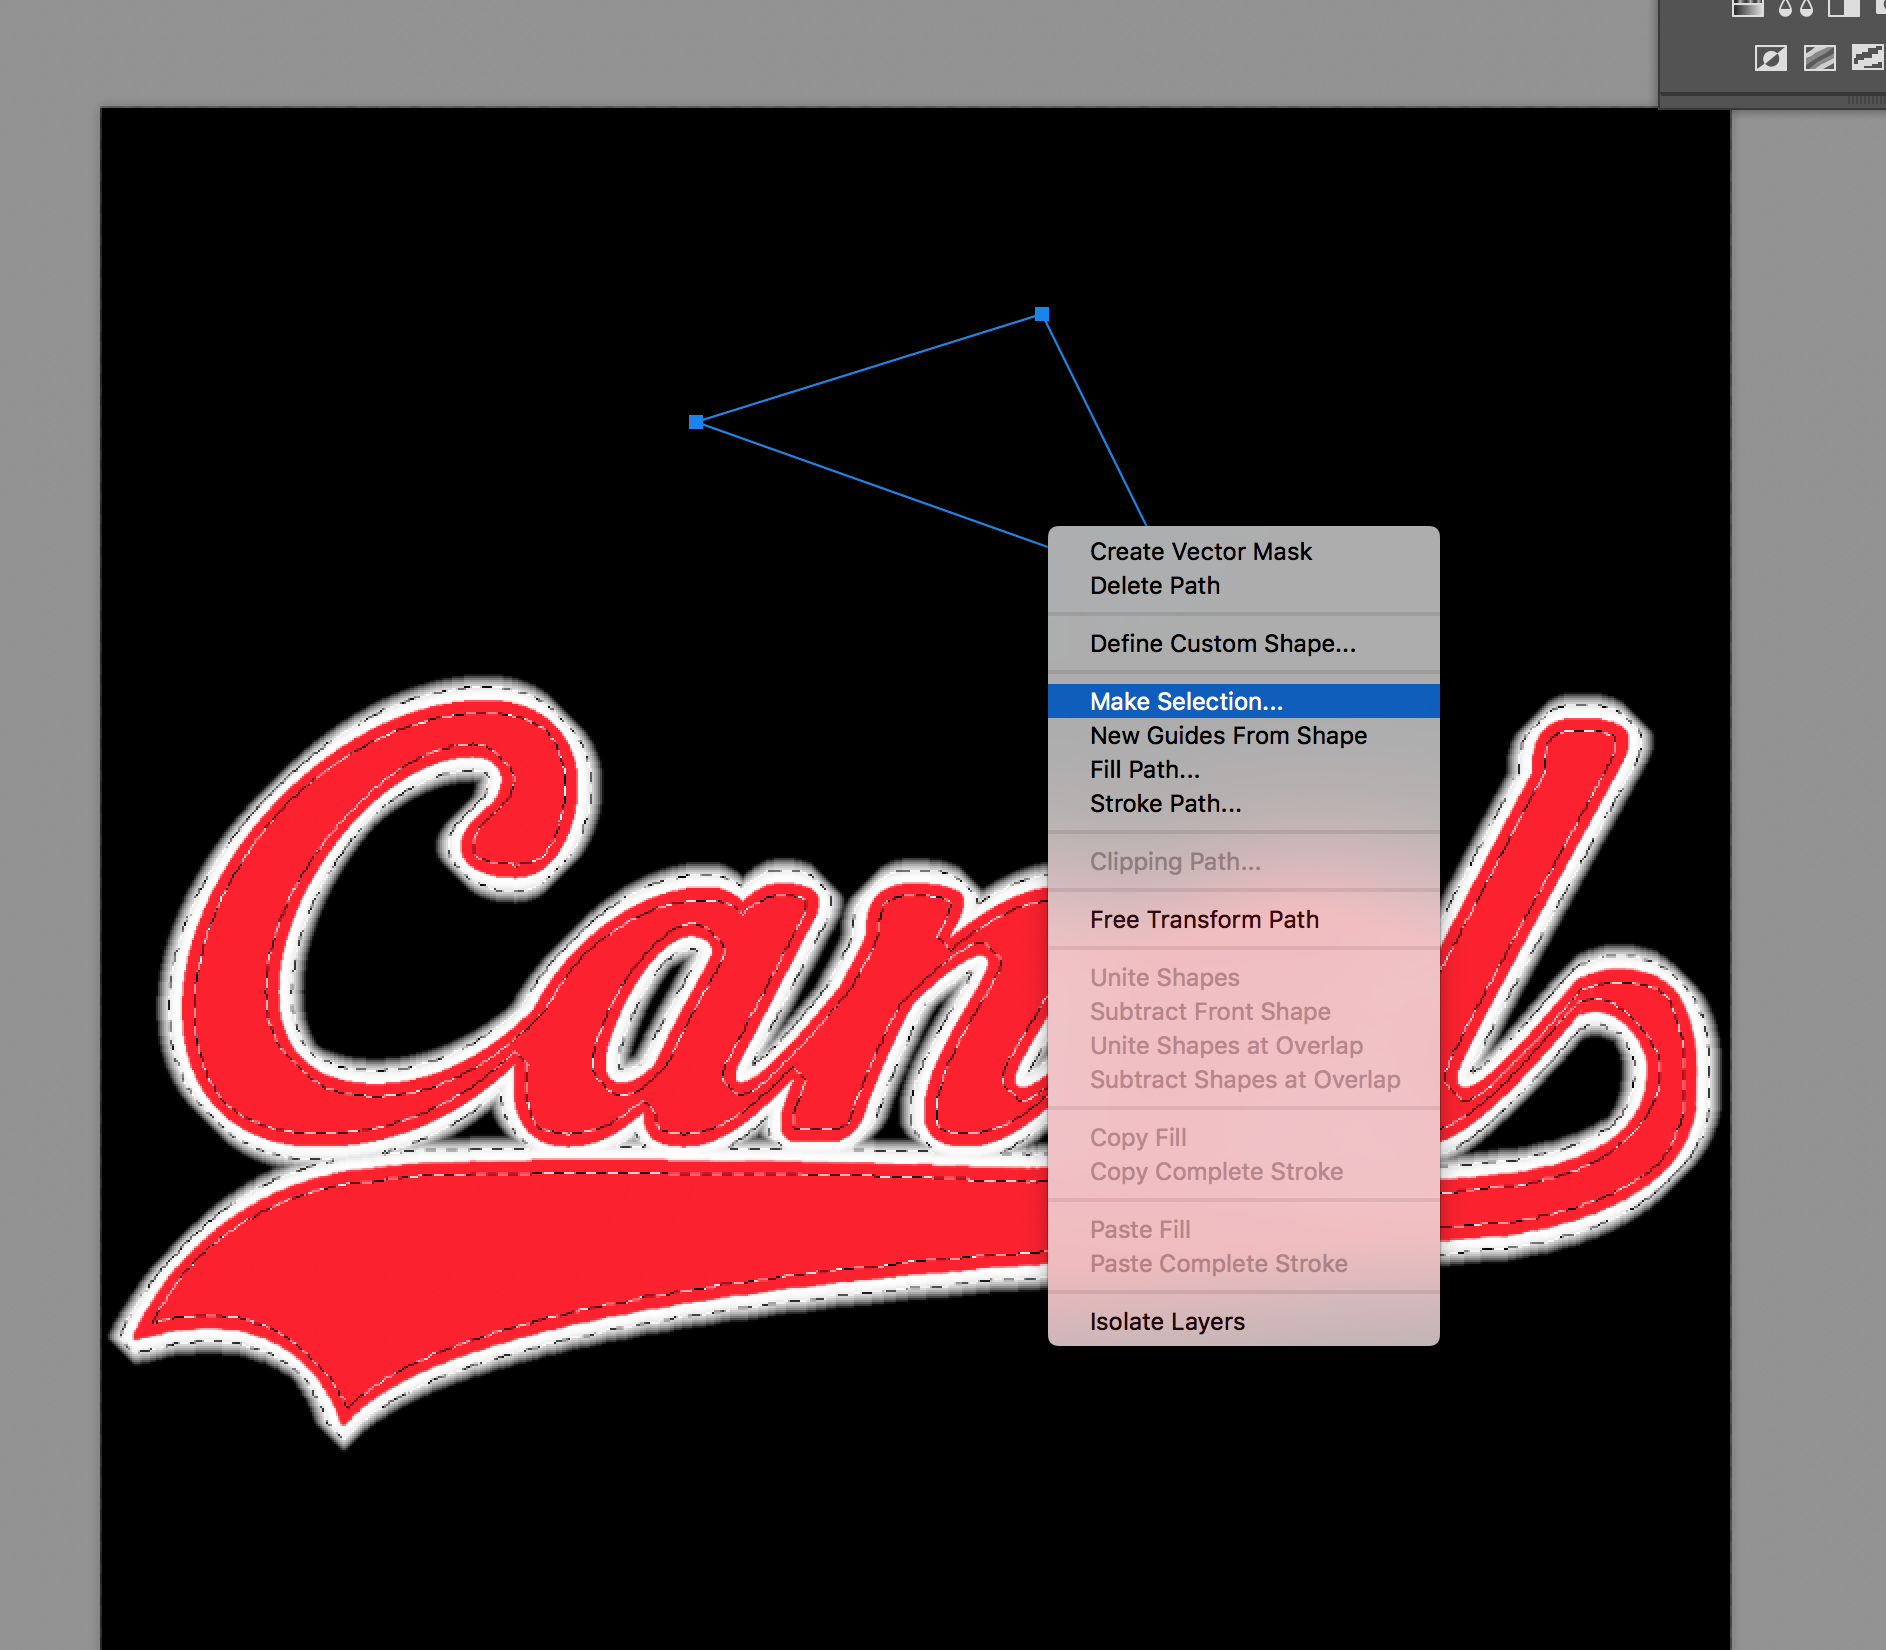
Then make sure your selection feather radius is 0
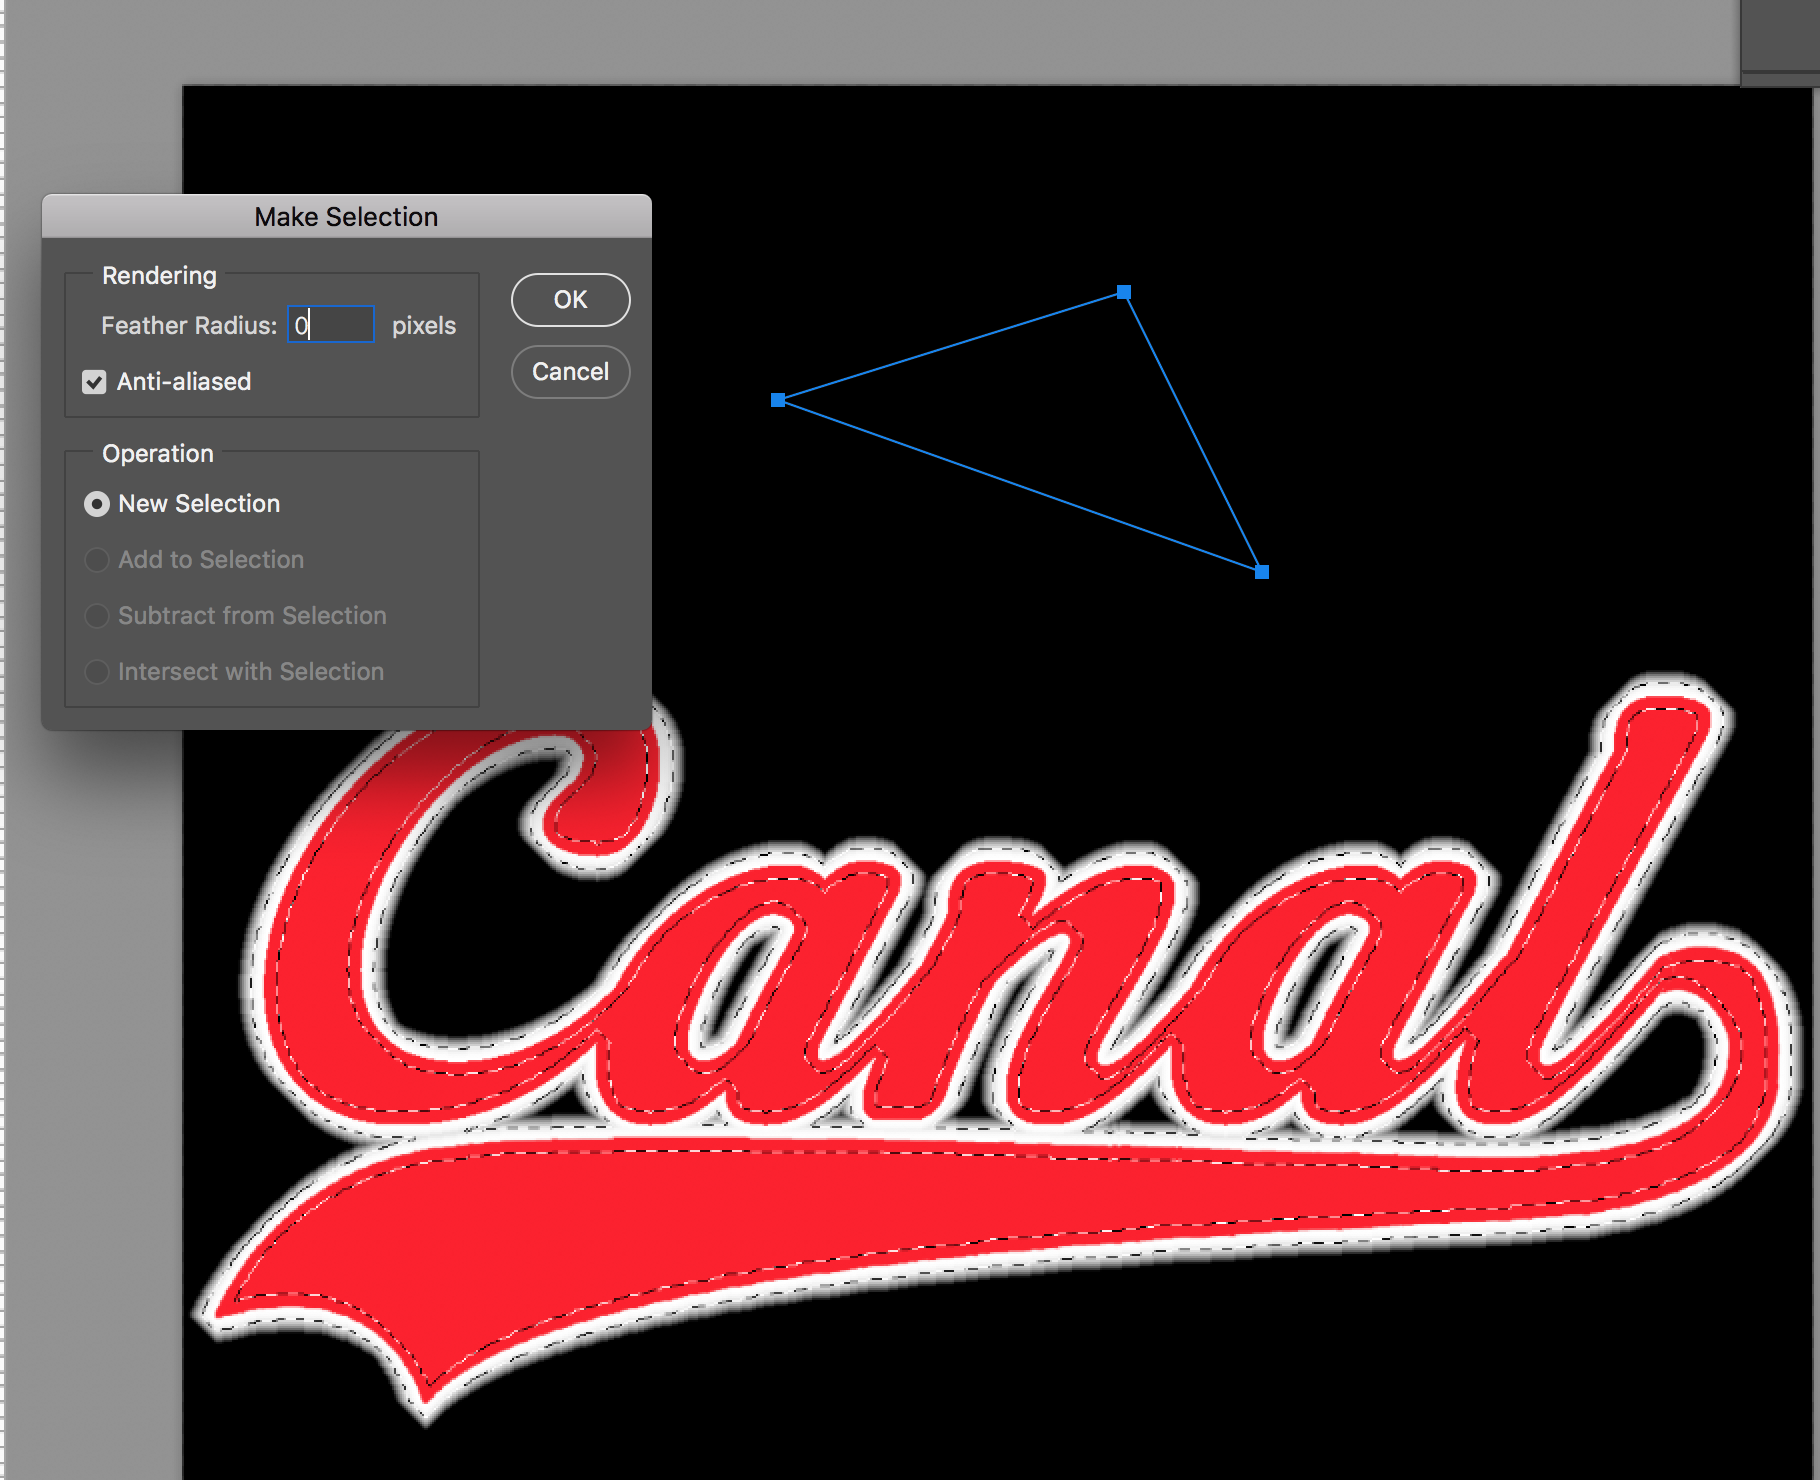
I hope this helps!
Sim
Copy link to clipboard
Copied
The Paint bucket is sort of like the magic want tool in the there is a tolerance setting. It looks like you has a selection around the text border so many pixels wide. For some of the red Text and some of the black background looks selected. You click with the paint bucket on the black background in the selection and the black was replaced with white. The red area selected was not replaced because of the Paint buckets 32 tolerance setting. It also looks like the selection was feathered as shown by the soft white outter edge..
Copy link to clipboard
Copied
I suspect that most experience Photoshop users rarely, if ever, use the Paint bucket tool. In your case, it might be better to use a Layer style to Stroke the text, but in most case where you want to fill an area inside an object, it is usually better to do so on a new layer behind the 'front' object. This eliminates issues with anti-aliassing, and poor selections.
A trick when you do find yourself with a 'thin' fill due to a poor selection, is to copy the layer a few times. So, by way of an example, I have created such a selection using Quick Mask because it shows the holes.

This is what I get when filling with the paint bucket

But if I copy it a few times and set it to Multiply, then the inner holes get filled.
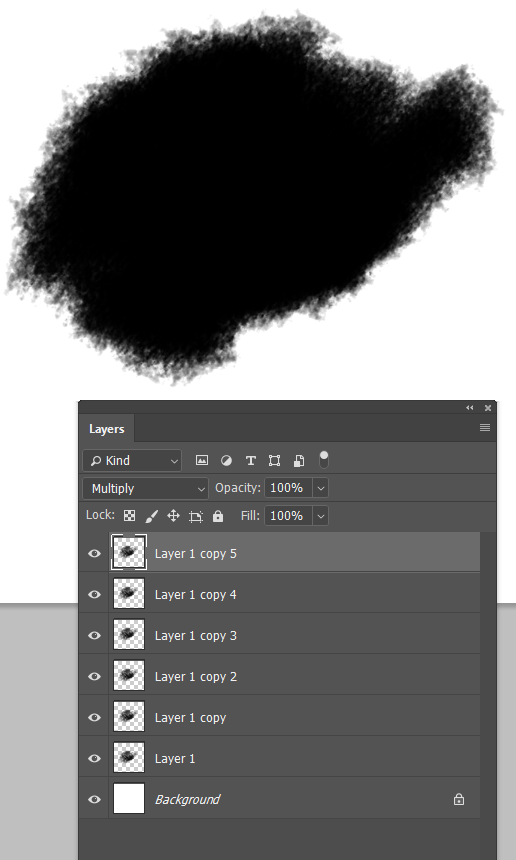
With light tones, you'd do the same thing, but use Screen as the blend mode


Copy link to clipboard
Copied
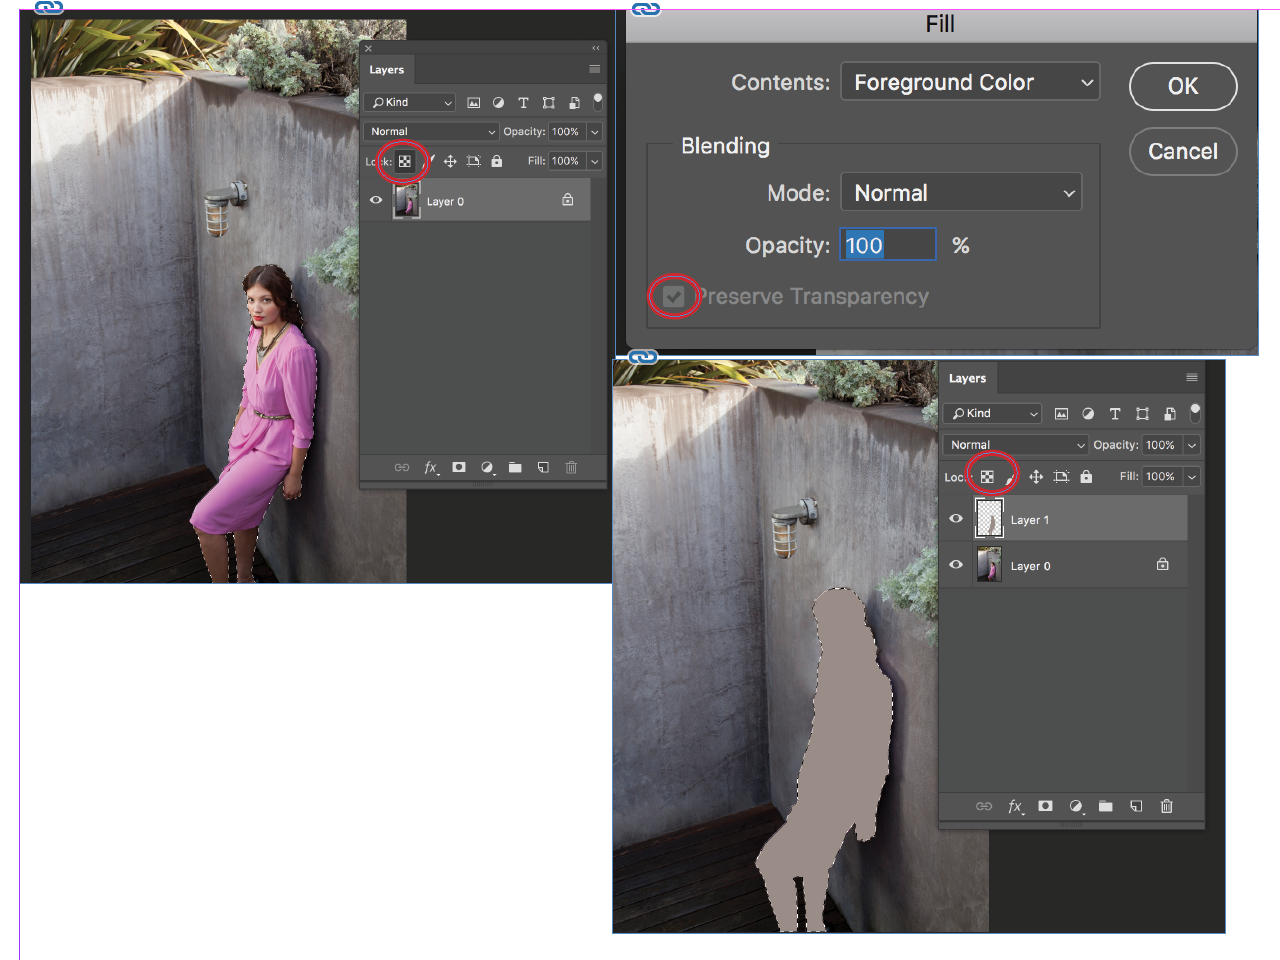
Make sure you turn off the first lock: Perserve transparency. When you have it selected and you have a selection on the screen it is not going to fill the area.
Checkout the layers panel or when you fill the area.
Copy link to clipboard
Copied
First of all, you're not crazy! What you have is a feather on your selection. That's why it's fuzzy and why you have to hit the fill button several times.
Make sure in your Options bar that Feather is set to 0. THEN make your selection. If you need to feather it, you can always do it from the Select Menu after the fact. Keeping Feather set to 0 in the Options bar ensures that you won't have this problem anymore.
The other option, as mentioned above, works really well too. Use the Shift-Delete key combination to fill a selection with White or Black or any other color you choose.
Let us know if that helps!
Michelle
Copy link to clipboard
Copied
Hi all is good it looks like when you zoom pixels and make sure you selecting correct layers when doing it....thanks.
Find more inspiration, events, and resources on the new Adobe Community
Explore Now


