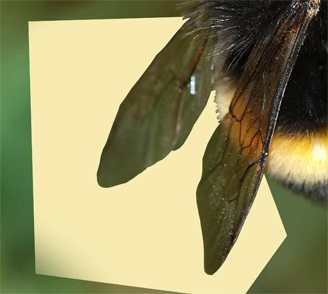
As I said, it was just a quick example, not necessarily the best option. You can adjust it in many ways, by changing the color (which includes hue, saturation, and lightness), the blending mode, or the selection method. I tried Select > Color Range to isolate the green parts between the wings, but it was a lot more challenging so I first went with a simple color overlay. And now I tried another variation:
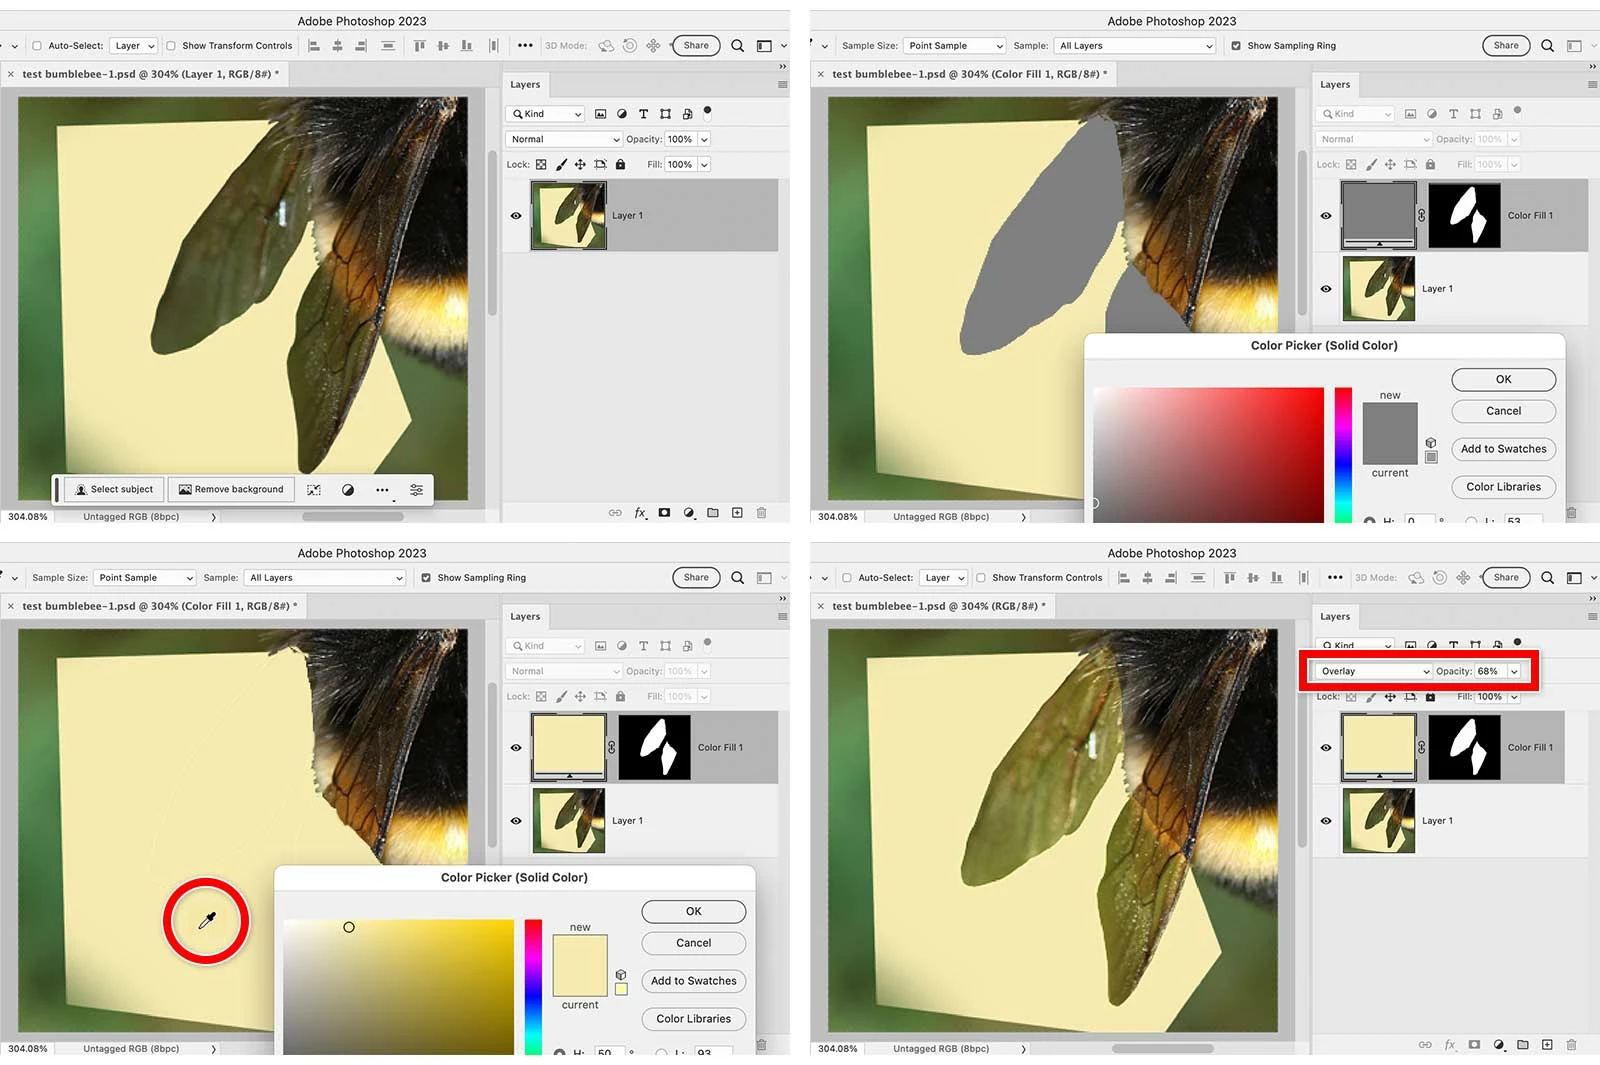
1. Select the wing parts that are over the background.
2. With the selection active, add a Solid Color fill layer. The wing selection becomes a mask for the new layer. My initial fill color is 50% black, but that doesn’t matter.
3. Double-click the solid color fill layer, and click the color sampler on the image background to set that as the fill color. Now the Solid Color fill layer matches the background.
4. Adjust the solid color fill layer blending mode, opacity, and color to get the balance between color and layer detail that you want. I used the Overlay blending mode that ended up at 68%.
Now, you might say, there’s still a lot of green in the wings, even when the layer matches the background. If there is no green in the actual wings, the green might be contamination from all that green ambient light clearly visible flooding in from the background. If the ambient light was more neutral, my guess is that the wing transparency would be more neutral. So I would not worry about the green in this sample image, unless this is the only picture you have and the green has to be removed. In that case, just correct the entire picture away from green.