Shalzis
Participating Frequently
January 22, 2019
Question

Changing the perspective of a floor PS CS2

  • January 22, 2019
  • 5 replies
  • 3605 views

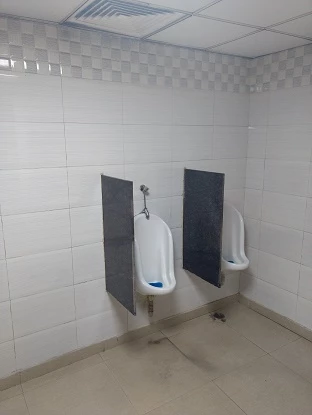
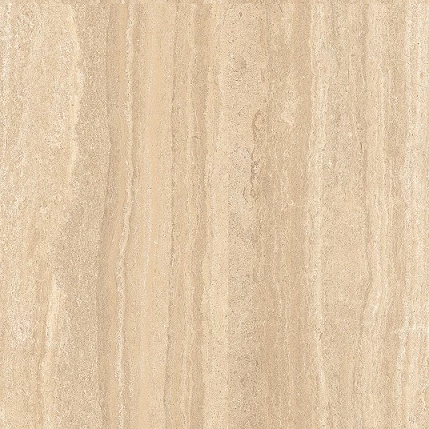
I am trying to apply tiles onto a picture of a bathroom. How can I do a 3D rotation to align and match the angle of the tile in such a way that the aspect ratio of the tile (height and width) are preserved?

Any help is appreciated. I am using PS CS2.

Thanks

This topic has been closed for replies.

5 replies

Trevor.Dennis
Community Expert
Community Expert
January 23, 2019

I jumped on this thread only to find my Lazy Nezumi Vanishing Lines preset was broken, so I have spent most of today trying to isolate the problem, (without success) so I have had to resort to the Bert Monroy method of producing perspective guides.

Which would make the floor.  So I seem to be getting the same result as as Sema, which is fair enough IMHO.

davescm
Community Expert
Community Expert
January 23, 2019

Hi

OK , this time back to Vanishing point but doing what I should have done in the first place.

1. Put a plane on the back wall using the corner, ceiling and tiles as a guide to lay down the corner points.
2. Ctrl click on the right handle and drag out a perpendicular plane on the right wall

3. Ctrl  click on the bottom handle and drag out the floor plane.

Those steps ensure the guides match the perspective of the image

Now just drop in the floor as earlier

Lesson to self - If I'm going to post here, do it right !

Dave

Shalzis
ShalzisAuthor
Participating Frequently
January 24, 2019

I think this makes sense. So in my case the tiles also need to be of 2ft by 2ft square.. I created one PSD file with a 2ft by 2ft tile and saved the image. I created a larger canvas and multiplied these tiles to create a floor pattern. Using Dave's technique, I should be able to drop the floor pattern image as is. I am assuming the perspective shouldn't be able to change the size of the tiles. (i.e. I should be looking at 2 x 2 tiles in the final)

Will post my picture once I get it.


I guess since I am using PS CS2, these are the only options I get for Vanishing Point: I am not sure where I can set the grid size.

Anyway I used your method to create the plane from wall behind the urinals and stretched to the right and floor as seen.

First here's what I did for the tiles. I had two 300x300mm tiles (they had slightly different grains). I was required to copy these and place underneath each other so that one tile of 600x600 was created. I left a 2mm space on the edges and 4 mm in the joins for the grouting. I created a larger canvas to create a floor pattern with this.

I copied the floor pattern and dropped it in. This is what i get.

The tiles look stretched at this point.

What am I doing wrong here? I need to be able to see roughly 2x2 ft tiles laid out.

Norman Sanders
Legend
January 22, 2019

A wooden floor in a Men’s Rest Room. That certainly callls for perspective correction.

D Fosse
Community Expert
Community Expert
January 22, 2019

davescm
Community Expert
Community Expert
January 22, 2019

I was tempted to add a wet look but thought better of it

Dave

D Fosse
Community Expert
Community Expert
January 22, 2019

Yes, vanishing point is probably better.

You need to match the lighting afterwards. The room is pretty dark, so either lighten that or darken the floor, with some falloff towards the wall.

davescm
Community Expert
Community Expert
January 22, 2019

You're right Dag - getting the perspective is just step 1

Dave

D Fosse
Community Expert
Community Expert
January 22, 2019

Yep, very good

davescm
Community Expert
Community Expert
January 22, 2019

Hi

If I remember correctly, CS2 had the vanishing point filter, in fact it came in with CS2

Open the image in vanishing point, draw a plane then paste your tiled image and use the marquee tool in VP to drag it onto the plane

Use Vanishing Point in Photoshop

Dave

Shalzis
ShalzisAuthor
Participating Frequently
January 22, 2019

Thank you for replying to my query. I will try that out. This is exactly what I need

D Fosse
Community Expert
Community Expert
January 22, 2019

I doubt that anyone here still remembers what you could and couldn't do in CS2. But now you'd turn it into a Smart Object and Transform > Distort. Just place the corners manually.

You could do each tile separately, or put them together first and then convert that to Smart Object.

Transform > Perspective tends to stretch in one direction unless you push and pull at the same time, and you'd also need to rotate. So that quickly gets unpractical. Distort is much more flexible.

Shalzis
ShalzisAuthor
Participating Frequently
January 22, 2019

Thanks for your reply. Let me try this out