- Home
- Photoshop ecosystem
- Discussions
- Clone Stamp Issue - Dark Lines Appearing.
- Clone Stamp Issue - Dark Lines Appearing.
Clone Stamp Issue - Dark Lines Appearing.
Copy link to clipboard
Copied
Hi Adobe Support Community.
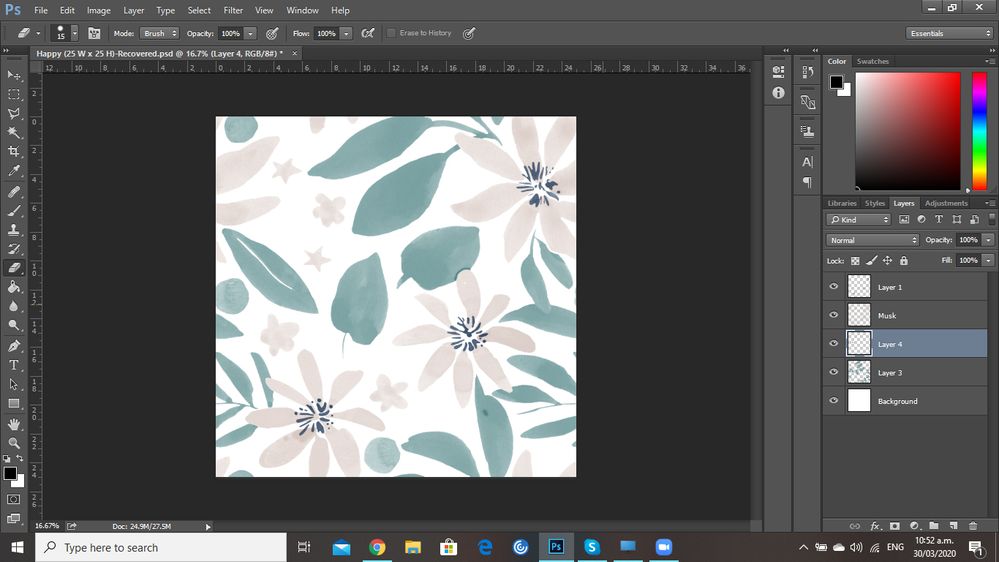
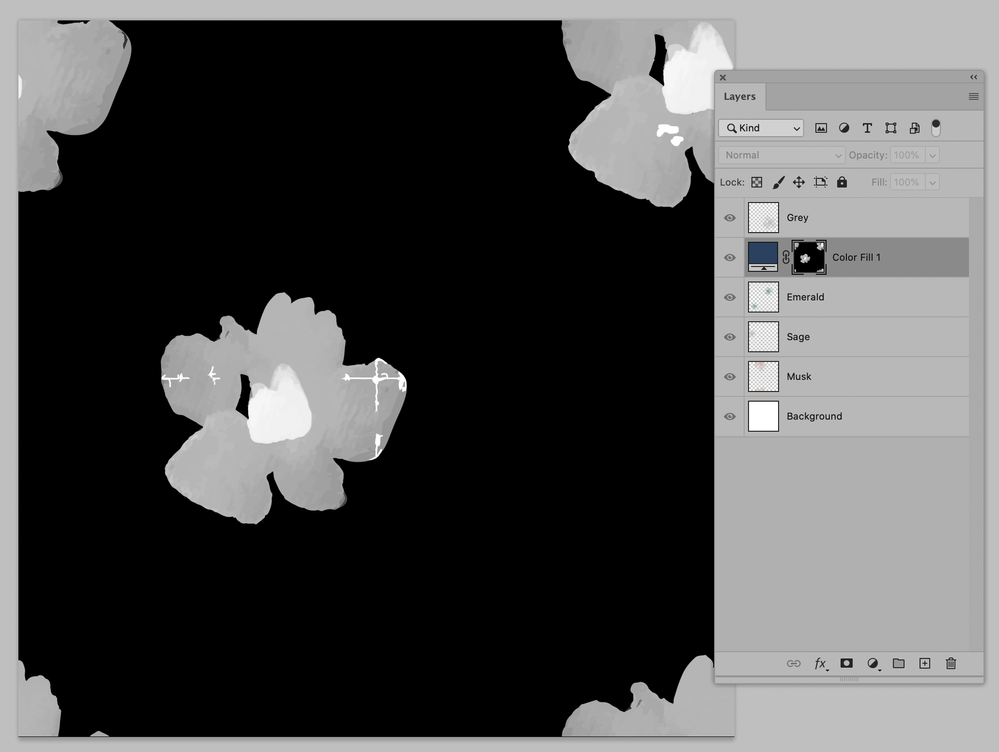
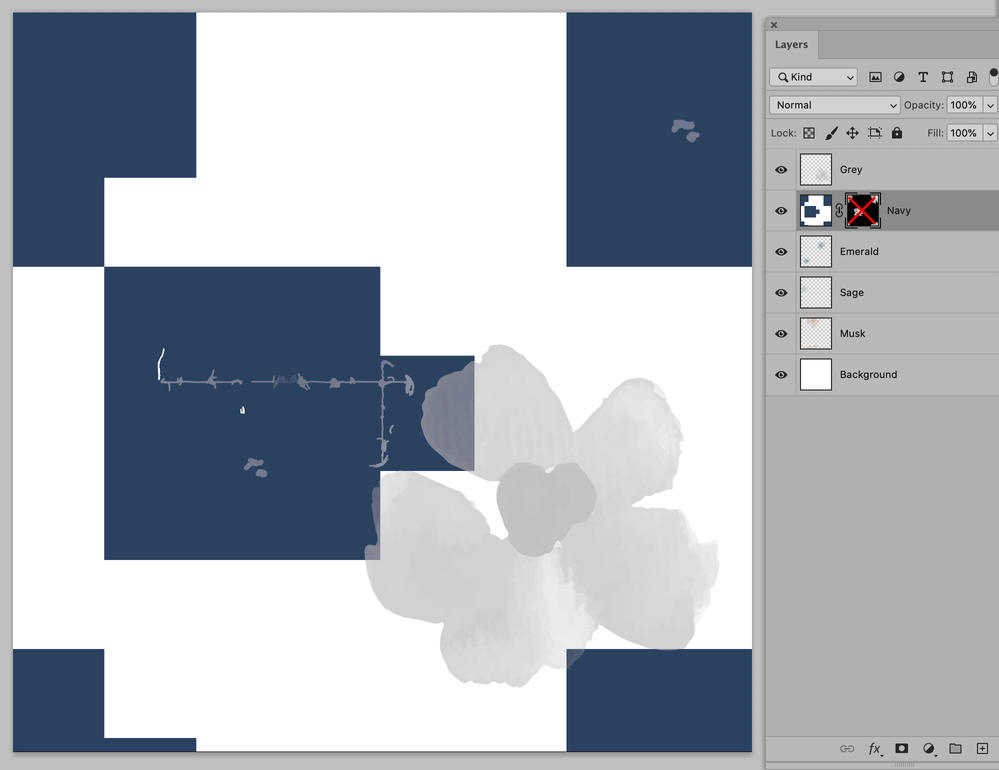
First time posting as I have been unable to find a solution online. I am having trouble with the Clone Stamp tool. It seems to be working correctly when I blend the tool on the layer I am using it on, however when I create a copy of the layer via Focus Area dark lines appear in the sections I have used the clone tool. I am unsure why this is happening and would appreciate some help in resolving this issue.
Explore related tutorials & articles
Copy link to clipboard
Copied
I am not sure what you mean, especially by »I create a copy of the layer via Focus Area«.
How did yoi pick the Clone Source?
What are the »Layer 3«’s Opacity, Fill and Blend Mode?
Copy link to clipboard
Copied
Hi. Thanks for you comment.
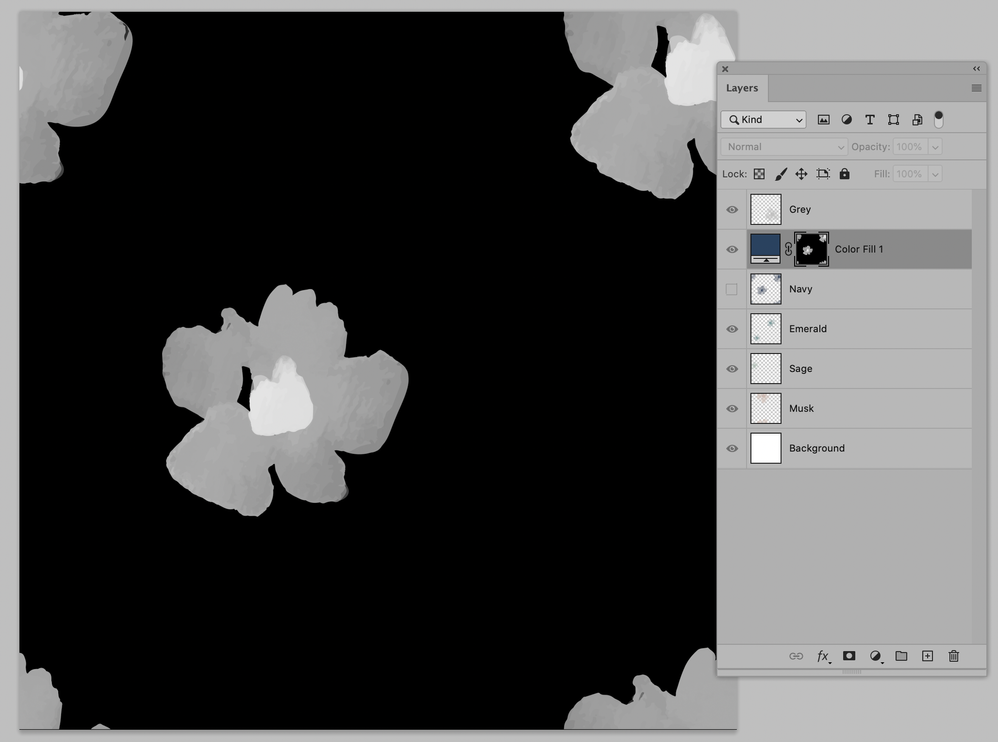
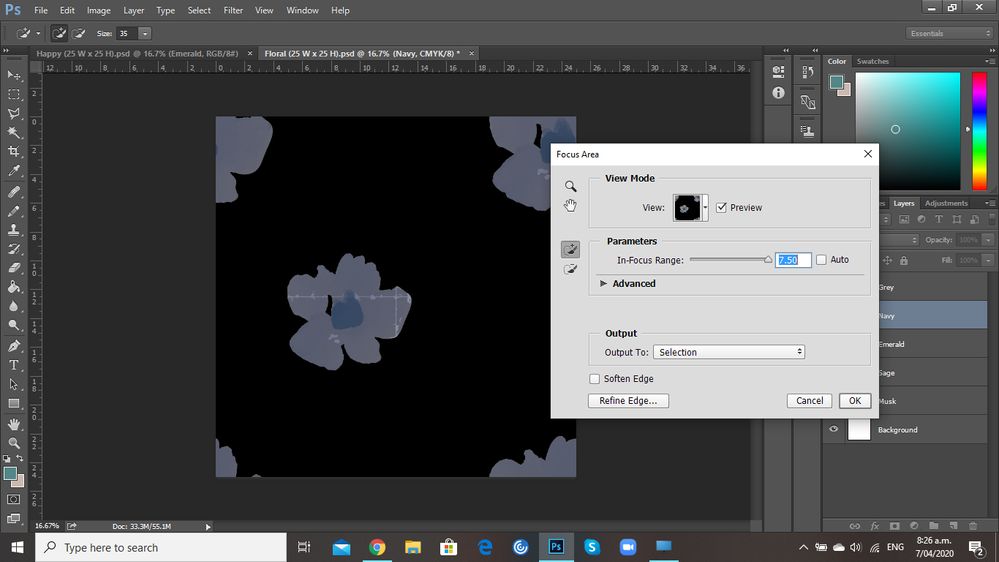
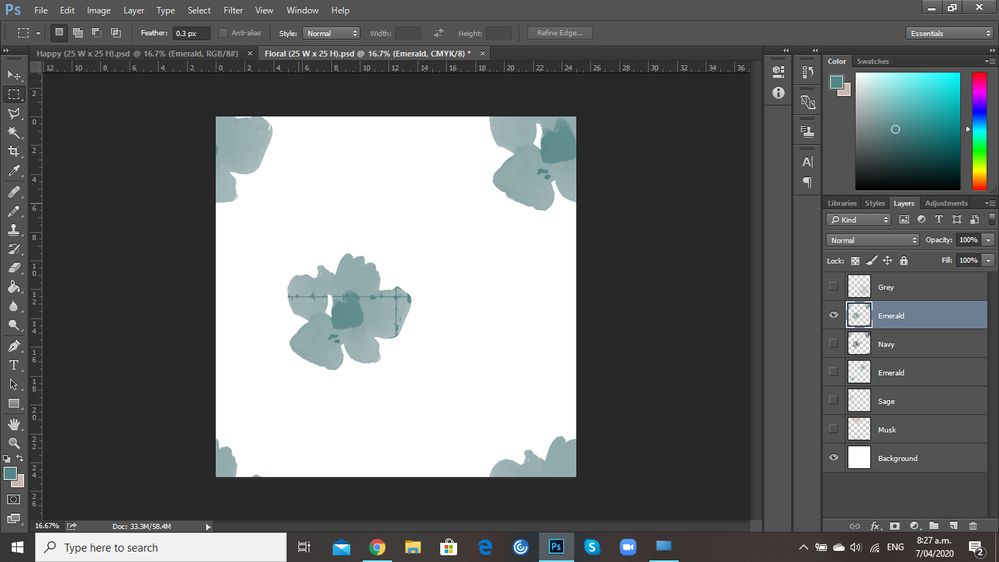
Using Select on the top tool bar I utilise Focus Area and this creates a selection of the layer. I then create a new layer and using the selection from above I fill this with a colour. This is when the lines from the previous layer appear, which show where I have used the Clone Stamp.
I pick the clone source using Alt. On the oringinal layer it blends fine and no lines appear, however I have to load them to a website and this is when they occur also as when I stated above.
I have tried blending on a seperate layer however the same lines occur.
Layer 3 (Main Layer) Normal and 100% Opacity.
Apologies if I am not explaining this clearly as it is an odd thing that is happening.
Copy link to clipboard
Copied
I do not understand your procedure, can you provide the actual file?
Copy link to clipboard
Copied
Hi.
Of course. It is happening on a few of my files, however I have attached the one that shows it the most.
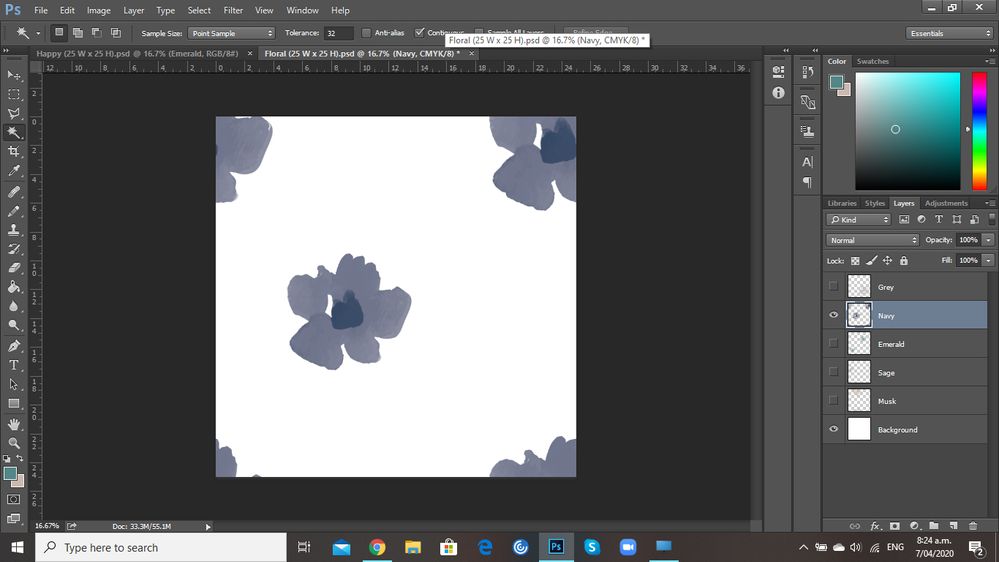
I am creating repeat patterns so I am needing to blend and the match the design so no lines appear. I do this by using the clone stamp as it gives me the same colour and texture.
\https://jamesdunloptextiles.box.com/s/xew8tk7hf3wdvsvh70jf82xzsy2so7l6
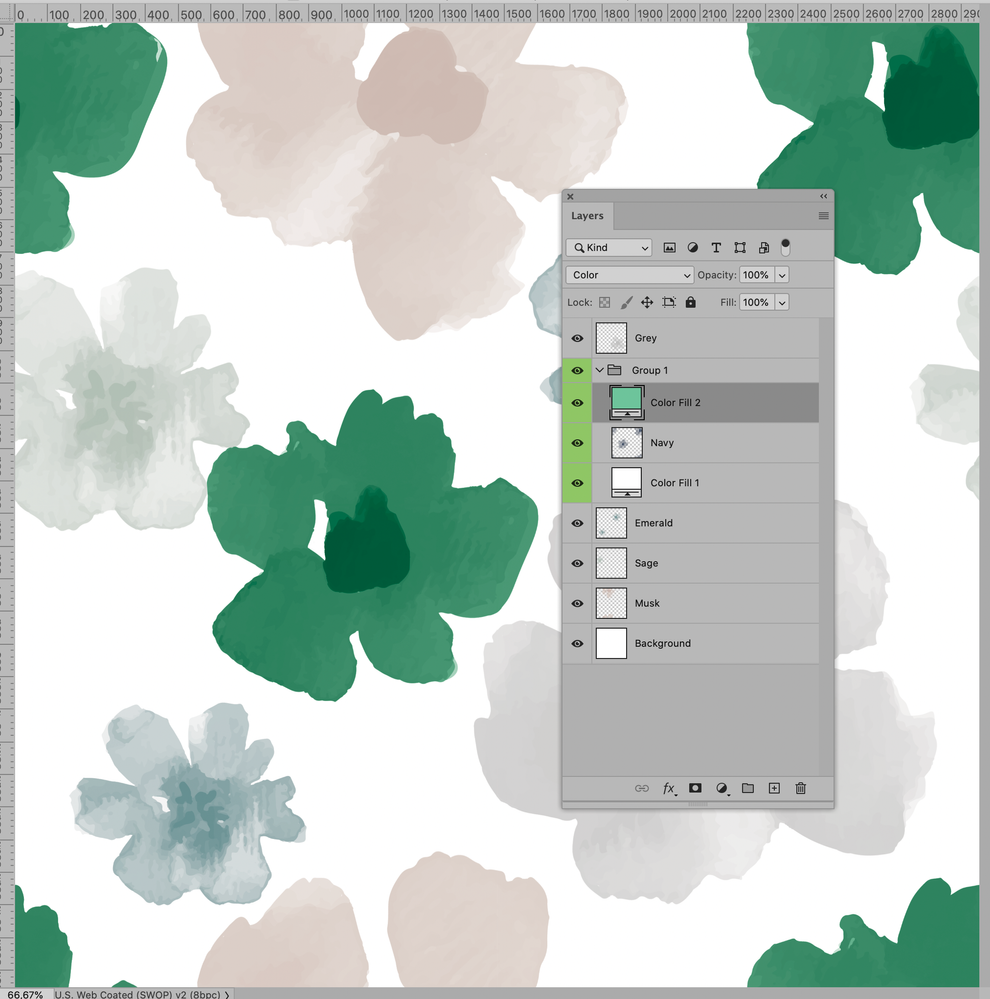
I have added captions to the photos below.
Copy link to clipboard
Copied
Thank you.
But quite frankly I gave no idea what Focus Area is supposed to be good for here.
And the problem with blue central flower sems to be that it is a highly transparent object and you clone stamped on it with the white background. Unnoticable on white but otherwise problematic.
To amend this after the act I see two options:
• Load the dominant Channel (cyan in this case) asa. Selection, invert the Seleaction and use as a Layer Mask for a new Solid Color Layer; you may need to use Curves to tune the Mask, though
• Use the transparency on a Solid Color Layer and touch up the »seams«
But I wonder if this even matters for recoloring if you restructure the image with Multiplying Groups that include a background and a Solid Color Layer set to Blend Mode Color.
Copy link to clipboard
Copied
Thank you...
Foucs area is useful as it selects the transparency/ water colour textures.
However, thank you for your advice above. I will try these and see how I go.
Copy link to clipboard
Copied
If you apply Layer > Layer Mask > From Transparency and then consider the Layer with the deactivated Mask you may notive plain, flat color areas (except for the Clone Stamping) – so Focus Area is utterly unnecessary as the whole structure is in the Transparency anyway.
Find more inspiration, events, and resources on the new Adobe Community
Explore Now