Copy link to clipboard
Copied
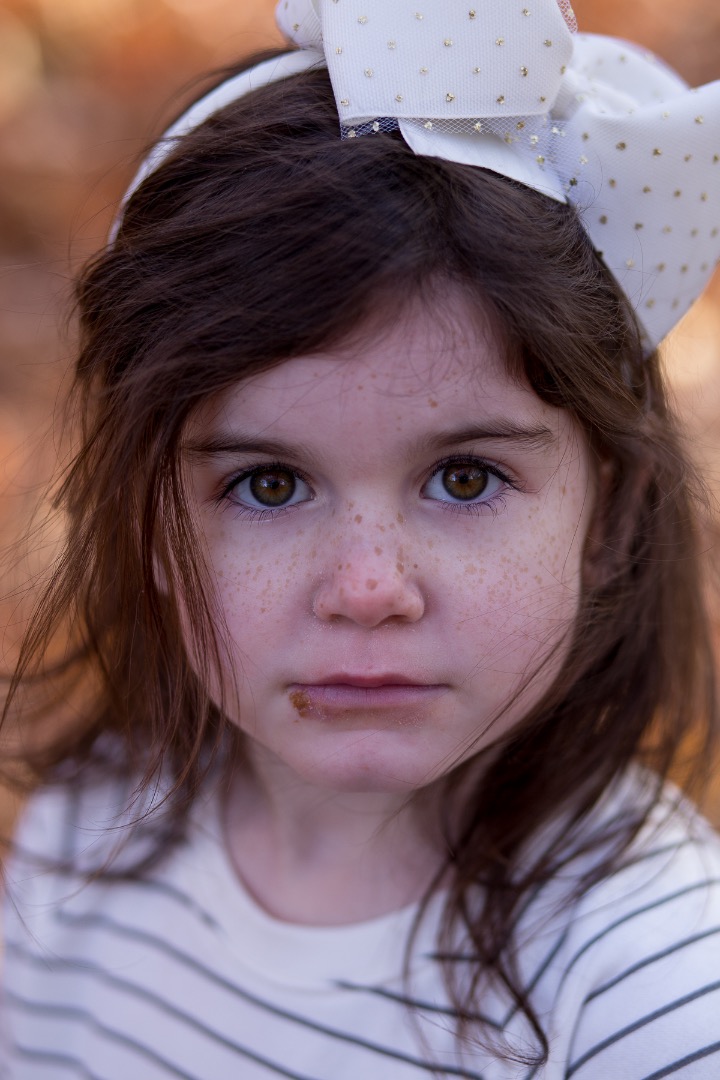
HOW do i fix this????

 1 Correct answer
You can use the spot healing brush to do this. set the brush with a low softness setting, small size and use content aware for the correction type. (see screen shot) brush carefully and avoid hitting the mouth line

You can also use this brush to clean up the crusts around her nose, just make the brush slightly larger than the crusties, and click on them, no need to paint.
Explore related tutorials & articles
Copy link to clipboard
Copied
You can use the spot healing brush to do this. set the brush with a low softness setting, small size and use content aware for the correction type. (see screen shot) brush carefully and avoid hitting the mouth line

You can also use this brush to clean up the crusts around her nose, just make the brush slightly larger than the crusties, and click on them, no need to paint.
Copy link to clipboard
Copied
Hi
Google for : Photoshop CC, removing blemish on a person face
Lot's of video tutorials.
Pierre
Copy link to clipboard
Copied
Thank you Michael!
Copy link to clipboard
Copied
Bless. That poor wee girl. She looks like she has had quite a cold.
The healing brush is great for areas surrounded by OK pixels, but in this particular situation, you'd have your work cut out getting a decent fix. With the young lady so square on to the camera, my preferred method would be to copy the other side of her mouth to a new layer, and Free Transform > Flip it to cover the other side of her mouth. It was ever so slightly lighter in tone, but a couple of strokes with the burn tool fixed that. This makes a much nicer fix than you'd easily get with the Healing brush.

Copy link to clipboard
Copied
Trevor.Dennis wrote:
.....
The healing brush is great for areas surrounded by OK pixels, but in this particular situation, you'd have your work cut out getting a decent fix. With the young lady so square on to the camera, my preferred method would be to copy the other side of her mouth to a new layer, and Free Transform > Flip it to cover the other side of her mouth. It was ever so slightly lighter in tone, but a couple of strokes with the burn tool fixed that. This makes a much nicer fix than you'd easily get with the Healing brush.
The reason I've become committed to trying to learn Photoshop is that sort of skill. Thanks you for helping stay motivated!
Copy link to clipboard
Copied
actually, this turned out to be the right answer. thank you!
Copy link to clipboard
Copied
rojas66 wrote:
actually, this turned out to be the right answer. thank you!
OK, but I won't change the Correct Answer as there are so many ways to do things in Photoshop. IMO The more you think of Photoshop as something much more powerful than something to spruce up your photographs, the more rewarding you'll find using it. Let's say, God forbid, that you wanted to paint out those beautiful freckles

If we sample the skin colour and select the area of roughly similar tone and hue, and fill our selection with that sampled colour on a new layer:

It looks very obvious, but applying Gaussian blur we merge the edge with the background

The problem being of course, and it would be far more obvious with an older person's skin, there is no texture so it looks false. A great way to reintroduce skin texture is Filter > Camera RAW > fx > grain using quite low values. If you go too far either undo and try again, or go Edit > Fade Camera RAW filter and reduce the effect of your last edit.
My favourite brush pack for retouching portraits (or creating them from scratch since MAX) is Castrochew's Hair and skin brushes.

Using a slightly darker, and possibly more saturated, tone than the skin, and one of Castrochew's skin texture brushes, we can make our solid colour start to look real. Be subtle, and use a new layer so you can dial it back with layer opacity.

