Known Participant
May 8, 2025
Answered

Colorize to Match Colour

  • May 8, 2025
  • 2 replies
  • 771 views

Hello everyone, I am hoping to learn a good method for my task.

Basically, I've been doing some mockup characters for a project and using some reference images for colour adjustments. What I'm trying to do is recolour my mockup character's hair (for example) to match the colour and tone depth (not just a flat dead one-tone colour overlay) of a reference character's hair colour.


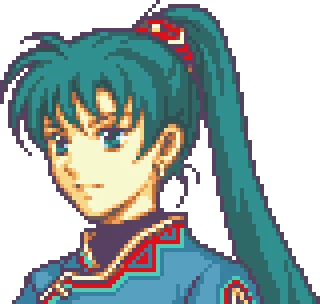
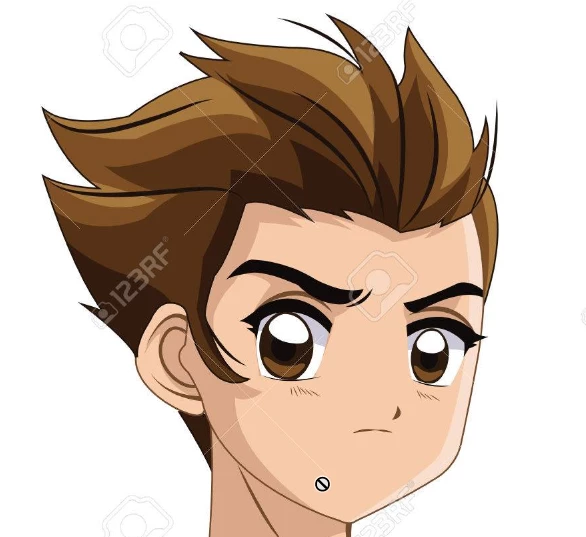
Horrible example but this is just to visualize my question: Let's say I liked the hair colour of the character on the left and I wanted to match that colour onto the character on the right. As you can see, low-res spritework like this only has 2 or 3 tones of colour for highlights/shadows, but there are often even more for more realistic photos and for high quality modern character art. I want to match the exact highlight/midtone/shadow of one character to another.

I know I can use a hair selection and an adjustment layer to do something like "Hue/Saturation" or "Curves", but I always just end up getting a wide patch of colour that doesn't look right and overblown with no depth. I'm not really good at painting by hand so doing that is tricky too.

I'm really just wondering if there's a really simple way to do this with an extra setting or two I'm just not familiar with. Would really appreciate the input here because it would save me a ton of time on my projects. Thank you!

Correct answer Trevor.Dennis

When you colorize a layer by overlaying a color with blend mode set to Color, or using Hue/Sat > Colorize, its effect depends on the tonal value of the underlying pixels.  It will show the full colour over 50% grey, but nothing at all over full white or full black.


So, in some circumstances you can select and copy a character's hair to a new layer. Desaturate it (Shift Ctrl U) and clip a layer filled with the new colour with blend mode set to color.  I made an extra copy of the hair layer and offset it so you could see what it looked like in greyscale.  


This is no always going to work of course, but you could also clip a curves layer between hair and color layer to adjust the greyscale values.  Or invert the greyscale layer. Whatever works.  If you lock the transparency, you could paint directly to the greyscale layer with shades of grey.


Original

2 replies

Trevor.Dennis
Community Expert
Trevor.DennisCommunity ExpertCorrect answer
Community Expert
May 8, 2025

When you colorize a layer by overlaying a color with blend mode set to Color, or using Hue/Sat > Colorize, its effect depends on the tonal value of the underlying pixels.  It will show the full colour over 50% grey, but nothing at all over full white or full black.


So, in some circumstances you can select and copy a character's hair to a new layer. Desaturate it (Shift Ctrl U) and clip a layer filled with the new colour with blend mode set to color.  I made an extra copy of the hair layer and offset it so you could see what it looked like in greyscale.  


This is no always going to work of course, but you could also clip a curves layer between hair and color layer to adjust the greyscale values.  Or invert the greyscale layer. Whatever works.  If you lock the transparency, you could paint directly to the greyscale layer with shades of grey.


Original

Known Participant
May 9, 2025

I like this method, thank you for sharing!

Just like the other suggestion, I think I need to tinker with these to get really familiar with them. They vary in difficulty depending on how much depth the references have for sure.

Trevor.Dennis
Community Expert
Community Expert
May 10, 2025

It seems that the Object Selection Tool's Ai will take a stab at recognising cartoon characters as People.  It's not great, but was getting me most of the way there.  Sometimes the list of options is reduced, so it only offers options that it thinks it recognises.  I'm sure it will get better, and will do so all the more quickly if we use it.  Exciting times to be a digital image artist/manipulator.  

c.pfaffenbichler
Community Expert
Community Expert
May 8, 2025

A Gradient Map Layer (with an appropriate Blend Mode) and a Curves Layer (for the luminance) might help. 

Though with only two or three values the Gradient Map could also be finetuned itself to affect the definite regions. 

Known Participant
May 9, 2025

I think I'm going to have to get more familiar with what Blend Modes work best per situation, but I like this solution. Thank you for demonstrating with my random example too!