

- Home
- Photoshop ecosystem
- Discussions
- Re: Concentric ring ripple on image comp
- Re: Concentric ring ripple on image comp

Copy link to clipboard
Copied
Need to put together a comp for a client that includes a concentric ring ripple effect. I cannot look amateurish. Can anybody guide me to a tutorial on how to add this effect? I not only need to create the distortion pattern but need to include some reflectivity AND control for both 2D distortion and reflectivity. Once I get this down then I will mask accordingly.
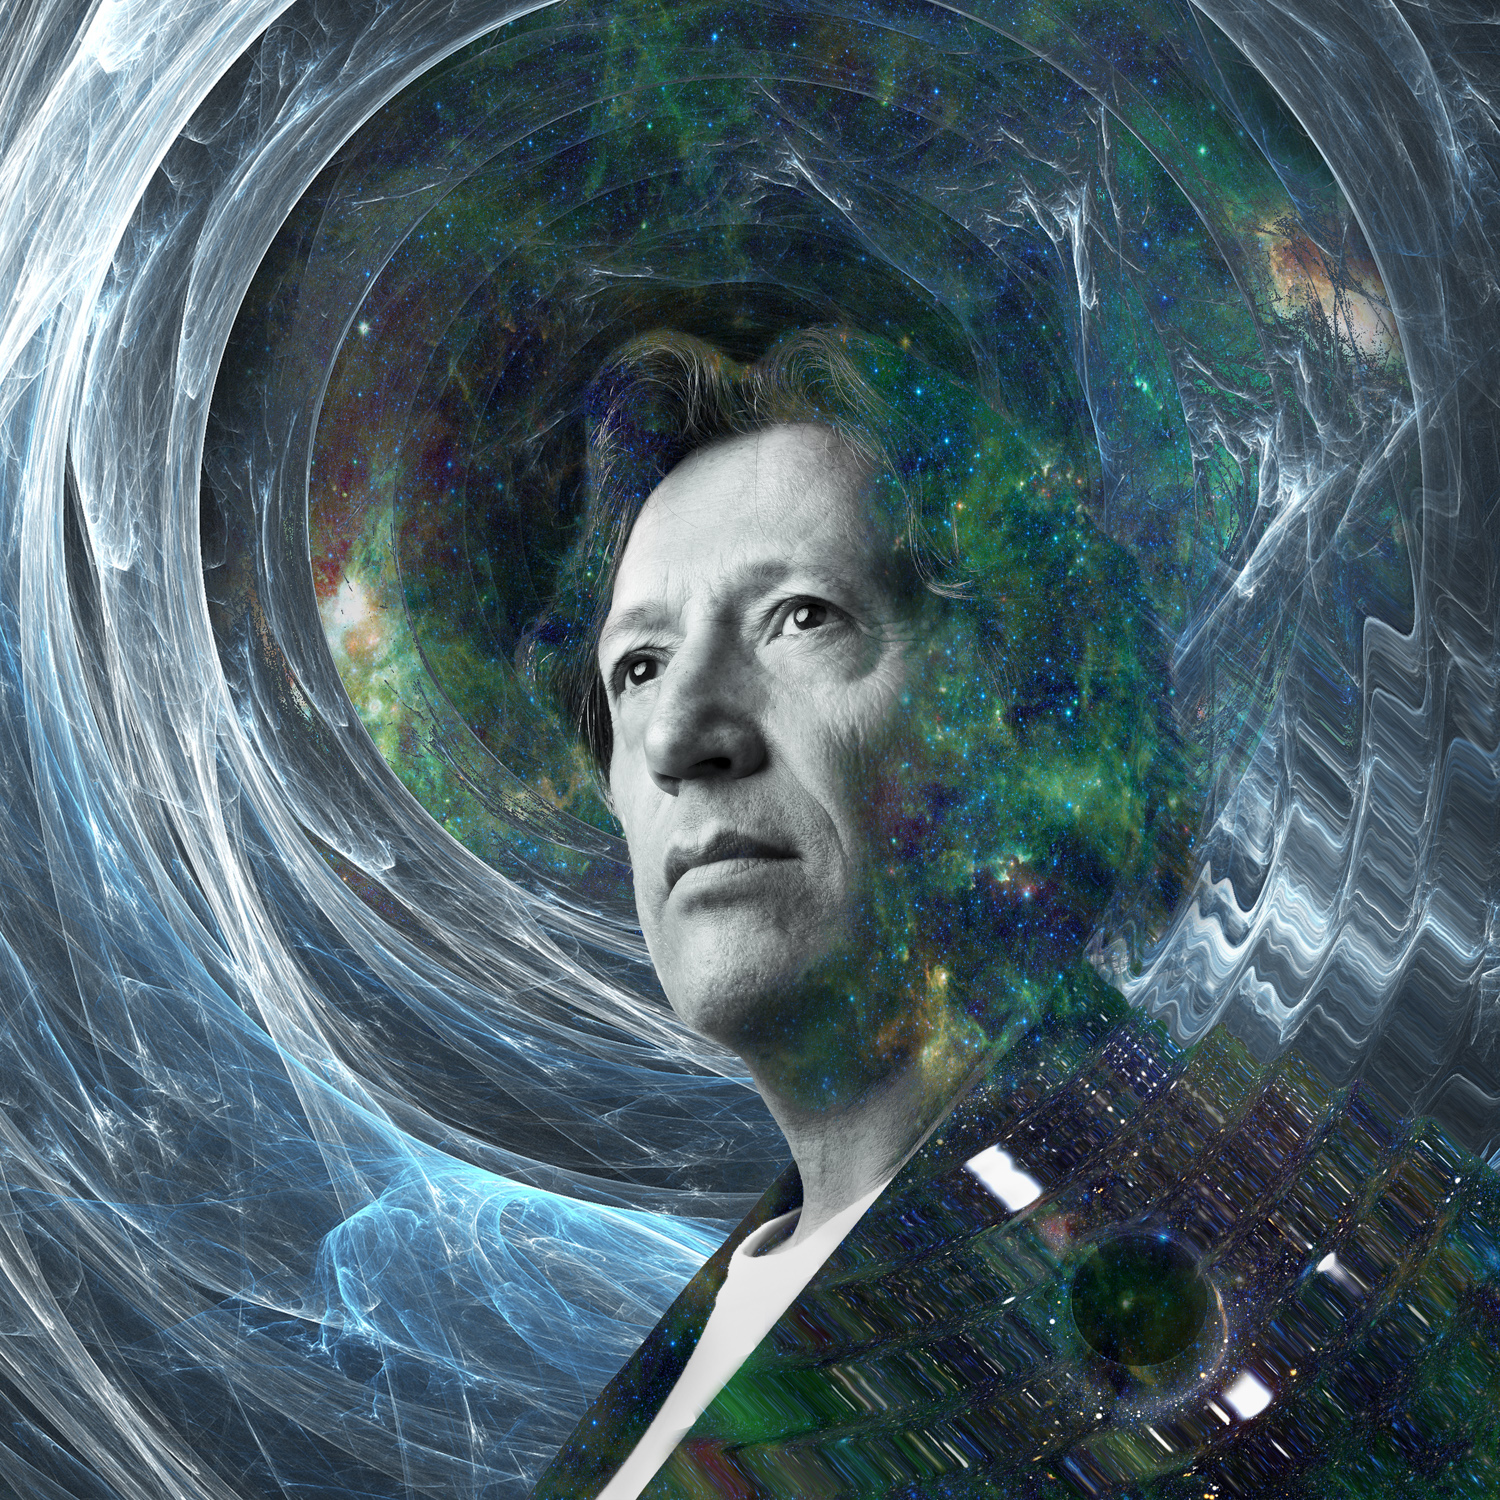
The image below is a rough cut of the image I am working on for this client. Most of the tutorials I have reviewed seem to be incomplete or amateurish. Any help would be deeply appreciated!


 1 Correct answer
If I wasn't using a photo to composite for this effect, I would build it with alpha channels, etc. See descriptions below.
Create an alpha channel with concentric circles that are white on a black background
Blue that alpha channel so that the white to black blends making a more "rounded" surface.
Create a new layer, fill it with 50% gray.
Now use Render > LIghting Effects and under Texture choose the alpha channel you've made earlier. Adjust settings for height and other properties. It will look a
...Explore related tutorials & articles
 11
Replies
11
11
Replies
11

Copy link to clipboard
Copied
What reflectivity? I see none. The rest is just a matter of using the Polar Coordinates filter to good effect and tweaking opacities and colors, but before that you need to do much better work on the cutouts. And by all means lose the green. This is one hell of an ugly color composition.
Mylenium

Copy link to clipboard
Copied
That might come across as a bit harsh.
But the advice on the Polar Coordinates Filter is excellent, the open question might be on which image it should be applied.
In the posted image the basis might have been smoke or paint-swirls in water, artificial or photographed. (edited)
Copy link to clipboard
Copied
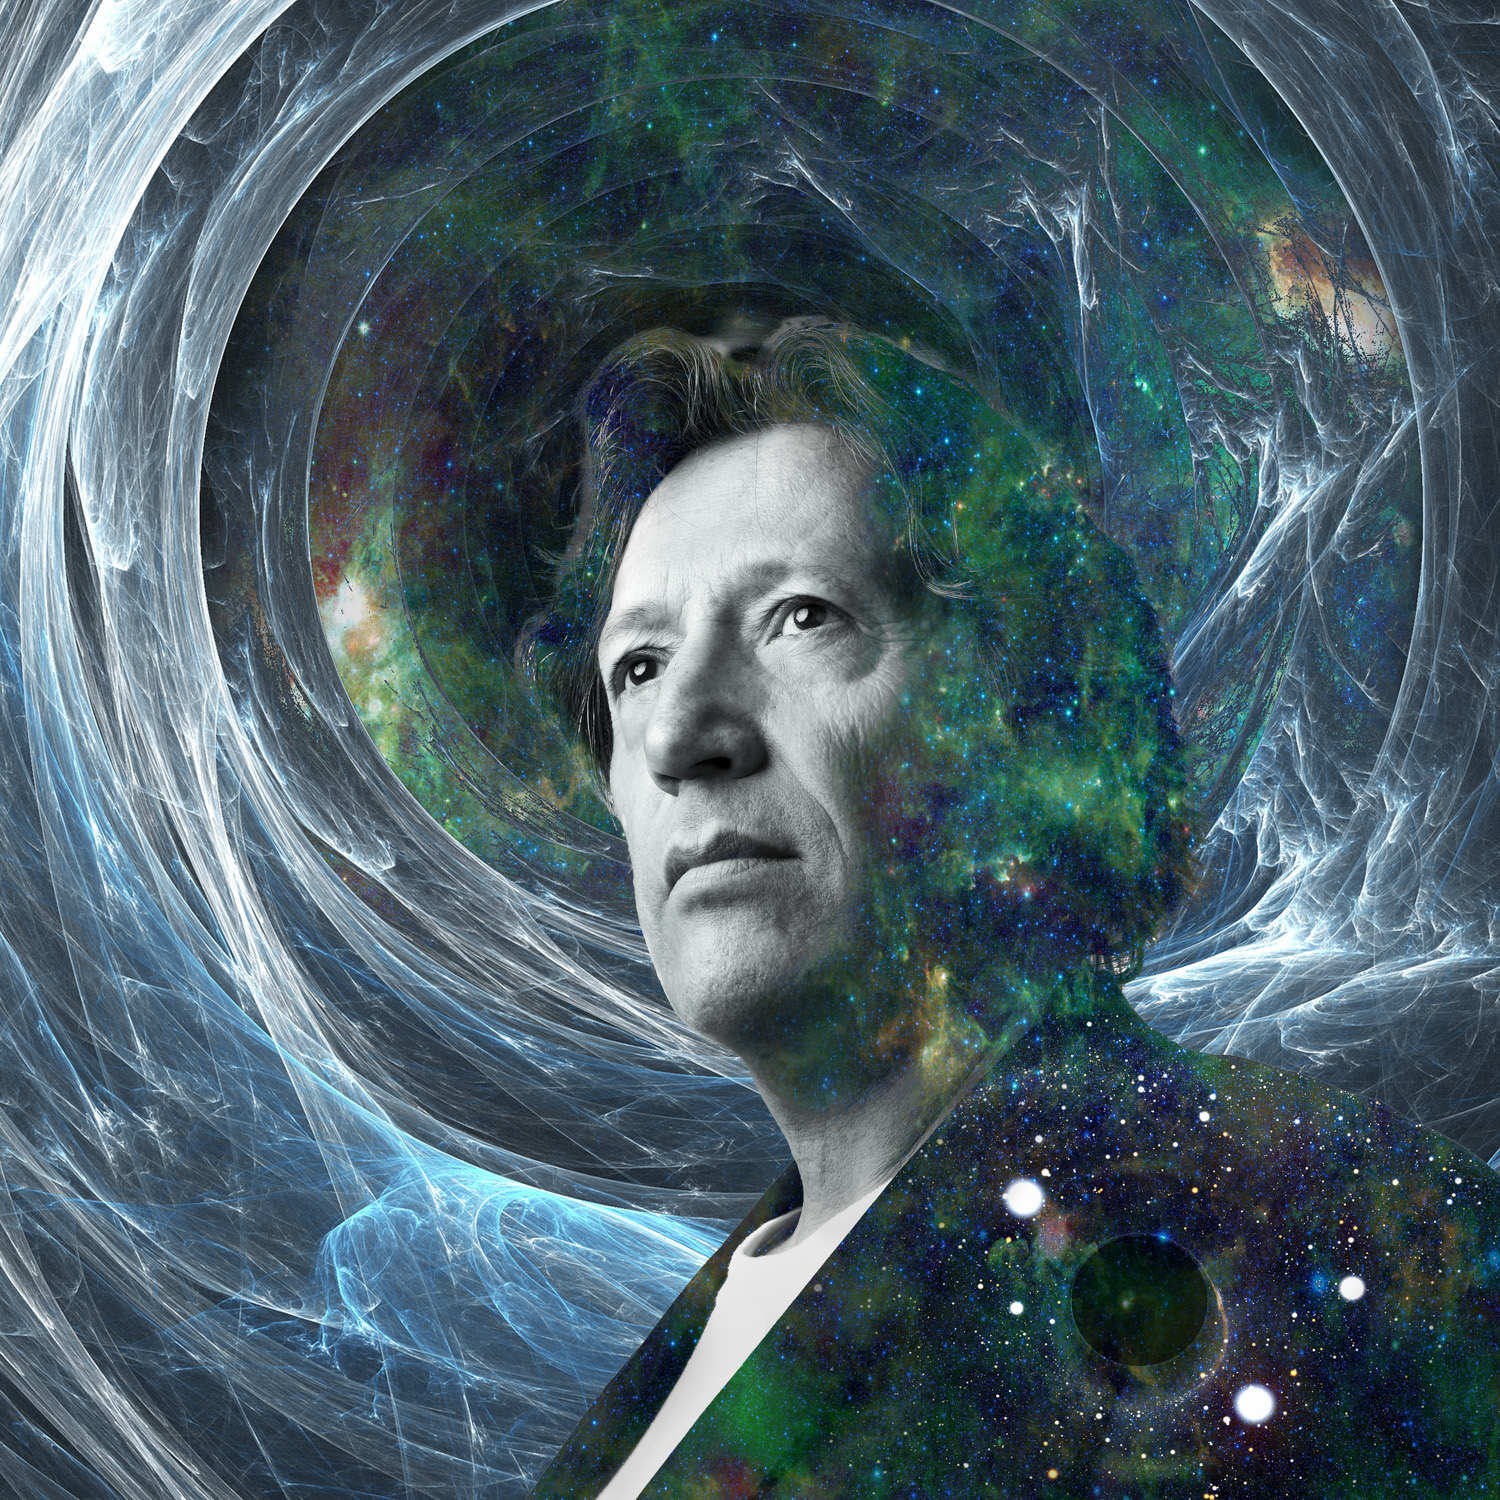
Hi Mr. Pfaffenbichler,
The current elements are a fractal model of the back hole in the background with infra-red image of a constalation.
Not sure my question was onderstood. This "rough cut" comp for the client has several layers to it. Just need to get the concentric wave pattern down before I implement subtly.
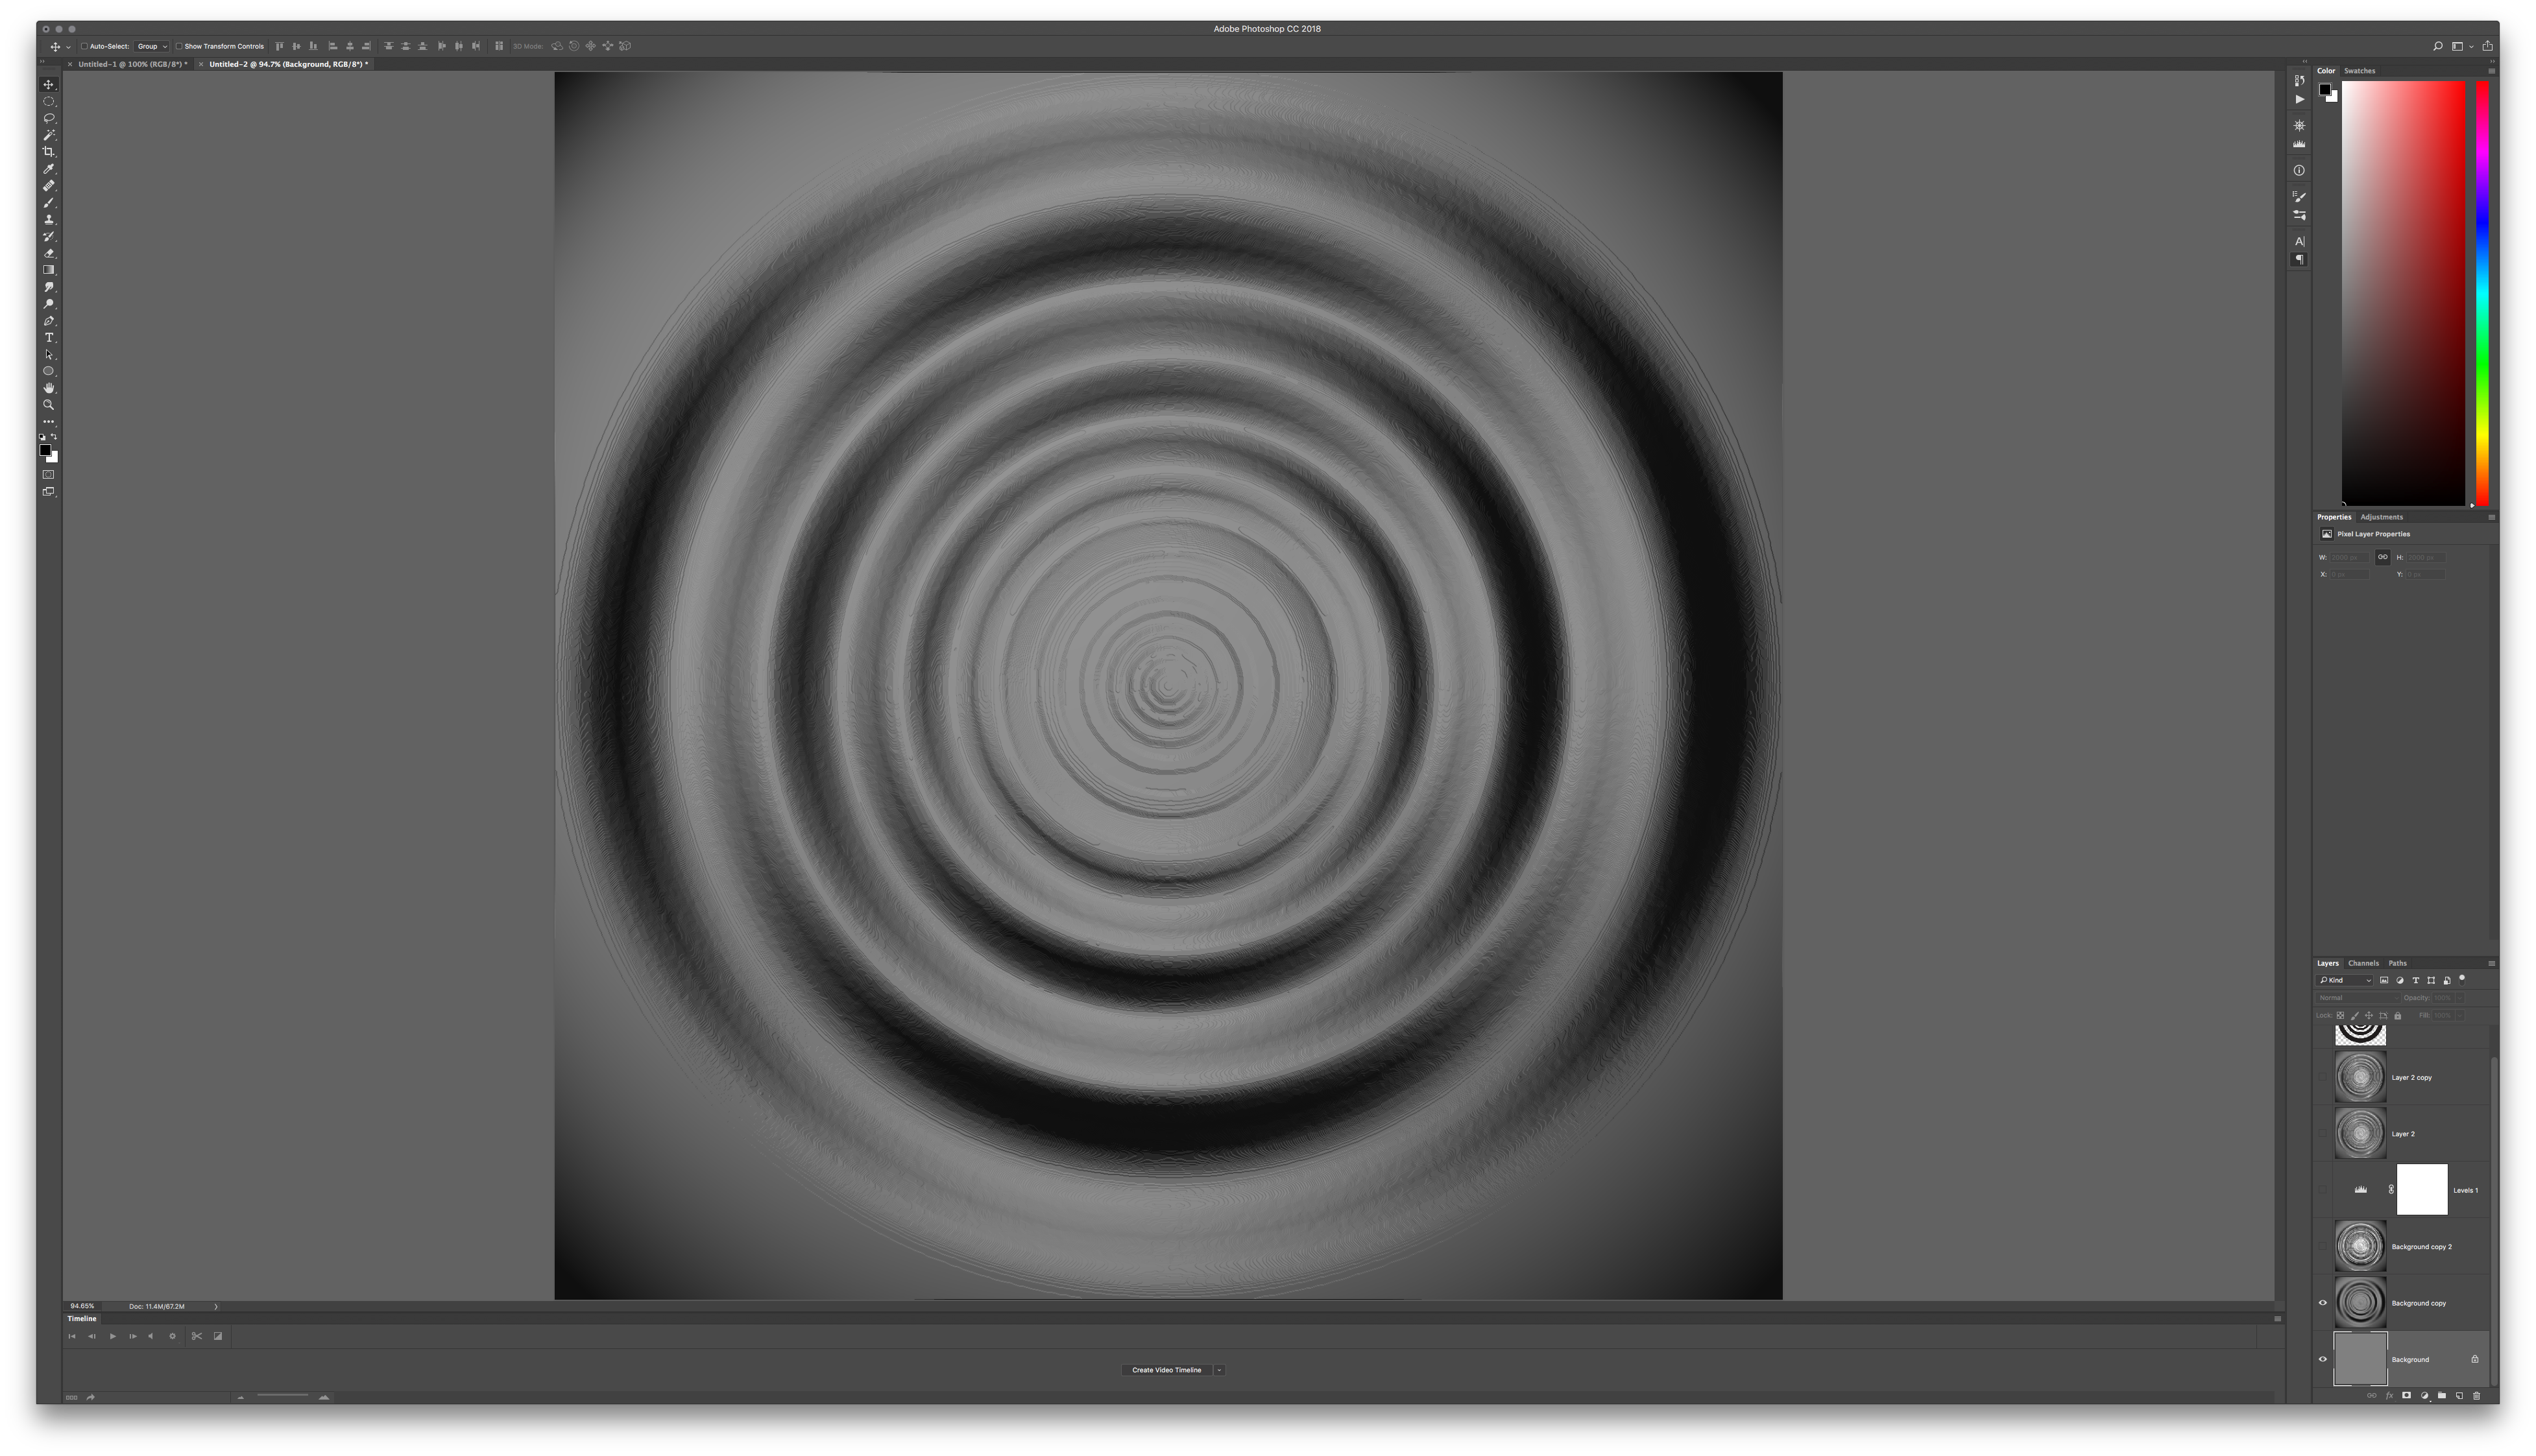
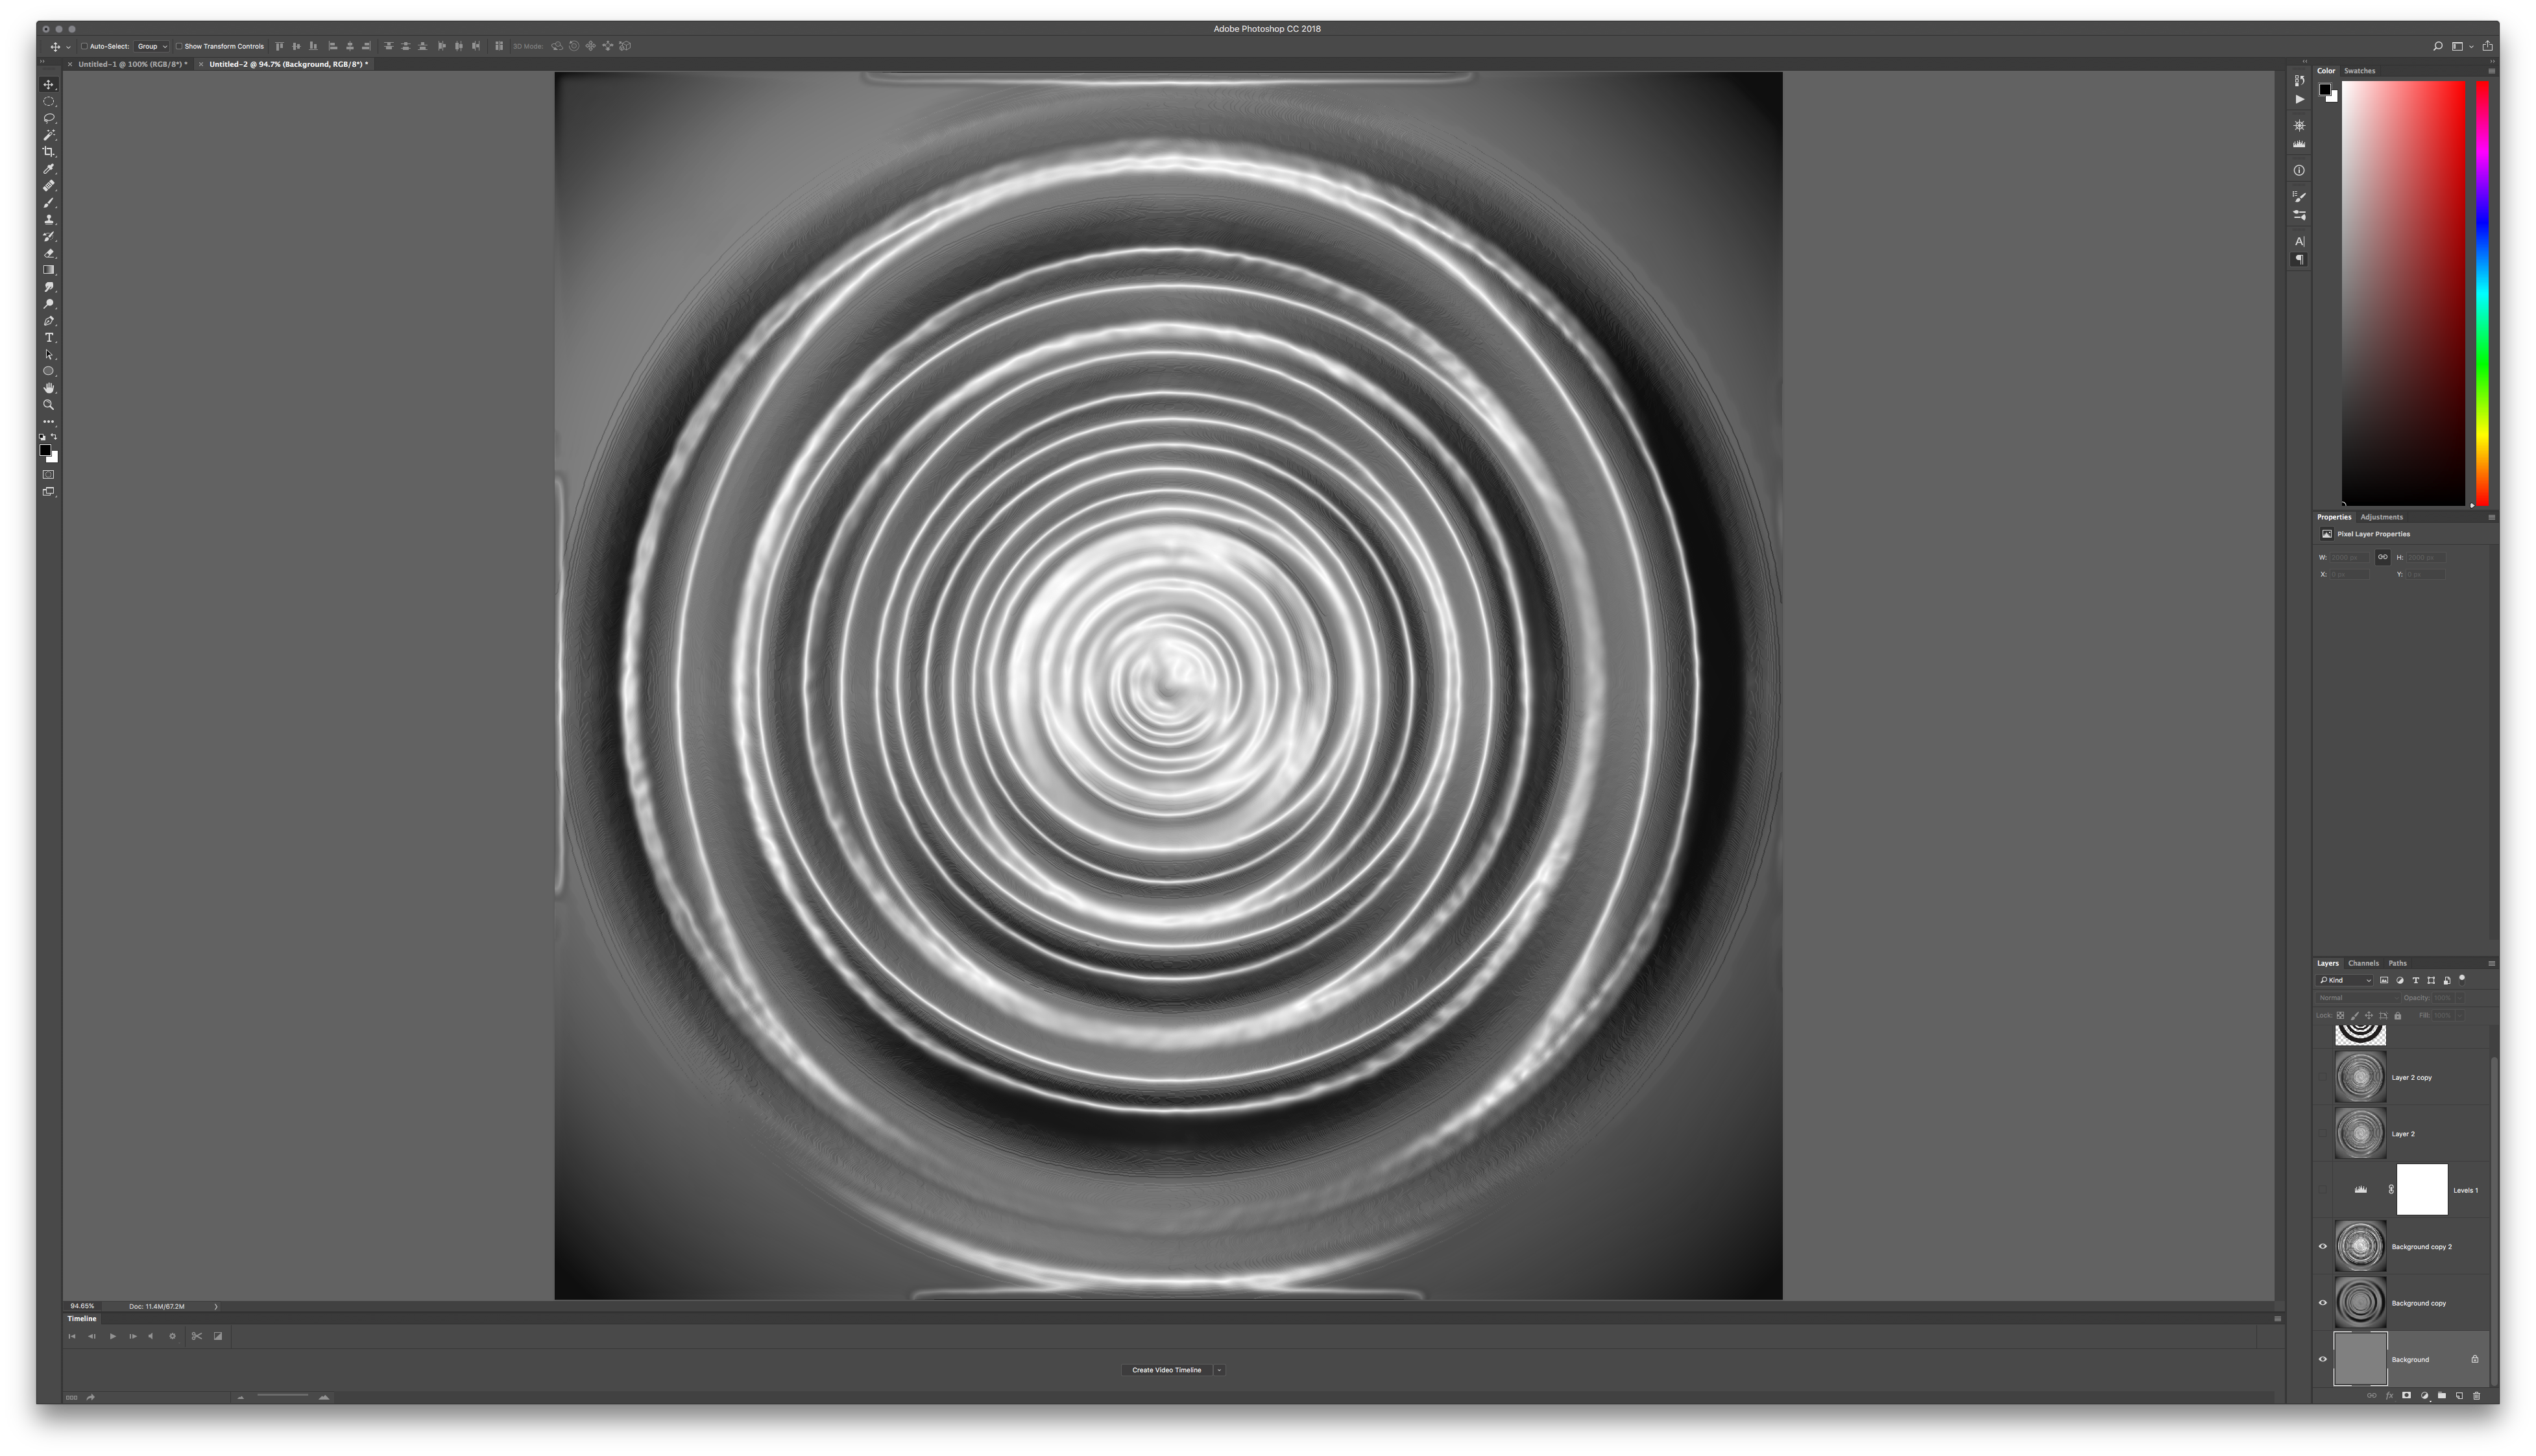
I used the zig-zag filer and it gave me accurate surface relieve for the conentric ripple pattern but there was no corresponding reflectivity. Link in this image attached:

Any thoughts on the matter would be helpful.
Copy link to clipboard
Copied
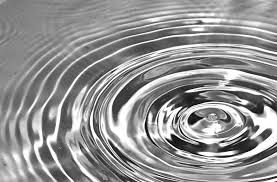
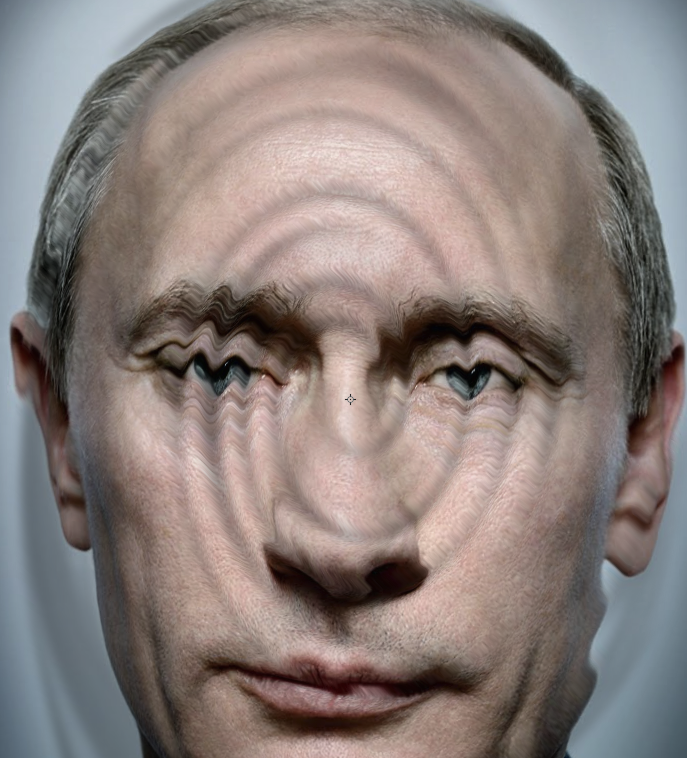
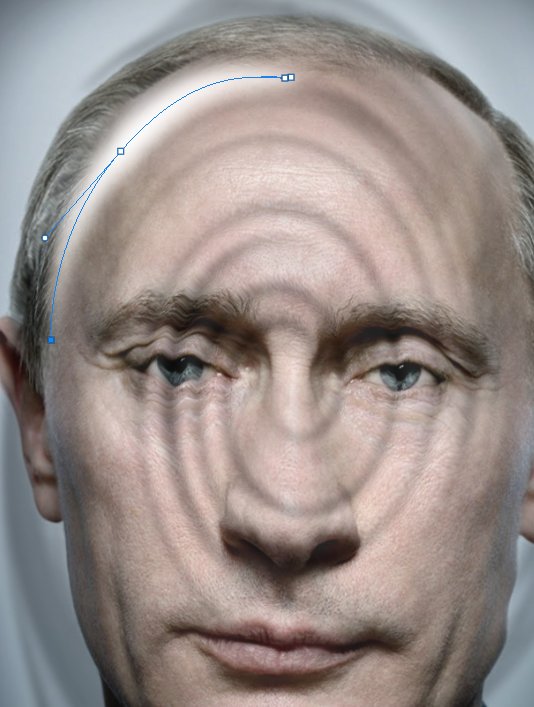
Hi @Mylenium, thanks for the polar coordinates idea. Will try that. As I mentioned in my original question, this is a rough cut so, I understand that the edge definition needs refinement but why waste my time on a comp?
below is an example of what I am trying to incorporate into the image. Would you still use polar corrdinates?

Copy link to clipboard
Copied
Hi Sanpanza,
I work with creative compositings producing compositings and creative images all the time.
The most important part in this project is to understand that there is no tutorial to do this. What is important is to cheat the eye of the viewer and create a nice composition.
In this kind of projects is a great idea to start using some images of what you need. Look for images with the ripple effect and use them in order to create your composition. There is no reason to do the ripple effect by hand because the time and the effort you put in is not better than using a photo.
The reflectivity is often achieved by duplicating the layer of the subject you want to reflect and move it around and play with the opacity until you like the result.
The depth of field, the use of different tones of colors in order to control the sense of depth in the image is far more important than a perfect mathematic ripple effect in order to convince the eye that what it sees is real.
I hope that this can help in order to set the right mindset for this image.
All my best,
Martin
Copy link to clipboard
Copied
Hi Martin,
Thank you for your reply. I am not sure how I would implement the ripple overlay you are talking about because it would not actually "bend" the lines to create a 2D concentric wave pattern. At least not in the way I imagine you are talking about but perhaps I don't understand you response.
Copy link to clipboard
Copied
If I wasn't using a photo to composite for this effect, I would build it with alpha channels, etc. See descriptions below.
Create an alpha channel with concentric circles that are white on a black background
Blue that alpha channel so that the white to black blends making a more "rounded" surface.
Create a new layer, fill it with 50% gray.
Now use Render > LIghting Effects and under Texture choose the alpha channel you've made earlier. Adjust settings for height and other properties. It will look a little gritty, you can smooth that later.
This will give you some ripples against the surface.
Now, use Plastic Wrap from the Filter Gallery and this will add smoothing and "wet" looking highlights to your ripples..
Now that you have this on a gray layer with ripple shadows and highlights being moved above and below middle gray, your blend modes will give you more flexibility for compositing. Use the middle grays as an option for blending in reflections from your composite image.
Continue layering in additional plastic wrap filters, throw some diffusion in for texture under Stylize > Diffuse and experiment from there for the layering of ripples/highlights that you want.
Blurring really helps when smoothing how the lighting renders some of these effects.
Alpha channel with concentric white circles, increasing in size

Blurred so that Render LIghting Effects will round out the form
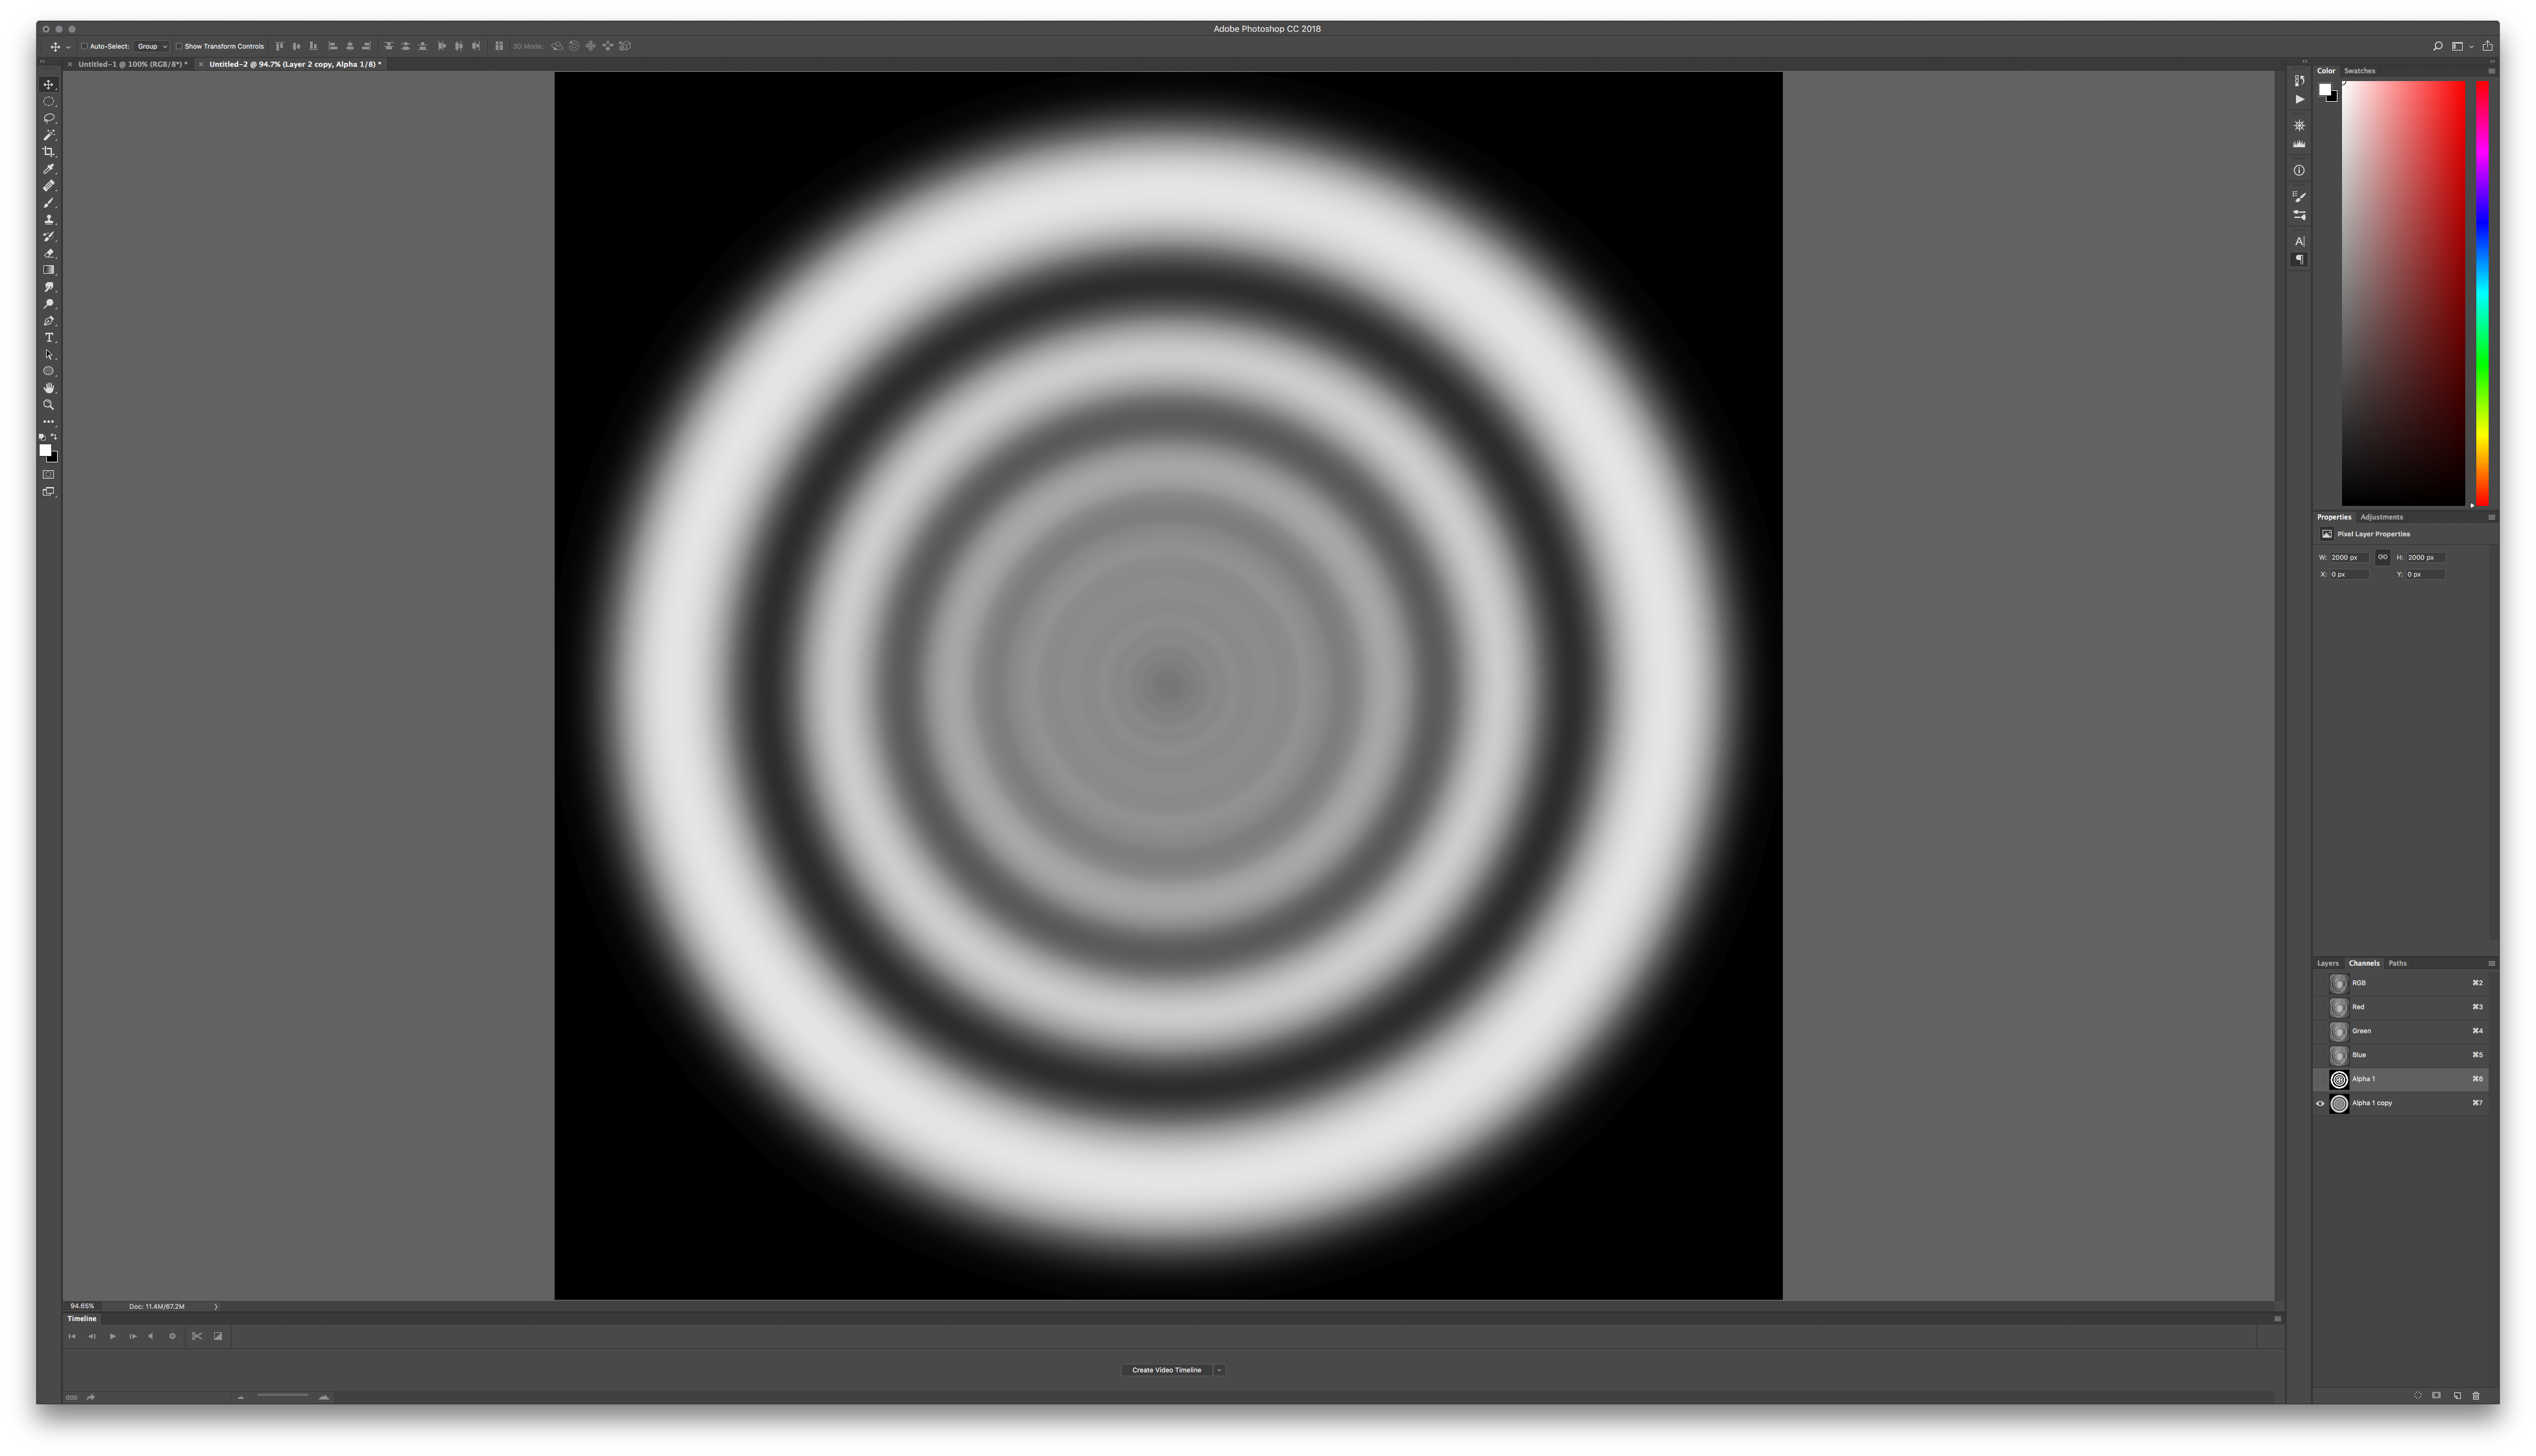
New Gray Layer we will build the ripple into
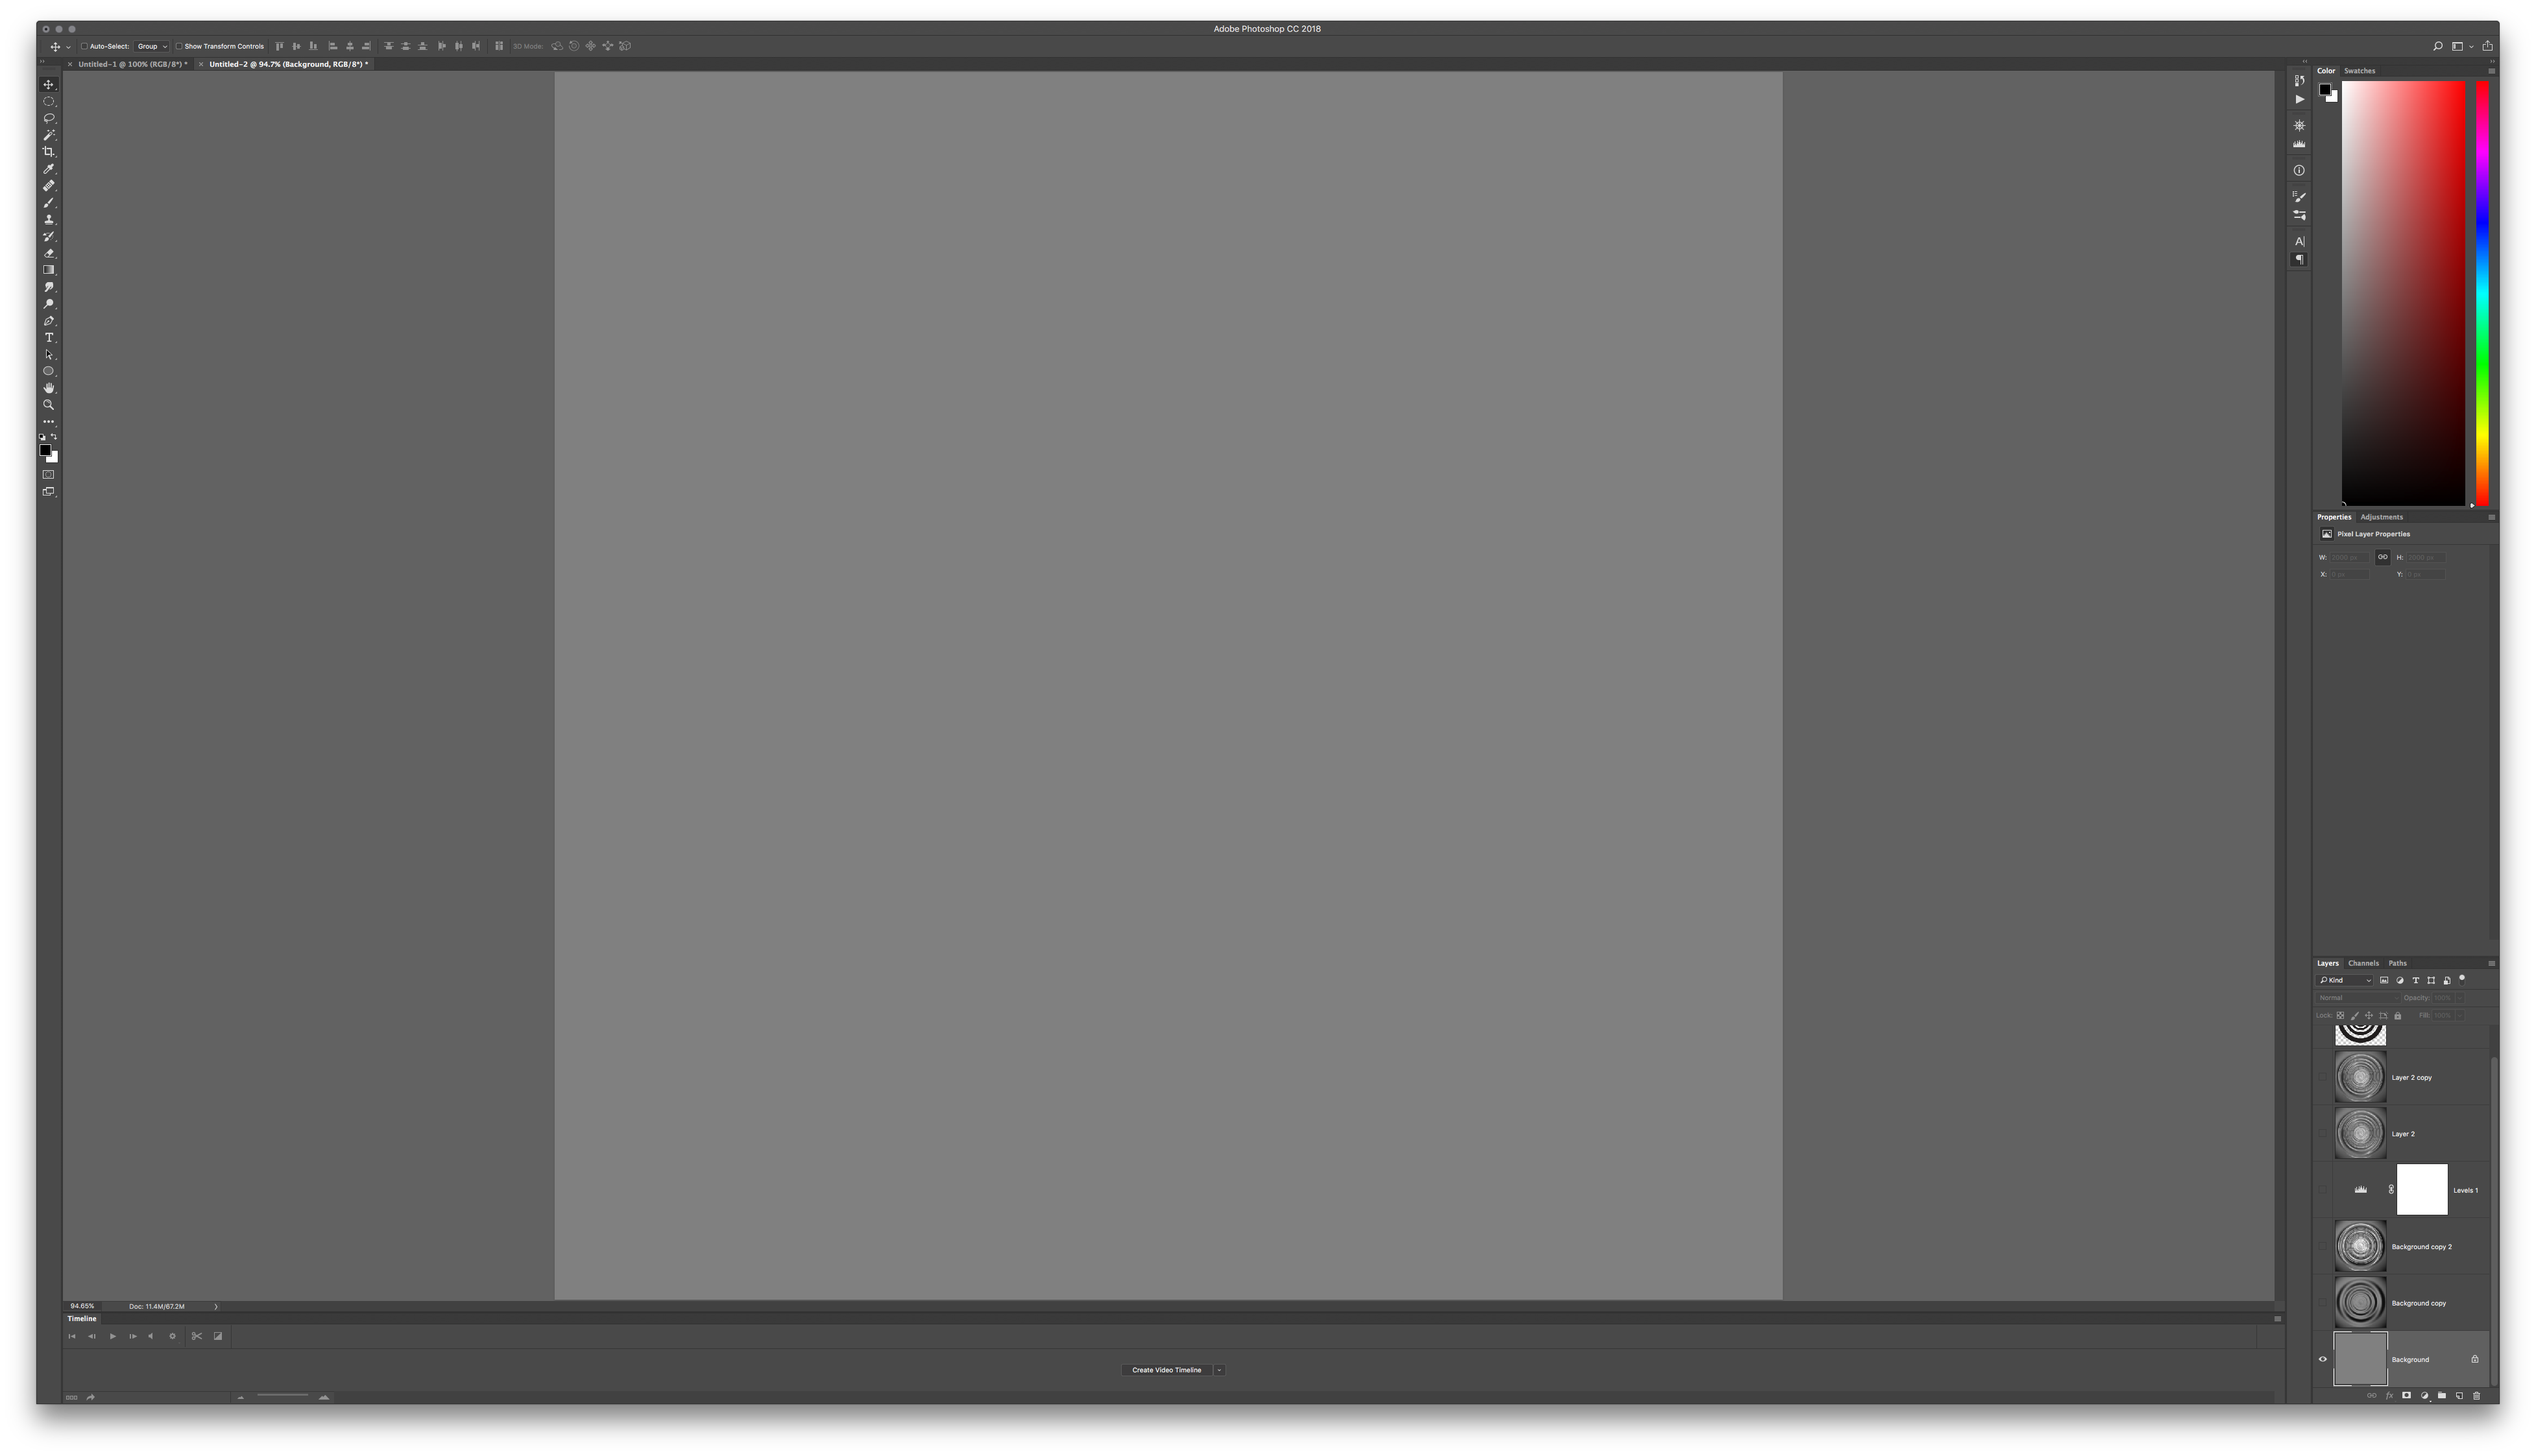
Using Render LIghting Effects on the Gray Layer, choose your Alpha Channel from the Texture Pull down menu option in the filter
Under Filter Gallery, choose Plastic Wrap. Use lots of smoothing and play with highlights for volume
Now under Filter Distort, use Twirl to spin it in a way that details blend together. This only works if you have your circles dead center at the start.

I added a little oil paint texture for some natural looking surface distortion and then added a small amount of plastic wrap highlights again to finish it out.

Being solid gray, this could now be easily blended into other images using various blend modes like overlay, screen, etc...

Copy link to clipboard
Copied
A quick and easy approach
Copy the portrait layer, and use Twirl to create the concentric rings.
Desaturate and blur the result.
Duplicate it to a new document, and save as a PSD file
Select the original portrait and Distort > Displace using the psd file you just saved as the map.
Set the original twirl layer to Multiply, and reduce the opacity to show some shadow.
Copy that layer and set to Screen and reduce the opacity some more
I used the default Displace values above of 10,10
This 5,5

Stroke a few paths with Simulate pressure turned on to create strong highlights
Copy link to clipboard
Copied
Hi Mark @mark-heaps and @Trevor.Dennis Trevor.Dennis for the very helpful answers.
You can see the effect in the bottom right hand side.
First I increased the size of my canvas from 20 to 32 inches, leaving a large empty border . This had the effect of extending the effect of the filter to the edges of my original frame. I ended up using the the Zig Zag filter on the "pond ripple" setting at 80 for amount and 16 for ridges.
Duplicated the filtered layer and desaturated it, then did a multiply blend, duplicated that layer and did a screen blend. Both B & W layers had their opacities adjusted for optimal effect. Luckily this is only a prototype and have some time to play with more refinements and interpretations.
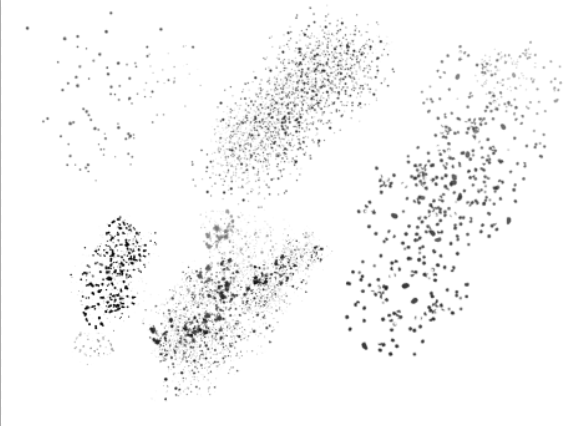
Any thoughts in on how to create spatters ?
Copy link to clipboard
Copied
You've done an excellent job so far. I like how the lens effect is masked behind the man camera left, and merged into him camera right. The lens effect is really nicely done as well.
It's fairly straight forward to produce splatter brushes, but there some really nice ready made sets out there. My favourite brush set is Hair & Skin Brushes by Castrochew which has some nice splatter effect brushes
If you want a rougher outline, start with one of the Chalk presets or similar, and set:
Spacing 1000%
In Shape Dynamics set Size Jitter, Angle jitter, and Roundness Jitter to maximum
In Scattering set Scatter to max and check Both Axes, and increase Count to something like 4
In Transfer set Opacity jitter to max.
You need to leave the Control for all of those to Off unless you want to control it with Pen Pressure as a for instance.

This won't give you much of a spread, so to increase that, lay down some splatter on a new layer, and define it as a new preset, and use the same settings as above again. I'd be incline to use different outlines when making the preset to reduce repetition.
Copy link to clipboard
Copied
Hi @Trevor.Dennis and @mark-heaps. Thanks for all your input.
Here is the final concept piece I created; the first of three I want to create. Adobe Photoshop Lightroom

Find more inspiration, events, and resources on the new Adobe Community
Explore Now
 AdChoices