Exit
  • Global community
    • Language:
      • Deutsch
      • English
      • Español
      • Français
      • Português
  • 日本語コミュニティ
  • 한국 커뮤니티
0

Create a darkened spot in photoshop?

Explorer ,
Jul 10, 2019 Jul 10, 2019

I have an image I want to adjust the darkness for in photoshop. I do this often in LR by using selective edits to select the area and then adjust the exposure etc. I can't seem to do something similar in PS. The burn tool is difficult to use in this scenario because i can't see what I am selecting and applying more burn on top of the other just increases the burn. I know i could make a selection with the lasso but is there a way to this with a brush?

542
Translate
Report
Community guidelines
Be kind and respectful, give credit to the original source of content, and search for duplicates before posting. Learn more
community guidelines
Adobe
Adobe Employee ,
Jul 10, 2019 Jul 10, 2019

Hi Elizabeth,

You can use the Adjustment Brush available in the Camera Raw plugin, you can access it by going to Filter > Camera Raw.
Please check this article to know more: Make local adjustments in Adobe Camera Raw

Regards,
Sahil

Translate
Report
Community guidelines
Be kind and respectful, give credit to the original source of content, and search for duplicates before posting. Learn more
community guidelines
Community Expert ,
Jul 10, 2019 Jul 10, 2019

yyy.png

One approach that offers flexibility is to make a Selection of the area you want to change, add a Levels Adjustment Layer and use the sliders  (in the Properties panel) to adjust the tone.

Translate
Report
Community guidelines
Be kind and respectful, give credit to the original source of content, and search for duplicates before posting. Learn more
community guidelines
Community Expert ,
Jul 10, 2019 Jul 10, 2019

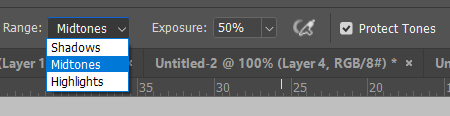
When using the Dodge & Burn tools, it is important to set the appropriate tonal range in the Options Bar.  Not only does this let you target specific parts of the image, but makes a lot of difference to how the effect looks.

It's covered to some extent in this thread

Re: Illustration advice ..?

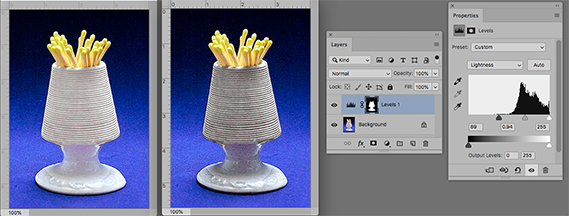
But you might do better using an adjustment layer (Curves or levels) and controlling where and how it is applied with the layer mask.  We have discussed this in recent threads describing how you can use Mask Properties to feather the mask, and unlink the mask so you can nudge it (unlinking is usually not needed with adjustment layers.

Click on the link icon to unlink the mask from the layer.  This will make no difference with adjustment layers, but can be useful with pixel layers

Translate
Report
Community guidelines
Be kind and respectful, give credit to the original source of content, and search for duplicates before posting. Learn more
community guidelines
Explorer ,
Jul 11, 2019 Jul 11, 2019

thanks!

Translate
Report
Community guidelines
Be kind and respectful, give credit to the original source of content, and search for duplicates before posting. Learn more
community guidelines
Community Expert ,
Jul 11, 2019 Jul 11, 2019
LATEST

I use a curves adjustment layer like Norm showed but I paint the edit into the adjustment layer mask. This is essentially the same as using the adjustment brush in Lightroom. I think it is superior to dodge and burn because it is non destructive, and the dodging can be done on a lighten curves and the burning on a darken curves. I love this technique so much I even recorded a video for it. Light Painting with Photoshop Curves Adjustment Layers - YouTube

Translate
Report
Community guidelines
Be kind and respectful, give credit to the original source of content, and search for duplicates before posting. Learn more
community guidelines