- Home
- Photoshop ecosystem
- Discussions
- Create a Double Exposure in Photoshop now!
- Create a Double Exposure in Photoshop now!
Create a Double Exposure in Photoshop now!
Copy link to clipboard
Copied
Easy steps to create a Double Exposure Effect in Photoshop
Have you ever wondered how some artists merge two or more images together and turn it into a "beautiful, artistic, illusion"? You can learn their secret technique by following these easy steps to create a similar effect known as Double Exposure.
High-contrast photos with distinct light and dark areas are the best images to use for a Double Exposure effect.
Get a jump start on creating by downloading these sample images to follow along.
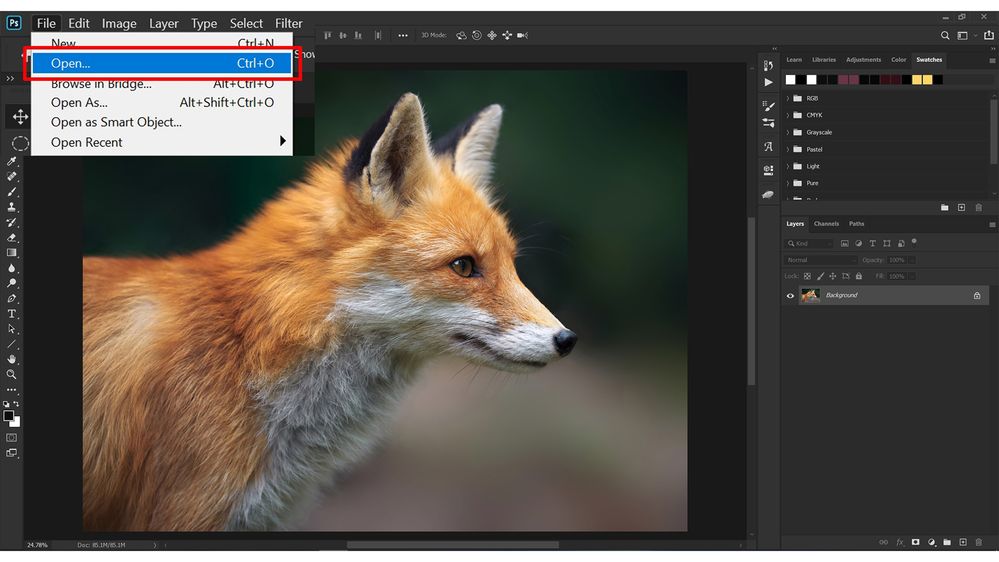
❶ Open the sample Fox image in Photoshop
❷ Select the Pen Tool and start by making a path around the Fox
Note: There are several different ways of making selections in Photoshop, however, using the Pen Tool allows us to be more precise.
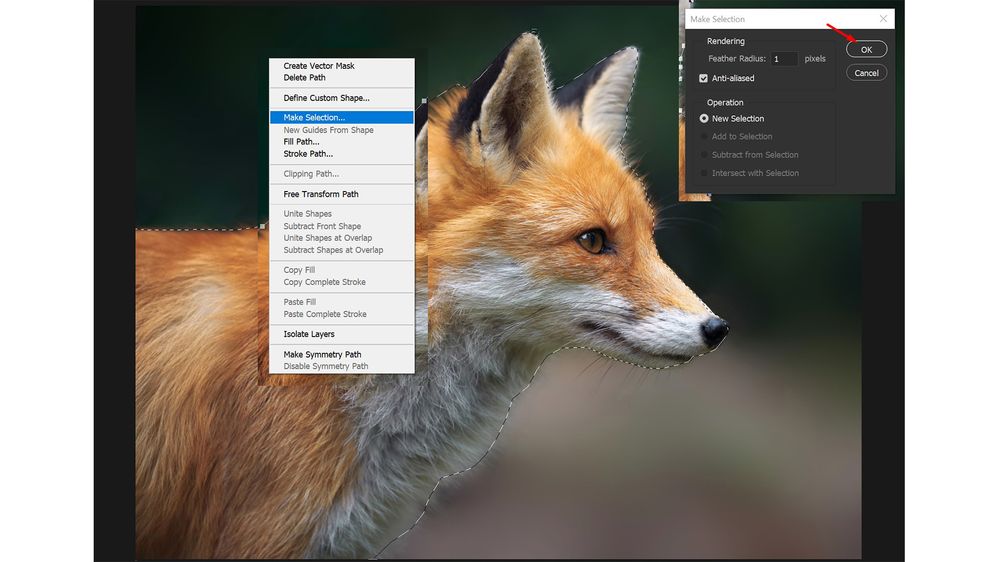
❸ Once the path is completed, Right-click (Windows) OR Ctrl-click (macOS) on the fox and choose Make Selection
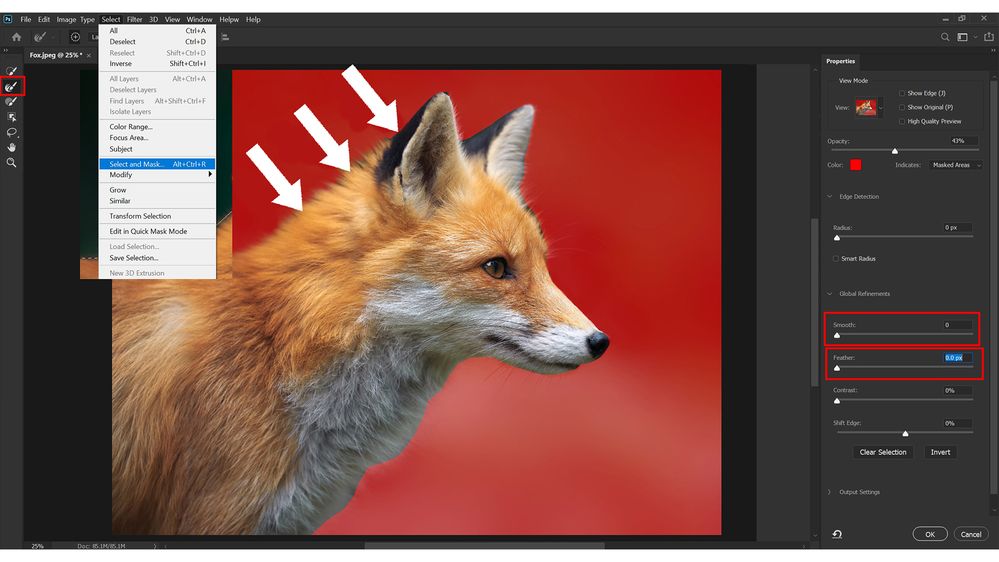
❹ The selection might not look perfect at first, but we can refine it by using the Refine Edge Brush available in the Select and Mask window.
To open the Select and Mask window, click on Select and choose Select and Mask
Note: Select the Refine Edge Brush and paint over the edges of the fox to refine the edge selection. We can further refine the selection by increasing Smooth & Feather sliders.
❺ After the selection is refined, click OK to exit the Select and Mask window.
Then Right-click (Windows) OR Ctrl-click (macOS) on the fox and choose Layer via Copy from the menu. The fox will be duplicated on a new layer as shown below
Note: You can rename Layer 1 to Fox by double-clicking on the Layer name.
❻ Add a Black & White Adjustment Layer above the Fox layer to subtract color from the image by making it grayscale
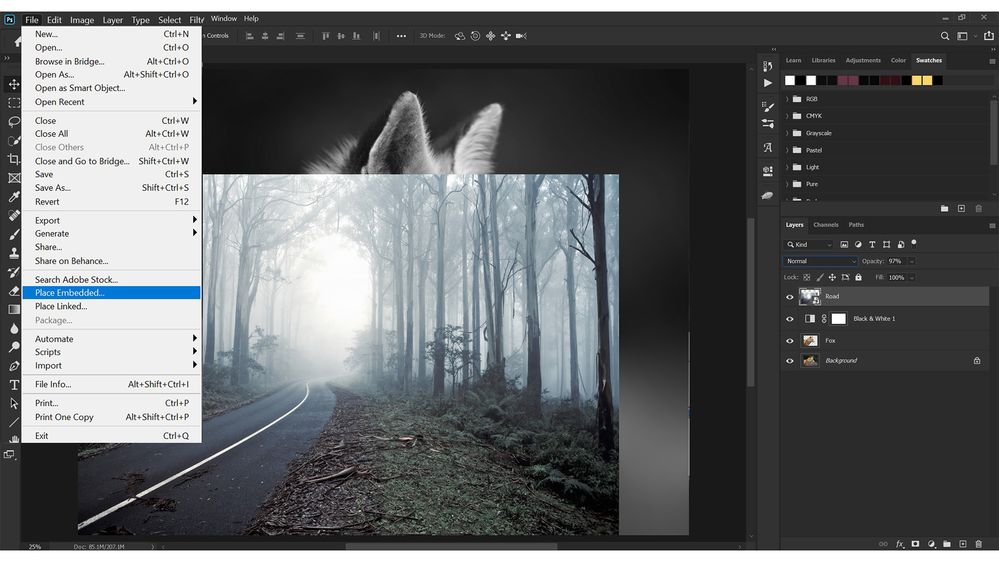
❼ Now it’s time to add the second picture, go to File and choose Place Embedded and select the sample image of a road in the woods. After you place the image, resize it and align it with the Fox accordingly as shown below
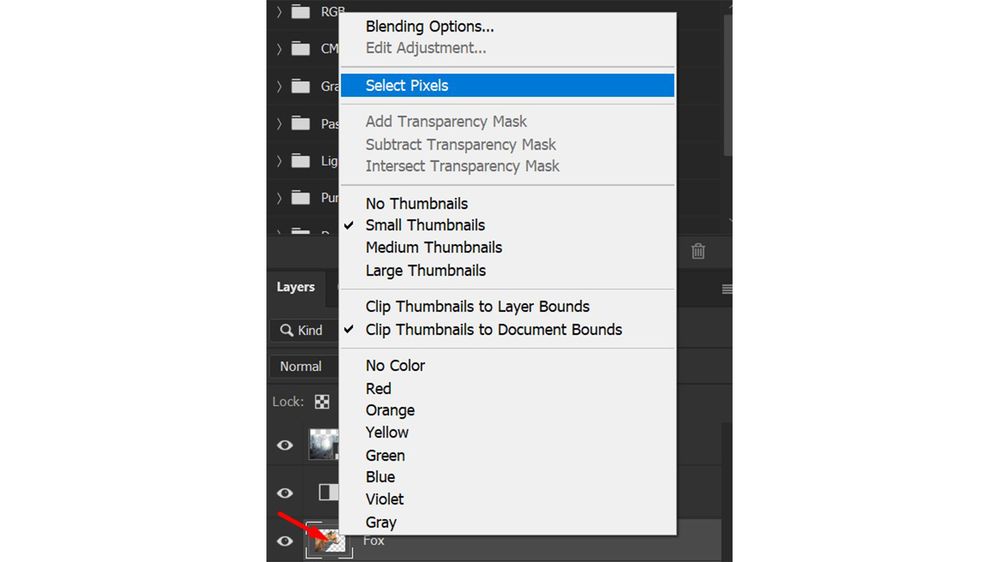
❽ Right-click (Windows) OR Ctrl-Click (macOS) on the thumbnail of the Fox layer and choose Select Pixels to make a selection
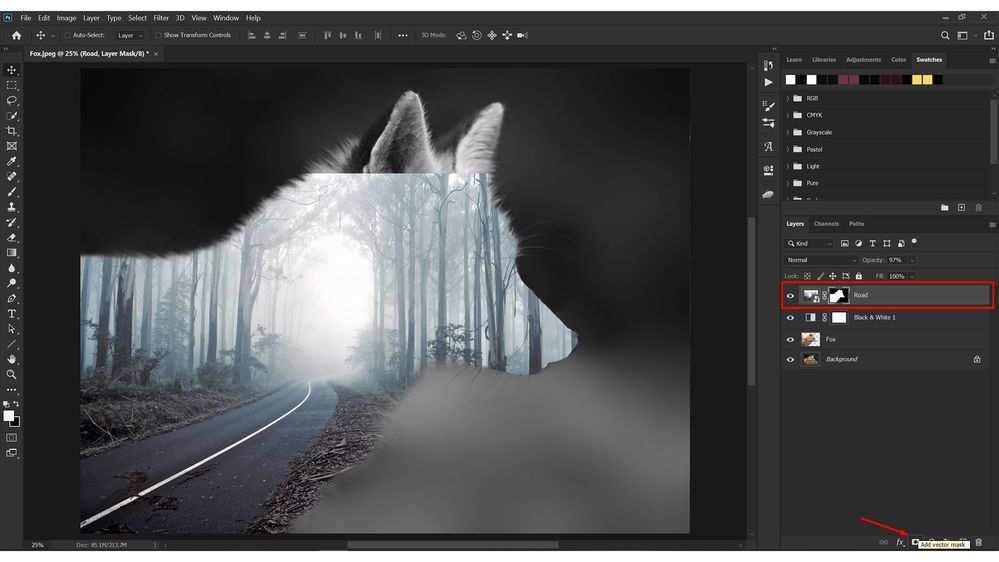
❾ After the selection is created, click on the Road layer to highlight it and add a Layer Mask
➓ Select the Brush Tool from the Toolbar, then decrease its opacity from the Options bar on top and start coloring with Black to hide the unwanted areas of the road or woods
Note: Make sure the layer mask is selected before you start painting with the Brush Tool. Always remember when it comes to Layer Masks in Photoshop “White reveals and Black conceals”.
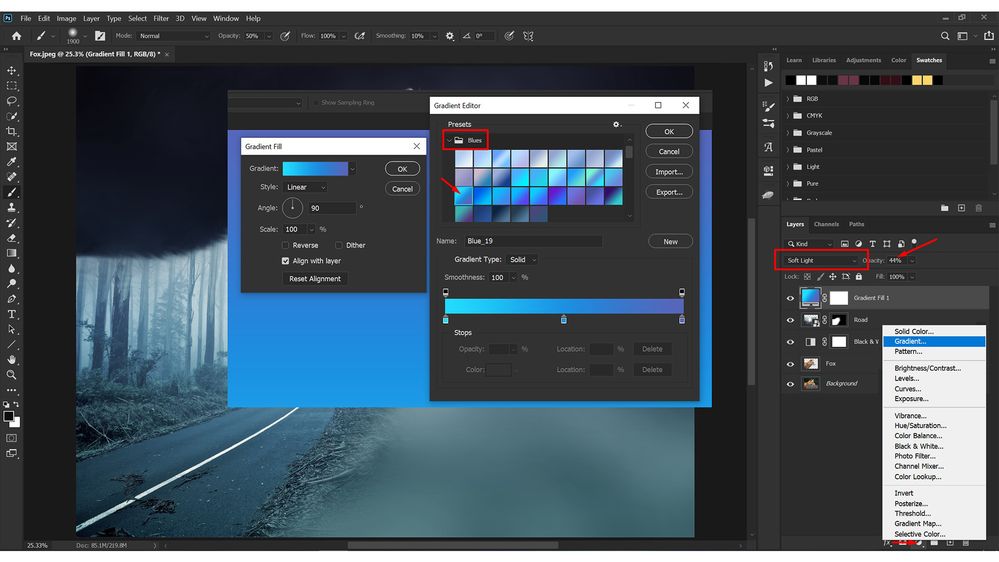
⓫ Once the layer mask is refined, you can add a Gradient Adjustment Layer to add some color to the image
Note: More adjustments layers can be added to further enhance the image.
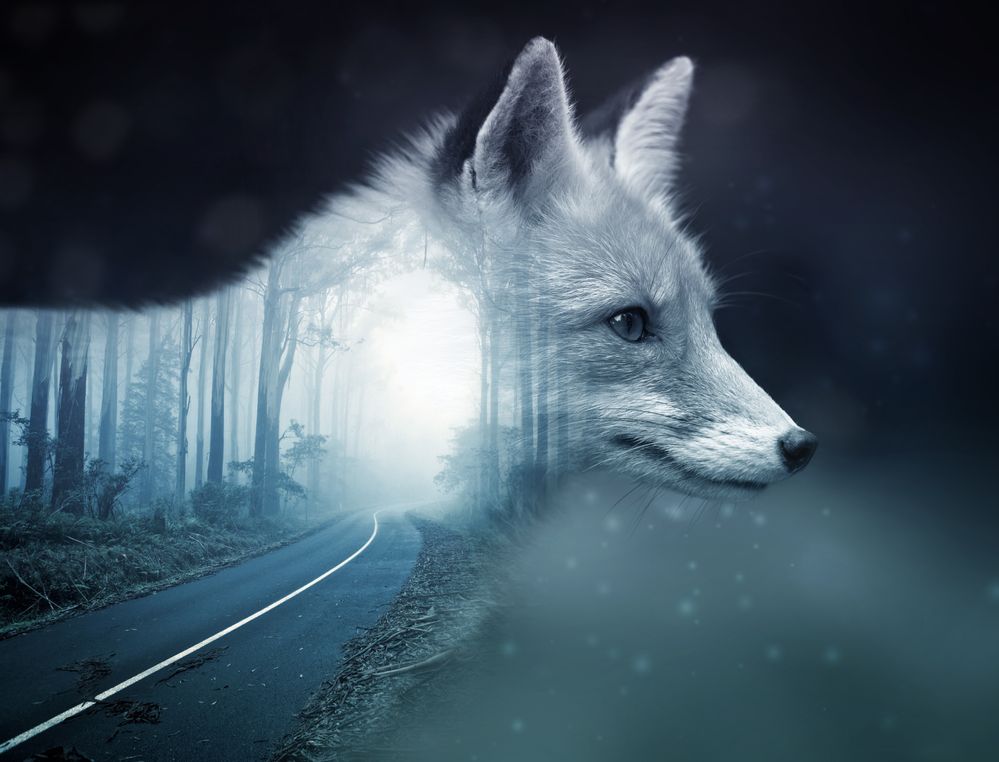
Here's the final result of our illustration
Related links:
Combine two photos into one amazing new image
Creating, opening & importing images Photoshop
How to use Pen Tool in Photoshop
Select & Mask workspace in Photoshop
Adjustment layers in Photoshop
Work with Smart Objects in Photoshop
Explore related tutorials & articles
Copy link to clipboard
Copied
I loved the photo a lot and learned something new today in Photoshop
Copy link to clipboard
Copied
Thank you for your kind words! I would love to see what you come up with using the same technique.
Regards,
Sahil
Copy link to clipboard
Copied
Thanks, glad you loved it! I would love to see what you come up with using the same technique.
Regards,
Sahil
Copy link to clipboard
Copied
Waow i like this move, ill copy it in my web site i do toturial ill take this step... I have other lesson here.
[Link removed by moderator]
Copy link to clipboard
Copied
Wow, it is a good lesson. Thank you for sharing this with us. I am doing these steps well. Also, I have another lesson here. [Link removed by moderator]
Hashan
Copy link to clipboard
Copied
Thank you so much for sharing
Copy link to clipboard
Copied
Amazing. Thank you for sharing.
Copy link to clipboard
Copied
This is a nice tutorial.
In 2016, I worked with Adobe to produce a conference here in Germany. In the Adobe Make It Area, we had Alexander Heinrichs taking pictures and then Dom Quichotte doing the editing giving the portraits this double exposure style. Being a producer and moderator... I did not have time to get my photo done. But my wife did while holding our whippet.... looks so amazing!!!
