Exit
  • Global community
    • Language:
      • Deutsch
      • English
      • Español
      • Français
      • Português
  • 日本語コミュニティ
  • 한국 커뮤니티
0

Difference Cloud vs Image Size In Creating Lightning

Contributor ,
Sep 18, 2018 Sep 18, 2018

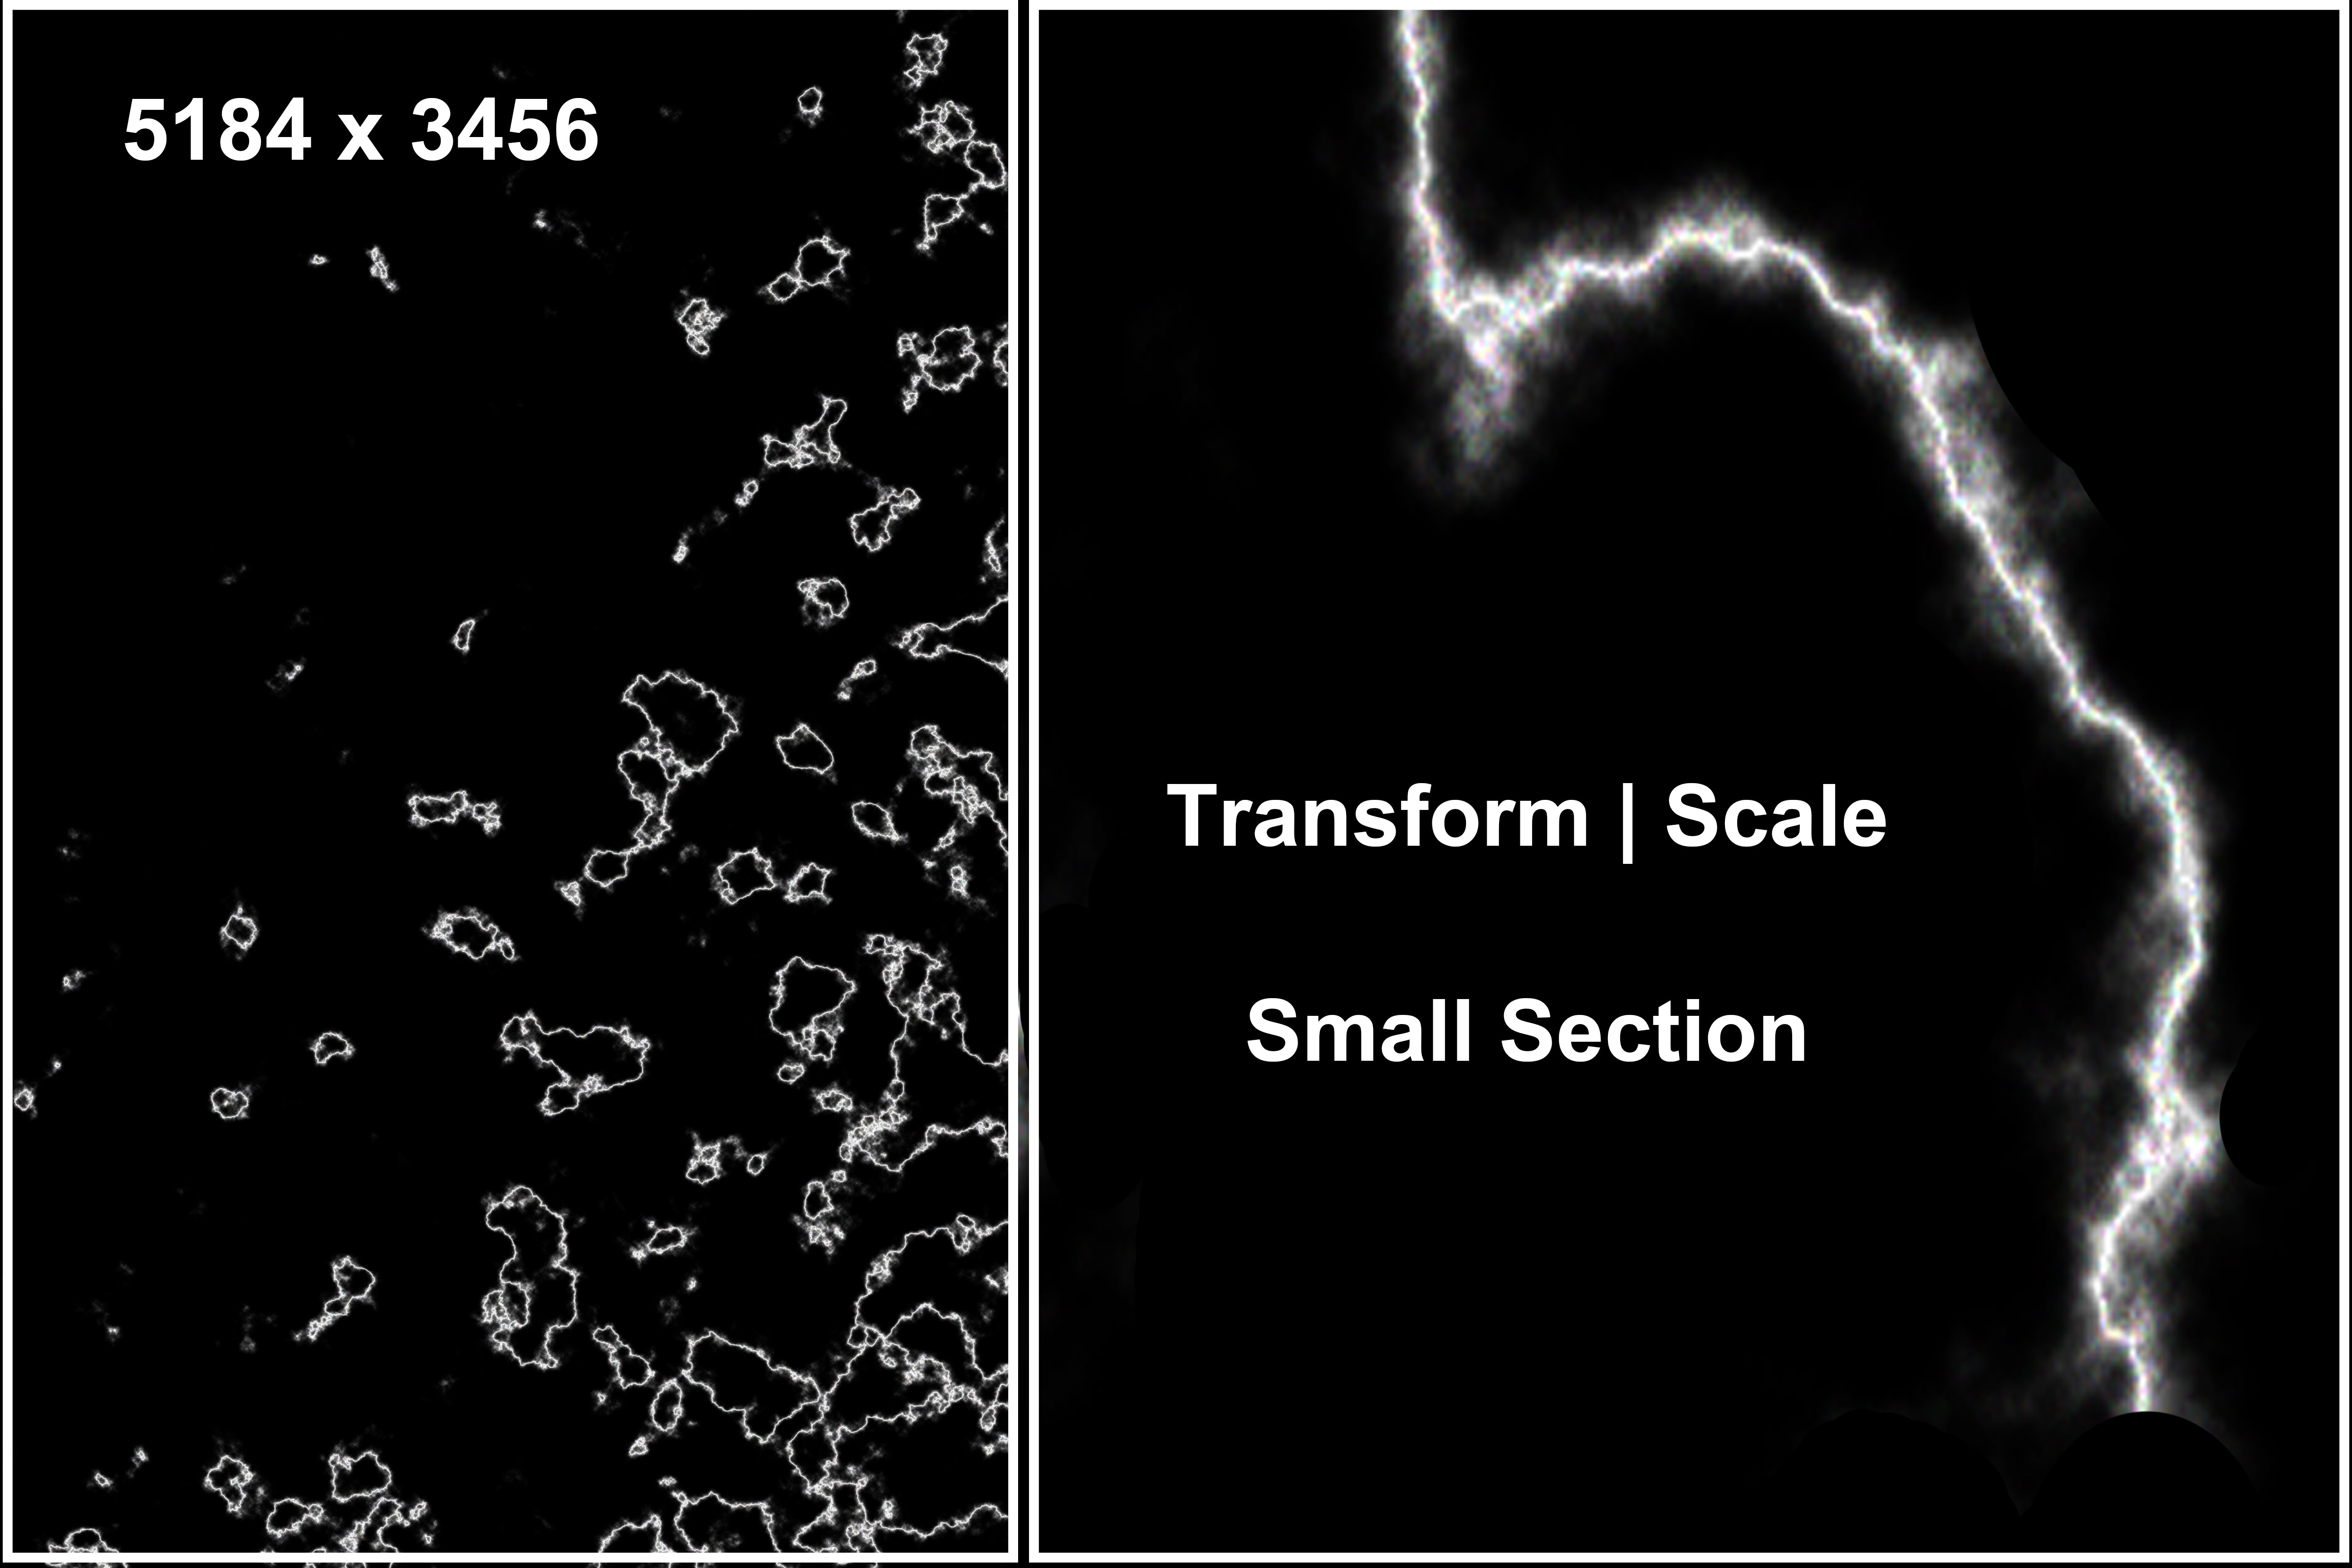
I have tried to create lightning with Difference Cloud, which works perfectly on a 500px W photo, but on a large image I cannot get it to work. On a photo of five or six MB,  this creates too many lines to use and when I try to zoom in on a small section that looks like it would do,  then enlarge it, it becomes far too pixelated. Can I get around the problem? 

I was following this: https://photoshopcafe.com/tutorials/lightning/lightning.htm
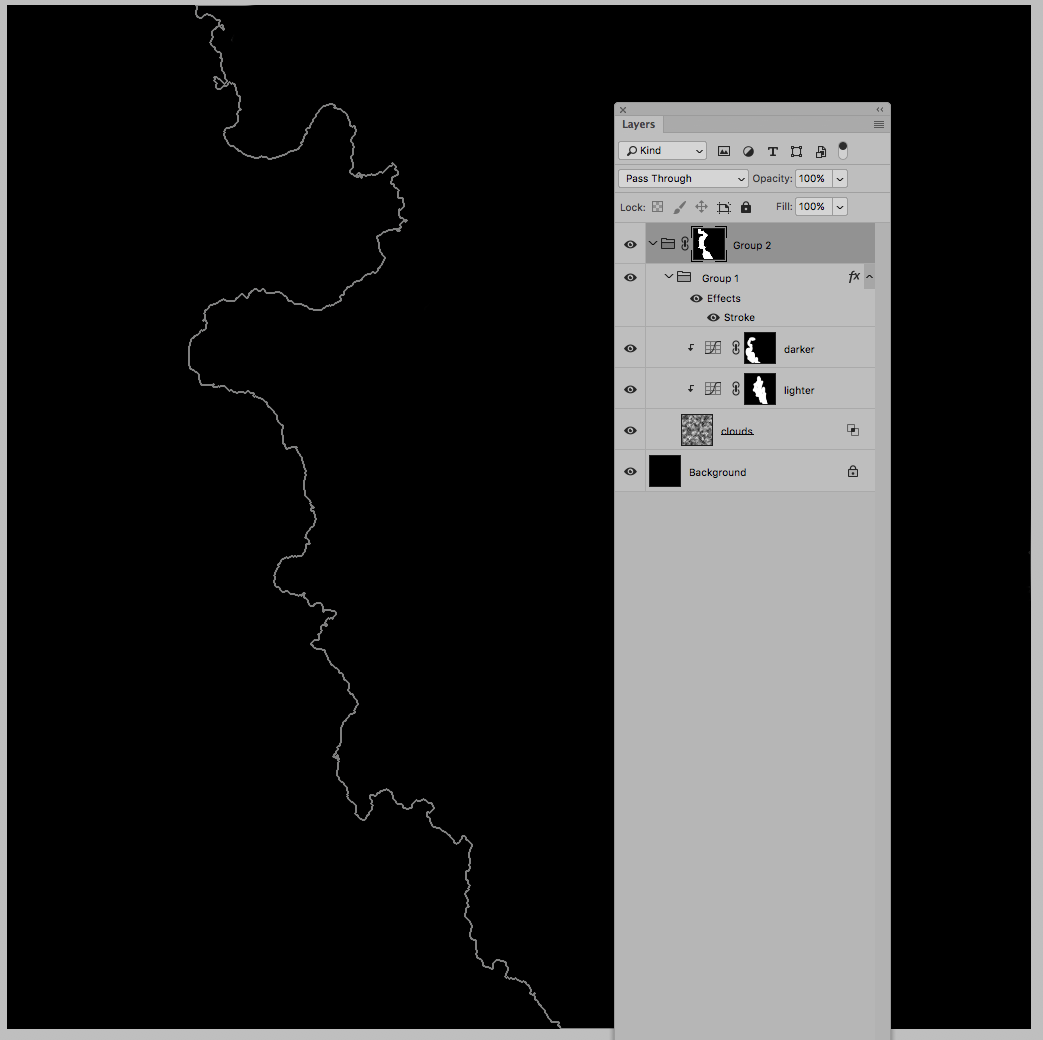
Make a new Layer

Add a black to white gradient

Difference cloud

Invert the cloud

Raise the black point with levels

Change Blend Mode to Screen

Paint out what you don’t want from the cloud layer

793
Translate
Report
Community guidelines
Be kind and respectful, give credit to the original source of content, and search for duplicates before posting. Learn more
community guidelines
Adobe
Community Expert ,
Sep 18, 2018 Sep 18, 2018

That is because effects such as cloud &  difference cloud  do not allow you to generate the effect at higher resolutions. You will have to scale the lightning larger.

Yes when you zoom in looks pixelated, but when you scale that should look better as long as you are not scaling an enormous amount. You can then sharpen afterwards if looks soft with unsharp mask or an S curve in curves if you are familiar with that.

Translate
Report
Community guidelines
Be kind and respectful, give credit to the original source of content, and search for duplicates before posting. Learn more
community guidelines
Community Expert ,
Sep 18, 2018 Sep 18, 2018

I would prefer

Filter > Render > Clouds

with a Gradient Map Adjustment Layer with a narrow white against black (and additional Adjustment. Layers if necessary).

when I try to zoom in on a small section that looks like it would do,  then enlarge it, it becomes far too pixelated.

How did you upsample?

Please post screenshots taken at View > 100%.

Translate
Report
Community guidelines
Be kind and respectful, give credit to the original source of content, and search for duplicates before posting. Learn more
community guidelines
Contributor ,
Sep 19, 2018 Sep 19, 2018

I originally used Transform and stretched the image--I hadn't found Scale, yet. Here, I used Transform | Scale on a very small portion of the image, then used Levels a second time to take out more grey. The look is more like the tutorial but still looks a bit too wispy to look realistic. I did try using Render | Clouds, instead of Difference Clouds, first, but did not come close to what looked like lightning.  Is there another way?

large.jpg

Translate
Report
Community guidelines
Be kind and respectful, give credit to the original source of content, and search for duplicates before posting. Learn more
community guidelines
Guest
Sep 19, 2018 Sep 19, 2018
Translate
Report
Community guidelines
Be kind and respectful, give credit to the original source of content, and search for duplicates before posting. Learn more
community guidelines
Contributor ,
Sep 19, 2018 Sep 19, 2018

That's a good idea and I will get the new brushes for PS.  For the moment, though, I am trying to follow a course outline, which doesn't allow for making things easy.

Translate
Report
Community guidelines
Be kind and respectful, give credit to the original source of content, and search for duplicates before posting. Learn more
community guidelines
Community Expert ,
Oct 09, 2018 Oct 09, 2018
LATEST
but still looks a bit too wispy to look realistic.

If you want »clean« lines you could try using Blend If settings and the Layer Style Stroke.

flashClousdBlendIfLayerStyleStrokeScr.png

Translate
Report
Community guidelines
Be kind and respectful, give credit to the original source of content, and search for duplicates before posting. Learn more
community guidelines