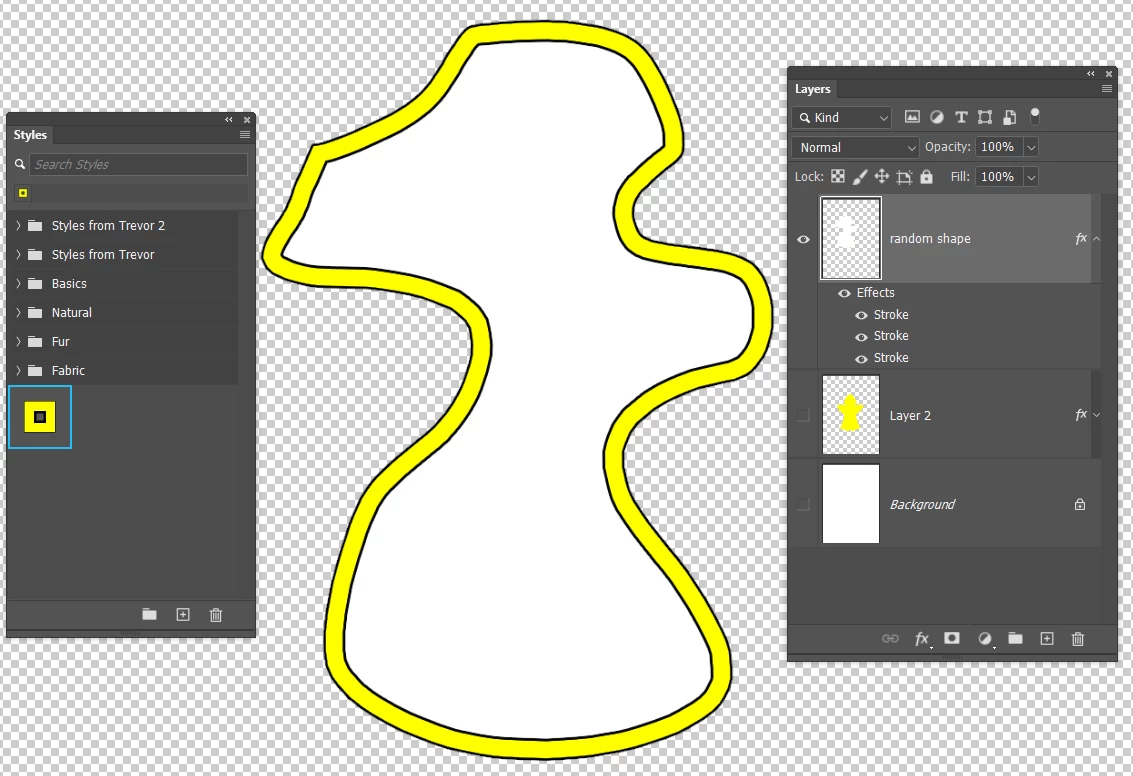
I've made the angel shape yellow so we can see what is going on.
Starting with the angel shape with transparent background, double click to open Layer Styles, and give it a thin black stroke with it set to Centre.
Layer Styles work rather like Photoshop layers. When you have multiple Strokes, Drop Shadows etc. the higher ones cover the ones beneath them. If you have never added more than one stroke in Layer Styles, you'll only see the one when you first open it. So you need to click on the + to open another.
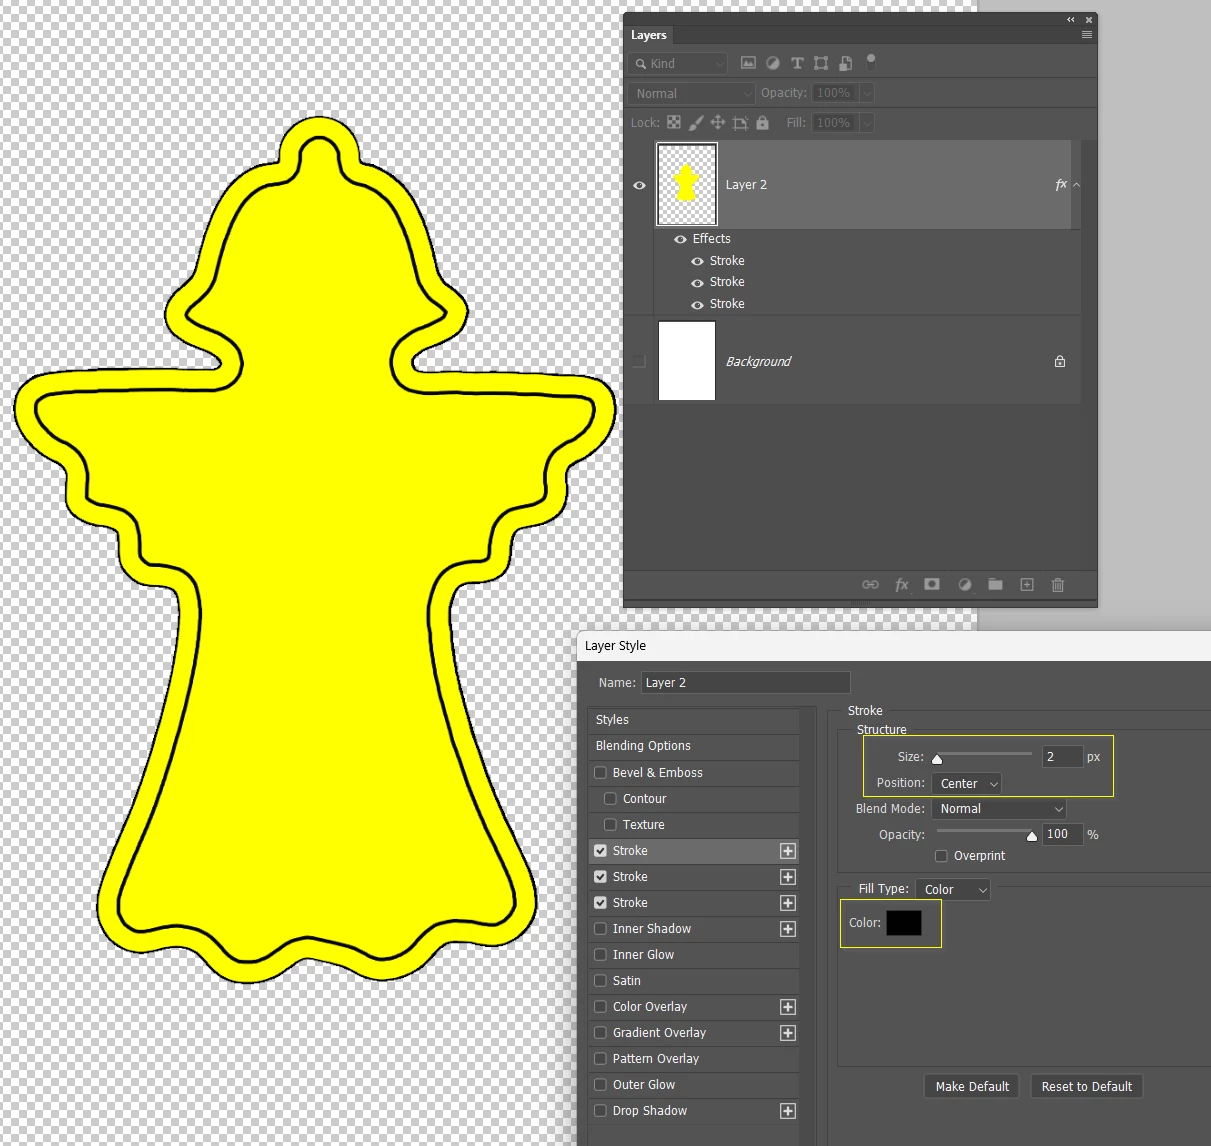
Click on the lower of the two stroke styles, make it the samer colour as the angel. Set it to Inside, and the size to whatever you want the offset to be. Note: you won't be able to see what's happening because it will be yellow on yellow, or whatever colour you are using.
Click to make a third Stroke. Select the lower one, and the color to black, the size to the value of the offset plus the width of the stroke.
Incidentally, if you make a Layer Style that you like, and might like to use again, you can save it in the Styles panel.
With the relevant layer selected, click on the New Style at the bottom of the Styles panel, and give it a name.
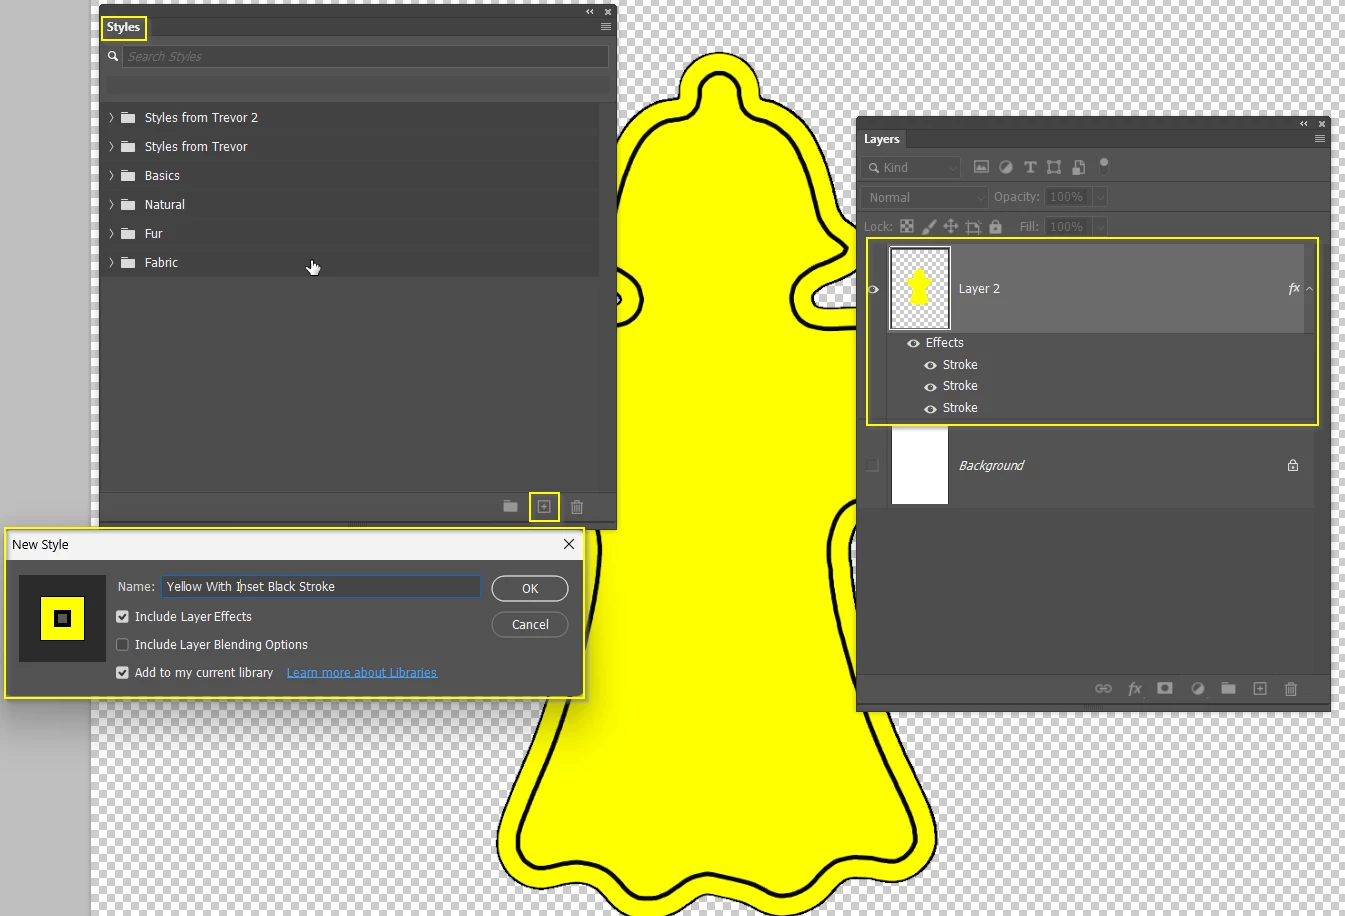
To use it again, select the layer and click on the style
Note: If you wanted the interior of the shape to be the same colour as the offset, then add a yellow Colour Overlay to the saved Layer Style.