 Adobe Community
- Home
- Photoshop ecosystem
- Discussions
- Re: Embed multiple images based on condition?
- Re: Embed multiple images based on condition?
Embed multiple images based on condition?

Copy link to clipboard
Copied
Hi, so here is my situation, i have 300+ images in a file, each image has a QR code in a png format. Based on the QR code file name, can i somehow place that QR code to its designated image, for example: B105.jpg has a QR code B105.png. I would like to somehow automate this process so that all the QR codes are embedded to its corresponding image.
Example 1:
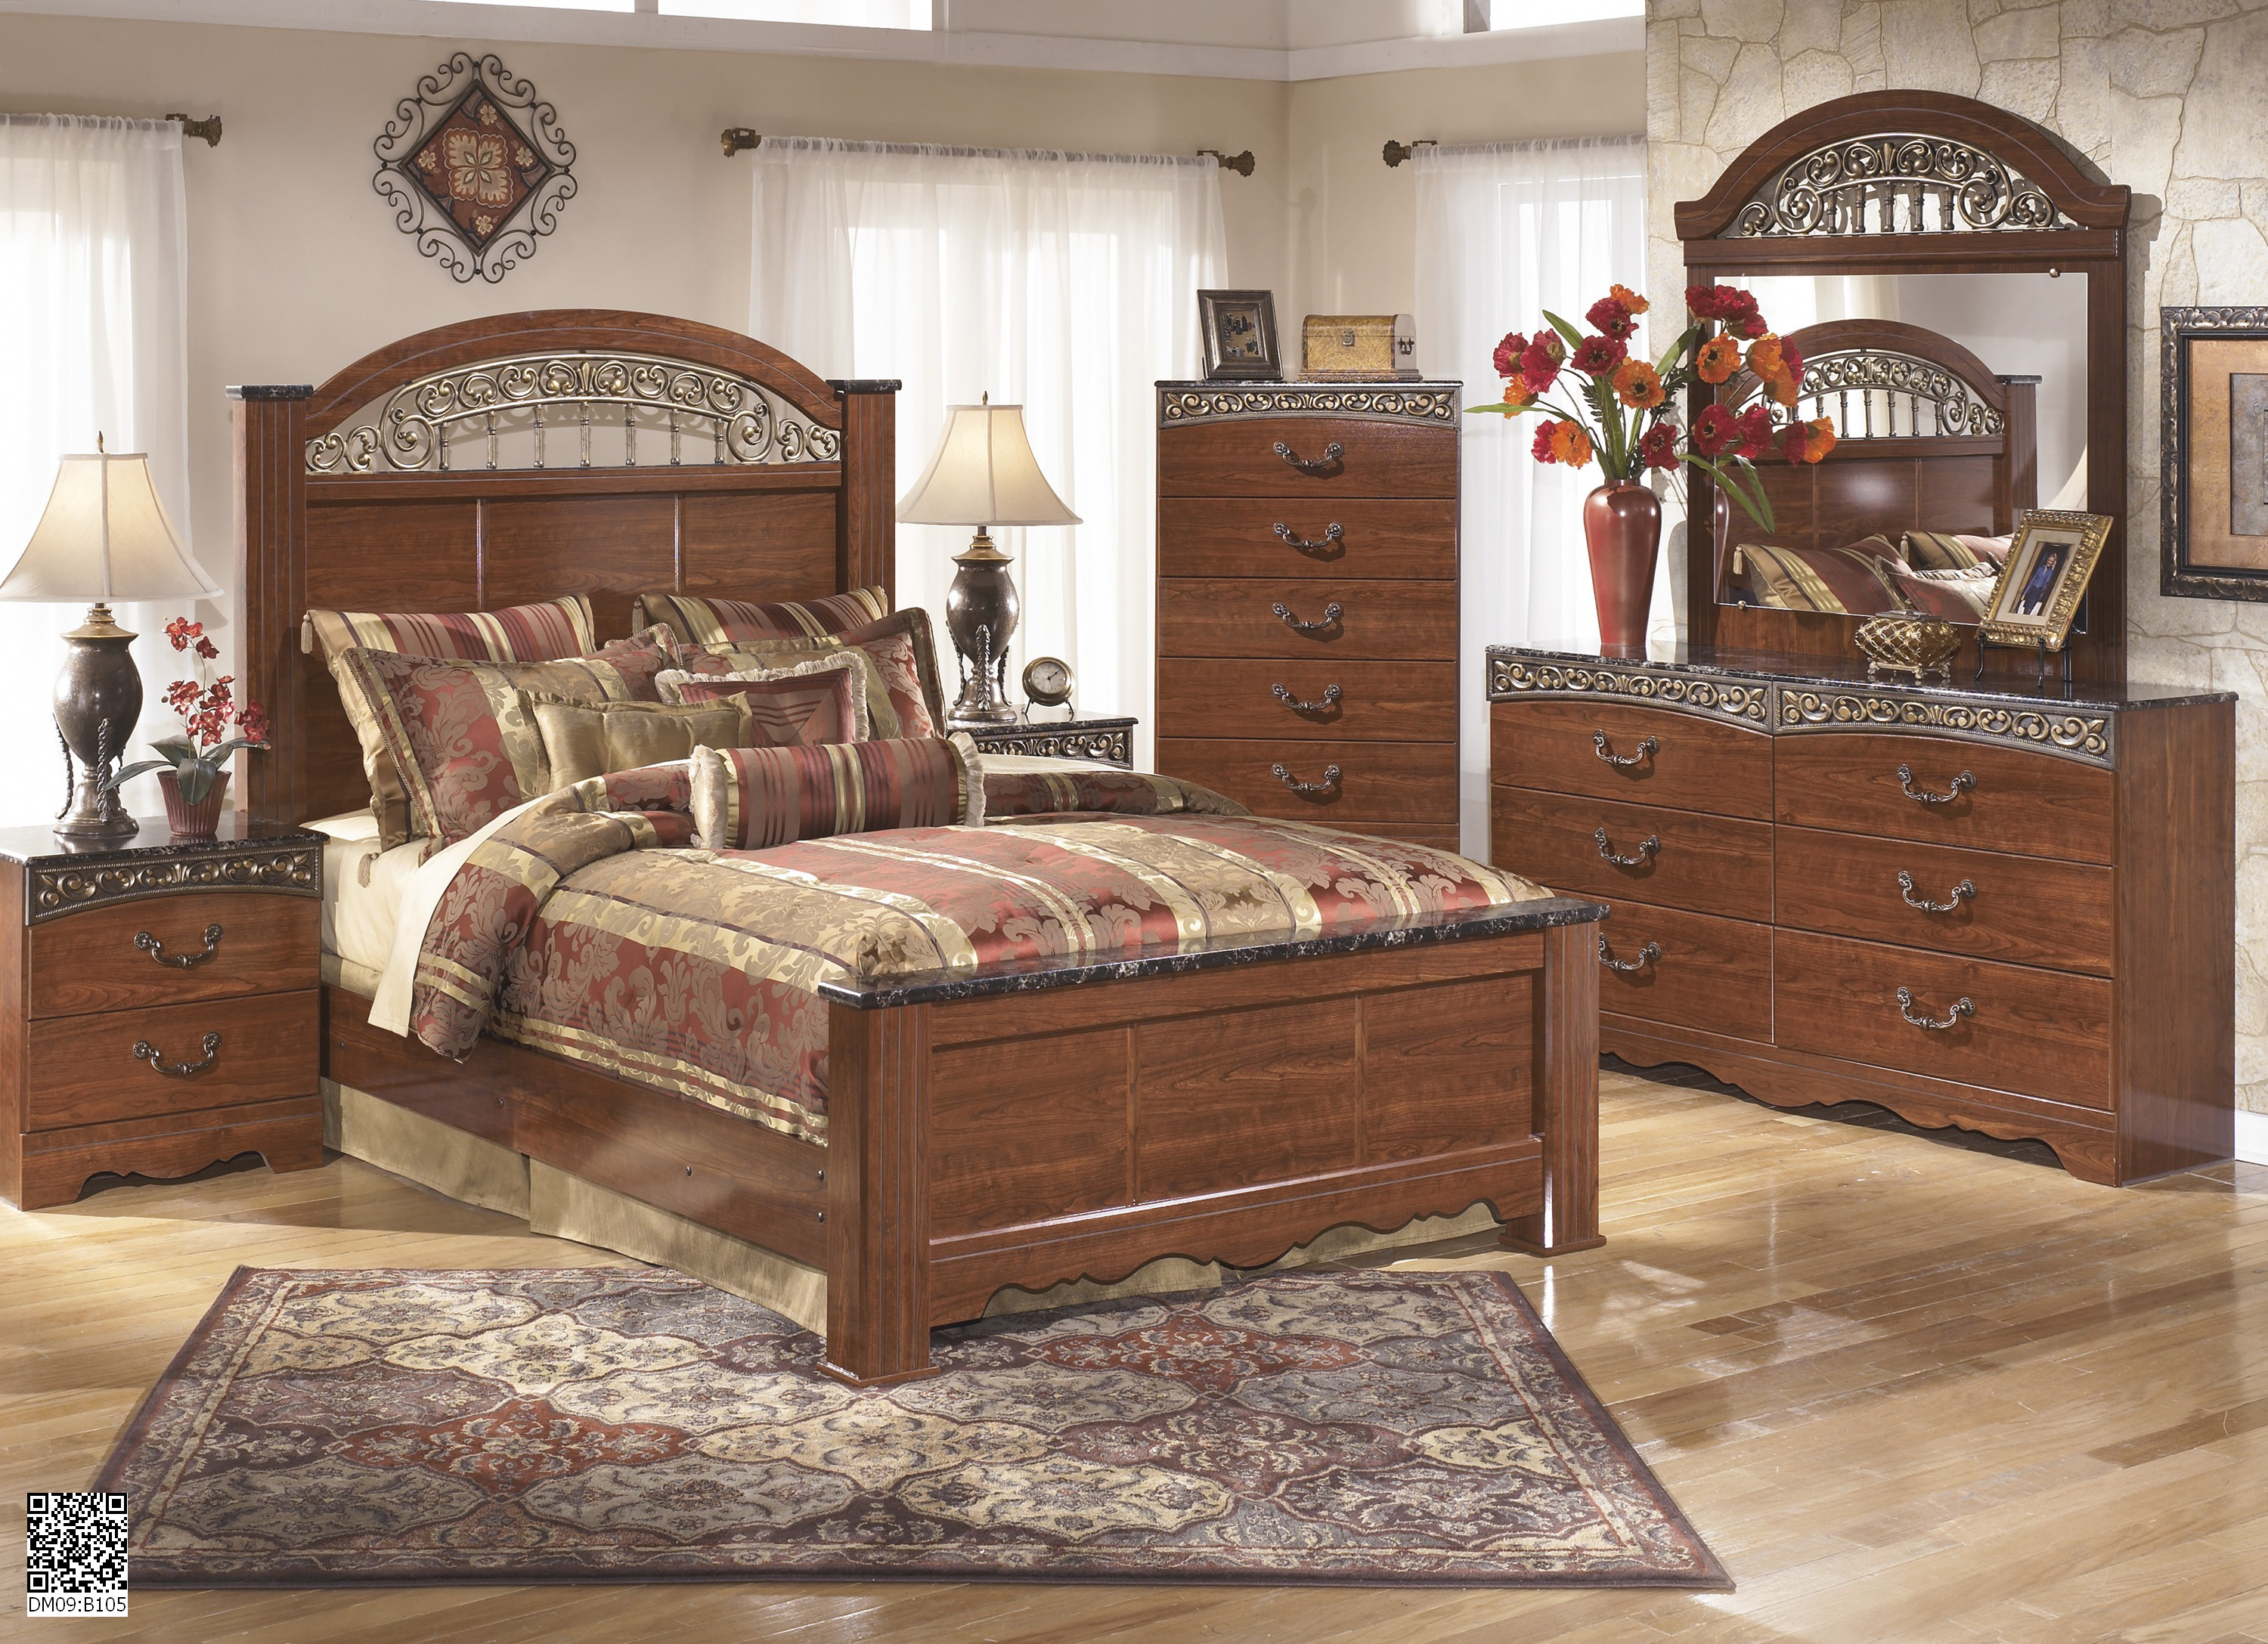
The QR codes have to be placed and aligned manually, its a tedious job, especially after doing 300+ of these. Any help would be appreciated. Thank you


Explore related tutorials & articles
 11
Replies
11
11
Replies
11

Copy link to clipboard
Copied
I think the would not be to to hard to script. If all the jpeg and png files are in the same folder or two folders one containing the Jpeg and another containing the png. The script would open the Jpeg file then place in the png image wthe the same file name and align the placed in layer to the bottom left corner of the image and save out a PSD or Jpeg in some folder. Other day SerperMerlin post an example of processing a file type in a folder. You would need to chaege how the files are processed. Changing text color in multiple .psd's with actions .
Copy link to clipboard
Copied
OK, im sorry but would you be kind enough to guide me on how to set this up to see if it executes correctly? Would this place the png file to the correct jpeg file (ex: B105.png to B105.jpeg)?
Copy link to clipboard
Copied
You would change the code to filter and Process Jpeg file not PSD file like currently coded. You would remove the code that address the open document top layer and if it is text layer change the text color. You would replace that code with code that would place in the png file with the same document name the align the smart object layer to the bottom left corner. you would change the save code to save code that would save file type you want into the output location you want.

Copy link to clipboard
Copied
Here's a script that should help you out.
Select JPEG images,
Select PNG images,
Select folder where final PSDs should be saved,
Define overlay placement (top-left, top-bottom etc),
Define overlay margins.
Enjoy!!!
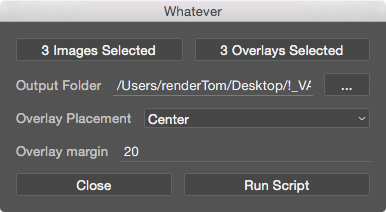
P.S.You can get nicer formatted code version here: PSD Script: Add overlay file — Bitbucket
// Name: Add Overlay.jsx
// Version: 1.0
// Release Date: 2016 09 27
//
// Developer: Tomas Sinkunas
// URL: www.rendertom.com
//
// Description:
// Select bunch of JPEG and PNG files. Script will run and add overlay
// PNG image on corresponding JPEG file. You also have options to define
// overlay placement (top-left, top-right etc) as well as overlay margins.
// Final file will be saved to PSD file.
//
//
// This script is provided "as is," without warranty of any kind,
// expressed or implied. In no event shall author be held liable
// for any damages arising from the use of this script.
addOverlay();
function addOverlay() {
#target photoshop
var config = {
imageFilesArray : [],
overlayFilesArray : [],
outputFolder : "",
placement : 0,
margin: 20,
}
buildUI();
function buildUI() {
var btnSize = 24;
var win = new Window('dialog', "Whatever");
win.spacing = 10;
win.alignChildren = ["fill", "fill"];
win.group1 = win.add("group");
win.btnImages = win.group1.add("button", undefined, "Select Images");
win.btnOverlays = win.group1.add("button", undefined, "Select Overlays");
win.group2 = win.add("group");
win.group2.add('statictext', undefined, "Output Folder");
win.etOutputFolder = win.group2.add('edittext', undefined, config.outputFolder);
win.btnSelectFolder = win.group2.add('button', undefined, "...");
win.group3 = win.add("group");
win.group3.add('statictext', undefined, "Overlay Placement");
win.ddPlacement = win.group3.add('dropdownlist', undefined, ["Center", "Top-Left", "Top-Right", "Bottom-Left", "Bottom-Right"]);
win.group4 = win.add("group");
win.group4.add('statictext', undefined, "Overlay margin");
win.margin = win.group4.add('edittext', undefined, "20");
win.group5 = win.add("group");
win.btnCloseWindow = win.group5.add('button',undefined, "Close", {name:'close'});
win.btnRunScript = win.group5.add('button',undefined, "Run Script", {name:'run Script'});
// Set Default values
win.ddPlacement.selection = config.placement;
win.margin.text = config.margin;
// Resize Buttons
win.etOutputFolder.preferredSize.width = 200;
win.btnSelectFolder.preferredSize.width = btnSize*2;
win.btnImages.alignment =
win.btnOverlays.alignment =
win.ddPlacement.alignment =
win.margin.alignment =
win.btnCloseWindow.alignment =
win.btnRunScript.alignment = ["fill", "fill"];
// button actions
win.btnImages.onClick = function () {
var imageFiles = selectFiles(true, "jpg");
if (imageFiles === null) return;
this.text = imageFiles.length + " Images Selected";
config.imageFilesArray = imageFiles;
}
win.btnOverlays.onClick = function () {
// var designFiles = selectFiles(".psb");
var overlayFiles = selectFiles(true, "png");
if (overlayFiles === null) return;
this.text = overlayFiles.length + " Overlays Selected";
config.overlayFilesArray = overlayFiles;
}
win.btnSelectFolder.onClick = function() {
var saveFolder = Folder.selectDialog("Select output folder");
if (saveFolder) {
win.etOutputFolder.text = saveFolder.fsName;
config.outputFolder = saveFolder.fsName;
}
}
win.btnCloseWindow.onClick = function() {
win.close();
}
win.btnRunScript.onClick = function() {
if (config.imageFilesArray.length === 0) {
alert("No Image Files selected\nPlease select some image files and try again");
win.btnImages.active = true; return;
} else if (config.overlayFilesArray.length === 0) {
alert("No Overlay Files selected\nPlease select some overlay files and try again");
win.btnOverlays.active = true; return;
} else if (config.outputFolder === "" || !Folder(config.outputFolder).exists) {
alert("Output Folder does not exist\nPlease set Output Folder and try again");
win.etOutputFolder.active = true; return;
} else if (isNaN(win.margin.text)) {
alert("Please enter valid margin value");
win.margin.active = true; return
}
// check if same amount of files is selected
if (config.imageFilesArray.length !== config.overlayFilesArray.length) {
alert("You must select same amount of Image files as Overlay files.")
return;
}
config.placement = win.ddPlacement.selection.index;
config.margin = win.margin.text;
win.close();
main();
}
win.show();
}
function main() {
for (var i = 0, il = config.imageFilesArray.length; i < il; i ++) {
var imageDoc = app.open(config.imageFilesArray);
var overlayDoc = app.open(config.overlayFilesArray);
var qr = overlayDoc.layers[0].duplicate(imageDoc);
overlayDoc.close(SaveOptions.DONOTSAVECHANGES);
positionLayer(qr);
var docName = decodeURI ( activeDocument.name );
var dot = docName.lastIndexOf(".");
var saveName = docName.slice(0, dot);
var myFile = config.outputFolder + "/" + saveName;
savePSD(myFile);
imageDoc.close();
}
alert("Done")
}
function positionLayer(layer) {
try {
var bounds = layer.bounds;
var layerWidth = bounds[2].value - bounds[0].value;
var layerHeigth = bounds[3].value - bounds[1].value;
var offsetX = bounds[0].value;
var offsetY = bounds[1].value;
var docWidth = app.activeDocument.width.value;
var docHeight = app.activeDocument.height.value
var newPos = [];
if (config.placement === 0) { // center
newPos[0] = (docWidth / 2) - offsetX - layerWidth/2;
newPos[1] = (docHeight / 2) - offsetY - layerHeigth/2;
} else if (config.placement === 1) { // top-left
newPos[0] = config.margin - offsetX;
newPos[1] = config.margin - offsetY;
} else if (config.placement === 2) { // top-right
newPos[0] = docWidth - config.margin - offsetX - layerWidth;
newPos[1] = config.margin - offsetY;
} else if (config.placement === 3) { // bottom-left
newPos[0] = config.margin - offsetX;
newPos[1] = docHeight - config.margin - offsetY - layerHeigth
} else if (config.placement === 4) {
newPos[0] = docWidth - config.margin - offsetX - layerWidth;
newPos[1] = docHeight - config.margin - offsetY - layerHeigth
}
layer.translate(newPos[0], newPos[1]);
} catch (e) {
alert(e.toString() + "\nLine: " + e.line.toString());
}
}
function savePSD(saveFile) {
psdSaveOptions = new PhotoshopSaveOptions();
psdSaveOptions.embedColorProfile = true;
psdSaveOptions.alphaChannels = true;
activeDocument.saveAs(File(saveFile), psdSaveOptions, false, Extension.LOWERCASE);
}
function selectFiles (multiSelect, extension) {
var theString = "Please select files";
if ($.os.search(/windows/i) != -1) {
var theFiles = File.openDialog (theString, "*." + extension, multiSelect);
} else {
var theFiles = File.openDialog (theString, getFiles, multiSelect);
}
function getFiles(theFile) {
var re = new RegExp("\.(" + extension + ")$","i");
if (theFile.name.match(re) || theFile.constructor.name == "Folder") {
return true
}
}
return theFiles;
}
}
Copy link to clipboard
Copied
Hi Tomas, sorry this will be a noob question for sure, how do i execute this? Ive never used scripts outside of excel, so would you be kind enough to guide me through this? Also is it possible for the script to read the file name to match the png with the jpeg? For example, I have 300 jpeg images, as well as 300 QR codes in png format, would it know to match B105.png with B105.jpeg? Thank you in advance
Copy link to clipboard
Copied
A script can be run from any folder. However the one listed in Photoshop's menu File>Scripts>ScriptName are normally in your Photoshop folder ...\Photoshop version\Presets\Scripts\ You may need Admin permission to copy the script into there and Photoshop will need to be started after the script is copied into that folder.
Copy link to clipboard
Copied
Hi Walida. Yes, this is rather noob quesstion, so please excuse me if I miss step:
1. Copy/paste provided code (line 1 to 286) and paste it into text editor.
2. Save file as "awesome script.jsx".
3. In Photoshop go File -> Scripts -> Browse and select "awesome script.jsx".
4. Script window should appear as in screenshot in previous post.
5. Click "Select Images" in the interface and select your JPEG images;
6. Click "Select Overlays" in the interface and select PNG files (these are your QR codes);
7. In the script interface set the Output Folder to where newly generated PSD files should be saved. Click on "..." and select a folder;
8. Define where QR overlay image should be placed on the image (top-left, top-right, etc) in "Overlay Placement" section.
9. Define margins for the QR image. This will make sure QR images are not stuck at the edge and will give then some space.
10. Click Run Script and watch the magic happen.
Note that PNG image (QR code) names doesn't have to be the same as JPEG images. However, make sure they have same order. Meaning:
JPEG images: image_01.jpeg, image_02.jpeg, image_05.jpeg, image_09.jpg;
PNG Images: overlay_01.png, overlay_03.png, overlay_08.png, overlay_09.png;
Names do not match, as you can see. However they are in same order. So script should work just fine. But to be safe, make sure you have same names both for JPEGs and PNG images - this way you will be certain that correct QR images are applied on JPEG images.
Let me know if you have more questions.

Copy link to clipboard
Copied
Tomas and can make 2 changes to the script
The first change is to save the file in jpg
The second change is to select one Watemark and apply it to all selected photos.
Copy link to clipboard
Copied
You may be better off just having a simple script that will place and resize your watermark for the current document. With such a Script you could use in an action. The Acton could easily add a layer style to the placed watermark and even preposition it over the canvas. Once you have your custom action that could be batch using some like the Image Processor Pro plug-in you can download from the web. You could batch all your image files and save as many image file types you need that are the size you need all with your watermark correctly sized the image file.
This simple script will place in your watermark on your image bottom right corner. You need toe change the first vat to you png log file. You can optionally change the next two var to change the size of the logo and the corner margins.
#target photoshop;
app.bringToFront();
var logoFile = "~/Desktop/JJMack.png"; // Watermark file should be large for resize down works better than up
var LogoSize = 10; // percent of document height to resize Watermark to
var LogoMargin = 1; // percent of Document height the Watermark should have as a margin
placeWatermark(logoFile, LogoSize, LogoMargin); // Place Watermark into the bottom right of document
function placeWatermark(Image,Size,Margin){
if(!documents.length) return; // if no document return
try{
var doc = app.activeDocument; // set Doc object to active document
app.displayDialogs = DialogModes.NO; // Dialog off
var strtRulerUnits = app.preferences.rulerUnits; // Save Users ruler units
var strtTypeUnits = app.preferences.typeUnits; // Save Users Type units
app.preferences.rulerUnits = Units.PIXELS; // work with pixels
app.preferences.typeUnits = TypeUnits.PIXELS; // work with pixels
var fileObj = new File(Image); // the passed file
if(!fileObj.exists){ // If file does not exits tell user
alert(fileObj.name + " does not exist!");
return;
}
placeFile(fileObj); // Place in file the Watermark png file
activeDocument.activeLayer.resize(100 ,100,AnchorPosition.MIDDLECENTER); // Insure Place did not scale layer
var SB = activeDocument.activeLayer.bounds; // get layers bounds
var layerHeight = SB[3] - SB[1]; // get layers height
var resizePercent = (100/layerHeight)*(Size/100*doc.height.value); // Percent to resize by
activeDocument.activeLayer.resize(resizePercent ,resizePercent,AnchorPosition.MIDDLECENTER); // Resize width and height by percentage
SB = activeDocument.activeLayer.bounds; // get resized layers bounds
activeDocument.activeLayer.translate(-SB[0].value,-SB[1].value); // Move resized layer to top left canvas corner
var LayerWidth = (SB[2].value - SB[0].value);
var LayerHeight = (SB[3].value - SB[1].value);
marginSize = Margin/100*doc.height.value; // move resized watermark into the document lower right corner with some margin
activeDocument.activeLayer.translate((doc.width.value -marginSize - LayerWidth),( doc.height.value -marginSize - LayerHeight));
}
catch(e) { alert(e + ': on line ' + e.line); } // inform user of error
finally{
app.preferences.rulerUnits = strtRulerUnits; // Restore user ruler units
app.preferences.typeUnits = strtTypeUnits; // Restore user type units
};
};
function placeFile(placeFile) {
var desc21 = new ActionDescriptor();
desc21.putPath( charIDToTypeID('null'), new File(placeFile) );
desc21.putEnumerated( charIDToTypeID('FTcs'), charIDToTypeID('QCSt'), charIDToTypeID('Qcsa') );
var desc22 = new ActionDescriptor();
desc22.putUnitDouble( charIDToTypeID('Hrzn'), charIDToTypeID('#Pxl'), 0.000000 );
desc22.putUnitDouble( charIDToTypeID('Vrtc'), charIDToTypeID('#Pxl'), 0.000000 );
desc21.putObject( charIDToTypeID('Ofst'), charIDToTypeID('Ofst'), desc22 );
executeAction( charIDToTypeID('Plc '), desc21, DialogModes.NO );
};
Copy link to clipboard
Copied
Your script is fine
but I would use to Tomas which I think is more comprehensive for my needs.
Copy link to clipboard
Copied
Please start new post with your request, because it's different from what OP requested.

 AdChoices