Extreme Cut Out
Copy link to clipboard
Copied
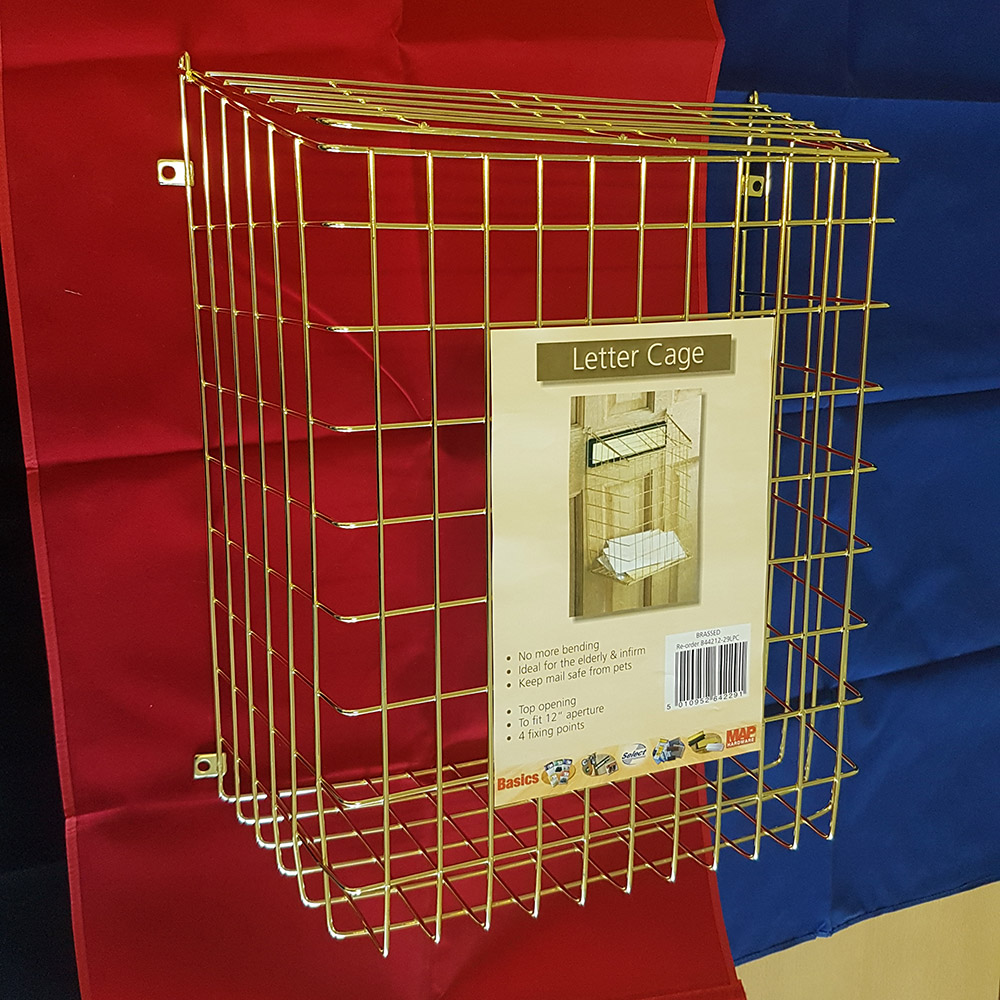
I basically have this picture that I want to cut the product out from, but it is proving to be one hell of a challenge.
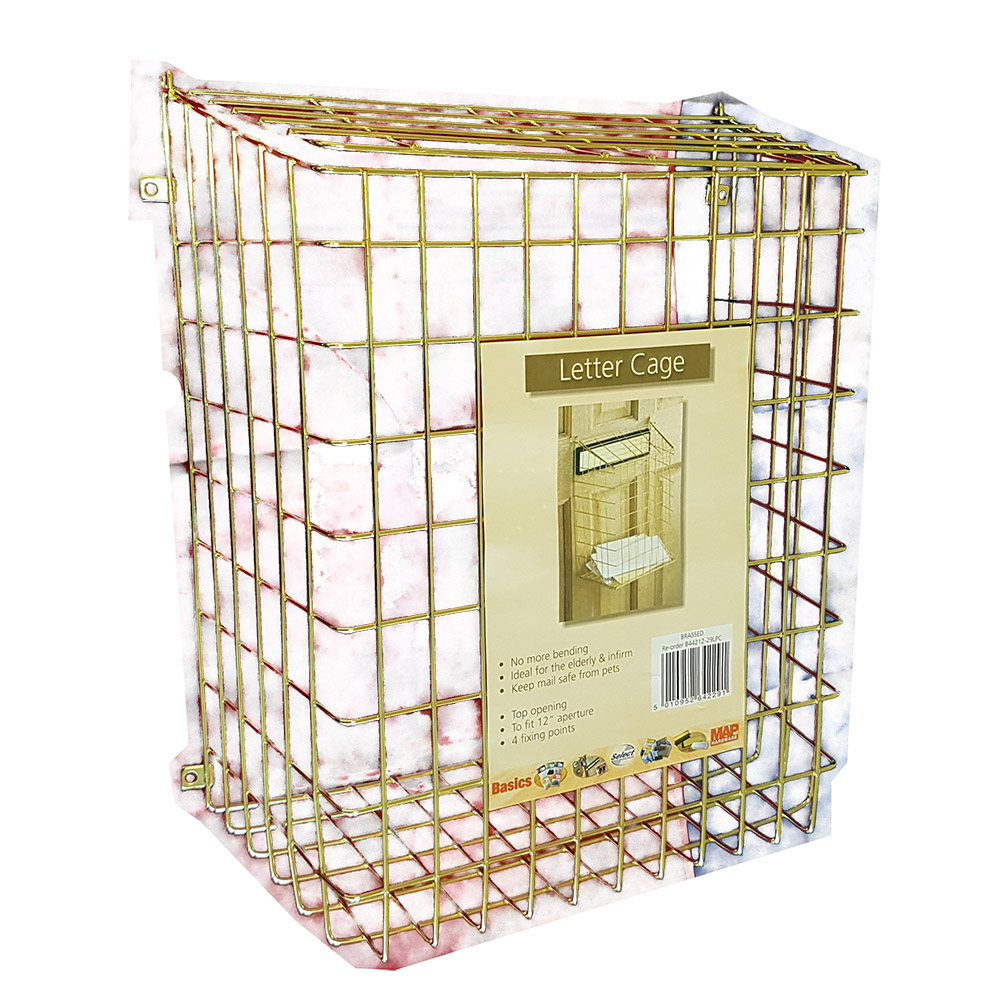
I've tried background eraser which does quite well but still leaves half transparent cut outs and I need this product to go again a solid white background.
Quick selection is just terrible for me and just keeps grabbing big bulks. I don't want to cut this out by hand... it would take hours.
Any help would be extreme appreciated,
Pictures below... The second is the best I could get using the background eraser.
Thanks ![]()


Explore related tutorials & articles
Copy link to clipboard
Copied
Your issue is that it is highly reflective, so you're getting a lot of the background color in the subject. I would suggest you use channels to create a mask to separate the high contrast areas. Then go back and clean up. since it's mostly fairly straight lines, the pen tool would be very to use to make selections and do the clean up.
Copy link to clipboard
Copied
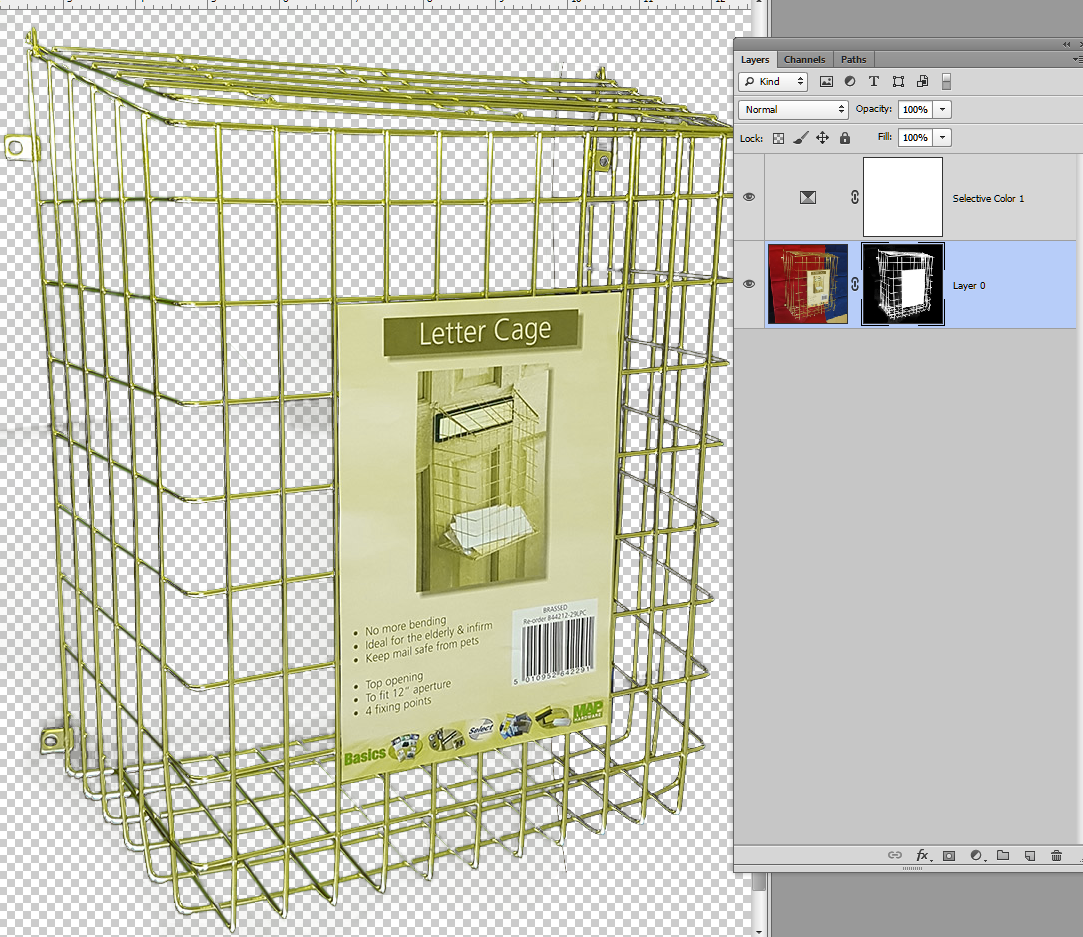
I didn't complete this as it is a bit time consuming but...it should get you started.
I started making color range selections for the red and blue and used that for a mask. Painted out the other areas as best I could quickly using black on the mask. Using white on the mask I painted in the red wires that were masked out by the color range selections. Then I used a Selective Color adjustment layer to change the red color reflected on the wires.

Copy link to clipboard
Copied
Wow, you guys are superb at this, I just need to get my head around all the masks, at least now I know what would be the best way to tackle it. I really appreciate your help as well as 'Chuck Uebele'. Great job guys! ![]()
Copy link to clipboard
Copied
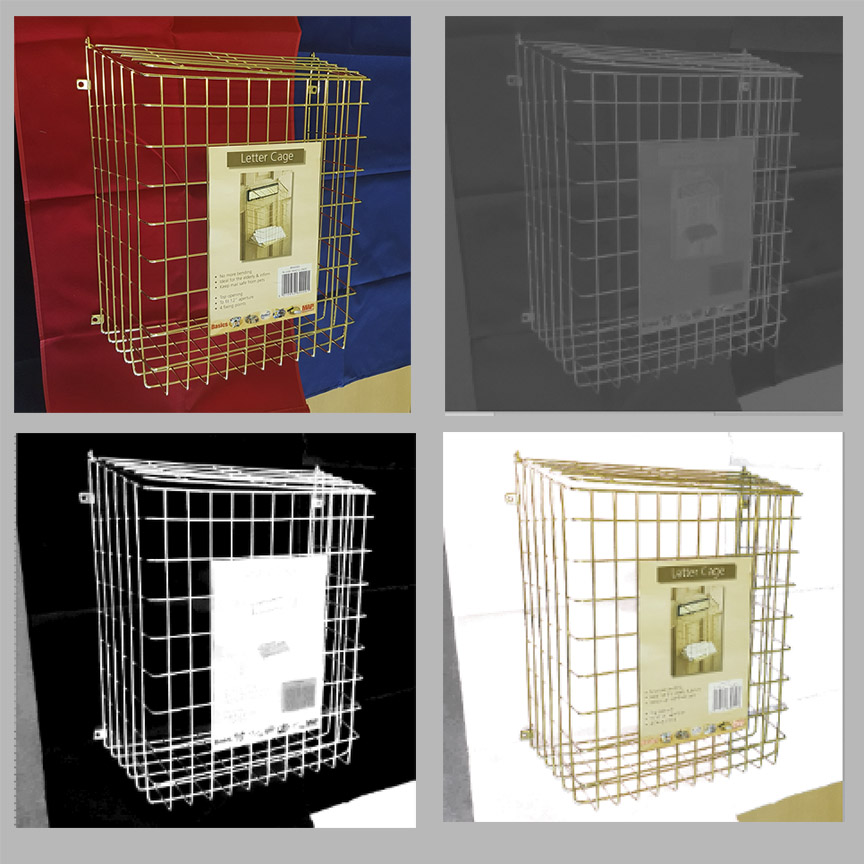
Another approach would be to use LAB to create the mask quickly.
1. Open the image file and duplicate the layer
2. Add a blank layer below the dupe layer and fill with white.
3. Change the mode to Lab Color (Do not flatten)
4. Choose Channels
5. Choose Image > Calculations
Source 1 Channel: a Checkmark: Invert
Source 2 Channel: b
Blending: Multiply
6. The result, as an alpha channel is Image #2 below
7. Choose Curves, click on Auto and then increase the contrest
8. The result is Image #3 below
9. Use the Alpha channel as a mask on the lop layer in the Layers panel
10. The result is Image #4 below
11. Return to RGB (Do not flatten)
11. Use Brush for final touch up the mask, in the object's tabs and label, for example

