Your post seemed to indicate that you did not want to add anything new to the sides of the image. In that case Content-Aware Scale might be an option. Content-Aware Scale allows you to alter the dimensions of an image – to fill a larger or smaller area -- while leaving parts of the picture unchanged. For example, you may now make a photograph wider, narrower, taller and/or shorter while leaving the images of people in the picture undistorted.
Sometimes Content-Aware Scale will automatically locate the objects not to be altered – such as people or wagon wheels – but don’t count on it.
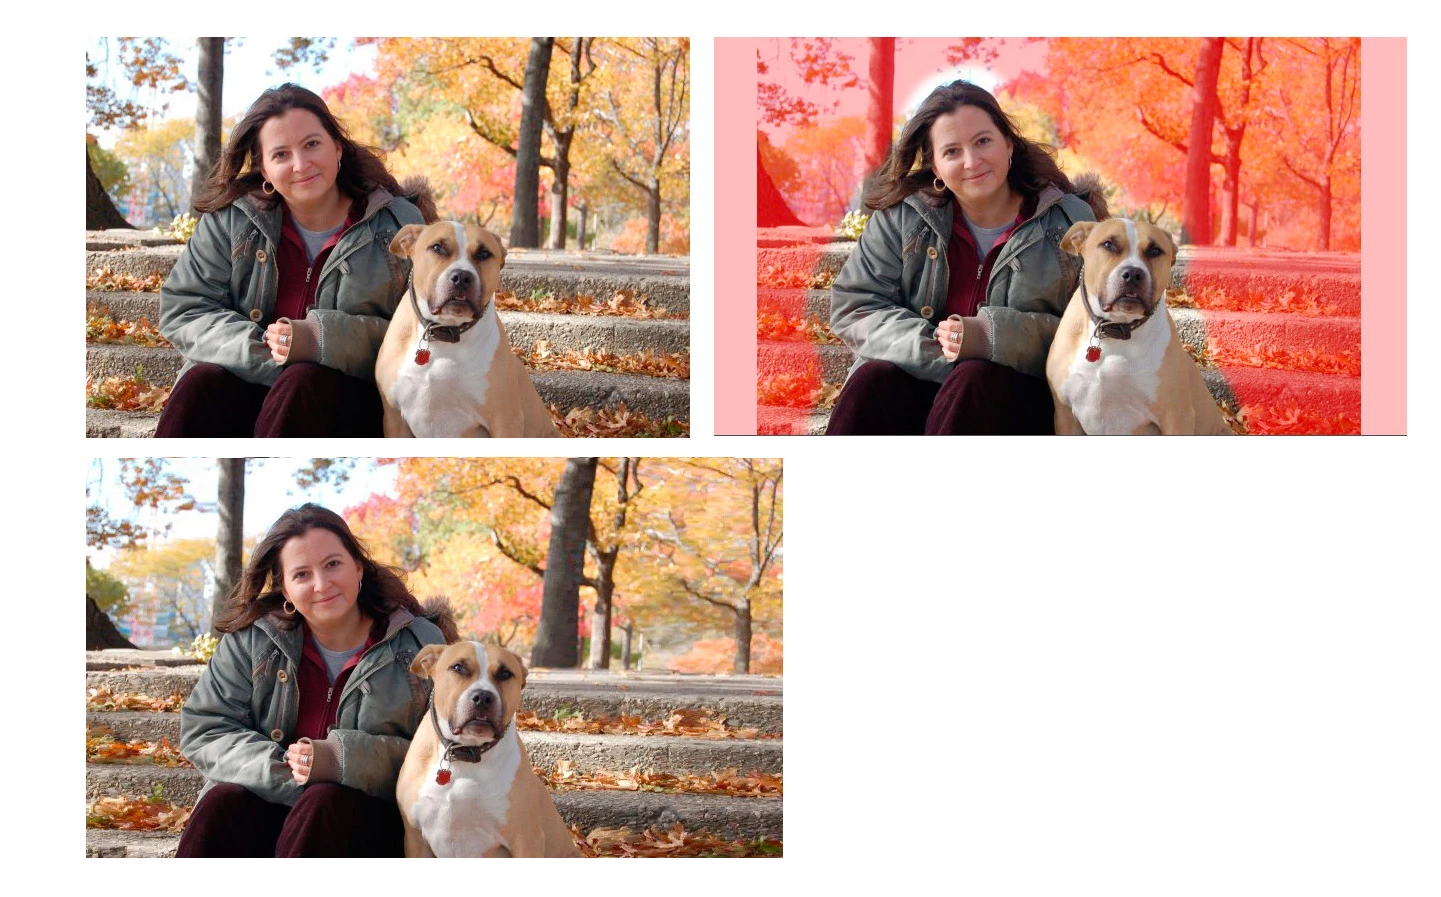
The instructions below present the steps to be applied when the image is to be made wider, but contains specific elements – Amy and her dog -- that should not be altered during this process.
1. Open a file.
2. (Optional) Create a duplicate layer by pressing Cmd+J
*3. Change the Canvas dimensions to the new, larger size by going to Image > Canvas Size.
a. Either:
Uncheck the Relative box, then enter the new dimensions.
or
Check the Relative box and key in additional dimensions..
b. Position the gray box of the Anchor grid so that the additional area will be properly positioned for the chosen image. For example, tap on the bottom-middle box to move the gray area down. This will signify that the added area should be applied to the left, right and top of the image.
c. Canvas Extension Color is of no consequence because it will be filled with image in a later step.
d. Click OK.
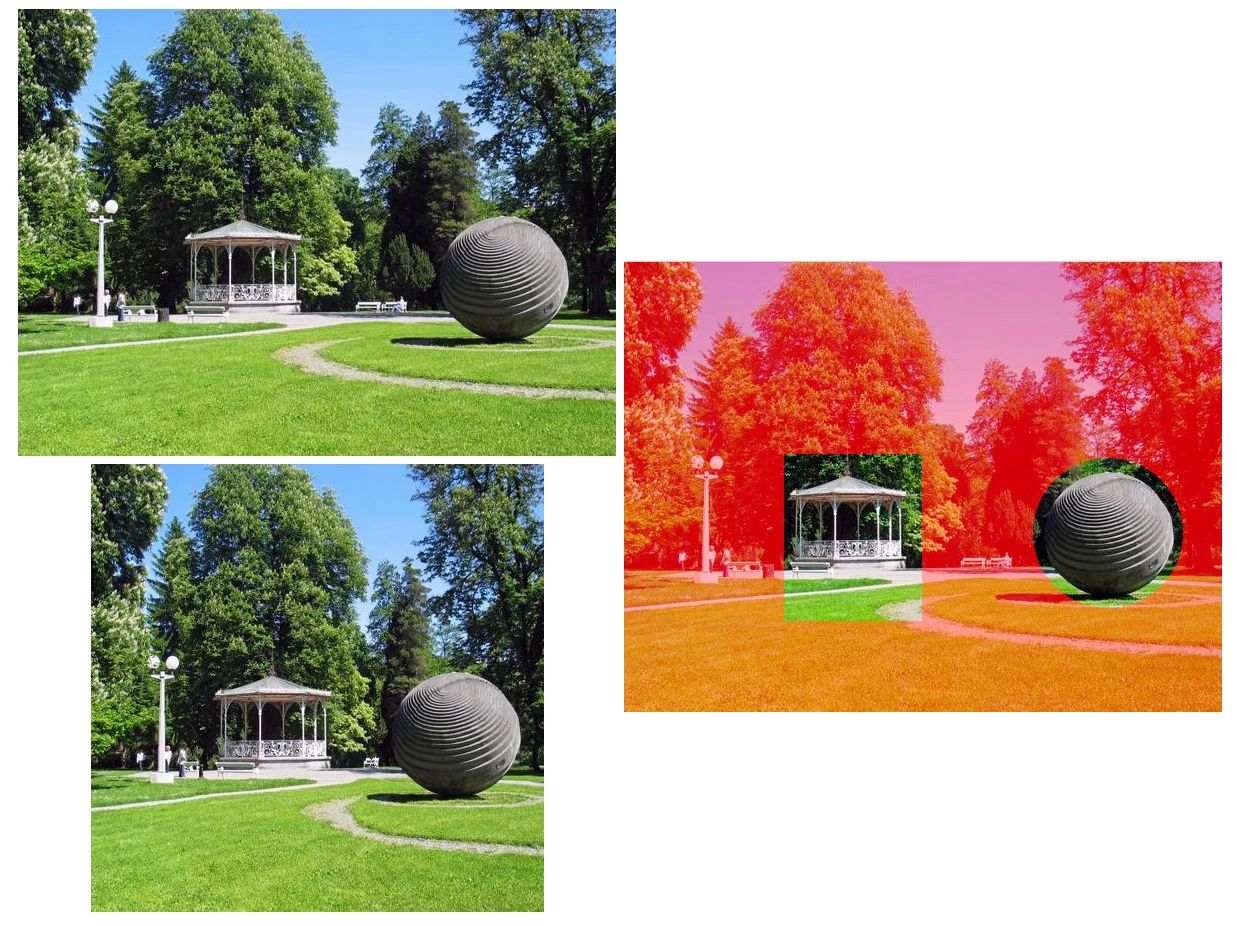
4. Go to the Channels panel. Add an Alpha 1 channel by clicking on the symbol at the bottom of the panel, to the left of the Trash. The image will become solid black.
5. Still in the Channels panel, click on the eye at the left of the RGB channel. The image will be revealed with a red overlay. Note that the Alpha 1 channel is still highlighted.
6. With the Foreground Color set to white, use the Brush tool to clear away the area of red that is covering that part of the image that you want to protect from distortion, such as a person or animal. (You may paint more than one object, if necessary.)
7. Click on the area adjacent to RGB in the Channels Panel. Click the eye off adjacent to Alpha 1.
8. Return to the Layers panel and, using the Rectangular Marquee tool, draw a selection around the image. Do not include the enlarged canvas area.
9. Go to Edit > Content-Aware Scale. In the Options Bar, adjacent to the word Protect: choose Alpha 1 from the drop-down menu.
10. Use the handles in the middle of the marching ants frame sides to pull the image and fill the canvas area.
11. In the Options Bar, click the Commit symbol (the check mark) to confirm the change and then choose Select > Deselect to remove the marching ants.
*If the image is to be made shorter or narrower, as the sample below, skip Step 3.